

What are community events?
A community event is a scheduled session tied to a specific date and time. Members can view upcoming events in a calendar view, RSVP to attend, and receive automated reminders before the session begins. Events can be linked to external video call platforms (Zoom, Google Meet, or any URL-based meeting room) or embedded directly using an embed code.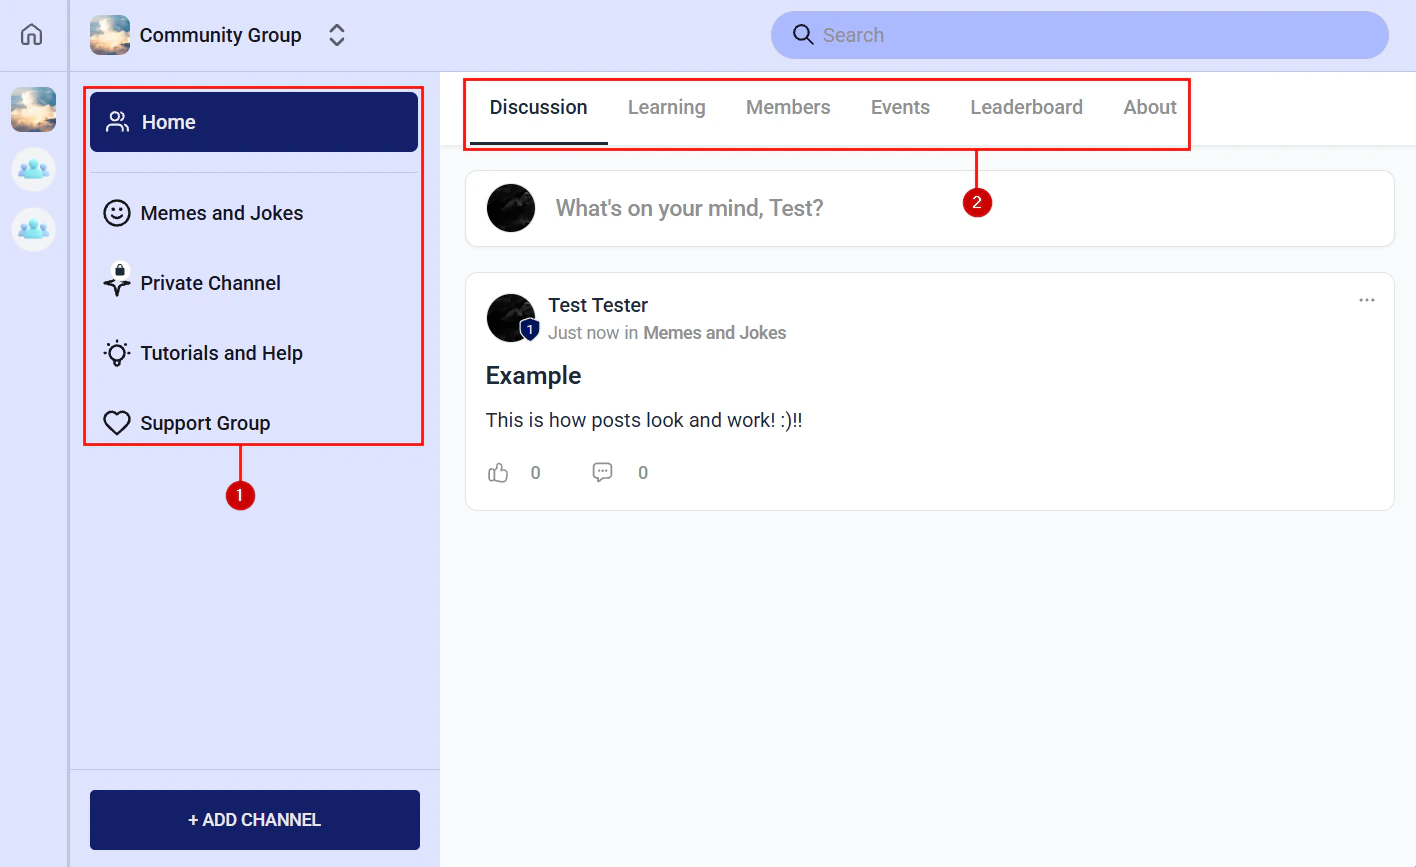
Events tab in a community group showing upcoming scheduled events
Creating an event
1
Open an Events channel
Navigate to Memberships and Communities > Communities, open your community, and select a group that has an Events channel. Click the Events tab.If no Events channel exists, open the group settings, click + Add Channel, and select Events as the channel type.
2
Click New Event
Click + New Event or Create Event at the top of the Events channel.
3
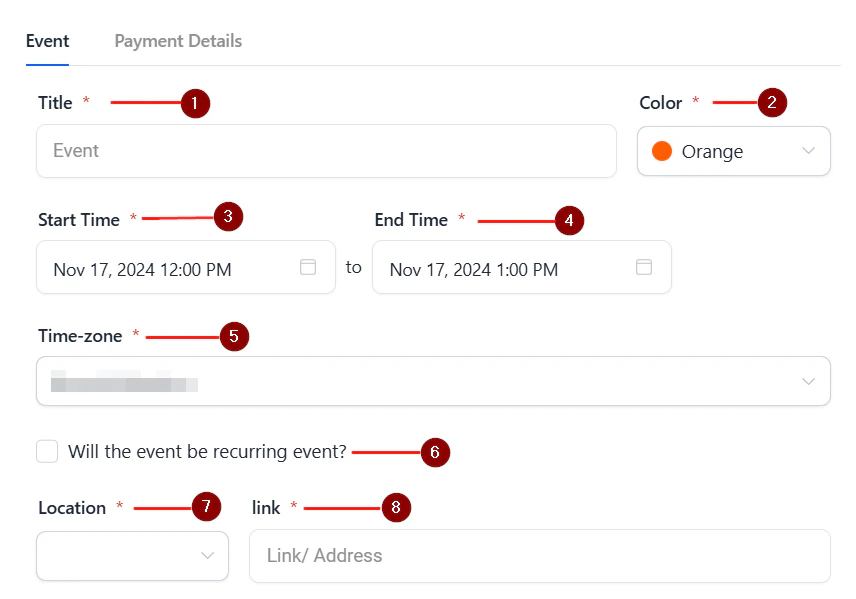
Add event details
Fill in the event information:
- Event title — a clear, engaging name (e.g. “Live Q&A: Your Top Marketing Questions Answered”)
- Description — what members can expect, who it is for, and what they need to bring or prepare
- Date and time — set the start time and duration; the platform displays times in each member’s local time zone
- Location / link — paste the Zoom, Google Meet, or other meeting URL; this is what members click to join
- Cover image — an optional event image displayed in the calendar and event card
4
Set RSVP options
Enable RSVP to allow members to indicate whether they plan to attend. You can cap attendance by setting a maximum RSVP limit (useful for intimate workshops where you want a controlled group size).
5
Publish the event
Click Publish. The event appears in the group’s Events channel calendar and in the community activity feed. Members who have notifications enabled receive an alert about the new event.
RSVP management
When RSVP is enabled for an event:- Members see an RSVP button on the event card
- RSVP responses appear in the event’s attendee list, visible to admins and moderators
- Members who RSVP receive reminder notifications before the event
- If you set a capacity limit, the RSVP button is disabled once the maximum is reached and shows a “Full” status
Community events calendar view with event details and RSVP options
Event reminders
The HoopAI platform sends automatic reminder notifications to members who have RSVP’d. You can supplement these with custom automations:1
Create a reminder automation
Navigate to Automation and click + New Workflow.
2
Set a date-based trigger
Use a Date & Time trigger set to X hours or days before the event start time, or use the Community Event RSVP trigger to start the sequence from the moment a member RSVPs.
3
Add reminder actions
Add a Send Email action with event details and the join link, or a Send SMS action for a last-minute reminder. You can chain multiple reminders (e.g. 24 hours before and 1 hour before).
4
Activate the workflow
Toggle the workflow to Active.
Hosting the live session
The HoopAI platform provides the scheduling, RSVP, and reminder infrastructure for events, but the live video call itself runs on your chosen external platform (Zoom, Google Meet, Riverside, StreamYard, etc.). Best practices:- Post the replay — after the session, upload the recording as a Video lesson in a course or as a post in the community feed so members who could not attend can catch up
- Use the community chat channel — have a Chat channel open during the event for members to ask questions, share reactions, and connect with each other in real time alongside the video call
- Create a post-event summary — publish a written recap with key takeaways and any links or resources mentioned during the session
Recurring events
For events that repeat on a schedule (e.g. weekly office hours every Tuesday at 12pm), create a new event entry each week or set up a recurring event pattern:- When creating the event, look for the Repeat or Recurring option.
- Set the frequency: daily, weekly, bi-weekly, or monthly.
- Set the end date or total number of occurrences.
Linking events to course content
Events work well alongside courses — for example, a live Q&A at the end of each course module where members can ask questions about what they have just learned:- Create a group for each course module with both a Learning channel (containing the course content) and an Events channel (for the live session)
- Schedule the live event to coincide with the week members are expected to complete that module (based on your drip schedule)
- Reference the event in the drip notification email members receive when the module unlocks
Calendar view
The Events channel displays all scheduled events in a calendar view by default, with a list view also available. Members see:- Upcoming events color-coded by group
- Their RSVP status on each event card
- A countdown timer on events happening within 24 hours
Frequently asked questions
Can I embed a live stream directly inside the community instead of linking to an external URL?
Can I embed a live stream directly inside the community instead of linking to an external URL?
Yes. In the event settings, you can paste an embed code from supported streaming platforms instead of a join URL. The embedded stream plays inline inside the Events channel, so members do not need to leave the community to watch. Check your streaming platform’s embed support for the specific code format required.
Can non-members see my community events?
Can non-members see my community events?
Community events are only visible to members who have access to the group containing the Events channel. If you want to promote an upcoming event to non-members (prospects), share the event description as a post on social media or send an email campaign with a link to your community signup page.
Can members add community events to their personal calendar?
Can members add community events to their personal calendar?
Yes. Each event card includes an Add to Calendar button that generates an ICS file or links to Google Calendar. Members click this to save the event to their preferred calendar app with the join link and event details pre-filled.
What happens to members on the waitlist if a cancelled RSVP opens up a spot?
What happens to members on the waitlist if a cancelled RSVP opens up a spot?
When the RSVP limit is reached, members can join a waitlist. If a confirmed attendee cancels, the first person on the waitlist receives a notification that a spot has opened and their RSVP is automatically confirmed (depending on your configuration).
Can I charge members to attend an event?
Can I charge members to attend an event?
Event-specific payments are not handled natively within the Events channel. For paid events, create a separate offer in your Courses/Memberships section, sell access through a checkout link, and then grant access to the relevant community group (which contains the event) via an automation after purchase.