

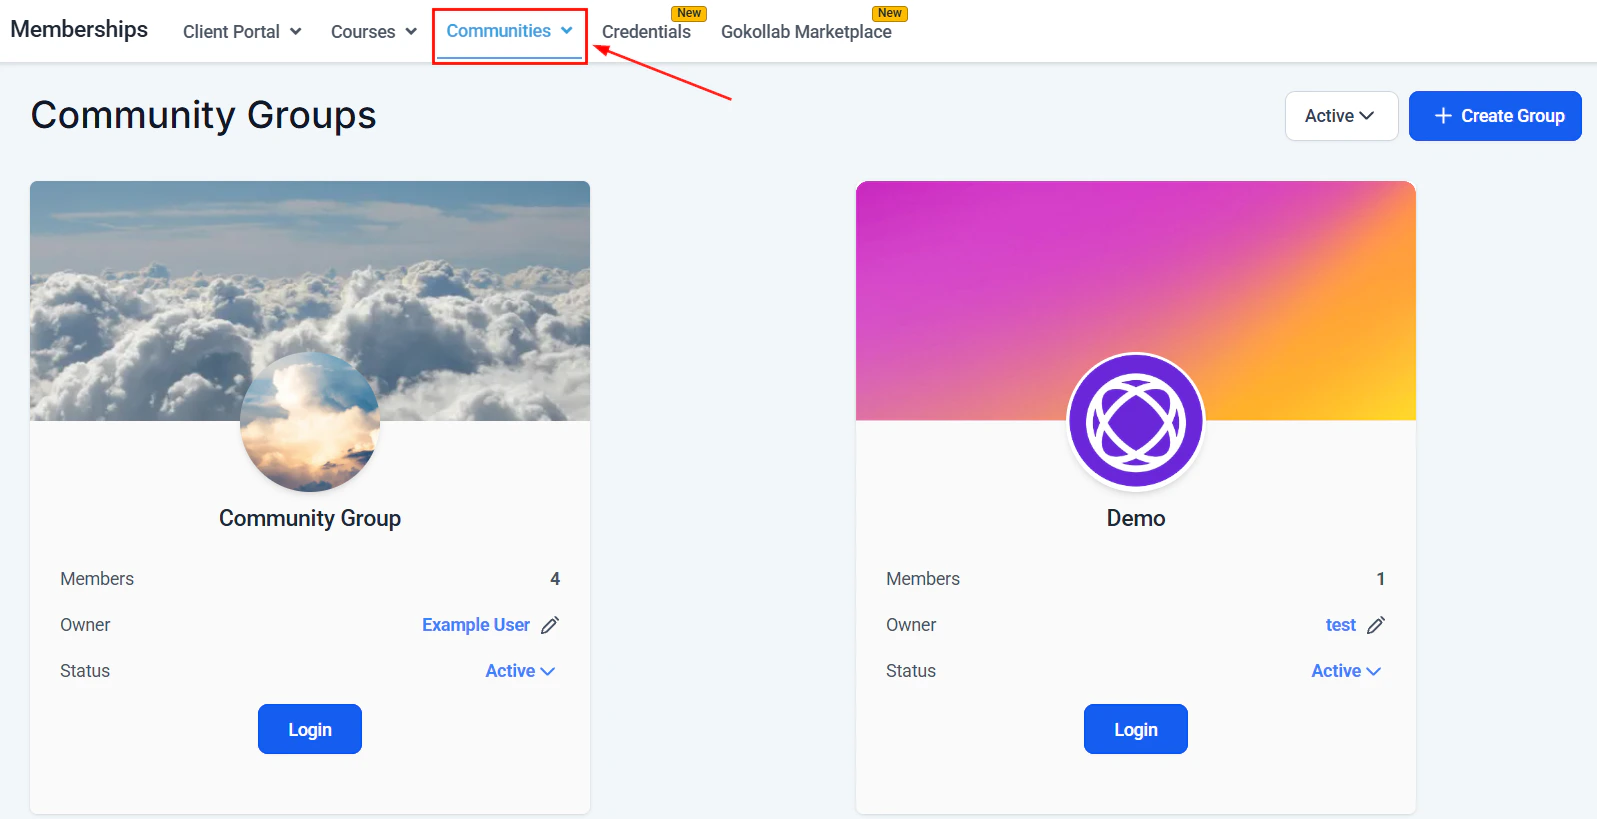
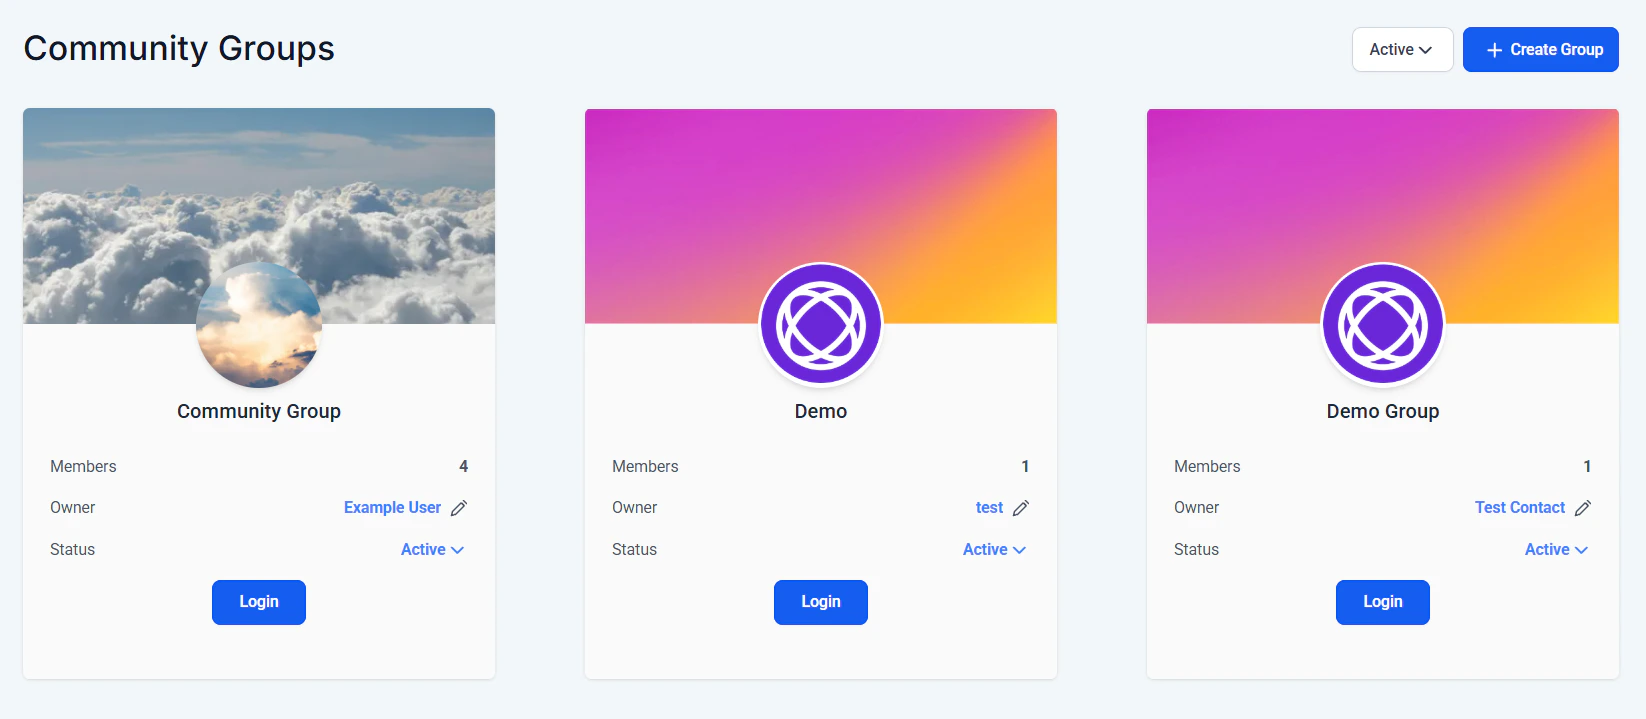
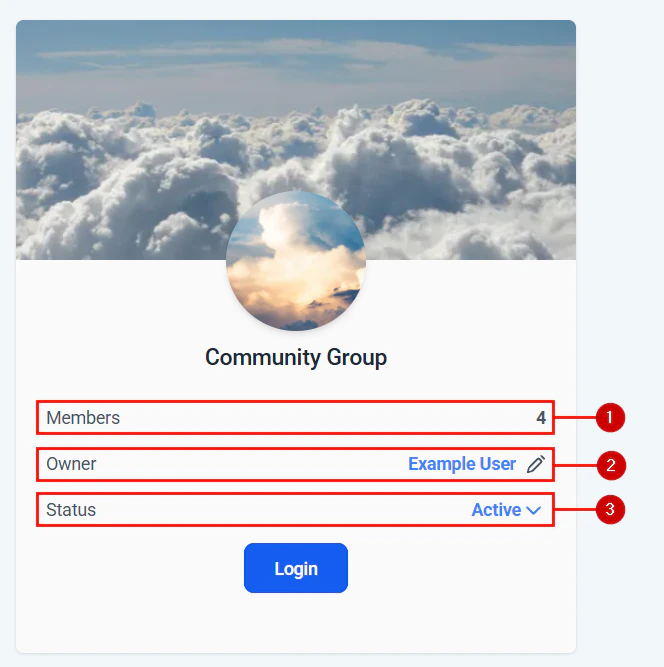
Communities overview showing all community groups in the platform
What is a community?
A community is a social feed-style space attached to your member portal. Members can:- Post text updates, images, and videos
- Comment on and react to other members’ posts
- Create and join topic-based Groups within the community
- Direct message other members (if enabled)
- Receive notifications for new posts, comments, and mentions
Creating a community
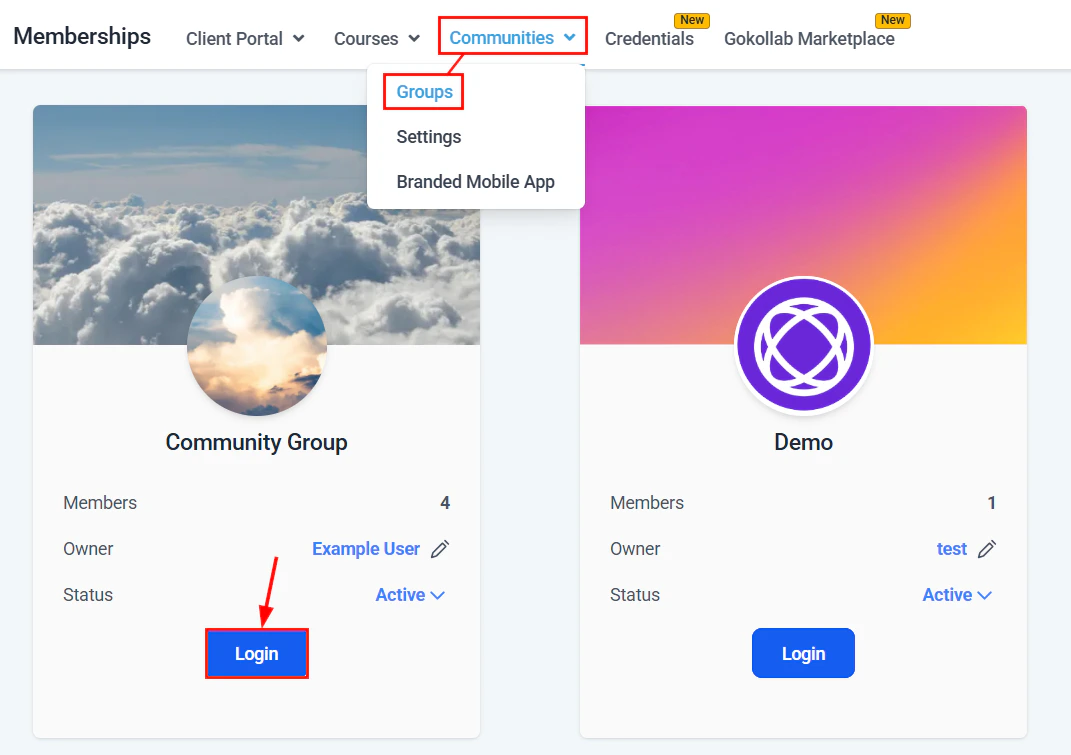
Navigate to Memberships and Communities > Communities
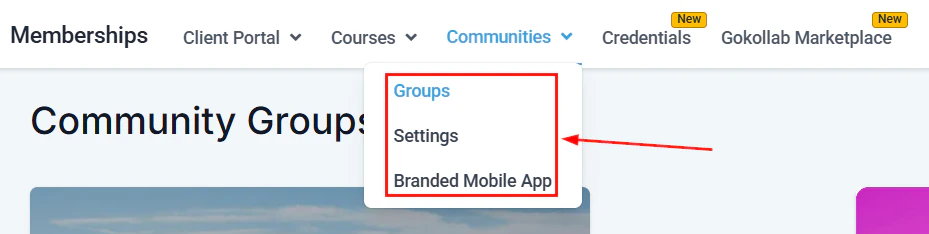
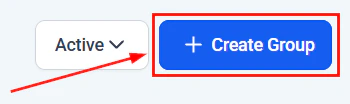
Creating a new community group from the Communities section
Name and configure the community
Community group setup — entering name, description, and branding
Set access rules
- Open — any member who logs into the portal can join
- Restricted — only members with a specific membership or tag can access the community
Community privacy settings — public, private, or paid access options
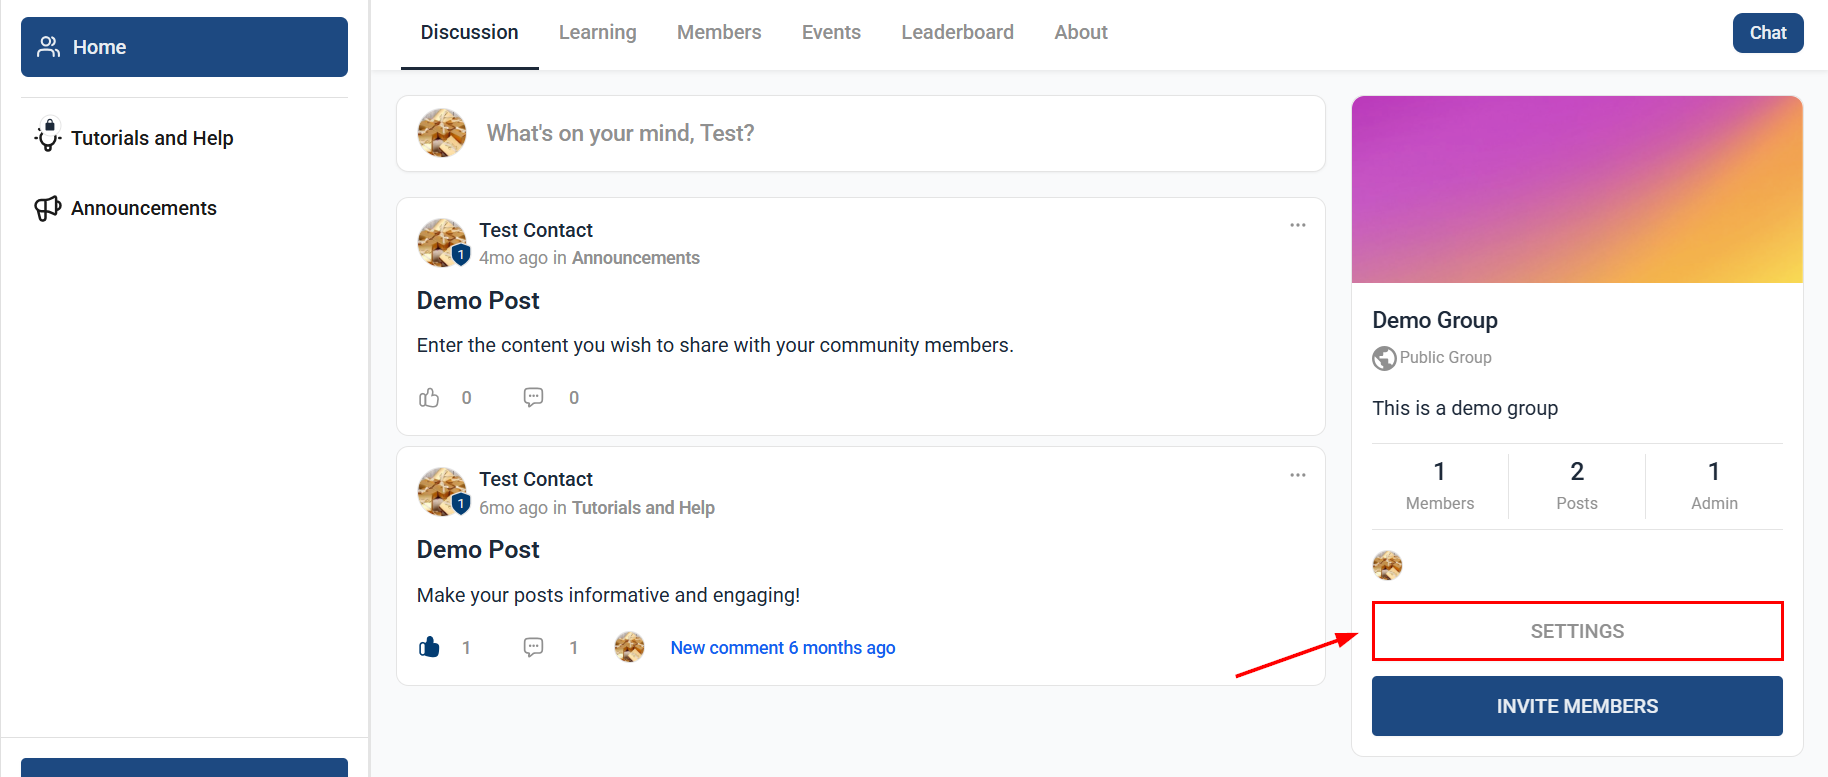
Community group settings panel with access configuration options
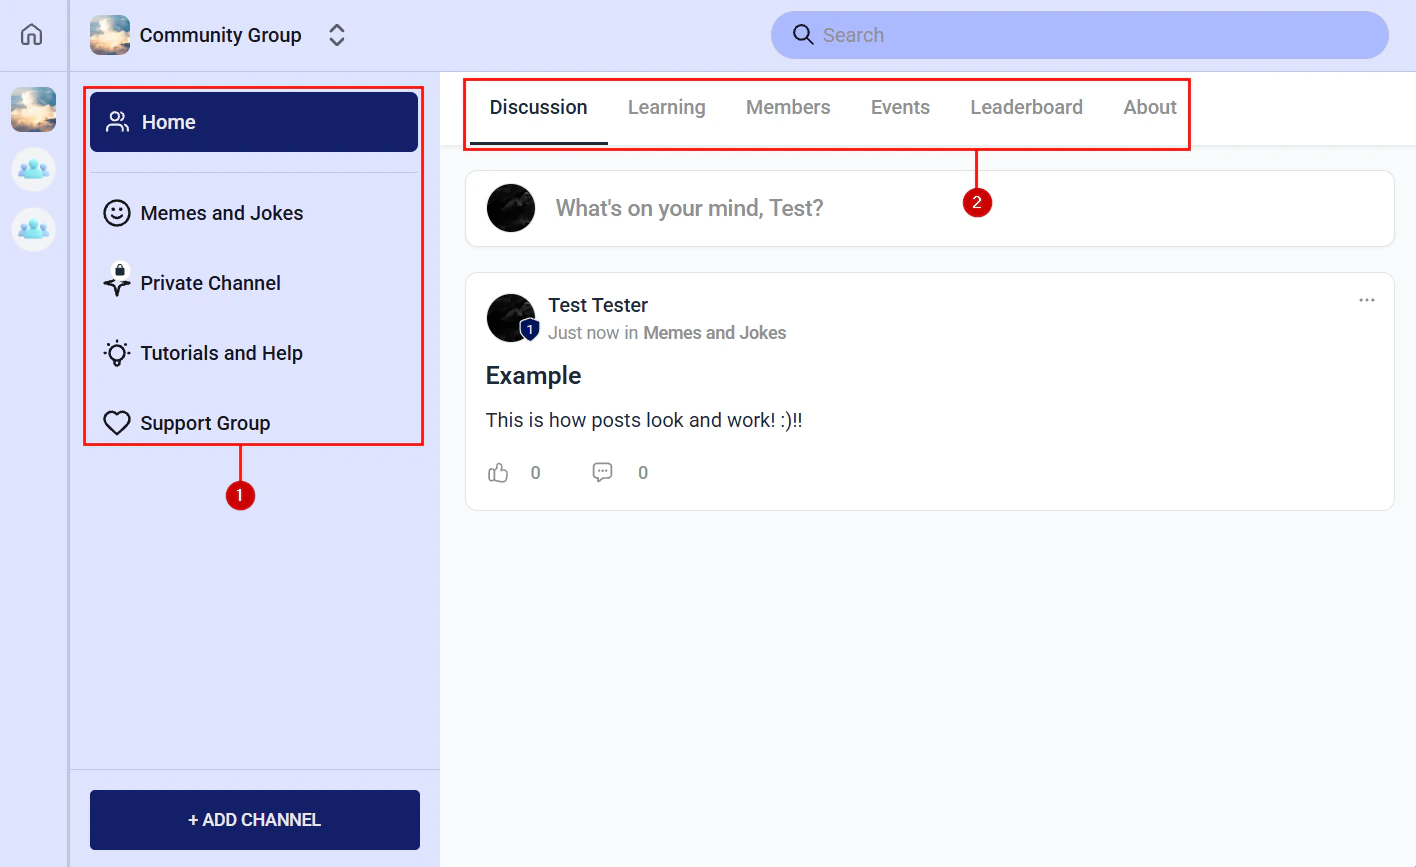
Create groups and channels
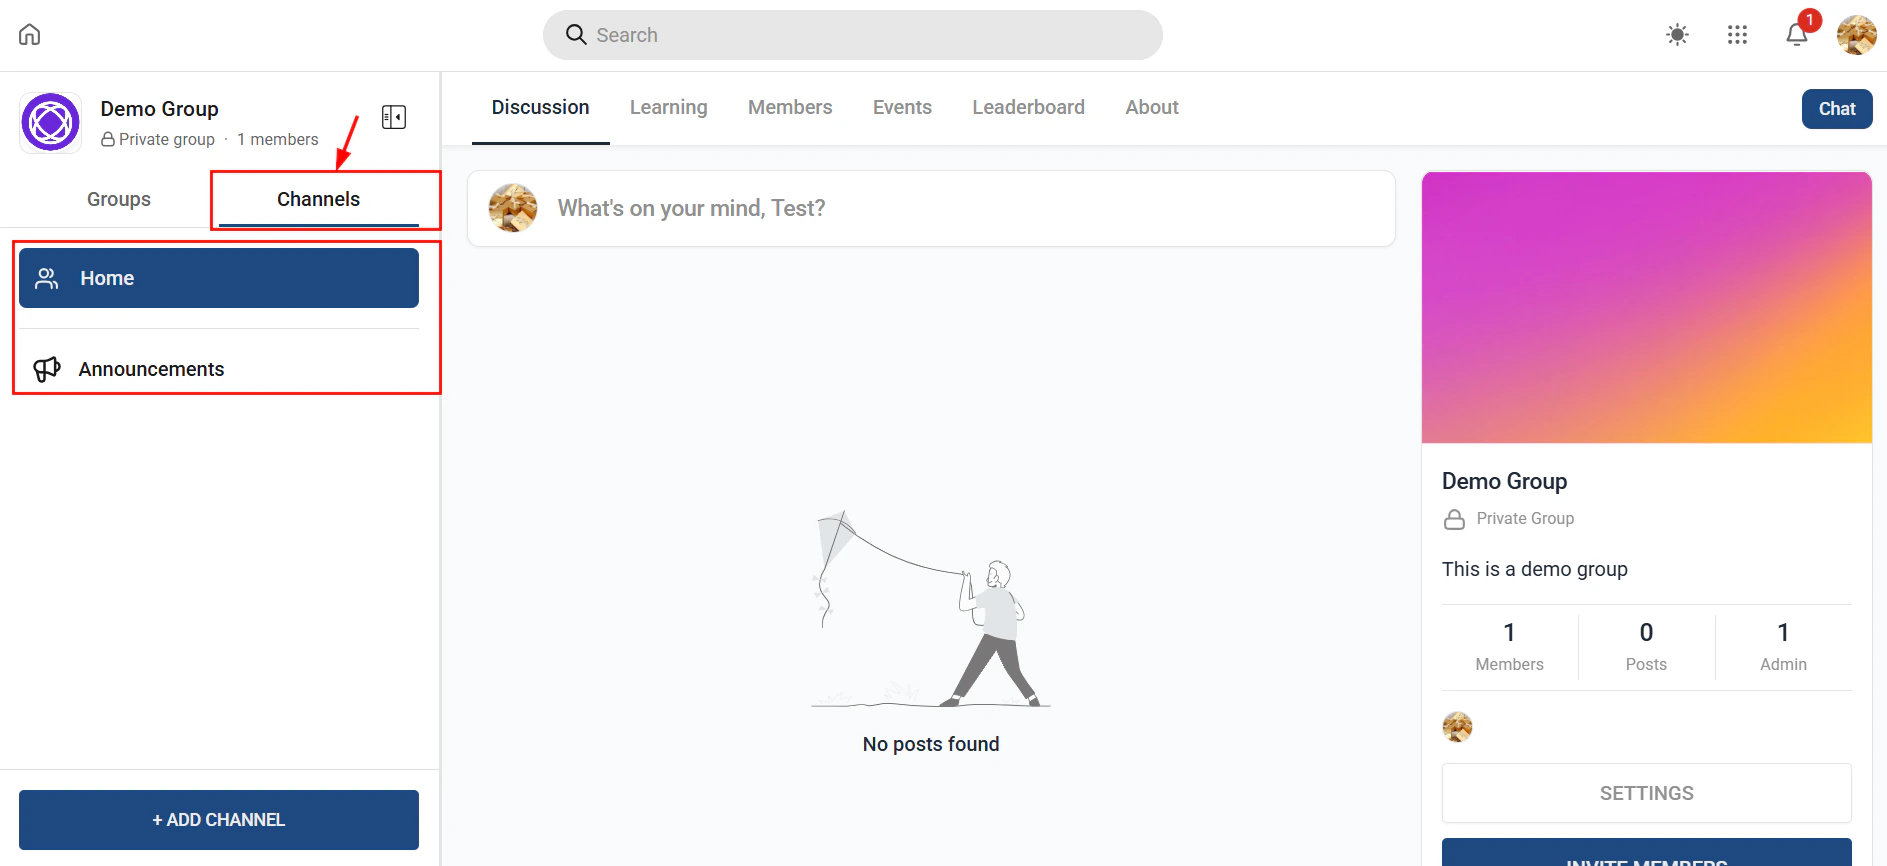
Community channels panel showing all available channel types
Channel type selection — feed, chat, events, and learning tabs
Community group channels view showing all channels within a group
Configure notifications
- Immediate notifications for new posts or comments
- Daily or weekly digest emails summarizing activity
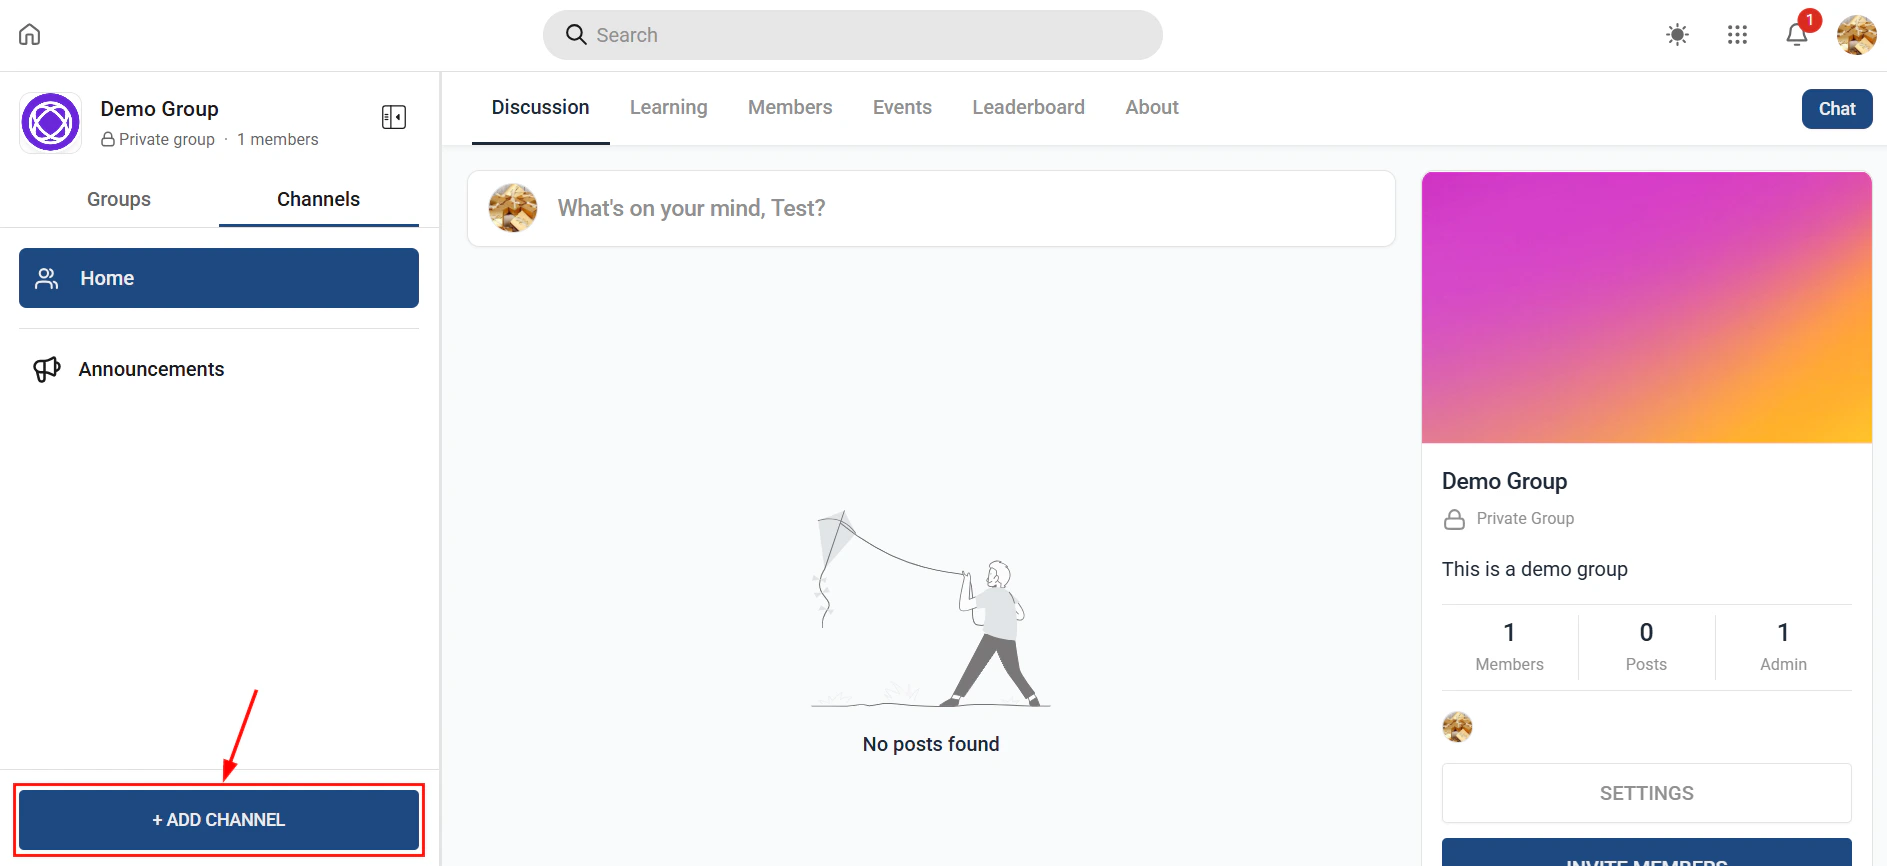
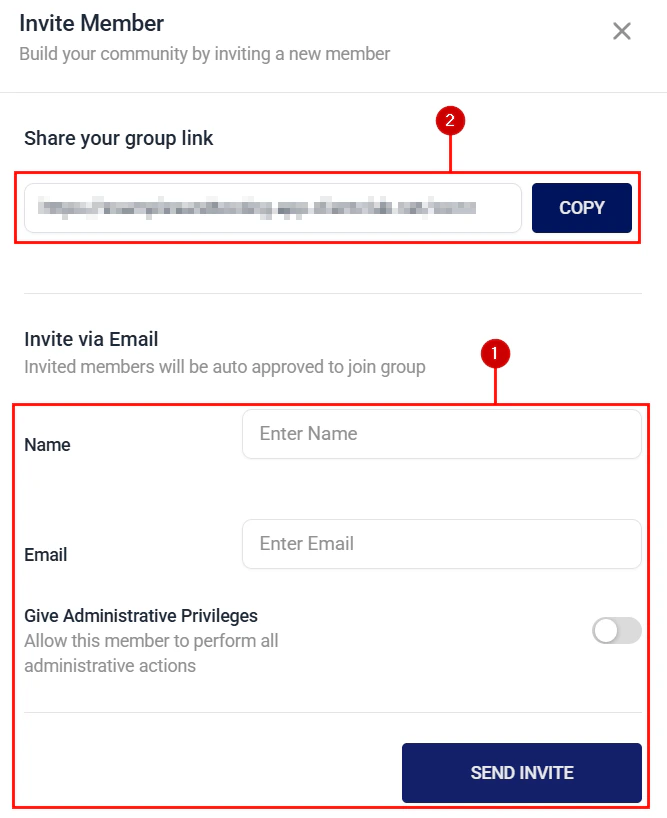
Publish and invite members
Community channel types
When you create groups inside a community, you choose a channel type for each group. Different channel types support different interaction styles:Channel type selection — feed, chat, events, and learning tabs
Community channels panel showing all available channel types
Feed channels
Feed channels are the default channel type. Members create posts (text, images, videos), and other members comment and react. Admins can pin posts, approve content before it appears, and create polls. Feed channels work best as the main social hub of your community.Chat channels
Chat channels support real-time threaded messaging. Unlike the feed, chat messages are shorter and conversational. Use chat channels alongside live events or office hours to give members a space to ask quick questions without cluttering the main feed.Events channels
Events channels let you schedule and promote community events. Members RSVP, receive reminders, and can view upcoming events in a calendar view. Link events to specific modules or course milestones to drive attendance at relevant sessions.Learning channels
Learning channels embed courses directly inside a community group. Members can switch between the social feed and their course content without leaving the community interface. This is ideal for cohort programs where course consumption and peer discussion happen side by side.Community moderation
As an admin or moderator you can:- Pin posts — keep important announcements at the top of the feed
- Delete posts or comments — remove inappropriate content
- Mute or ban members — restrict posting rights for specific members
- Approve posts — enable a moderation queue so posts require approval before appearing publicly
- Create polls — post a multiple-choice poll to gather member opinions
Post creation interface in a community channel

Community leaderboard showing top contributing members
Member roles
Member list showing all members and their roles in the community
Managing members inside a community group — roles and permissions
Member role assignment — changing member roles within a community
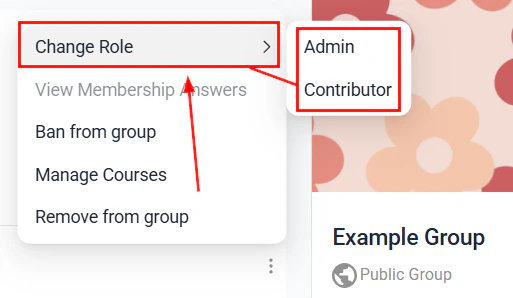
Member actions — message, promote, or remove members from the community
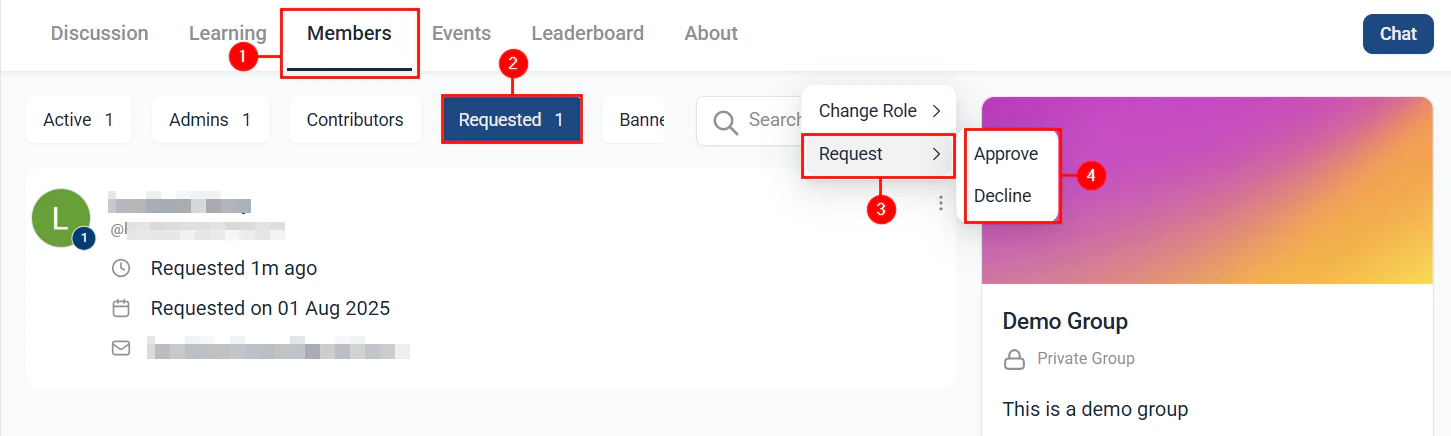
Membership approval requests for restricted community groups
Paid communities
You can require a paid subscription to join a community group.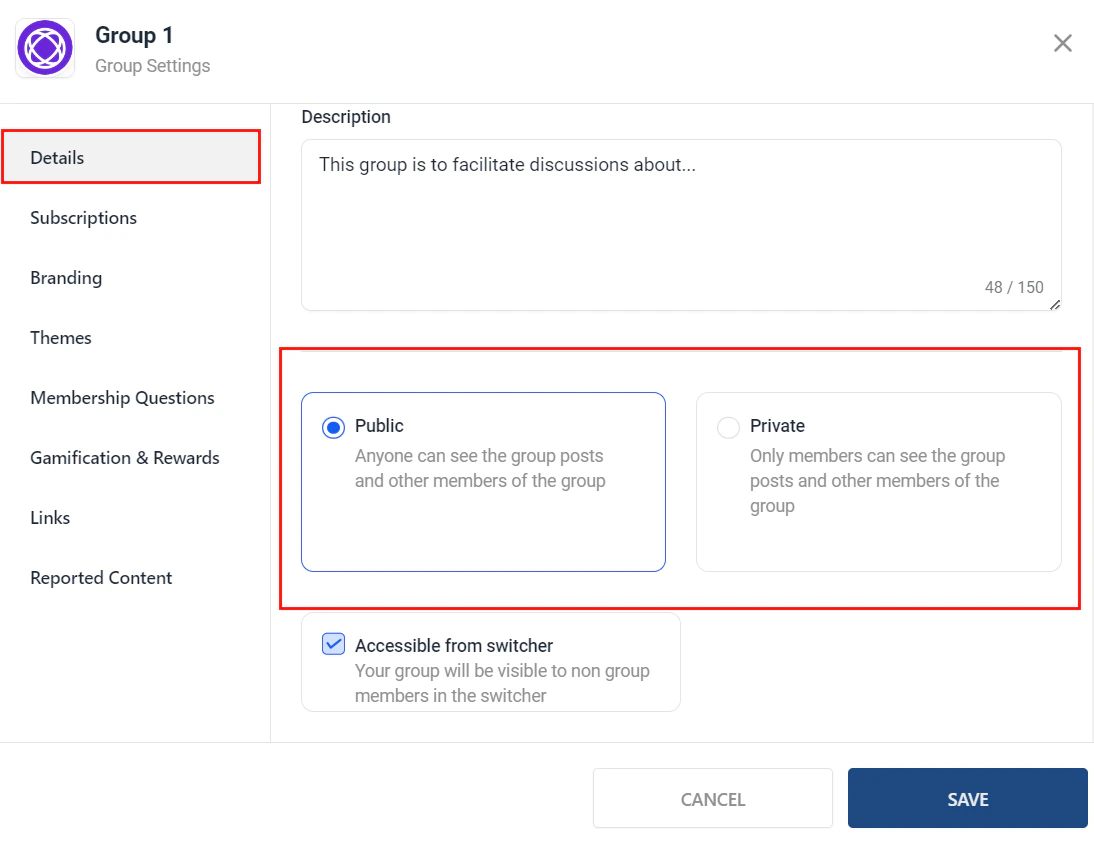
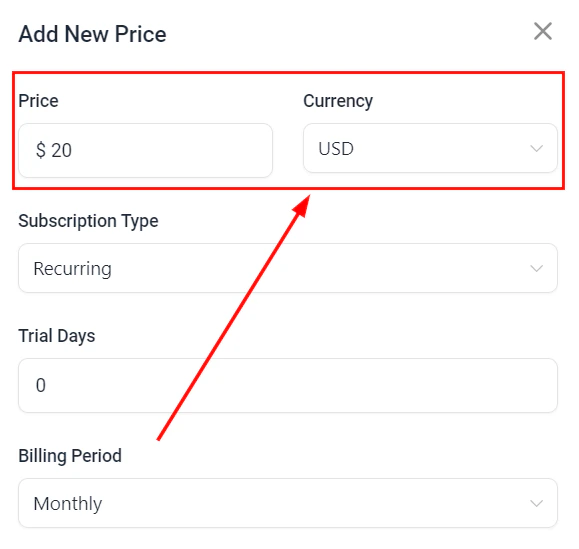
Paid group setup — configuring payment type and pricing for community access
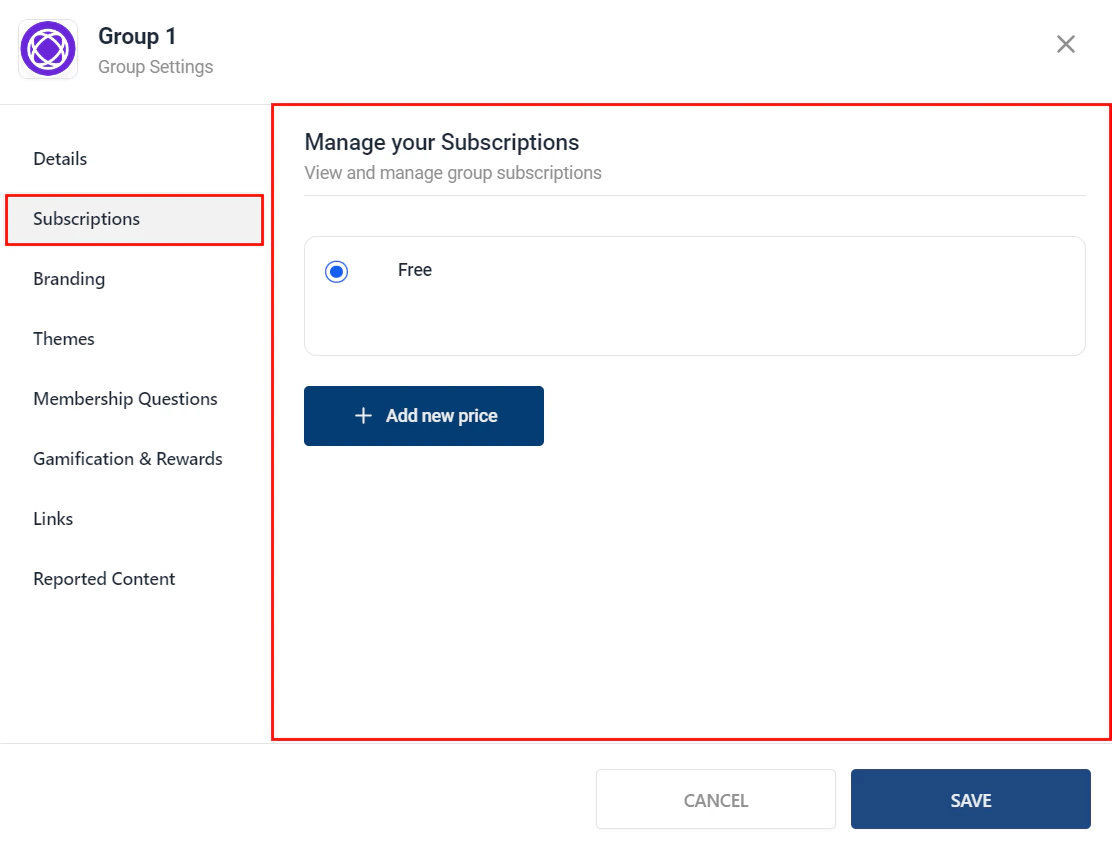
Subscription options for a paid community group
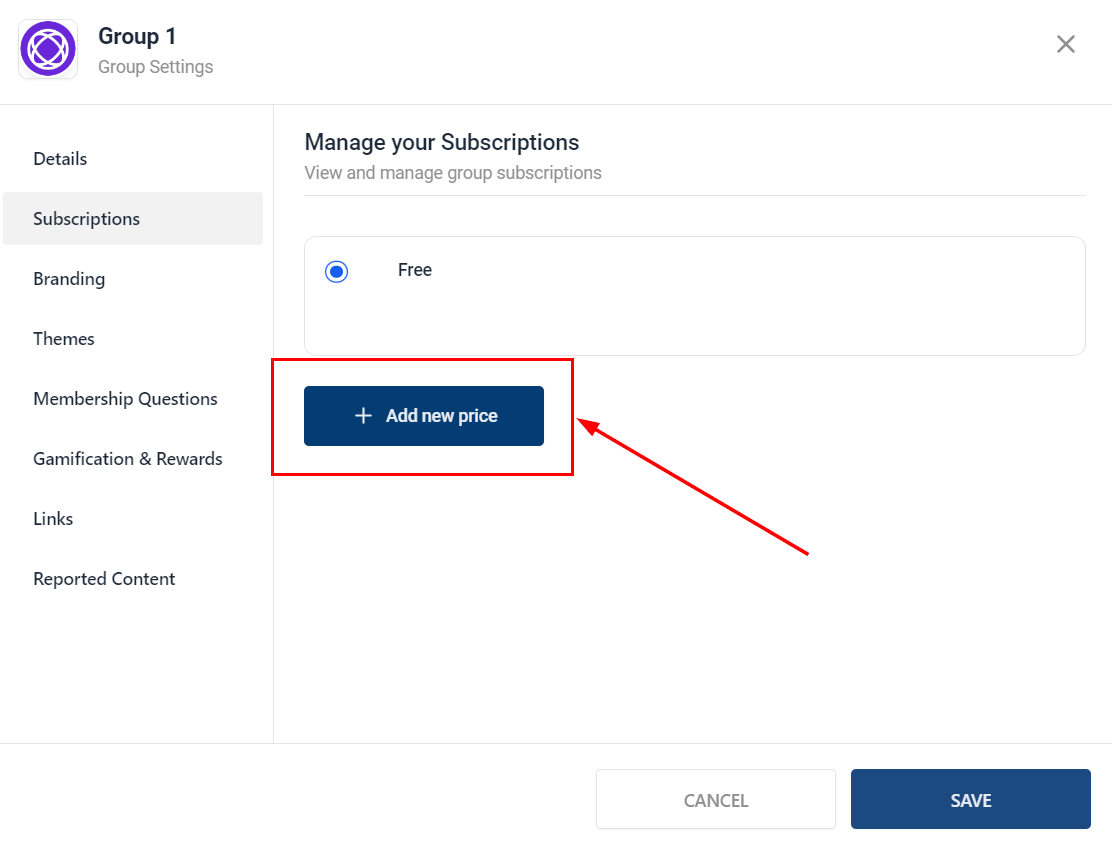
Pricing configuration for a paid community group
Payment gateway settings for a paid community group
Community badges
Badges reward members for participation and achievement within the community.Community badge creation — designing and naming a new member badge
Badge assignment criteria — setting conditions for earning a badge
Badge levels and progression settings for community gamification
Community and courses
Pairing a community with a course creates a cohort experience:- Members work through the course and discuss lessons in the community
- Create a group for each course module as a dedicated discussion space
- Post weekly challenge prompts to drive engagement and accountability
Learning tab in a community showing courses available to members
Automations for communities
Use the Community Member Joined trigger in Automations to:- Send a welcome email with community guidelines and tips to get started
- Add a tag to the contact record for community members
- Notify a team member or moderator
Frequently asked questions
What types of channels can I create within a community?
What types of channels can I create within a community?
Can I restrict a community to specific members?
Can I restrict a community to specific members?
How do I charge members to join a community?
How do I charge members to join a community?
What are the different member roles in a community?
What are the different member roles in a community?
Can I enable a post approval queue?
Can I enable a post approval queue?
How do badges work in communities?
How do badges work in communities?
How do I automate a welcome message when someone joins?
How do I automate a welcome message when someone joins?
Paid groups
You can require payment to join a specific community group, creating a monetized community experience:- In the group settings, enable Paid access.
- Choose the payment type: one-time, subscription (monthly/annual), or payment plan.
- Set the price.
- Connect your payment gateway (Stripe is required for paid groups).
- Members are prompted to pay before gaining access to the group.
Paid courses inside communities
Embed paid courses directly within community groups to create a cohort learning experience:- Add a Learning channel to the group.
- Select the course to embed.
- Link the course to a paid offer (configured in Memberships and Communities > Courses > Offers).
- Members who purchase the offer gain access to both the course content and the community group.
Member approval questions
When a group is set to Private, you can add custom approval questions that members must answer before their join request is submitted:- In the group settings, navigate to Approval Questions.
- Click + Add Question and enter your question (e.g., “What is your main goal for joining this group?”).
- Add as many questions as needed.
- When a member requests to join, their answers appear alongside the join request for admin review.
Ban members and report content
Admins and moderators have tools to maintain community safety:Banning members
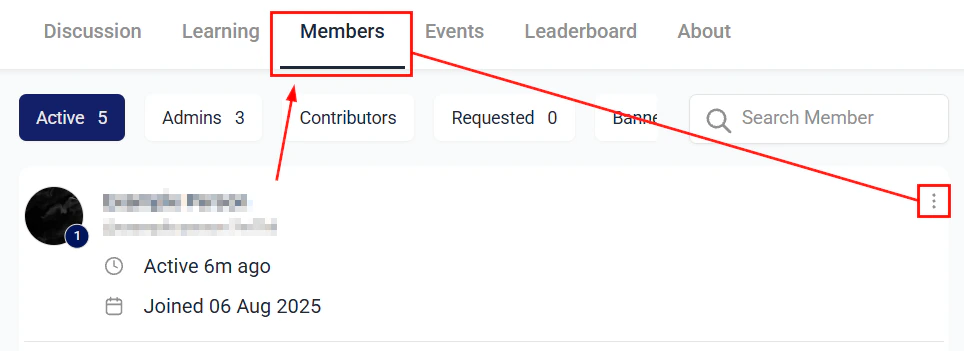
- Navigate to the Members tab in the community or group.
- Find the member and click the three-dot menu.
- Select Ban. The member is immediately removed from the community and cannot rejoin.
- Banned members can be unbanned later from the Banned Members list in community settings.
Reporting content
Members can report posts and comments that violate community guidelines:- The member clicks the three-dot menu on a post or comment.
- They select Report and choose a reason (spam, harassment, inappropriate content, etc.).
- The report appears in the admin’s Moderation Queue for review.
- Admins can delete the content, warn the member, or ban the member based on the report.