

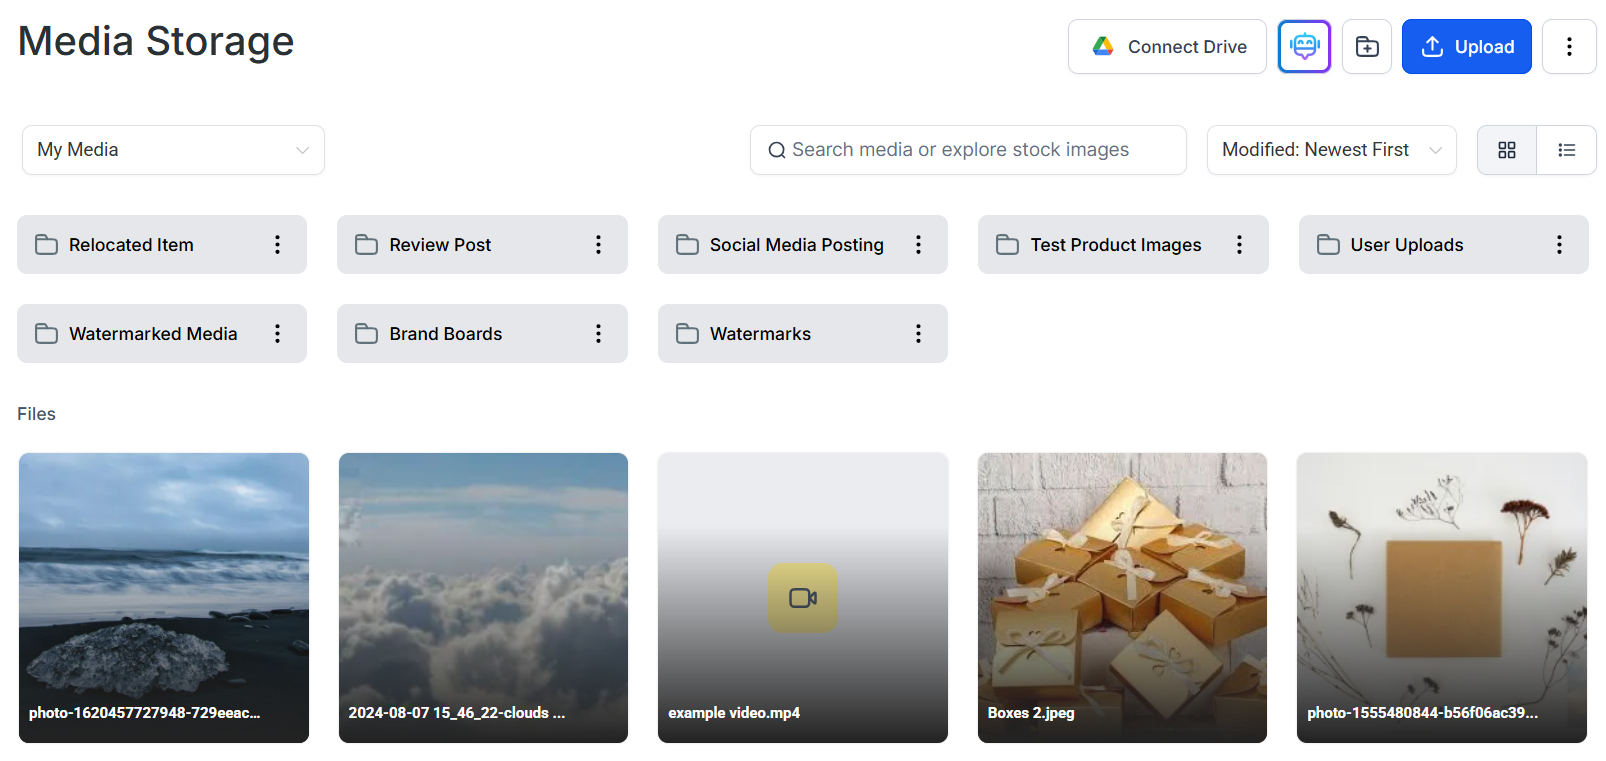
Media Storage library showing uploaded files organized in folders
Managing files and folders
Upload, organize, move, rename, and delete media files
Uploading files
Upload images, video, audio, and documents from your computer
Creating AI images
Generate custom images using AI directly in the media library
Image editing
Crop, resize, and adjust images without leaving the platform
Supported media types
File formats and size limits for all upload types
Storage limits
Per-file size limits and account storage information
Pixabay
Browse and use free stock photos from Pixabay
Unsplash
Browse and use free stock photos from Unsplash
Backgrounds
Access a curated library of background images for pages and posts
Font files
Upload custom font files for use in the page and email builders
Google Drive
Sync and access files stored in Google Drive
Video hosting
Host and embed videos across funnels, websites, and course lessons
Sharing files
Copy public URLs to share or embed files anywhere
CDN delivery
How files are served via CDN for fast global delivery
Custom domain CDN
Serve media files from your own custom domain
Getting started
1
Open the media library
Click Media Storage in the left navigation sidebar. This opens your Media Library where you can view uploaded content and manage all your files.
2
Upload files
Click the Upload button to select files from your computer. Images, videos, audio clips, PDFs, and font files are all supported. See the Supported Media Types page for format and size details.
3
Organize with folders
Click New Folder and give it a name. Drag files into folders or use the three-dot actions menu to move files. Keep your library organized by campaign, client, or content type.
4
Connect Google Drive or stock photo libraries
Click Connect Drive to sync your Google Drive. Access free stock images by switching the filter to Pixabay or Unsplash inside the library.
5
Use media across the platform
Files stored here are available everywhere you insert media — the page builder, email builder, course editor, social planner, and chat widget all draw from the same media library.
Frequently asked questions
Is there a total storage limit for my account?
Is there a total storage limit for my account?
There is no overall account storage cap. You can upload as many files as needed within the per-file size limits (4 GB for video, 100 MB for other file types). See the Storage Limits page for full details.
Can I use media files in email campaigns?
Can I use media files in email campaigns?
Yes. Files stored in Media Storage are accessible from the email builder. Use the image picker inside any email template to browse and insert your media library files directly.
How do I recover a deleted file?
How do I recover a deleted file?
Deleted files go to the trash and can be recovered for up to 30 days. Open the trash via the three-dot menu at the top-right of the media library and click Restore on any file you want to recover.
Can I bulk upload files?
Can I bulk upload files?
Yes. Click Upload and select multiple files from your computer in the file picker. All selected files upload simultaneously and appear in your media library once complete.
Can I edit images directly in the platform?
Can I edit images directly in the platform?
Yes. Open the Image Editing tool from within the media library or from an image element inside the page builder. You can crop, resize, rotate, and apply basic adjustments without an external editor.