

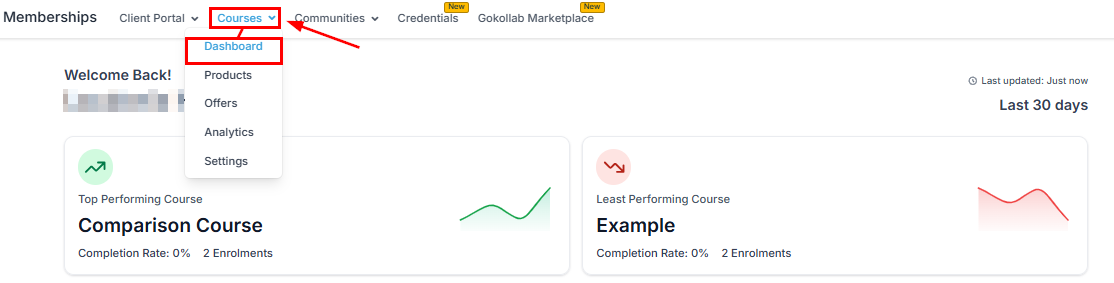
Courses dashboard showing performance overview and key metrics
Course structure
A course follows a three-level hierarchy:- Course — the top-level container (e.g. “Email Marketing Mastery”)
- Module — a themed section within the course (e.g. “Module 1: List Building Foundations”)
- Lesson — an individual piece of content (e.g. “Lesson 1: Choosing the right email platform”)
Creating a course
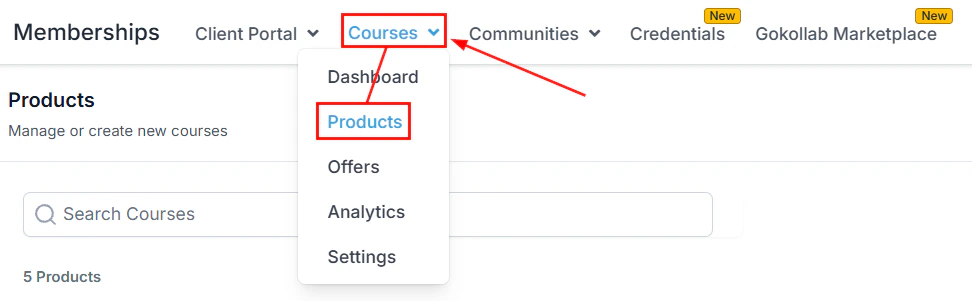
Navigate to Memberships and Communities > Courses
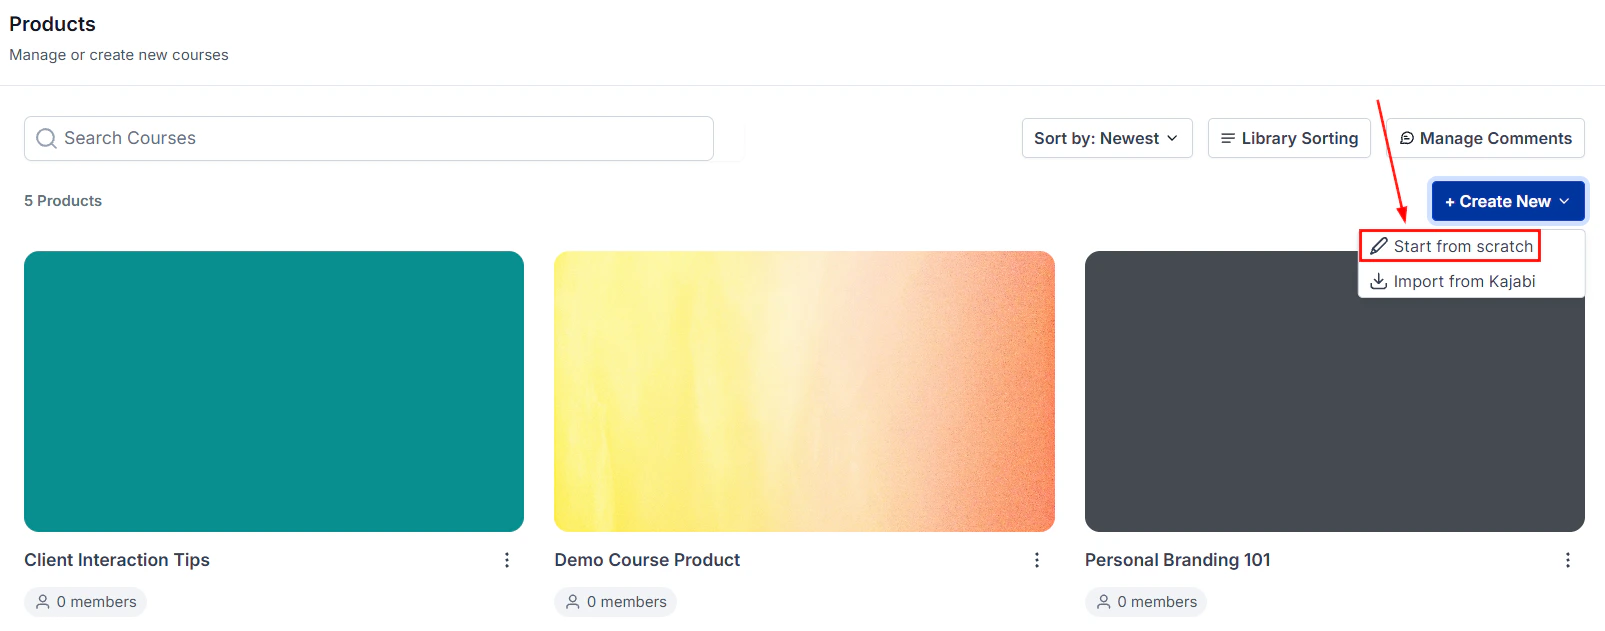
Creating a new course from the Courses section
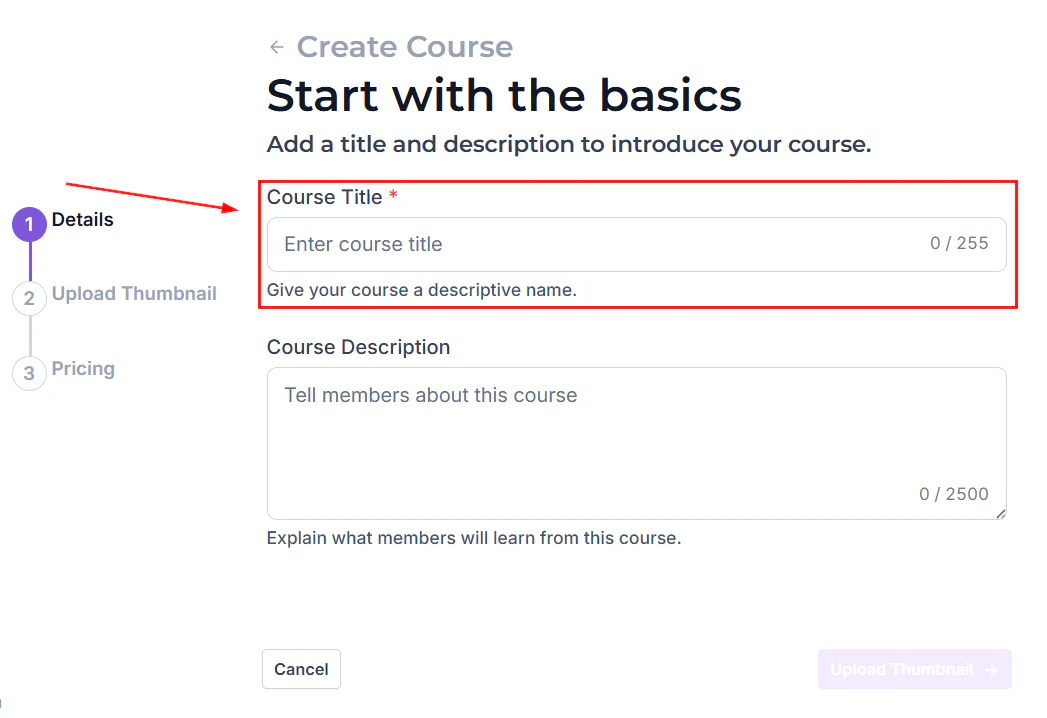
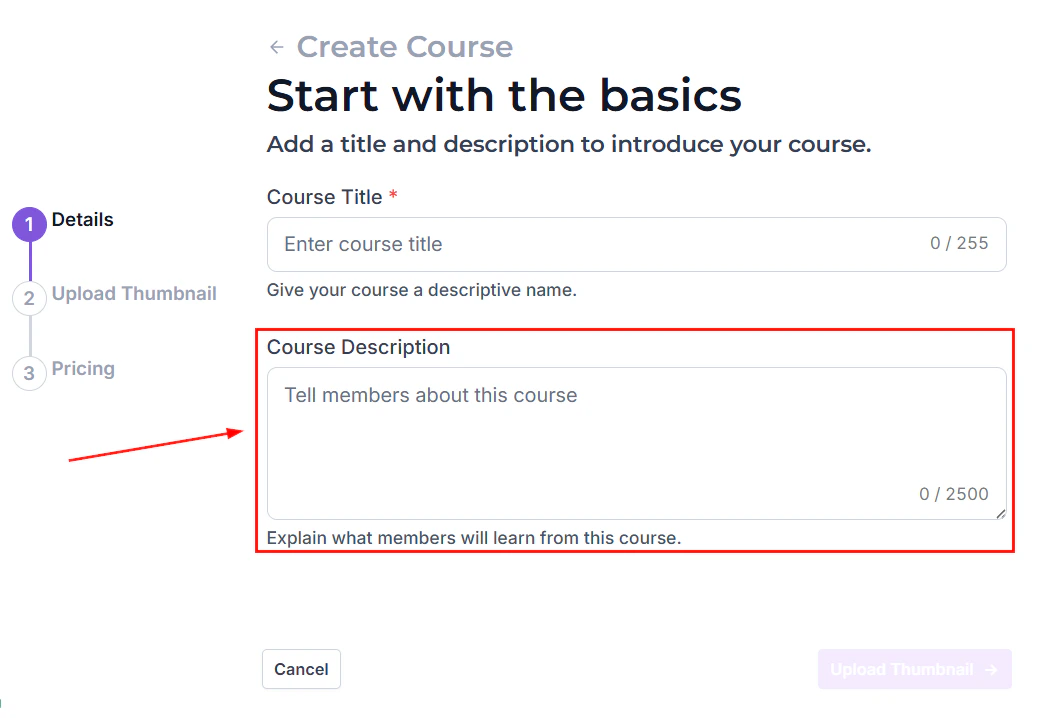
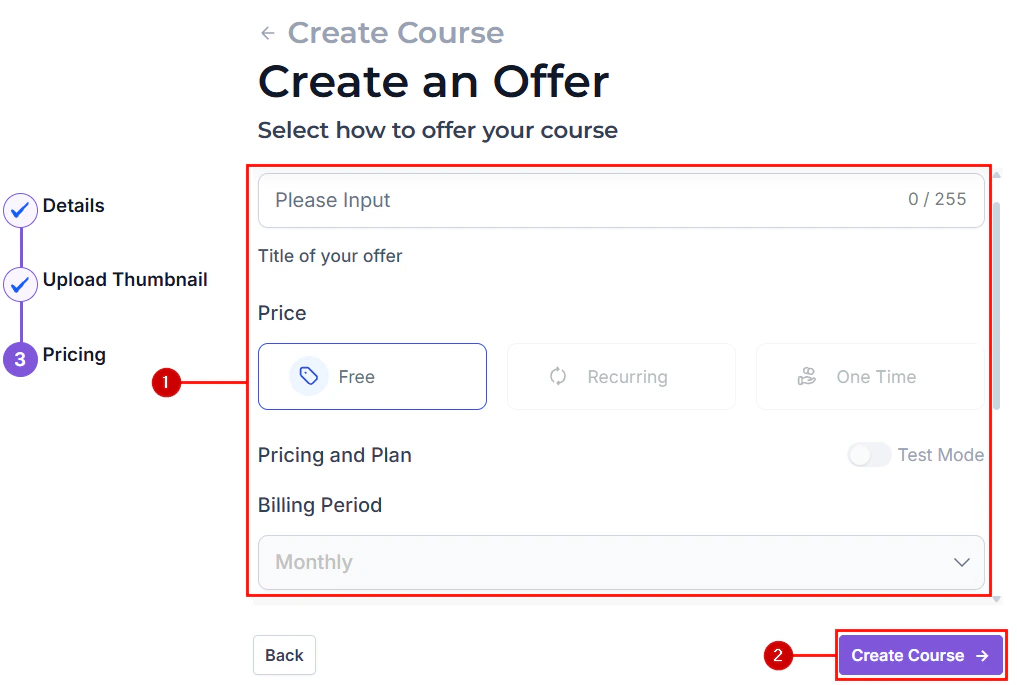
Name and configure the course
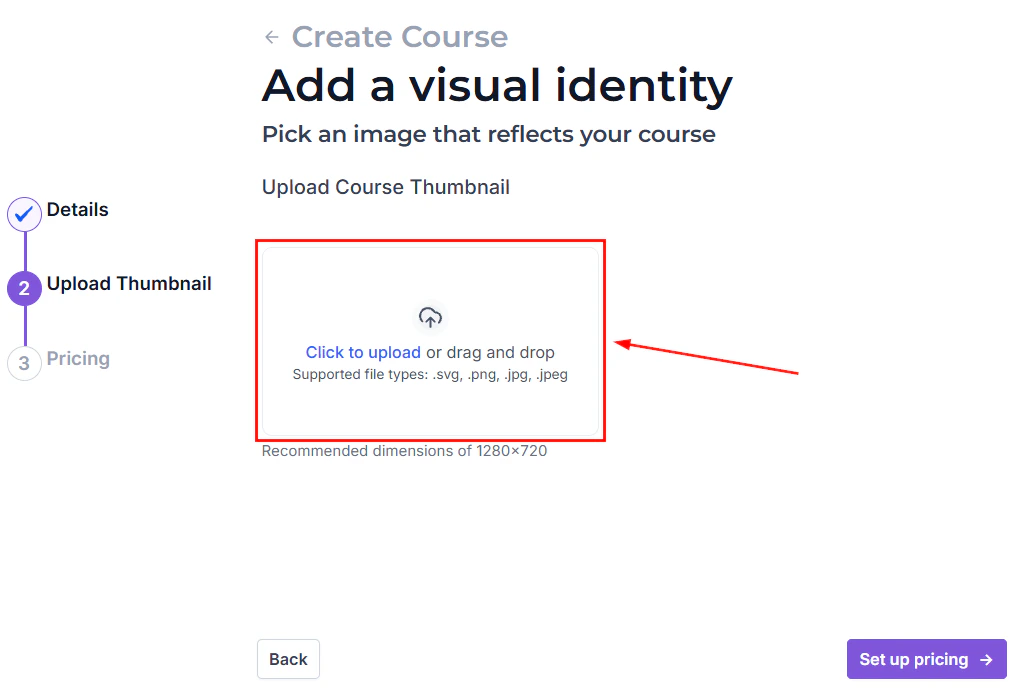
Course details form — entering title, description, and thumbnail
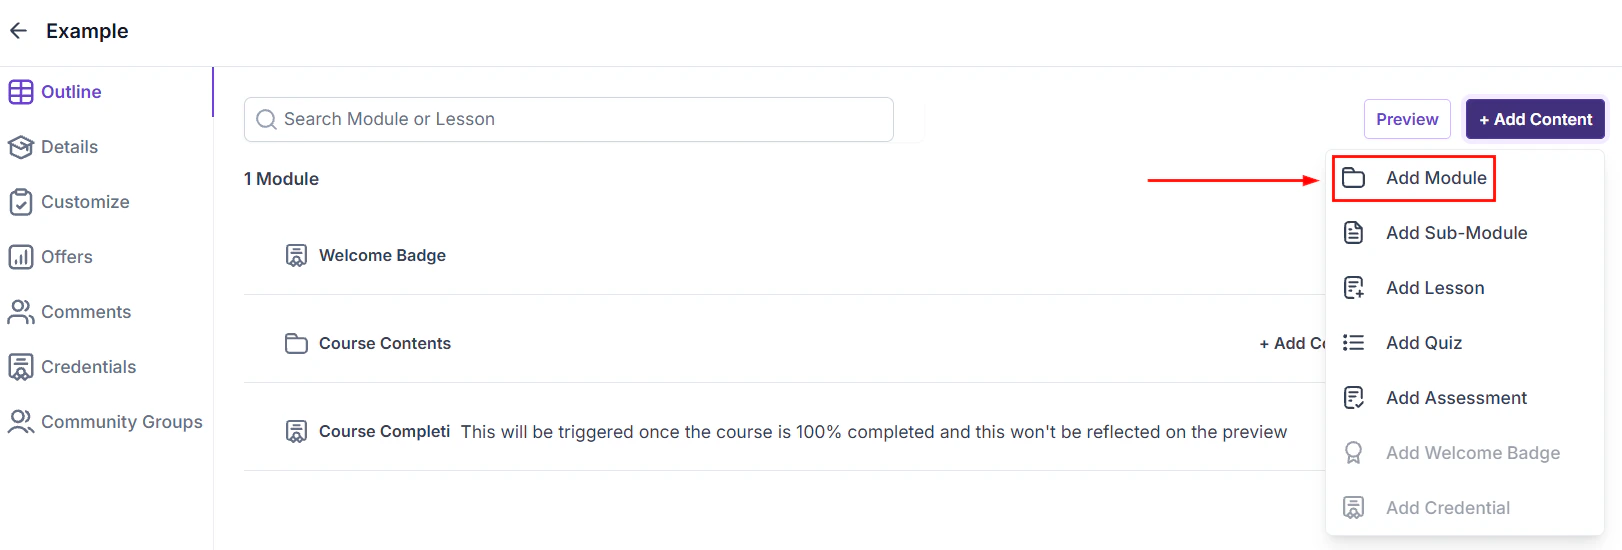
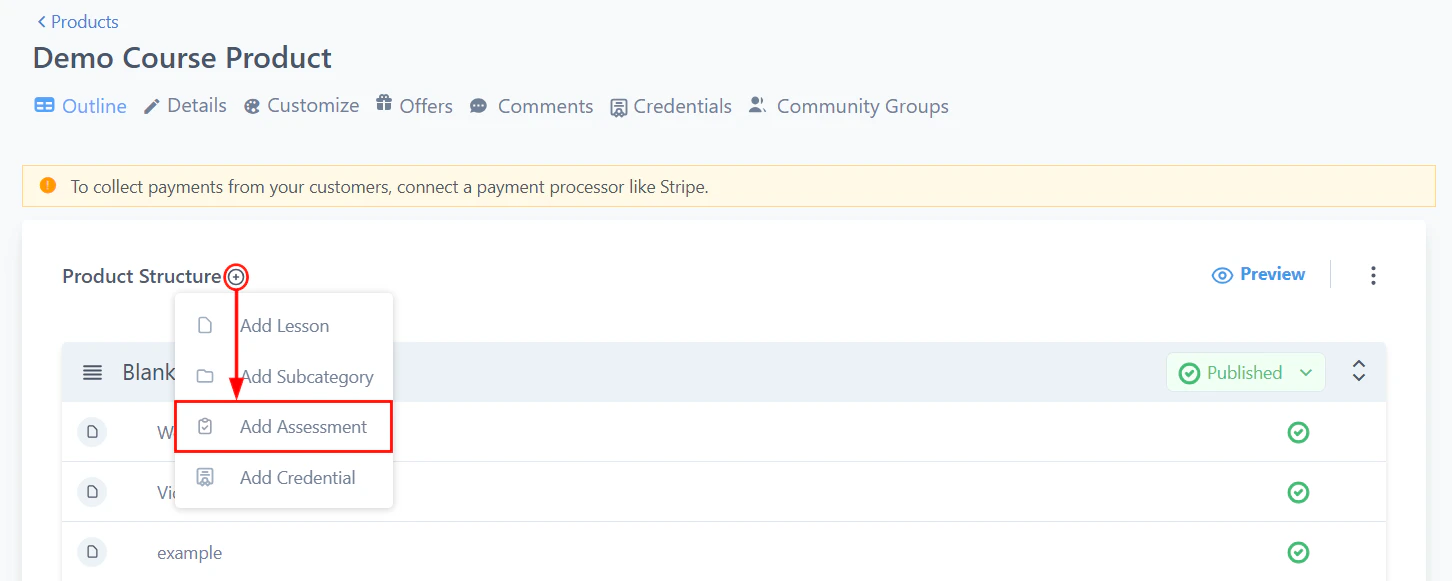
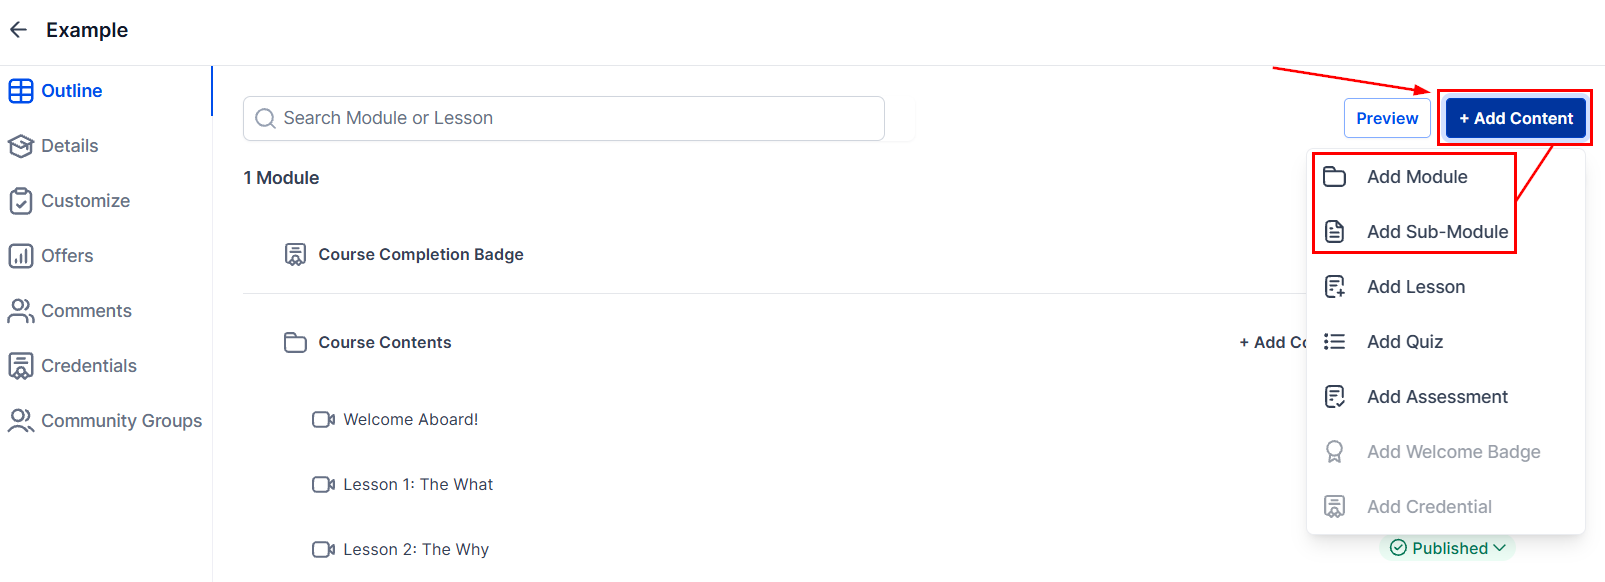
Add modules
Adding a new section (module) to a course
Add lessons to each module
- Video — upload a video file or embed from YouTube, Vimeo, or Wistia
- Text — rich-text content with formatting, images, and embedded media
- Audio — upload an MP3 or other audio file
- PDF / File — attach a downloadable PDF, worksheet, or resource
- Quiz — add a comprehension check at the end of a module
Adding a lesson to a course module
Lesson editor showing content type options and media upload
Uploading media files to a lesson
Set lesson completion criteria
- Manual — the member clicks a “Mark as Complete” button
- Video watch — the lesson is marked complete after the member watches a certain percentage of the video
- Quiz passed — the lesson requires passing a quiz to be marked complete
Lesson settings including completion criteria and visibility options
Configure drip schedule (optional)
Publish the course
Publishing a course to make it live in the member portal
Progress tracking
Members see a progress bar on the course page showing how many lessons they have completed. Individual lesson thumbnails show a checkmark when completed. Admins can view progress for all members from the Members tab:- Lessons completed vs total lessons
- Last active date
- Quiz scores
- Completion percentage
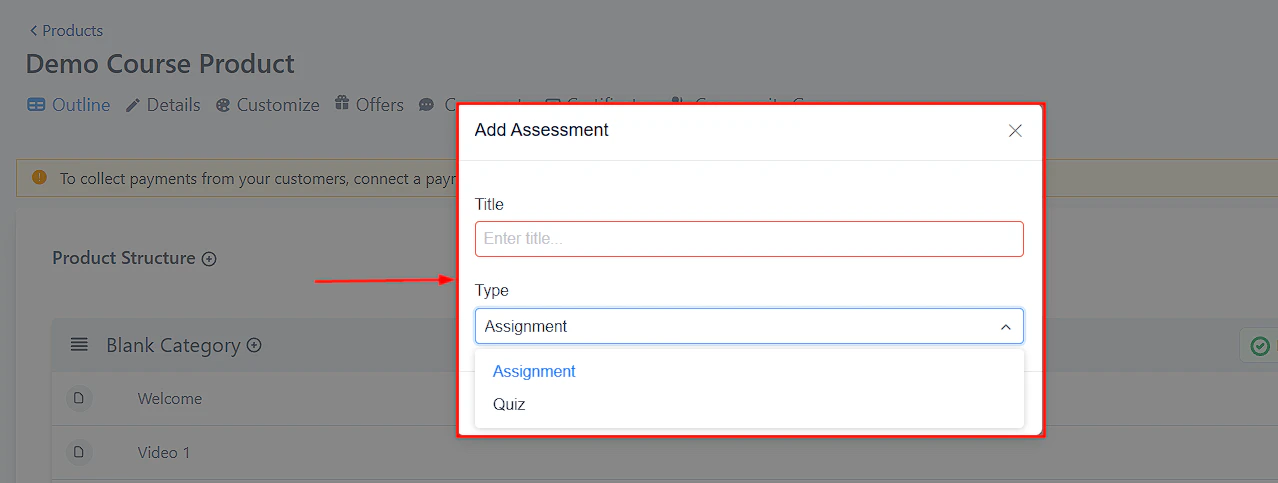
Quizzes in courses
Add a quiz lesson at the end of each module to reinforce learning:- In the lesson editor, select Quiz as the content type.
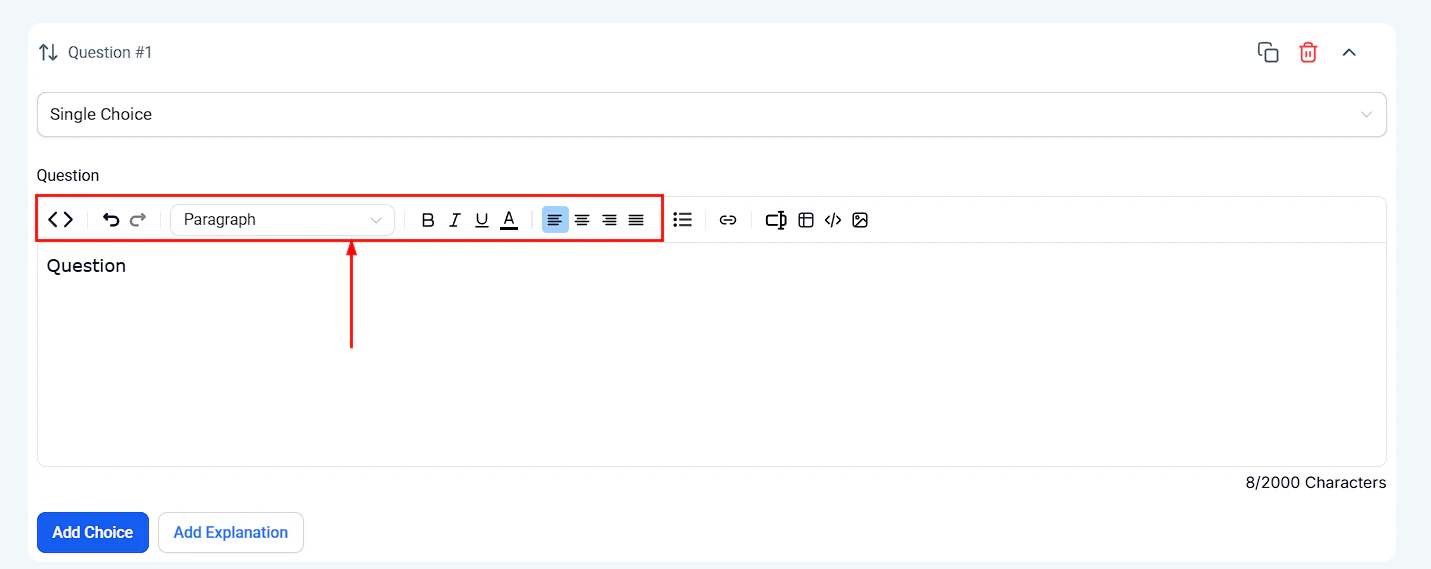
- Add questions with multiple-choice, true/false, or short-answer formats.
- Set the passing score (e.g. 70%).
- Configure what happens if the member fails — allow retakes, or lock subsequent lessons until they pass.
Adding an assessment (quiz) to a course lesson
Quiz question types including multiple choice, true/false, and short answer
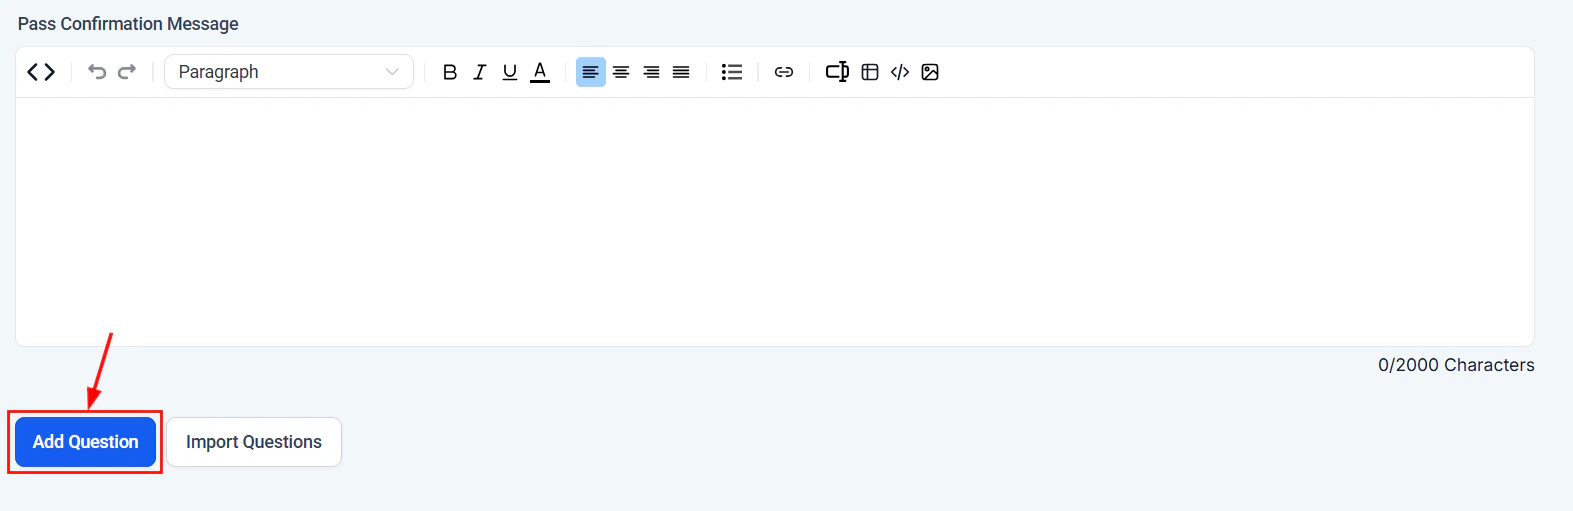
Adding a new question to a course quiz
Quiz settings — passing score, retake rules, and result display
Drip content example
Drip content settings — configuring when lessons become available

Drip delay options — setting days after enrollment for content to unlock
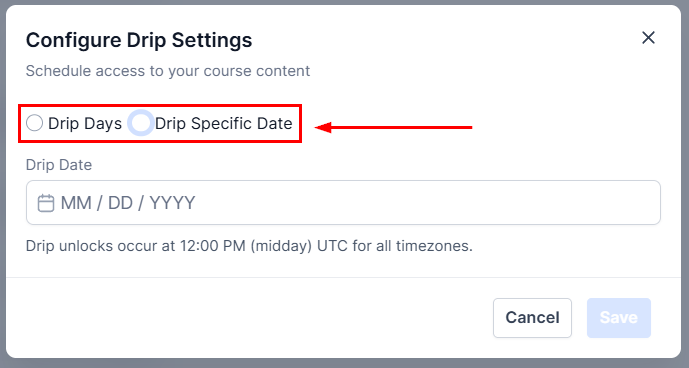
Drip date trigger — scheduling content release on a specific date
Completion certificates
When a member completes all lessons in a course:- An automation trigger fires: Course Completed.
- The automation runs a Grant Certificate action to issue a personalized certificate.
- The certificate appears in the member’s portal and can be downloaded as a PDF.
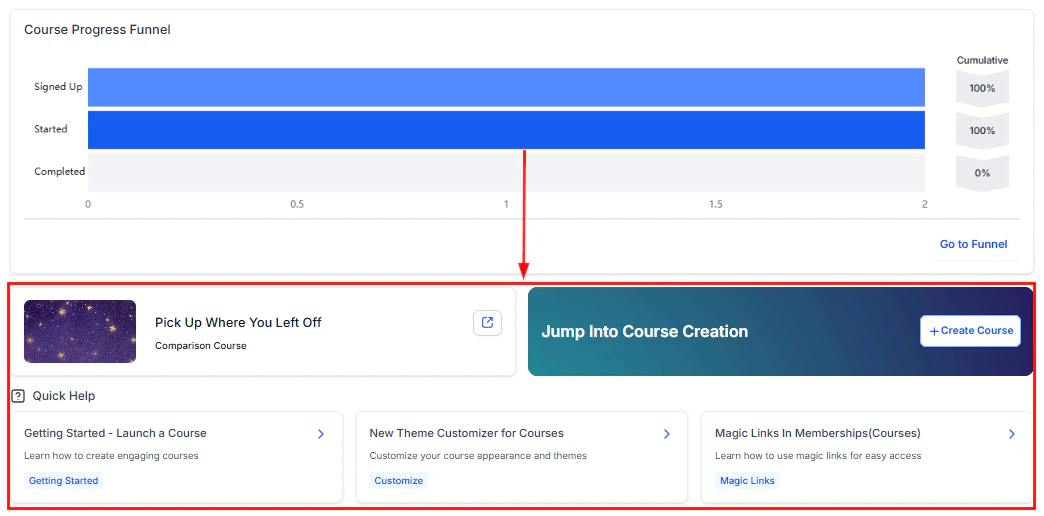
Courses dashboard
The Courses Dashboard gives you a centralized view of all your course performance metrics.Courses dashboard overview showing all active courses
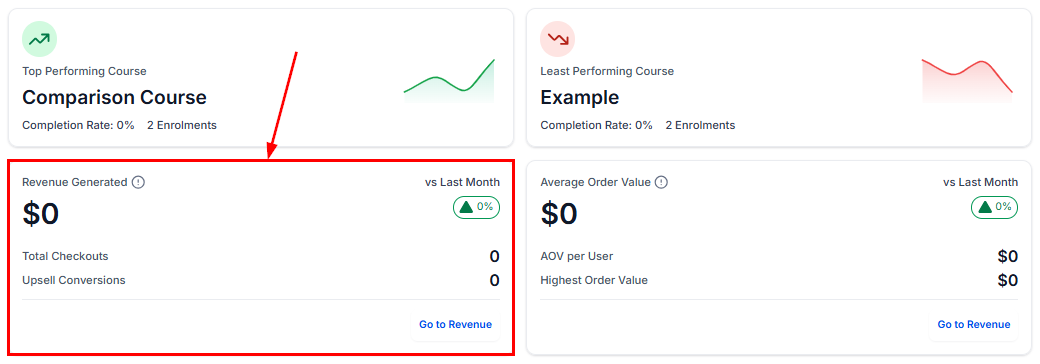
Revenue metrics on the courses dashboard — last 30 days and average order value
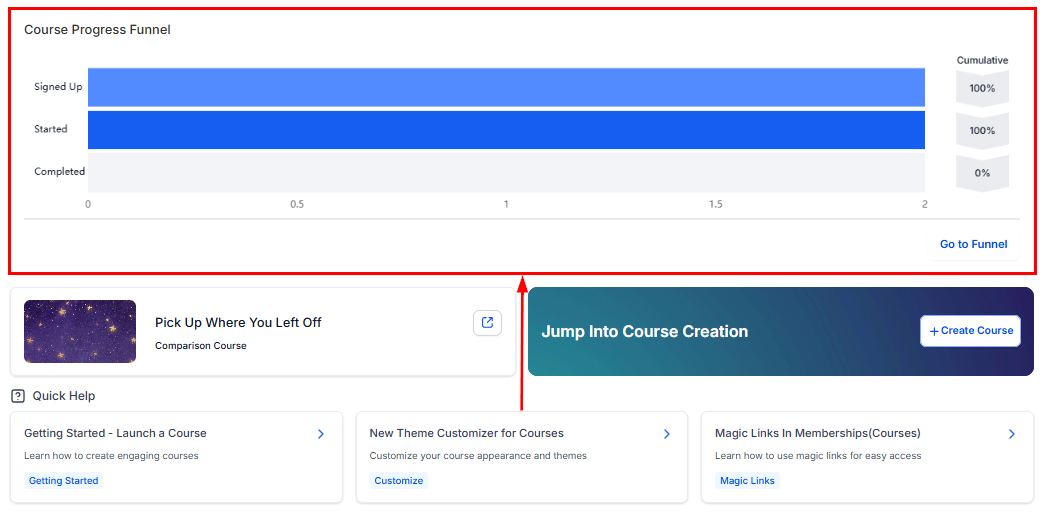
Member progress overview showing completion rates across all courses
Courses dashboard actions — export data and manage course settings
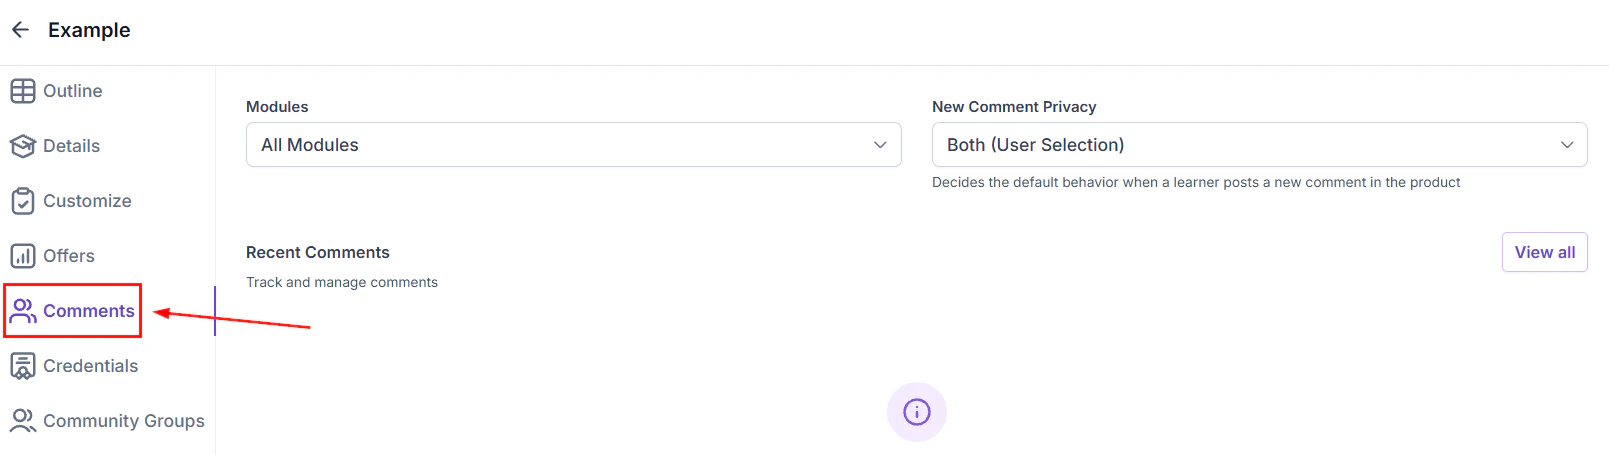
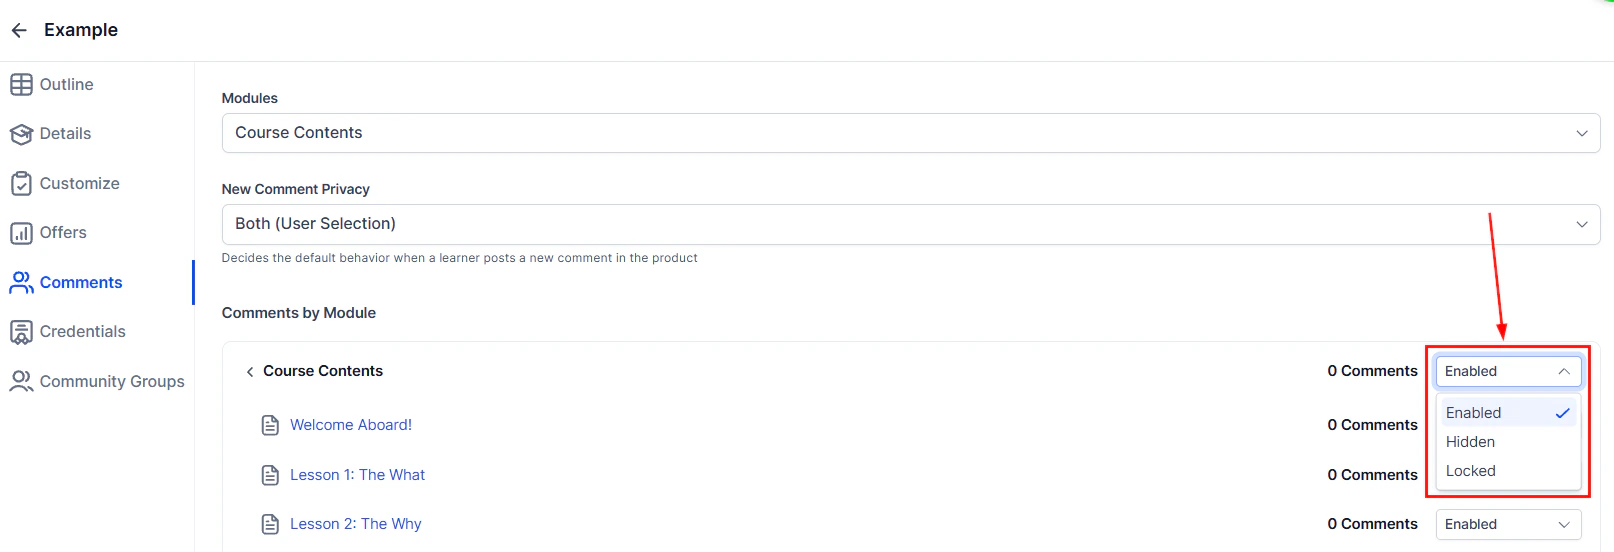
Managing course comments
Members can leave comments on lessons to ask questions and share feedback. Admins can manage all comments from the Comments tab.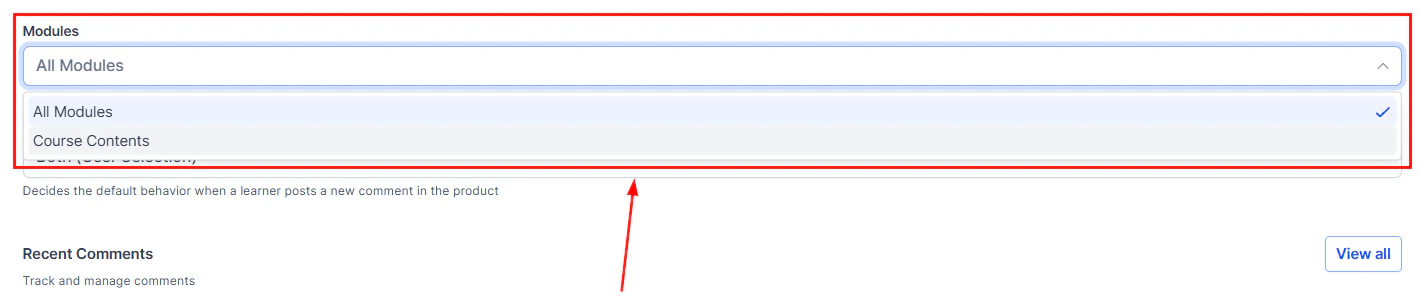
Course comments management panel showing all member comments
Moderating course comments — approve, reply, or delete member comments
Frequently asked questions
What video hosting options are available?
What video hosting options are available?
What is drip content and how does it work?
What is drip content and how does it work?
How does student progress tracking work?
How does student progress tracking work?
Can I prevent members from skipping ahead in a course?
Can I prevent members from skipping ahead in a course?
How many question types are available in quizzes?
How many question types are available in quizzes?
Can I allow members to comment on lessons?
Can I allow members to comment on lessons?
How do I issue a certificate when a course is completed?
How do I issue a certificate when a course is completed?
Course assessments and quizzes
Assessments go beyond simple quizzes by providing more detailed evaluation of member knowledge. The platform supports several assessment features:Question types
Assessment settings
- Passing score — set the minimum percentage required to pass (e.g., 70%)
- Retake policy — allow unlimited retakes, a fixed number of attempts, or no retakes
- Time limit — optionally set a maximum time to complete the assessment
- Show correct answers — choose whether to reveal the correct answers after submission
- Lock next lesson — require passing the assessment before the next lesson unlocks
Audio files in lessons
In addition to video and text, you can upload audio files as lesson content:- In the lesson editor, select Audio as the content type.
- Upload an MP3, M4A, or WAV file.
- The audio player appears in the lesson with play/pause, progress bar, and speed controls.
- Members can listen directly in the portal without downloading.
Custom values for courses
Use custom values (merge fields) within your course content to personalize the member experience:- Member name — greet members by name in lesson text
- Course name — dynamically reference the current course
- Enrollment date — show when the member joined
- Progress percentage — display their current completion status
{{ }} syntax in the rich text editor. They are replaced with the member’s actual data when the lesson is viewed.