

Before diving into multi-bot orchestration, make sure you are comfortable with Conversation AI basics and bot settings, including the distinction between primary and non-primary bots.
Primary vs non-primary bots
Understanding the difference between primary and non-primary bots is the foundation of multi-bot orchestration.Primary bot
- There can be only one primary bot per account at any given time.
- The primary bot handles all inbound conversations on its assigned channels unless a workflow has explicitly assigned a different bot to that contact.
- Think of the primary bot as your “default responder” — it catches everything that is not routed elsewhere.
- The primary bot is configured in bot settings by toggling the Primary flag.
Non-primary bots
- Non-primary bots are specialist bots that only activate when triggered by a workflow.
- They do not respond to inbound messages on their own — they must be explicitly assigned to a contact through a workflow action.
- You can have unlimited non-primary bots, each with its own prompt, knowledge base, and configuration.
- Non-primary bots are ideal for department-specific tasks, language routing, or campaign-specific conversations.

Primary bot settings with the primary toggle and channel assignments

Non-primary bot configuration
Toggling primary bot status on and off
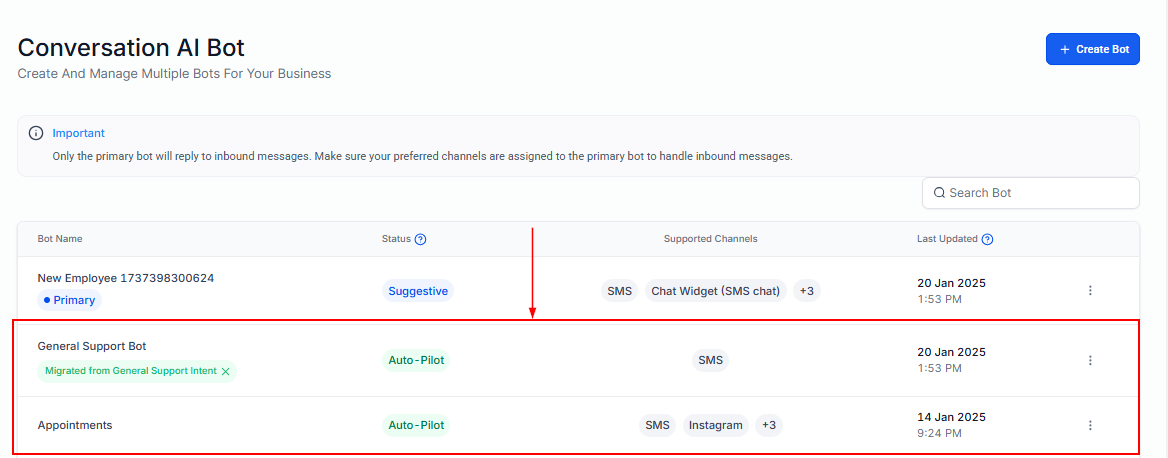
Primary vs non-primary bot assignment in the bot list
When to use multiple bots
A single bot works well for many businesses. But as your operations grow in complexity, multi-bot orchestration becomes essential. Here are the most common scenarios.Different departments
Create separate bots for sales, support, and billing. Each bot has its own prompt tailored to the department’s goals, tone, and knowledge base.- Sales bot: Focused on qualifying leads, answering product questions, and booking demo appointments.
- Support bot: Trained on troubleshooting guides and FAQ content, focused on resolving issues.
- Billing bot: Handles payment inquiries, invoice questions, and subscription changes.
Multiple languages
If your customer base spans multiple languages, create a bot for each language. Each bot’s prompt and knowledge base should be written entirely in the target language.- English bot: Primary bot handling the default language.
- Spanish bot: Non-primary bot triggered when the contact’s language preference is Spanish.
- French bot: Non-primary bot for French-speaking contacts.
Campaign-specific bots
When running targeted marketing campaigns, create a dedicated bot for each campaign. This allows you to:- Tailor the conversation to the campaign’s offer and messaging.
- Use a campaign-specific knowledge base with relevant landing page content.
- Track bot performance per campaign on the Conversation AI dashboard.
Funnel stages
Use different bots at different stages of your sales funnel:- Top of funnel: A friendly, inquisitive bot that qualifies leads and collects basic information.
- Middle of funnel: A knowledgeable bot that provides detailed product information and handles objections.
- Bottom of funnel: A closing bot focused on booking appointments, sending proposals, or processing orders.
Managing multiple accounts
If you manage multiple accounts, you can create account-specific bots within each account with customised prompts and knowledge bases tailored to each business.Bot transfer workflows
Bot transfers are the mechanism that makes multi-bot orchestration possible. A transfer moves a conversation from one bot to another using workflow actions.How bot transfers work
When a transfer occurs, the following happens:- The current bot stops responding to the contact.
- The new bot is assigned to the contact and begins handling the conversation.
- The conversation history is preserved — the new bot can see previous messages for context.
- The contact’s bot status is updated to reflect the new bot assignment.
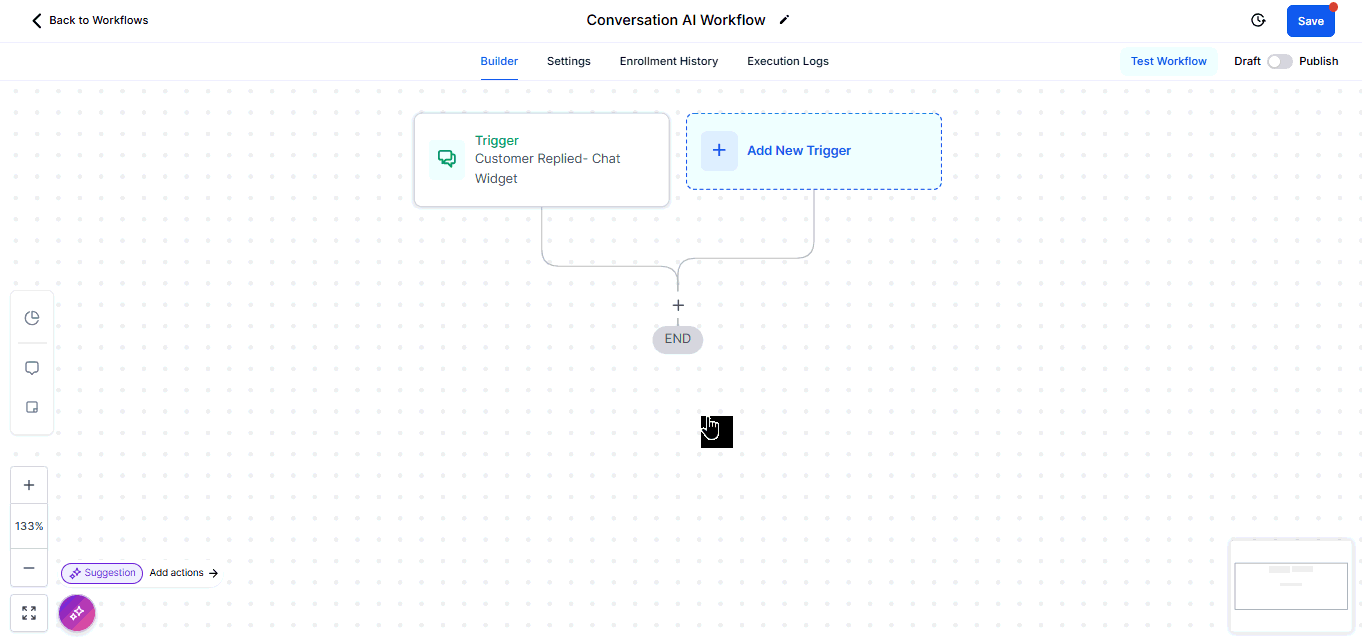
Setting up a bot transfer workflow
1
Create or open a workflow
Navigate to Automation > Workflows and create a new workflow or open an existing one.
2
Choose a trigger
Select the appropriate trigger for when the transfer should occur. Common triggers include:
- Contact tag added (e.g., “needs-support” tag triggers transfer to support bot)
- Conversation AI action fired (the current bot triggers a custom action)
- Custom field updated (e.g., language preference changes)
- Form submitted (a campaign form submission triggers a campaign bot)
3
Add the 'Assign to Bot' action
In the workflow actions, add an Assign to Conversation AI Bot action. Select the target bot from the dropdown.
4
Set the bot mode
Choose whether the new bot should operate in Auto-Pilot or Suggestive mode for this contact.
5
Optional: add a handoff message
Add a Send Message action before the bot assignment to inform the customer about the transfer. For example: “Let me connect you with our support specialist who can help with that.”
6
Test the workflow
Trigger the workflow with a test contact and verify the new bot takes over the conversation correctly.
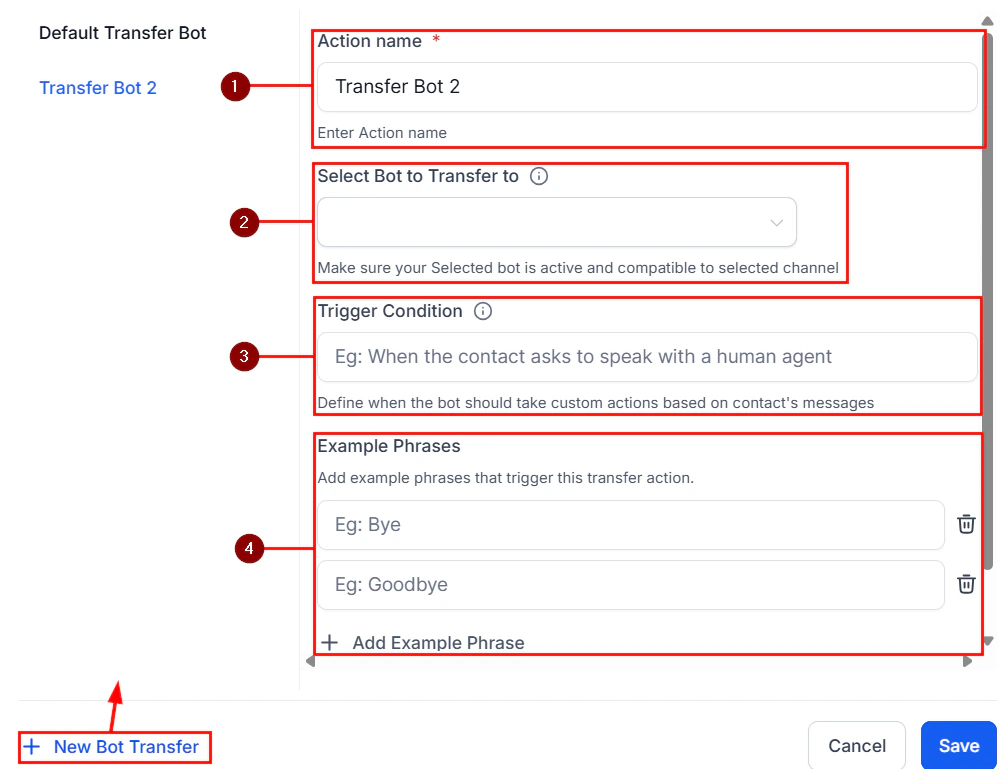
Transfer bot action configuration with bot selection
Transfer bot action with bot selection and configuration

Saving the transfer bot configuration
Transfer triggered by bot actions
One of the most powerful patterns is having the bot itself trigger its own transfer. Using Conversation AI actions, you can configure the bot to fire a custom action when it detects that the conversation needs a different specialist. For example, your primary sales bot could be prompted with:Architecture patterns
Below are common multi-bot architectures. Choose the one that best fits your business.Pattern 1: Hub and spoke
The primary bot acts as a “receptionist” that triages incoming conversations and routes them to specialist bots.Pattern 2: Language router
A workflow detects the contact’s language and assigns the appropriate language-specific bot before any conversation begins.Pattern 3: Campaign cascade
Different marketing campaigns route to different bots, each tailored to the campaign’s offer and audience.Pattern 4: Funnel progression
Bots are assigned sequentially as the contact moves through pipeline stages.Managing bot status per contact
Each contact has a bot status that determines how the Conversation AI interacts with them. Understanding and managing this status is critical for multi-bot setups.Bot status values
- Active: The assigned bot will respond to messages from this contact.
- Paused: The bot is temporarily paused. It will not respond but can be resumed.
- Stopped: The bot has been stopped for this contact (either manually or via a stop bot action). It will not respond until re-activated.
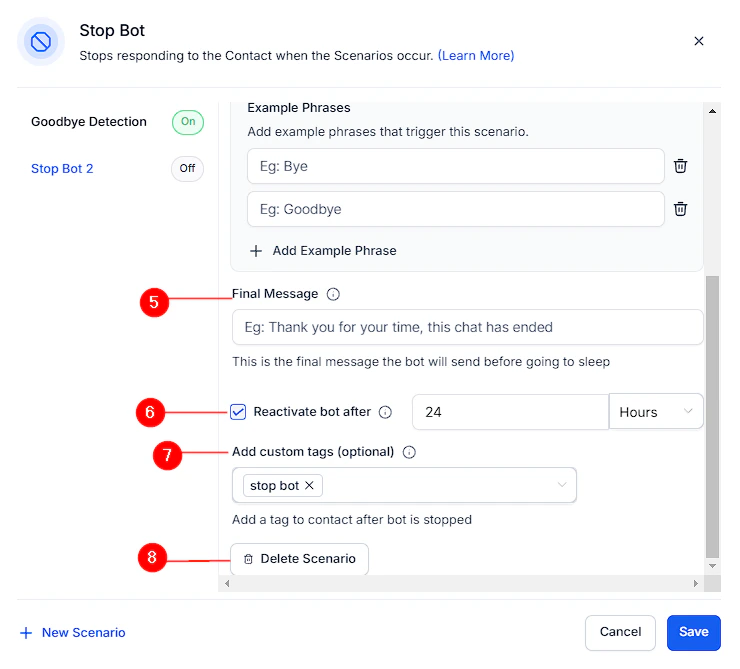
Stop bot action with scenario configuration and trigger phrases
Managing status in workflows
You can control bot status through workflow actions:- Enable bot for contact: Sets the bot to Active for the contact.
- Disable bot for contact: Stops the bot for the contact.
- Assign bot: Assigns a specific bot and sets it to Active.
Status in the conversations inbox
You can view and manually change a contact’s bot status directly in the conversations inbox. Look for the bot status indicator in the contact details panel. You can also filter conversations by bot status — see bot status management for details.Best practices for multi-bot orchestration
- Start simple. Begin with a primary bot and add specialist bots only when you have a clear need. Over-engineering a multi-bot setup adds complexity without proportional benefit.
- Define clear boundaries. Each bot should have a well-defined scope. Overlapping responsibilities lead to confused routing and inconsistent customer experiences.
- Use handoff messages. When transferring between bots, send a brief message to the customer explaining the transfer. This prevents confusion when the tone or style changes.
- Monitor transfer rates. If a bot is transferring too many conversations, its prompt or knowledge base may need refinement. Use the dashboard to track this.
- Test end to end. Before deploying a multi-bot setup, test every transfer path with real conversation scenarios. Verify that contacts move smoothly between bots.
- Keep knowledge bases separate. Each bot should have its own knowledge base focused on its domain. Shared knowledge bases can cause irrelevant information to surface.
Next steps
Conversation AI overview
Review the fundamentals of setting up and configuring a Conversation AI bot.
Conversation AI actions
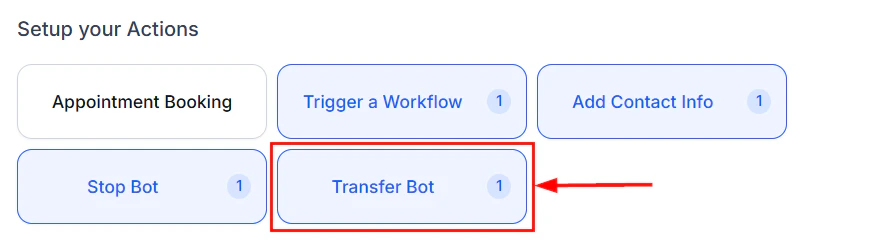
Configure bot actions including transfers, escalation, and appointment booking.
Bot settings
Manage primary and non-primary bot assignments and channel configuration.
Multi-channel deployment
Deploy your bots across SMS, Instagram, Facebook, WhatsApp, and web chat.