

Screenshot
Create Knowledge Base
Click this button to set up a new knowledge base in your account. You will be required to assign a name to the knowledge base and enter the URL that hosts the information. Optionally, you can add FAQs and enter a description for further details.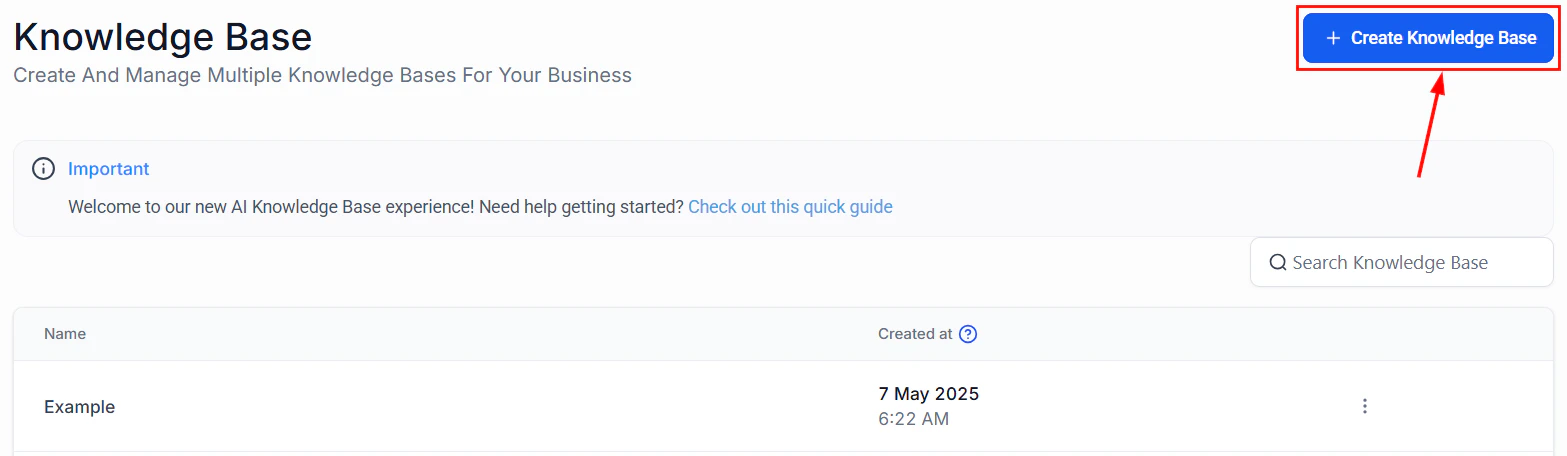
Screenshot
Search
Manage multiple knowledge bases seamlessly by using the search bar to locate them!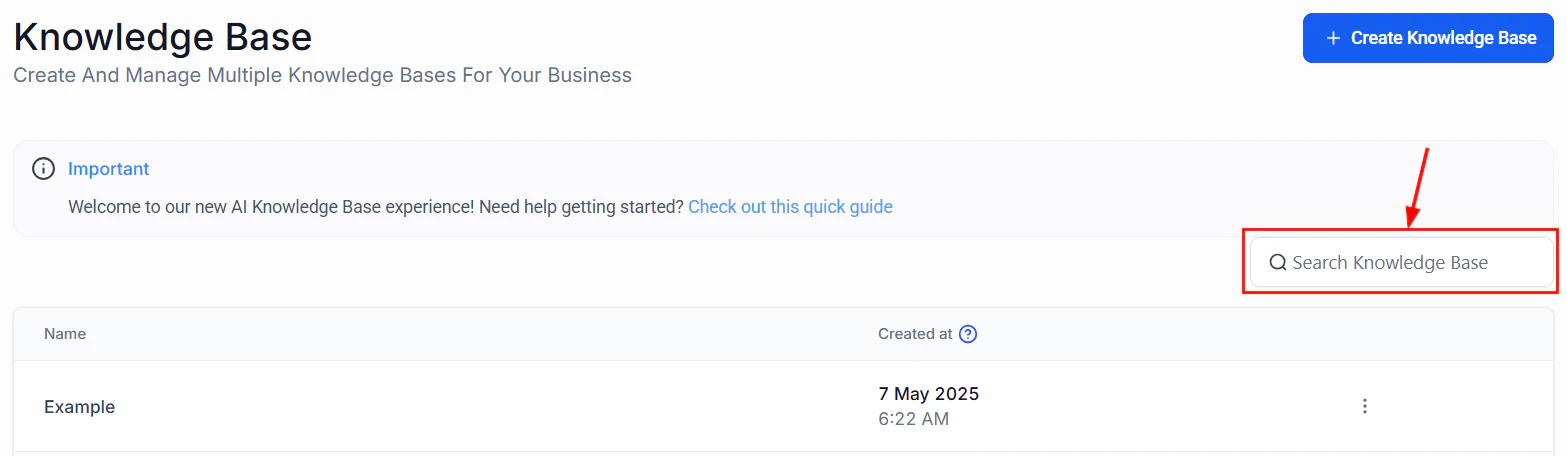
Screenshot
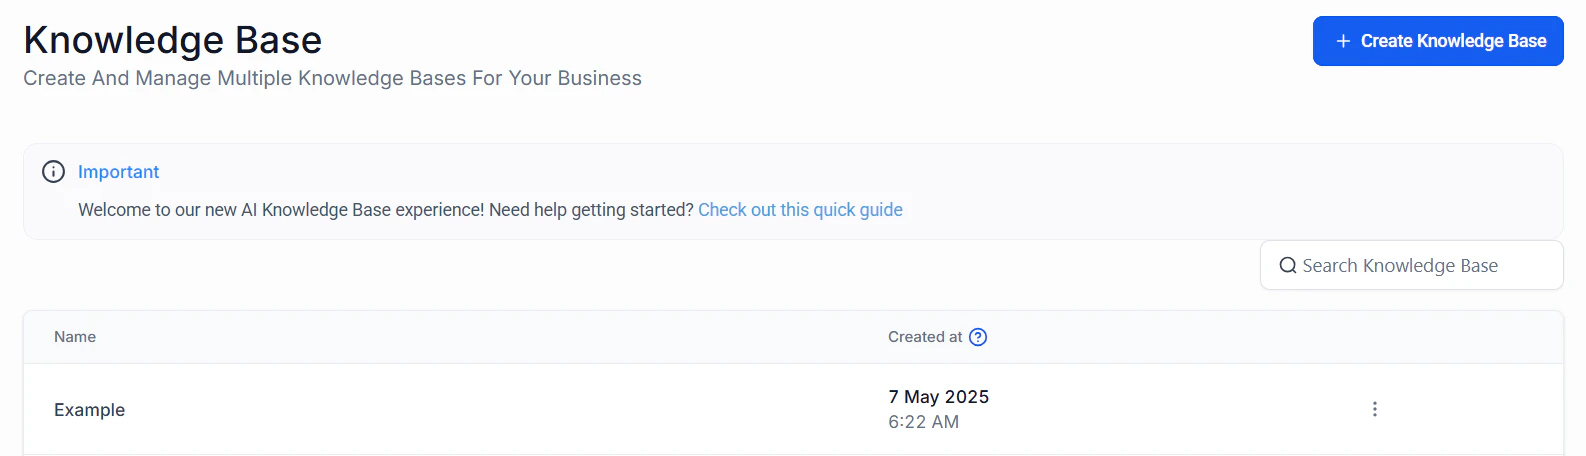
Knowledge Base Table
The Knowledge Base Table lists all the knowledge bases created by the users in your account alongside their creation date and time.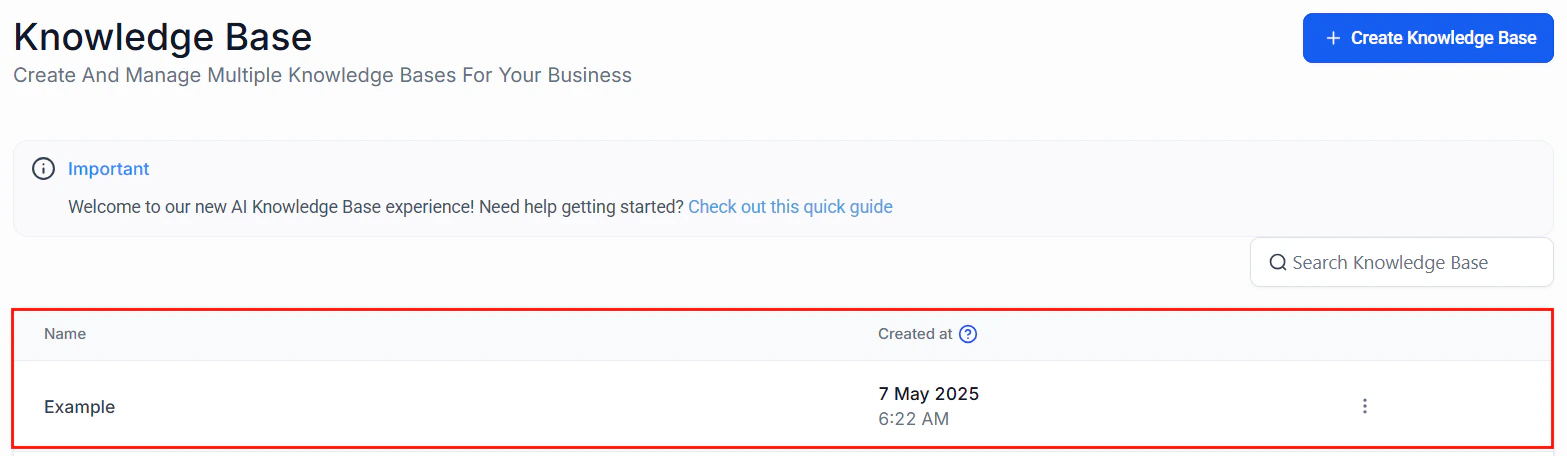
Screenshot
Actions
To modify or remove a Knowledge Base, click the three-dot menu located next to the corresponding entry.
Screenshot
Creating a knowledge base
The Knowledge Base feature offers the flexibility to create and manage dedicated knowledge bases for your AI tools. A properly configured knowledge base ensures you will deliver accurate, context-aware responses tailored to your business needs. This guide walks you through the setup process and outlines best practices to help you maximize the effectiveness of your AI integrations.Creating a Knowledge Base
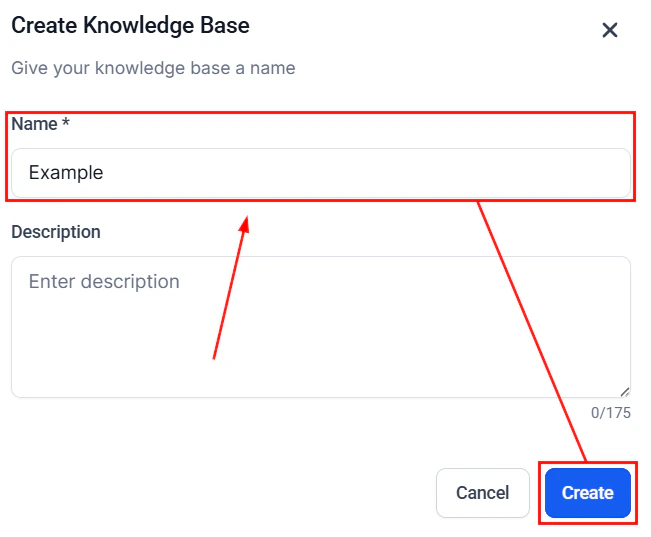
To get started, navigate to the Knowledge Base tab inside the AI Agents section and click the ” + Create Knowledge Base” button.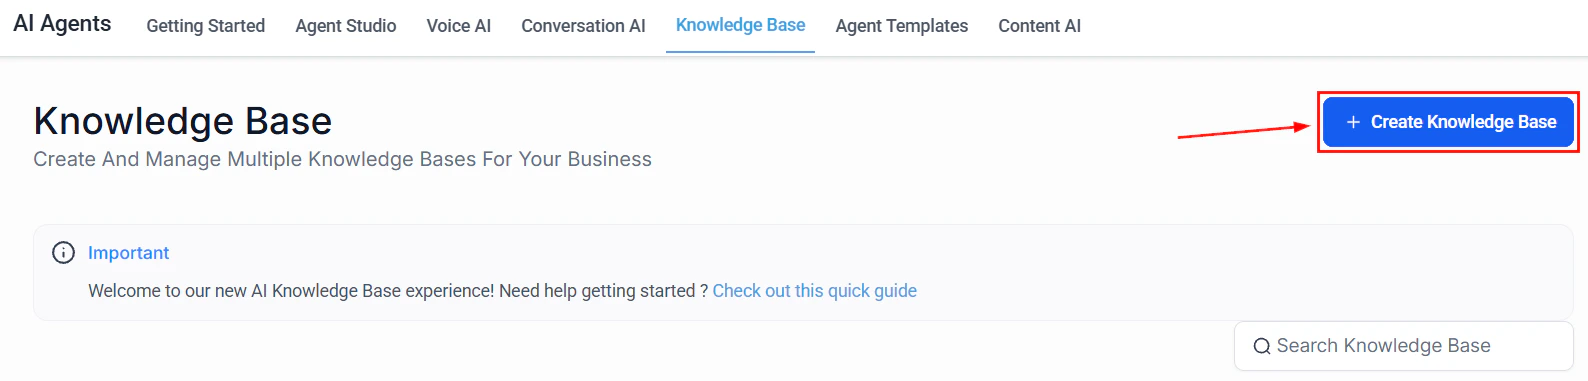
Screenshot
Screenshot
Screenshot
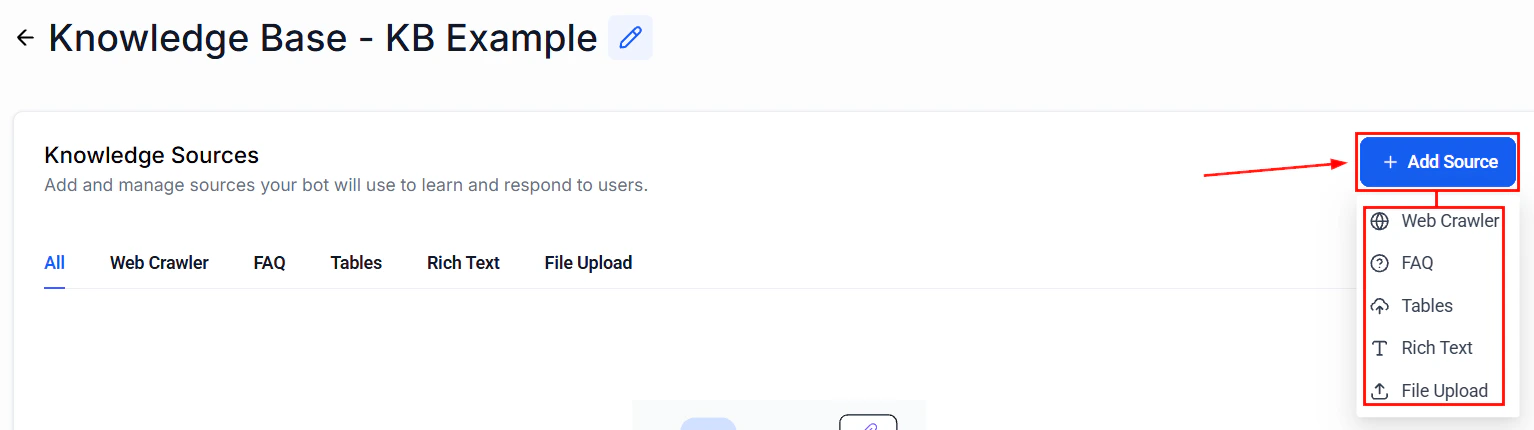
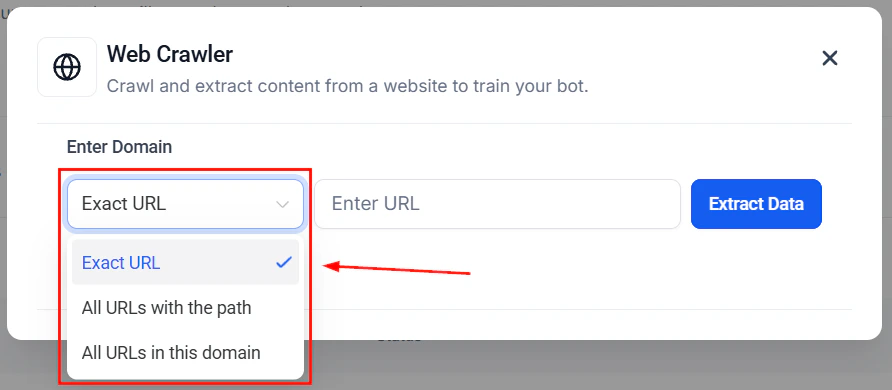
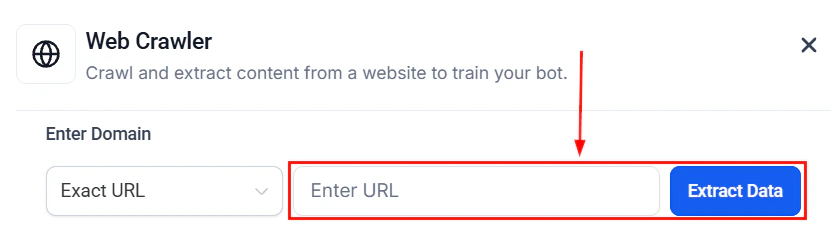
Web Crawler
The Web Crawler option allows you to enter the link for the Knowledge Base. Use publicly available information from websites and ensure that it provides accurate, context-specific responses. You can configure the Web Crawler to include data from specific URLs, paths, or entire domains, as well as from Google Docs. ��Note: Ensure Google Doc files are set to “public” by changing the share settings to “Anyone with the link.”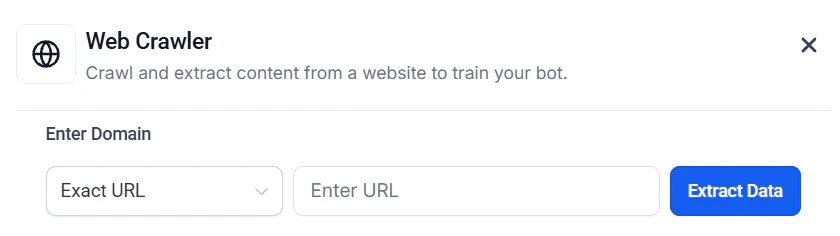
Screenshot
Screenshot
Screenshot
Screenshot
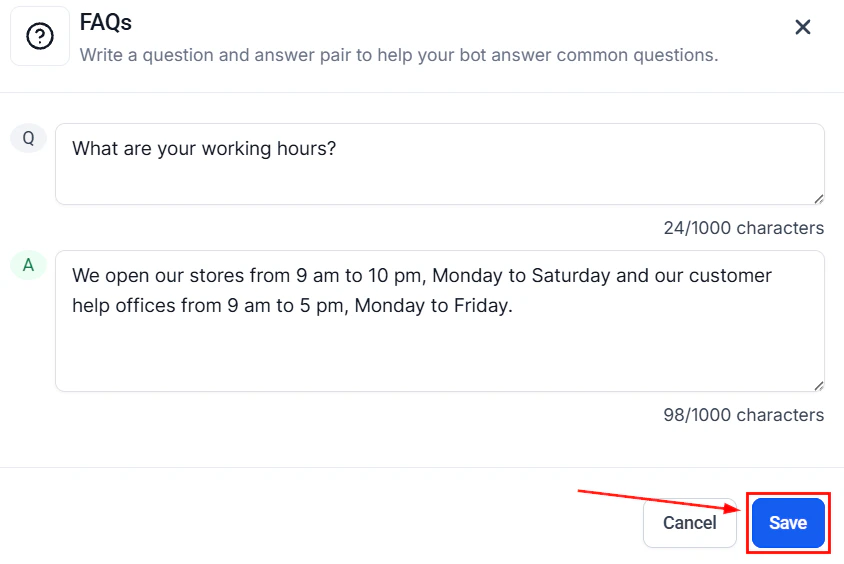
FAQs
Select the FAQs option to add question-and-answer pairs addressing common client inquiries, as an alternative to uploading a link.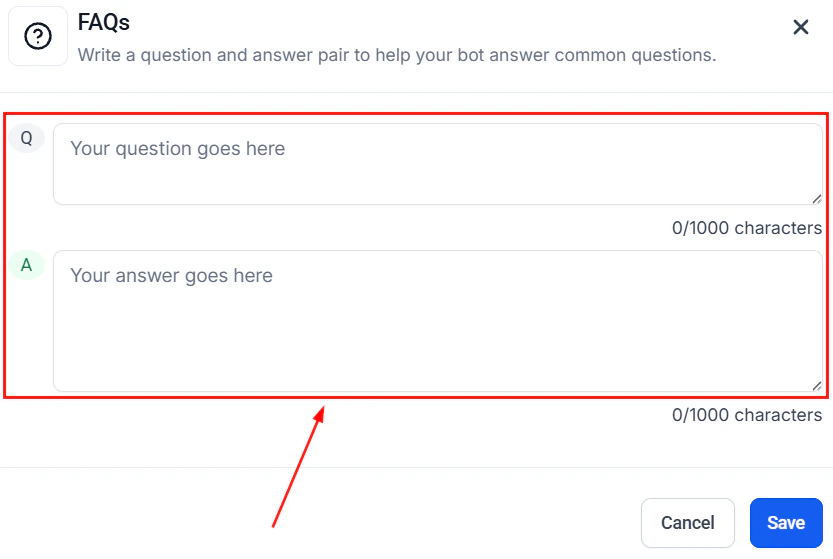
Screenshot
Screenshot
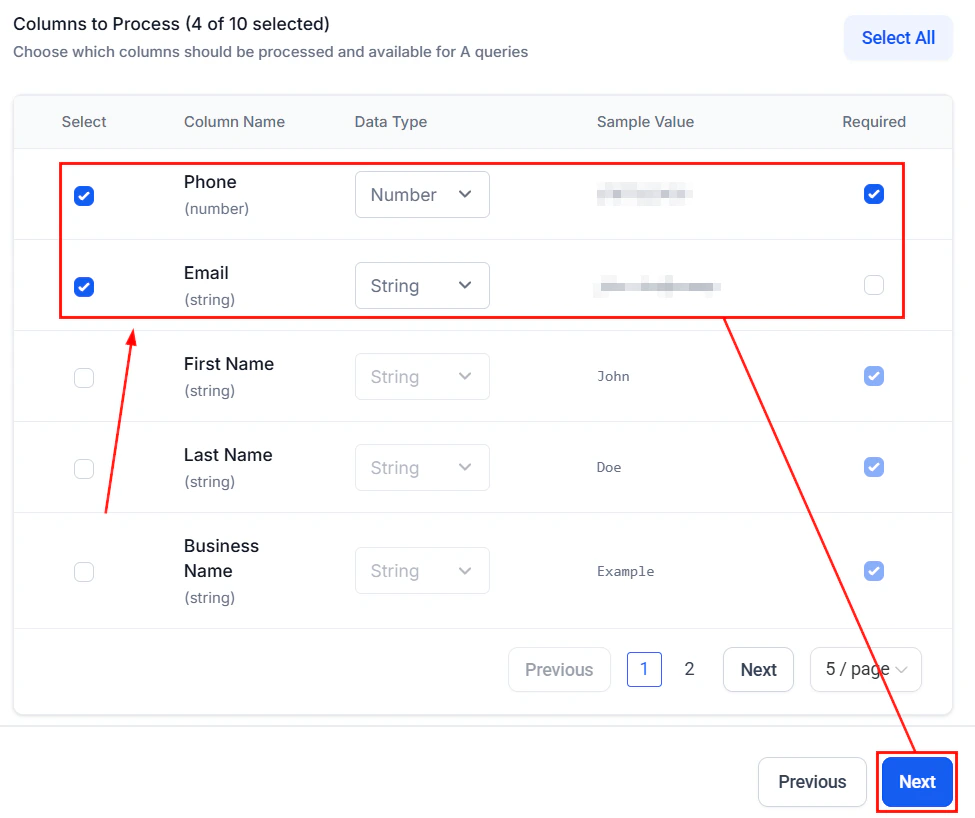
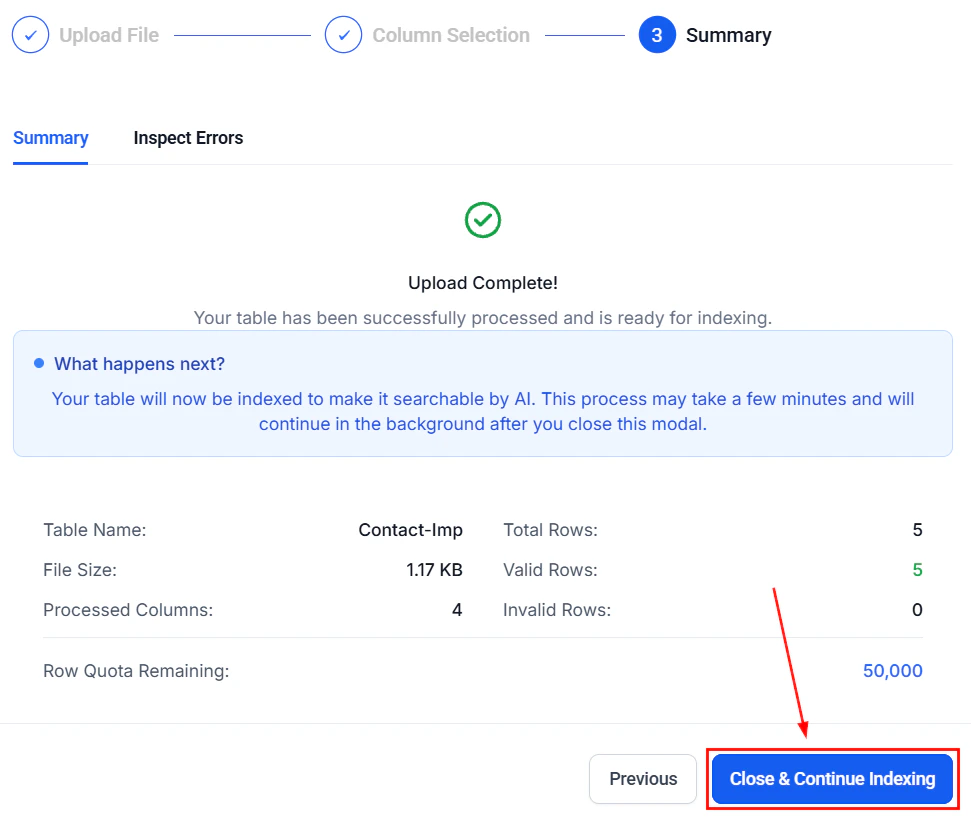
Tables
The Tables option allows you to upload data organized in a spreadsheet via CSV files. To use it, first upload your CSV file (max 10MB, up to 20 columns) and enter a name for identification.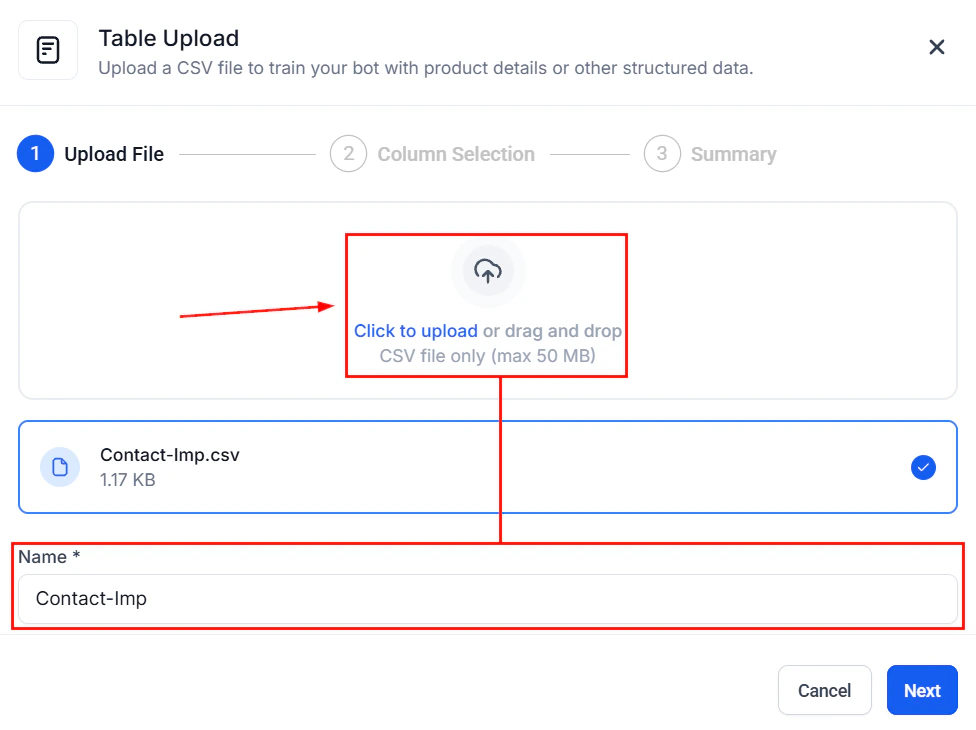
Screenshot
Screenshot
Screenshot
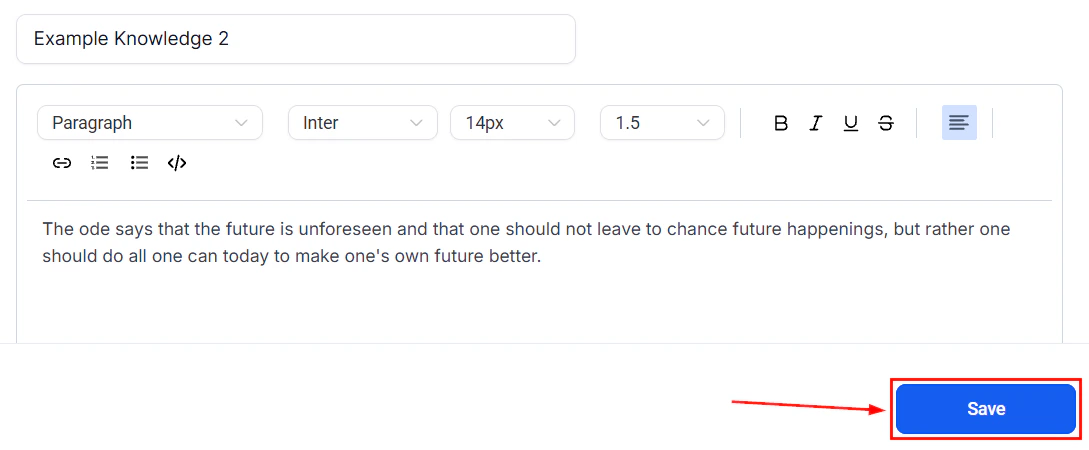
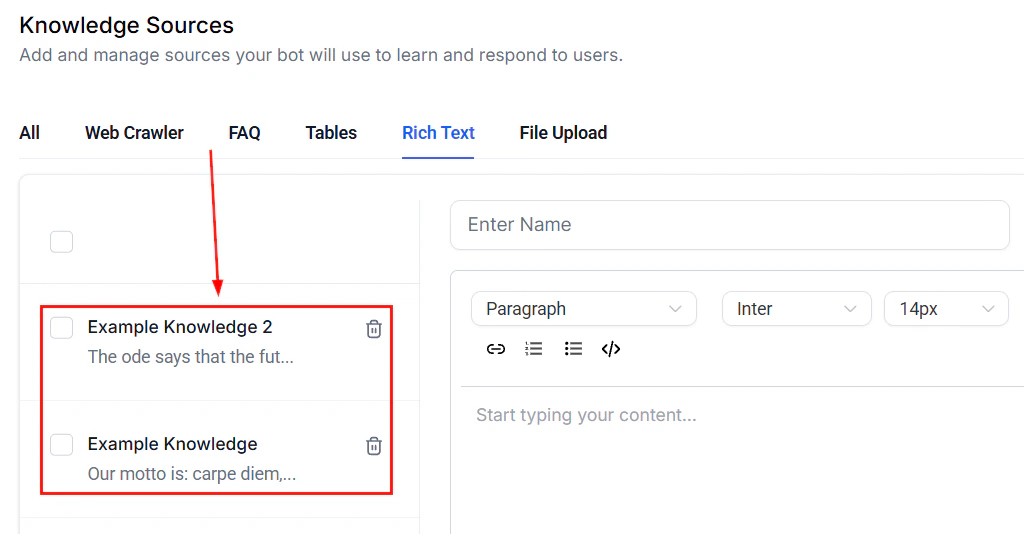
Rich Text
The Rich Text section enables you to add and format content directly in a rich text interface, allowing quick edits, summaries, and knowledge updates without file uploads.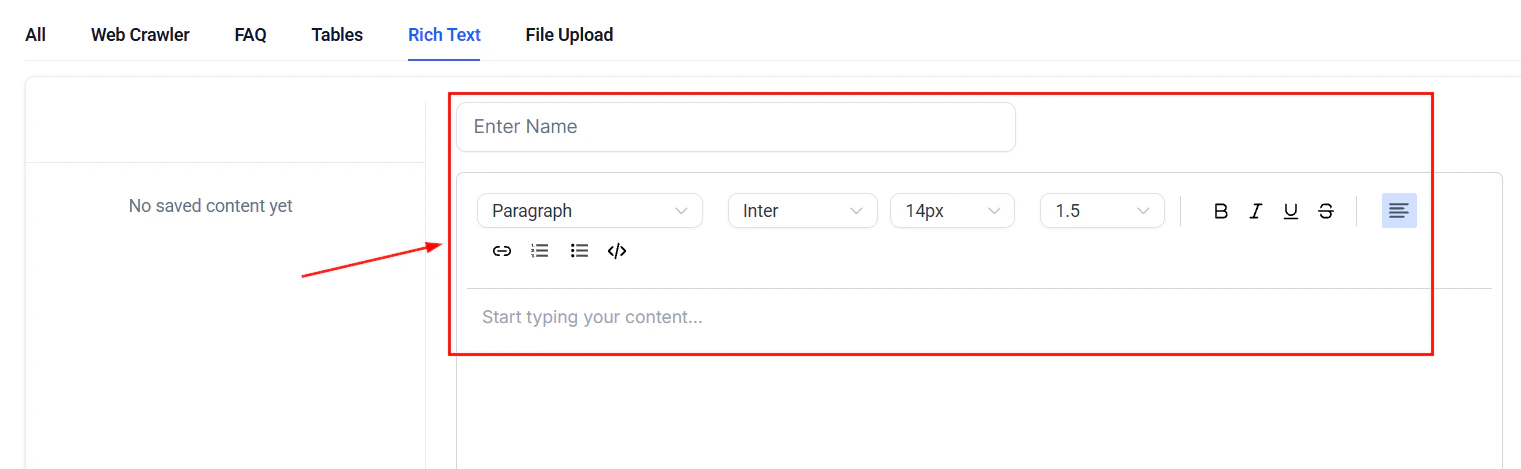
Screenshot
Screenshot
Screenshot
File Upload
This option allows you to drag and drop or upload your .doc, .docx, and PDF files from your desktop to import content seamlessly into your Knowledge Base.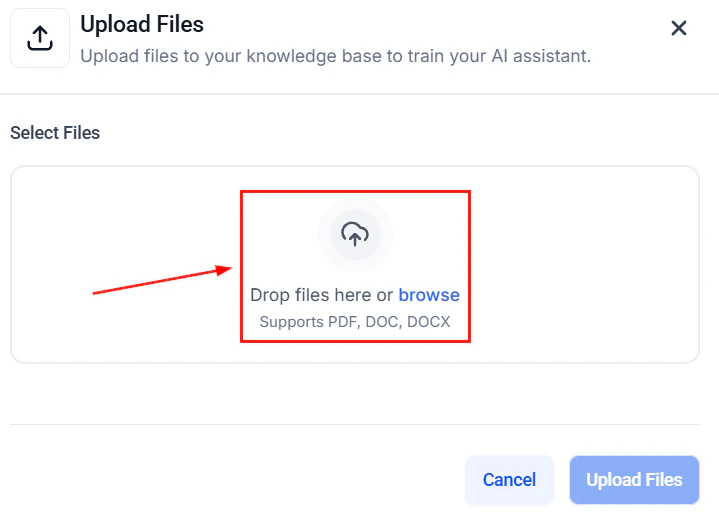
Screenshot
Document support (DOC, DOCX, PDF)
The Knowledge Base supports direct file uploads for DOC, DOCX, and PDF documents. This lets you import existing business documents — policies, product guides, training materials — without manual copy-paste. Supported formats:
To upload a document:
- In the Knowledge Base, click + Add Source
- Select File Upload
- Drag and drop your file or click to browse
- The platform processes the document and extracts the text content
- Click Save to add it to the knowledge base
Documents with complex formatting (tables, images, charts) may lose visual structure during extraction. The AI will still have access to the text content. For best results, use well-structured documents with clear headings and paragraphs.
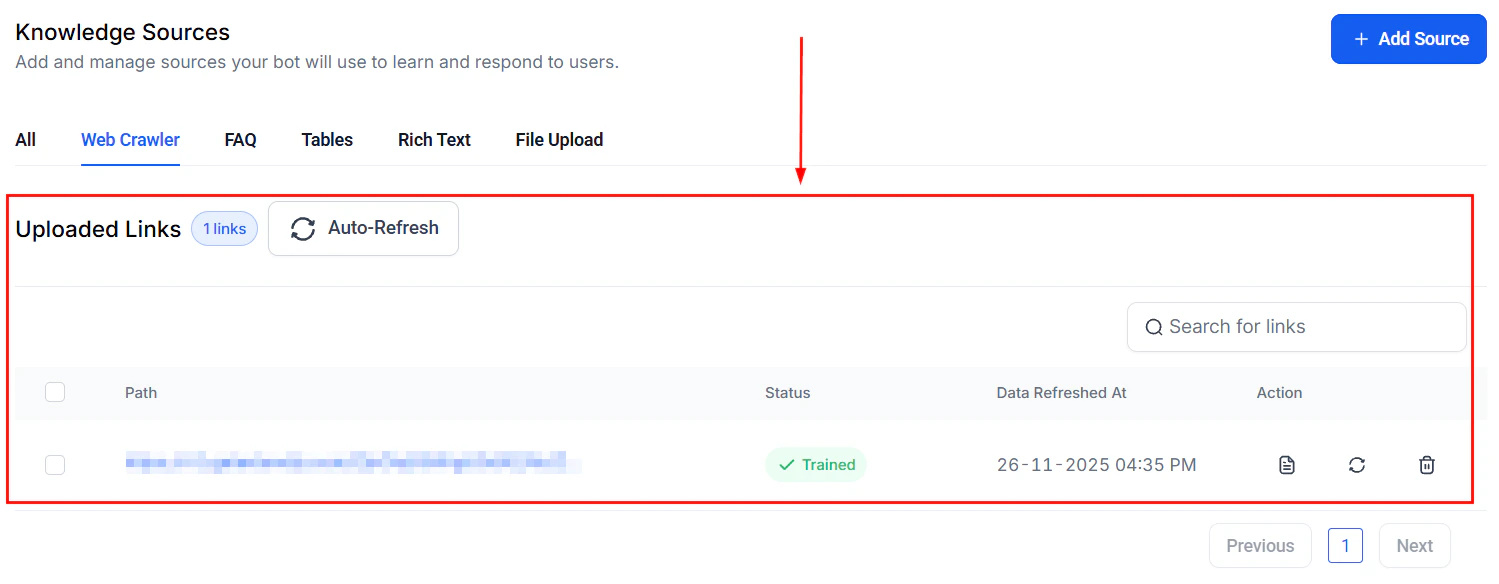
Auto refresh of trained links
Web-crawled URLs in your Knowledge Base can be set to refresh automatically, ensuring your AI agent always has the latest information from your website or documentation. When auto refresh is enabled:- The platform periodically re-crawls the URLs in your knowledge base
- Updated content is automatically reflected in the AI’s responses
- Deleted or moved pages are flagged for your review
Best Practices for Managing Knowledge Bases
- ****Assigning Knowledge Bases Strategically: ****Use separate knowledge bases for different teams or purposes (e.g., sales, support, product). This enables AI agents to specialize and deliver more relevant responses.
- ****Keeping Content Up to Date: ****Regularly review and update your knowledge base content to ensure accuracy. All changes are reflected instantly in your agent’s responses.
- ****Monitoring and Improving Performance: ****Track how often the knowledge base is triggered and evaluate response quality. Use analytics and feedback to refine prompts or update content as needed.
Frequently Asked Questions
Can I assign more than one knowledge base to a single Voice AI agent?
Can I assign more than one knowledge base to a single Voice AI agent?
Currently, only one knowledge base can be assigned per agent.
How quickly are knowledge base updates reflected?
How quickly are knowledge base updates reflected?
Updates are immediate and instantly applied to agent responses.