

What are AI actions?
AI actions bring the power of large language models directly into your HoopAI workflows. Instead of relying solely on static templates and fixed logic, you can insert an AI-powered step that reads contact data, generates intelligent responses, and feeds its output into every subsequent action in your workflow. Whether you need to draft a personalized follow-up email, score a lead based on conversation history, or generate dynamic content for an SMS, AI actions make it possible without writing a single line of code.
AI agent configuration panel showing custom action setup for workflow integration
How AI actions work
At a high level, an AI action is a workflow step that sends a prompt to an AI model and stores the response as a custom value you can reference later. The flow looks like this:- A trigger fires (form submission, tag applied, appointment booked, etc.)
- The workflow reaches the AI action step
- HoopAI assembles the prompt using your template and any merge fields
- The AI model processes the prompt and returns a response
- The response is stored and available to all downstream steps
Setting up your first AI action

Adding an AI action step inside the workflow builder
Open the workflow editor
Add the AI action step
Configure the model
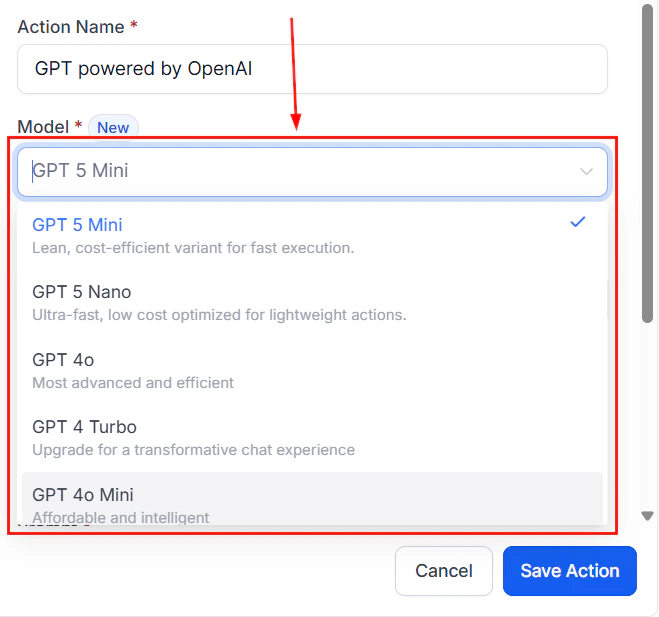
Selecting the AI model for your workflow action
Write your prompt
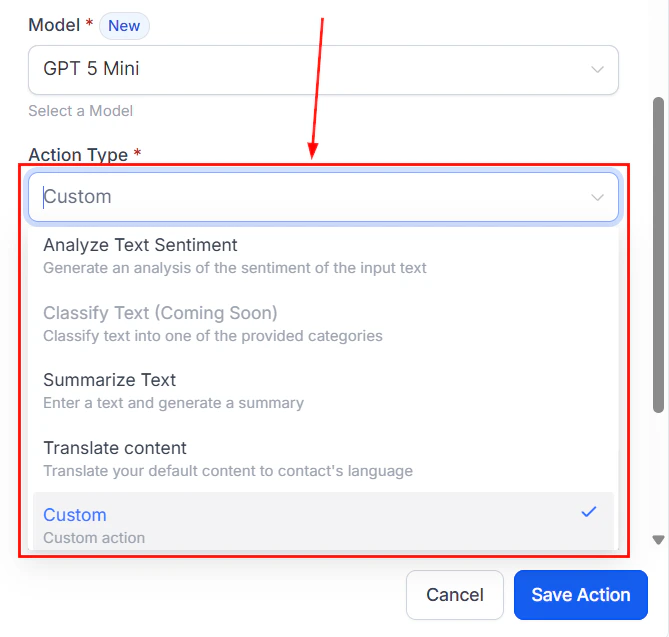
Choosing the action type for the GPT-powered workflow step
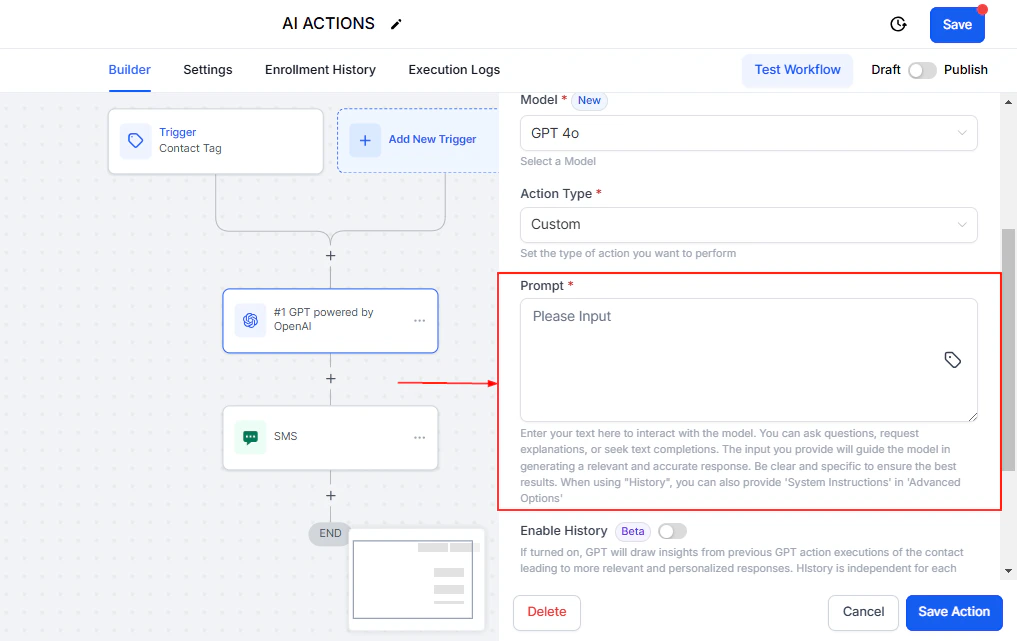
Writing a custom prompt with merge fields for the AI action
Set the response variable
ai_response or lead_score. This variable becomes available to every action that follows in the workflow.Test and activate
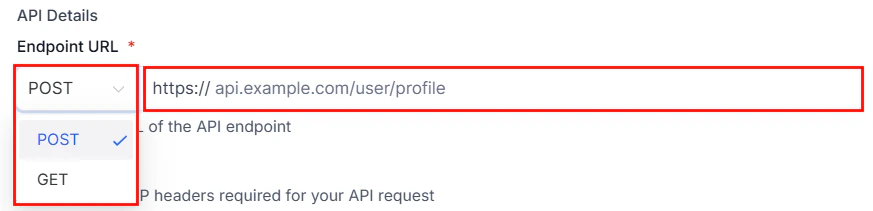
Custom action details panel showing endpoint URL and configuration options
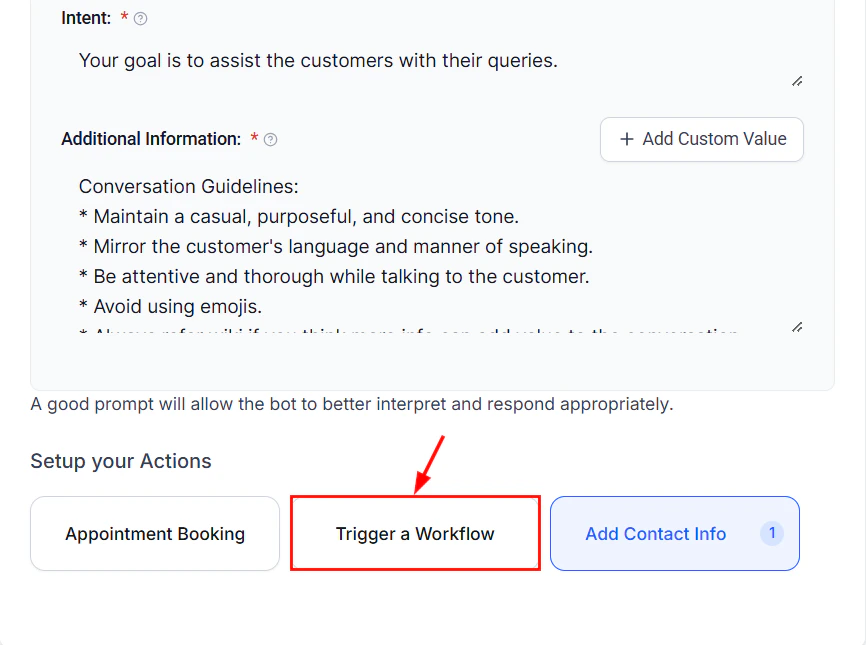
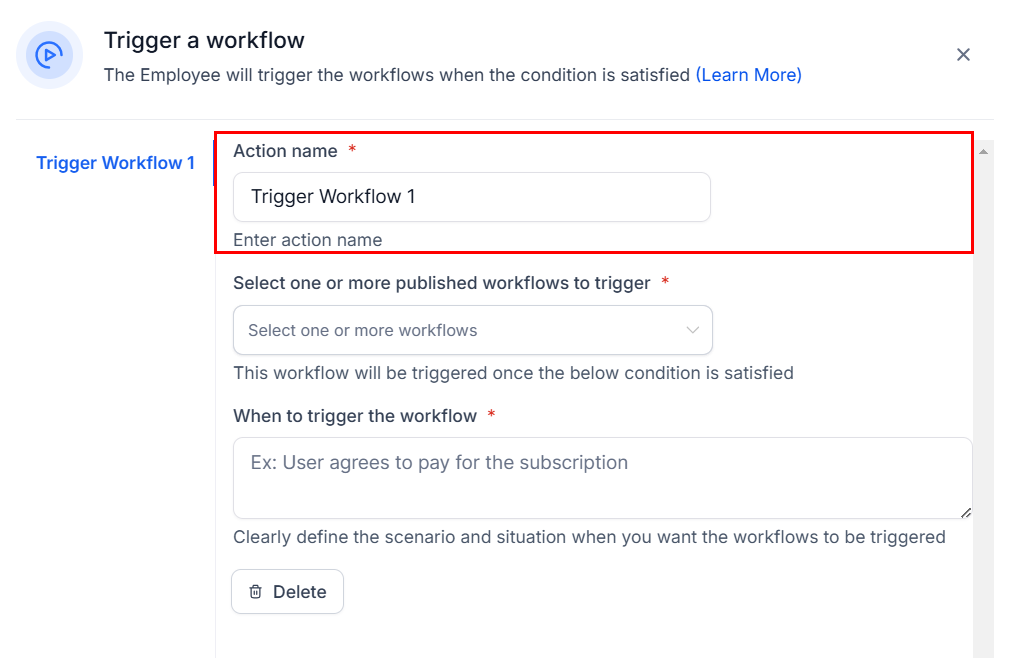
Triggering a workflow from an AI action showing the workflow selection interface
Passing contact data via merge fields
Merge fields are the bridge between your contact records and the AI prompt. They allow the AI to personalize its output based on real data.Commonly used merge fields
Example prompt with merge fields
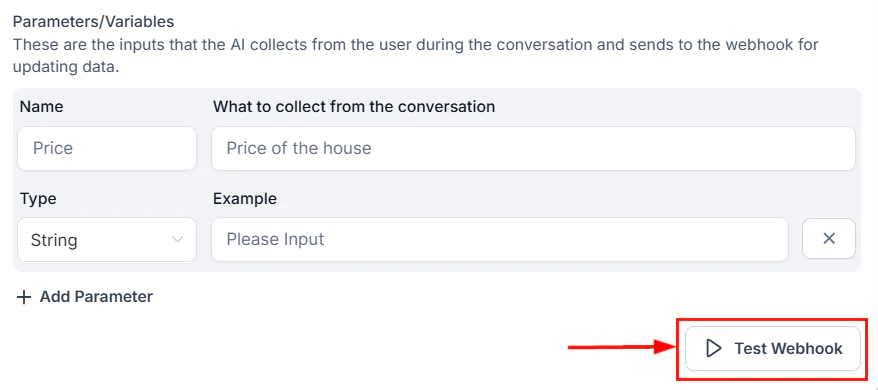
Testing a custom action to verify AI output before activating the workflow
Naming the AI action for use in subsequent workflow steps
Using AI output in subsequent steps
Once the AI action runs, its output is stored in the variable you defined. You can reference this variable in any downstream action.In email or SMS actions
Insert the AI response variable directly into your message body:In if/else conditions
Use the AI output to branch your workflow logic. For example, if the AI returns a numeric lead score, you can route high-scoring leads to your sales team and low-scoring leads to a nurture sequence.In webhook actions
Pass the AI-generated content to external systems via webhook payloads. This is useful for updating CRMs, triggering third-party automations, or logging AI decisions.In update contact actions
Store the AI output directly on the contact record by mapping the response variable to a custom field. This creates a permanent record of the AI’s analysis.Practical examples
AI-powered follow-up emails
AI-powered follow-up emails
- Trigger: Form submitted
- Step 1: Wait 5 minutes
- Step 2: AI action — prompt the AI to draft a follow-up email based on the form responses stored in custom fields
- Step 3: Send email using the AI response as the body
AI lead scoring
AI lead scoring
- Trigger: Contact created
- Step 1: AI action — provide the AI with the contact’s source, form responses, and any available conversation history; instruct it to return a score from 1 to 10 with a brief justification
- Step 2: Update contact — store the score in a custom field
- Step 3: If/else — if score is 7 or above, notify sales team; otherwise, add to nurture sequence
Content personalization
Content personalization
- Trigger: Tag applied (e.g., “interested_in_demo”)
- Step 1: AI action — prompt the AI to generate a demo invitation message tailored to the contact’s industry and company size
- Step 2: Send SMS or email with the AI-generated content
Intelligent appointment prep
Intelligent appointment prep
- Trigger: Appointment booked
- Step 1: AI action — compile all known data about the contact (source, conversations, form responses, tags) and ask the AI to generate a brief summary with suggested talking points
- Step 2: Internal notification — send the AI brief to the assigned team member
Prompt writing tips for workflow AI
Writing effective prompts for workflow AI actions differs from conversational AI. Here are key guidelines:Be explicit about format
Tell the AI exactly what format you need. If you want a numeric score, say “Return only a number from 1 to 10.” If you want an email, specify “Write a complete email with subject line and body.”Set length constraints
Workflow outputs often feed into SMS (160 characters) or email snippets. Always specify maximum length: “Keep your response under 100 words” or “Write exactly 2 sentences.”Define the persona
Tell the AI who it is: “You are a professional customer service representative for a plumbing company.” This ensures consistent tone across all automated messages.Handle edge cases
Consider what happens when merge fields are empty. Add instructions like: “If the service type is not provided, ask about their general needs instead.”Use system-level instructions
When available, separate your system instructions (role, rules, constraints) from the user-level content (contact data, specific request). This produces more reliable outputs.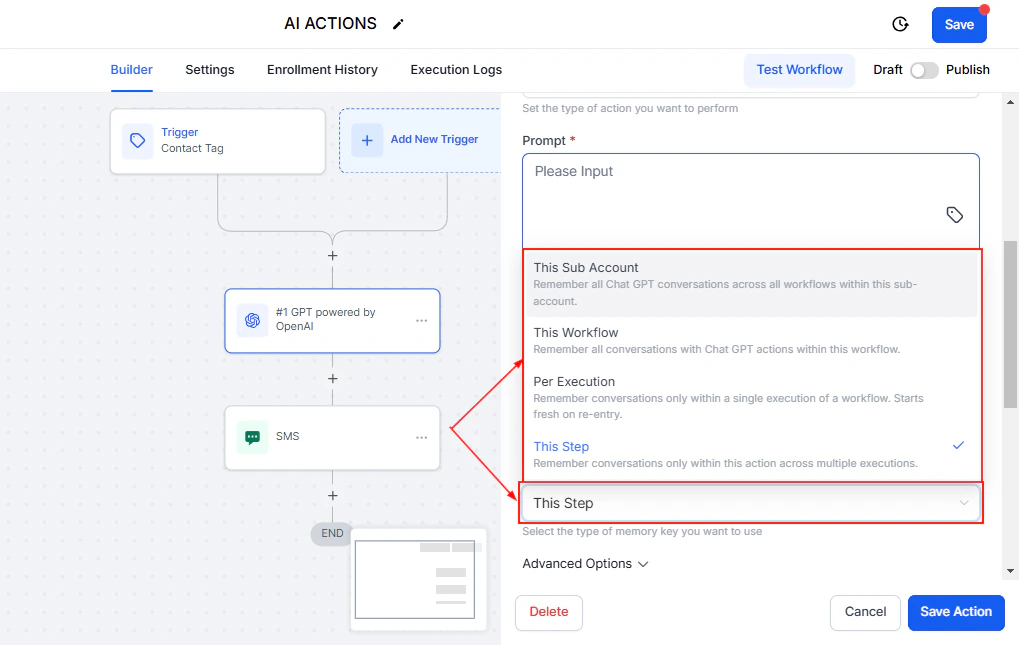
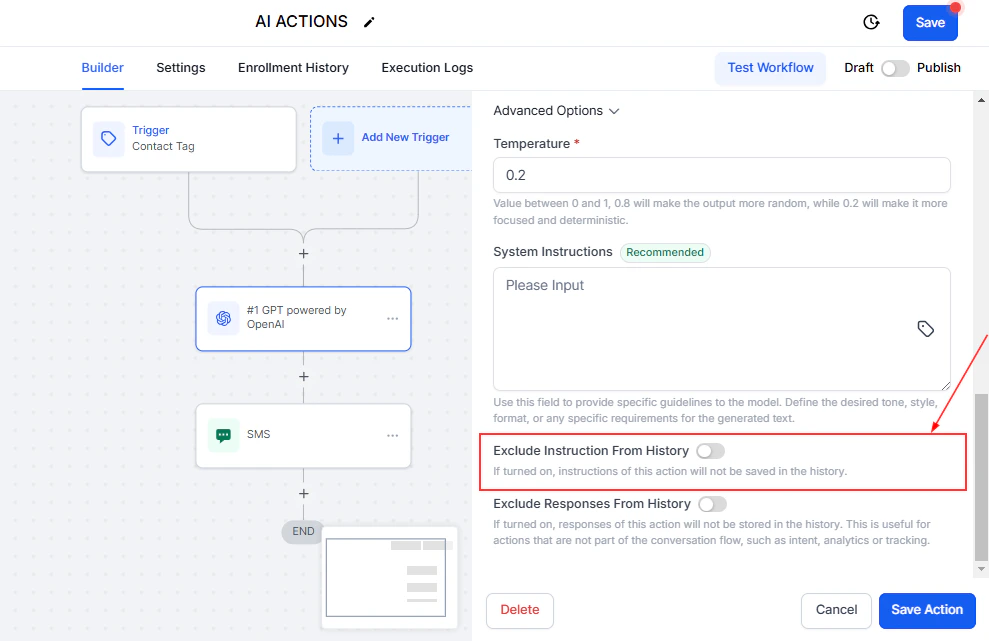
Adjusting the temperature setting to control AI response creativity
Configuring where the AI action output is stored for use in downstream steps
Monitoring and optimization
After your AI-powered workflow is live, keep an eye on these metrics:- AI credit usage — track consumption in Settings to manage costs
- Response quality — periodically review AI outputs by checking contact records or internal notifications
- Workflow completion rate — ensure the AI step isn’t causing errors or timeouts
- Conversion metrics — compare AI-personalized messaging against your previous static templates
Troubleshooting common issues
Saving the custom action configuration with all parameters defined
Combining AI actions with other workflow features
AI actions become even more powerful when combined with other HoopAI workflow capabilities:- Wait actions — add delays between AI steps to avoid overwhelming contacts
- If/else branches — route contacts based on AI analysis results
- Webhooks — send AI outputs to external tools and dashboards
- Math operations — combine AI scores with other numeric values
- Loops — process multiple data points through AI iteratively