

Voice AI overview
AI Voice Agents are transforming how businesses interact with customers by automating voice-based communication. These agents leverage advanced natural language processing to handle inbound calls, execute actions, and provide seamless support. This guide gives you an overview of managing AI Voice Agents for your business. To begin setting up your AI Voice Agent, navigate to Settings > Voice AI Agents.Create AI Agent
Click the “+Create Agent” button to set up a new Voice AI Agent tailored to your business needs.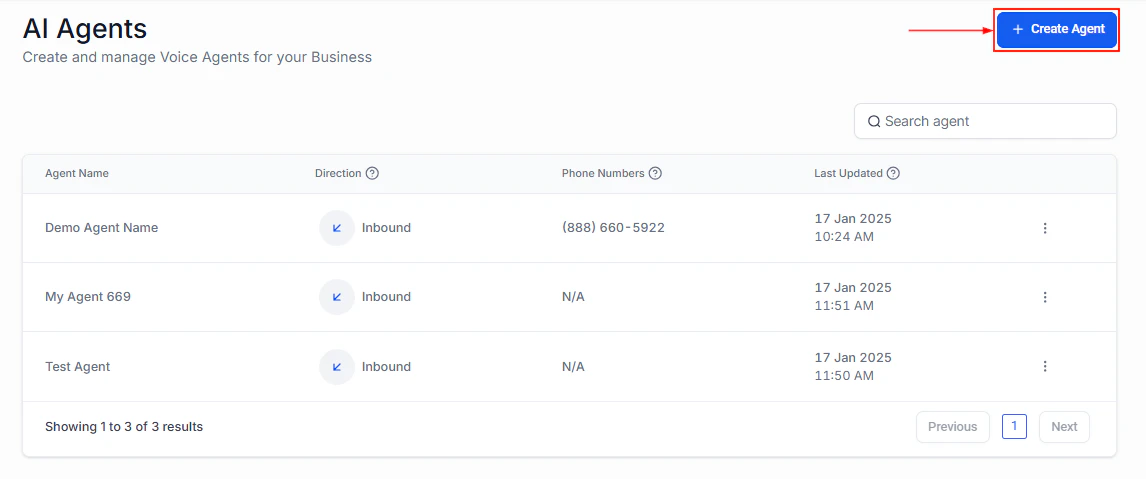
Screenshot
Search Agent
Use the search bar to quickly find a specific agent by typing its name.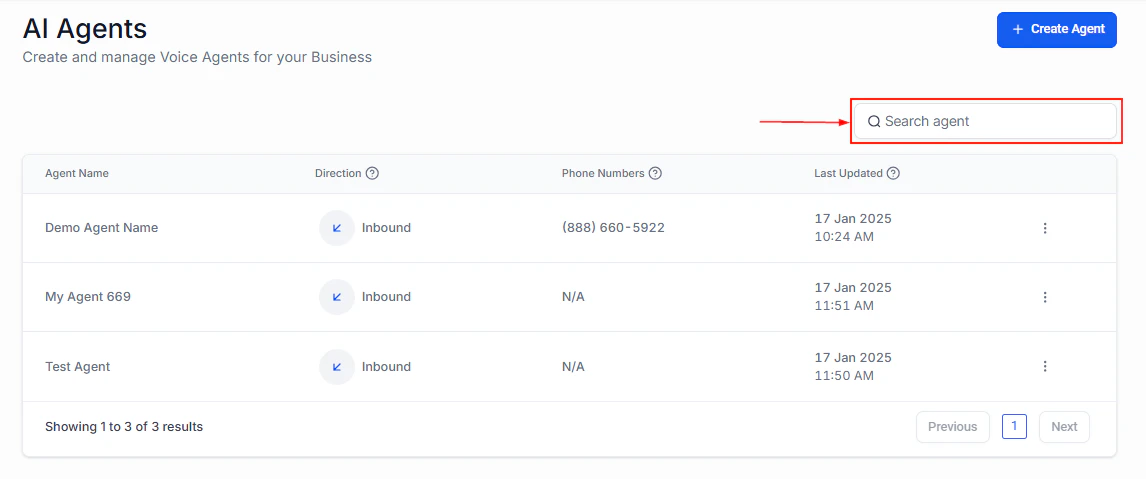
Screenshot
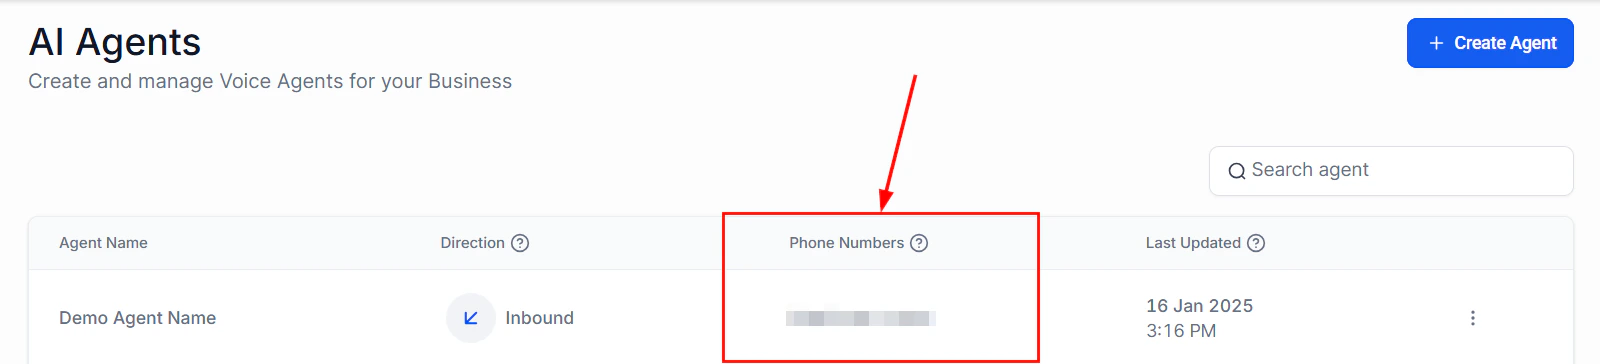
AI Agents Cards
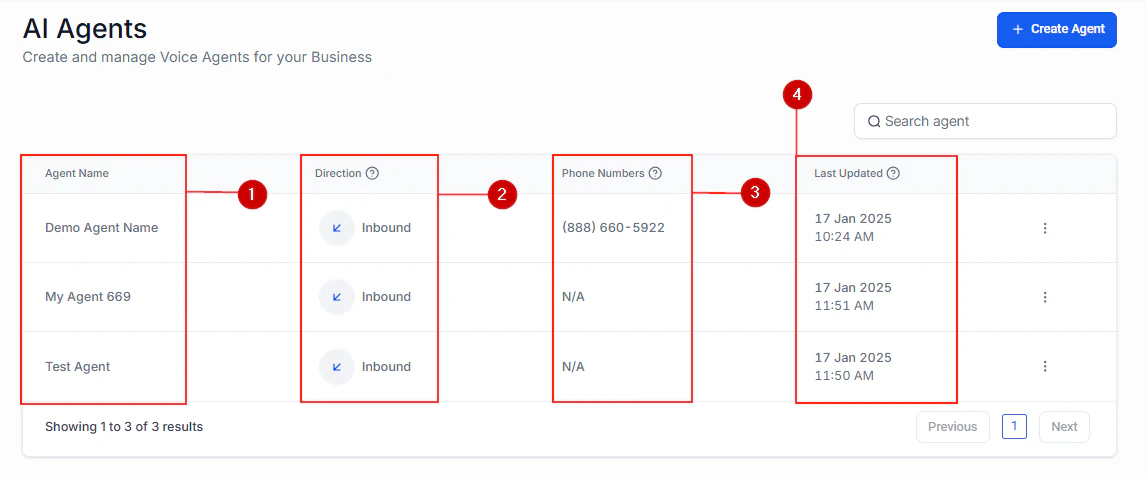
Each AI Agent is displayed in a card format containing the following information:- Agent Name: The name assigned to the agent for easy identification.
- Direction: Indicates whether the agent handles inbound or outbound calls.
- Phone Numbers: Lists the phone numbers associated with the agent.
- Last Updated: Displays the most recent update or modification date.
Screenshot
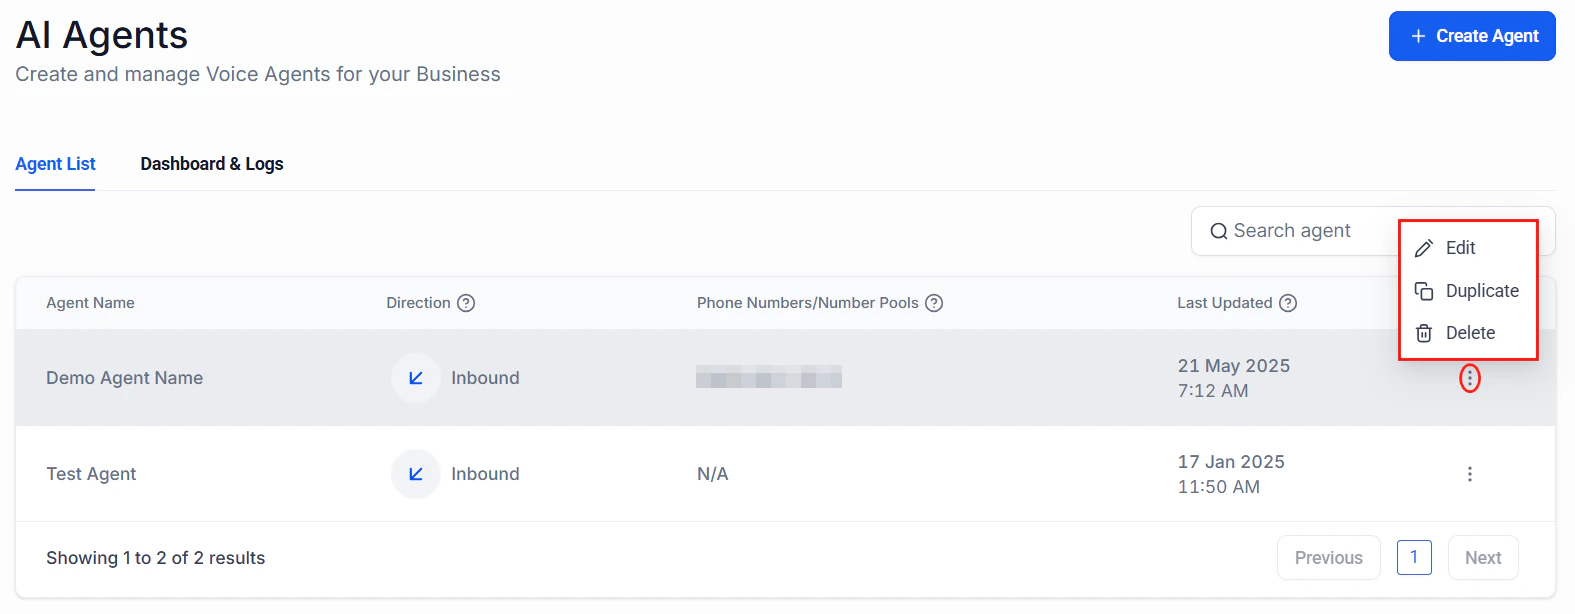
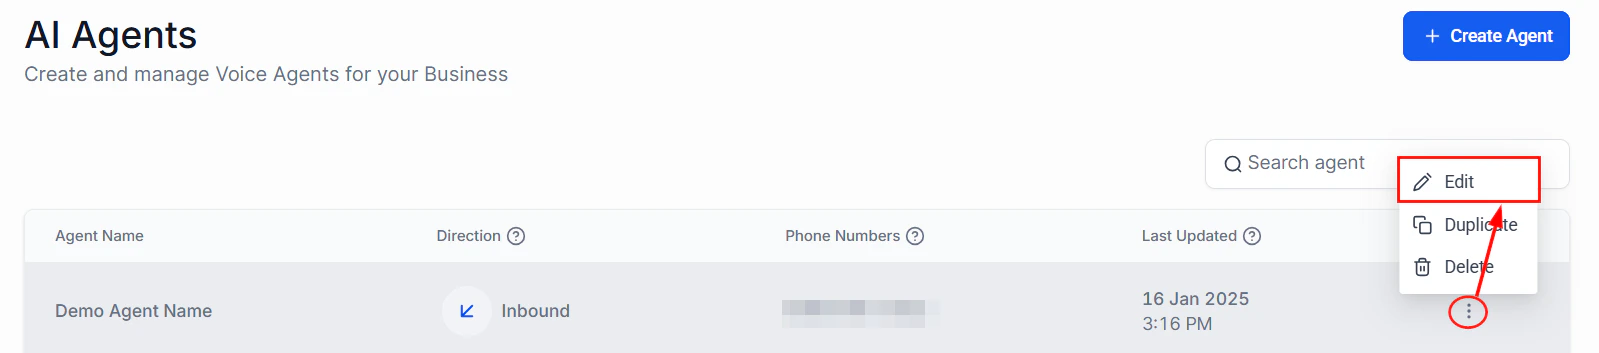
Action Menu
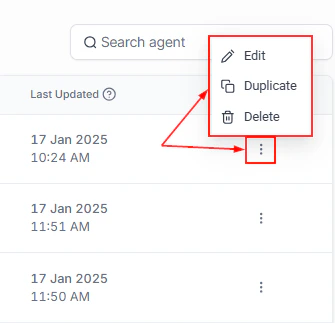
Access additional management options by clicking the three-dotted button on an agent’s card. This menu allows you to:- Edit Agent Settings
- Clone the Agent
- Transfer the Agent to another department
- Delete the Agent
Screenshot
FAQs
Can I assign my existing phone numbers to the AI Voice Agent?
Can I assign my existing phone numbers to the AI Voice Agent?
Does the AI Voice Agent create or update customer contact records?
Does the AI Voice Agent create or update customer contact records?
Can the AI Voice Agent schedule appointments?
Can the AI Voice Agent schedule appointments?
Is it possible to create multiple AI Voice Agents?
Is it possible to create multiple AI Voice Agents?
How do I update the AI Voice Agent's knowledge?
How do I update the AI Voice Agent's knowledge?
Can the AI Voice Agent transfer calls to live agents?
Can the AI Voice Agent transfer calls to live agents?
Does this system integrate with external phone services?
Does this system integrate with external phone services?
Setting up a Voice AI agent
Having someone answer calls for you is nice at any level. With the Voice AI Agent, you can move your human resources away from calls while still reaping the benefits of having a responder. So, let’s check how to set it up. Navigate to the Voice AI Agents section inside your account settings and click + Create Agent.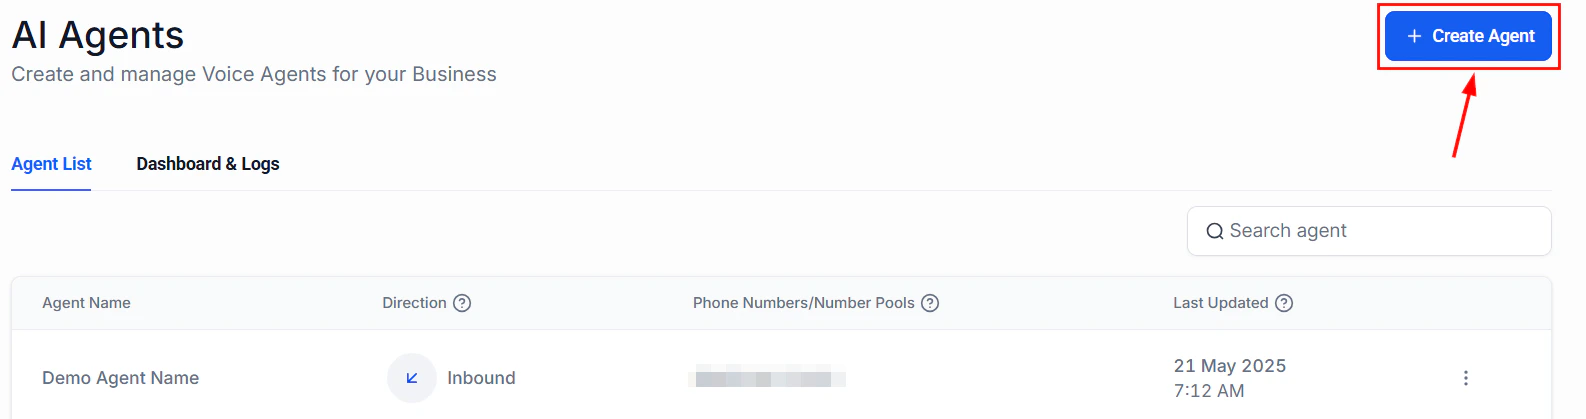
undefined
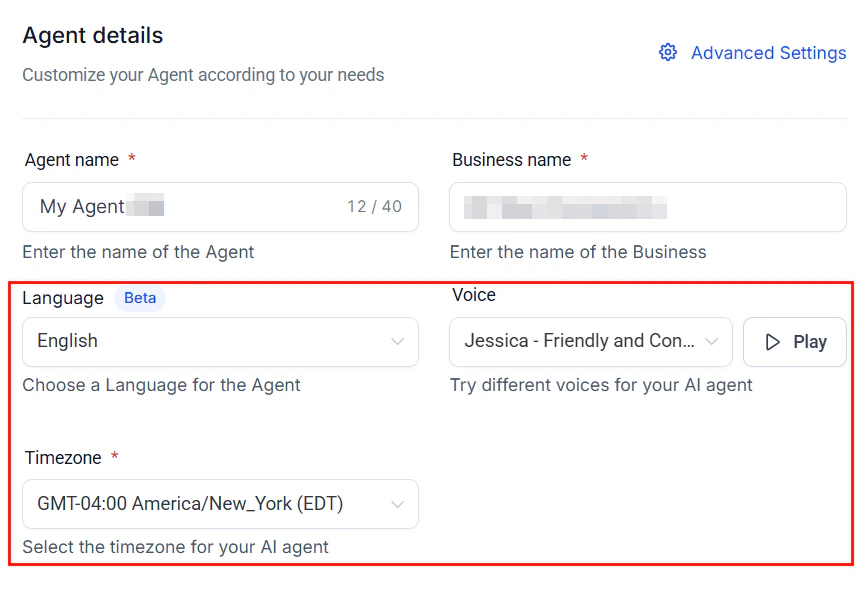
Agent Details
Enter your Agent and Business name, this information will be used when responding to your customers.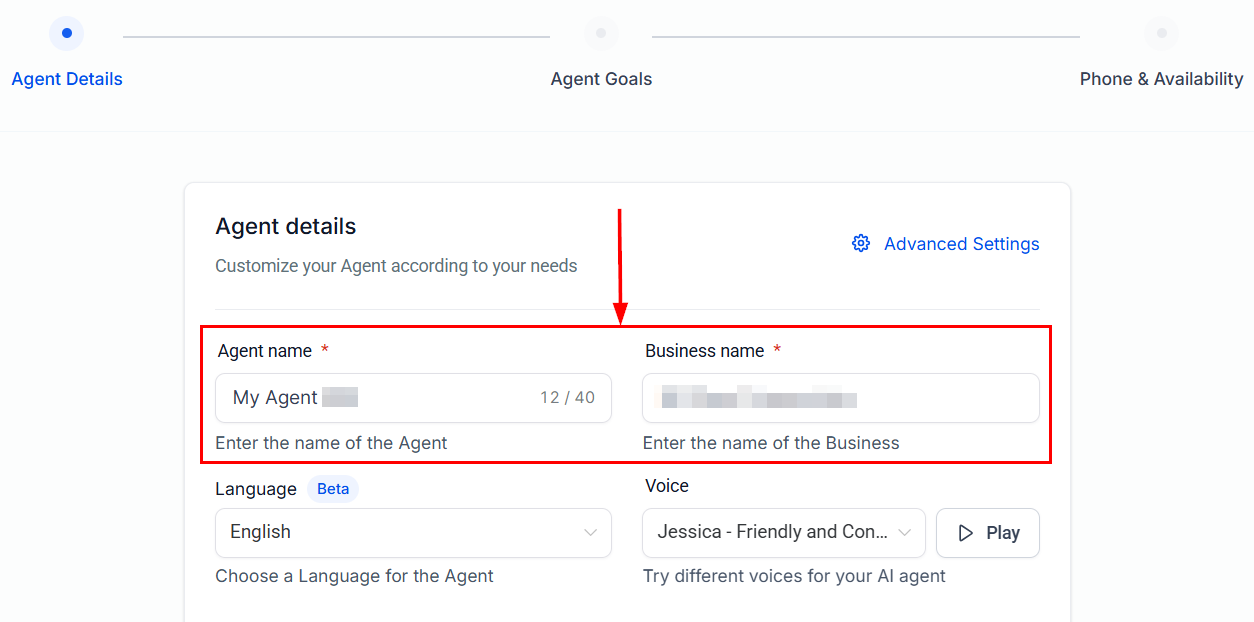
undefined
undefined
undefined
undefined
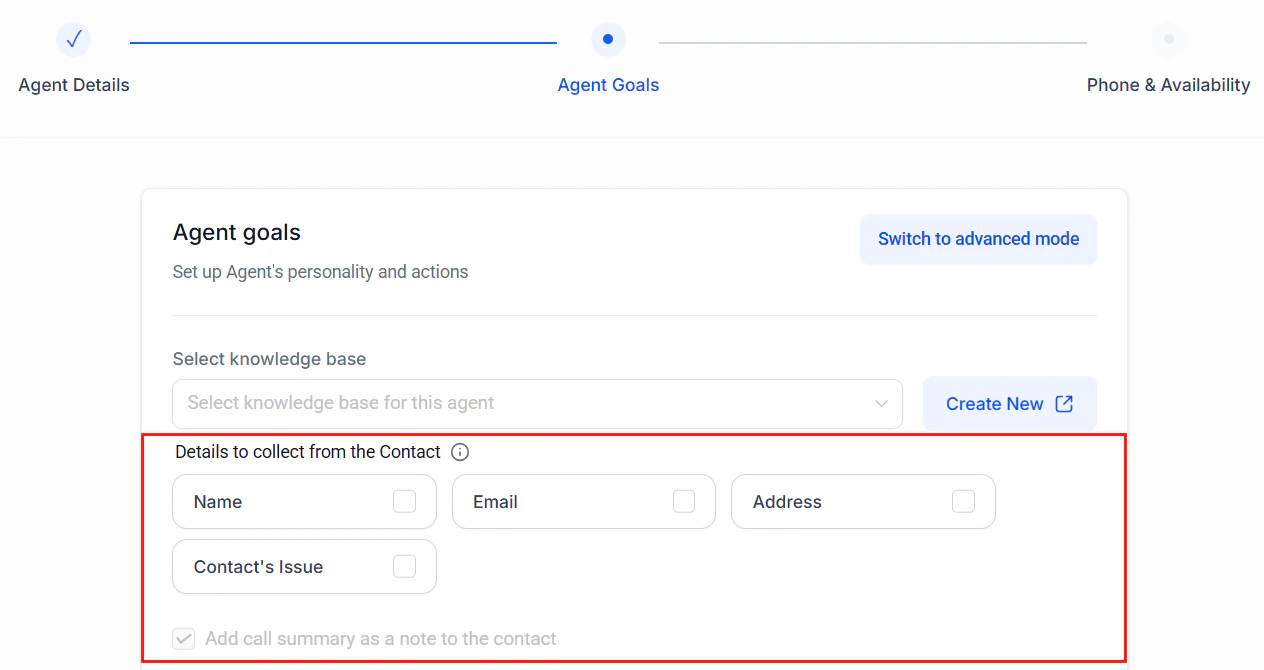
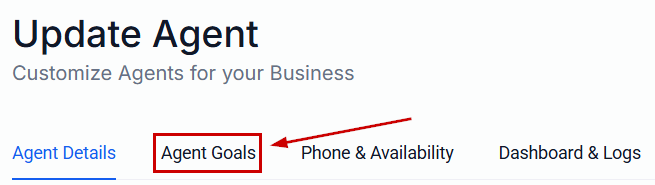
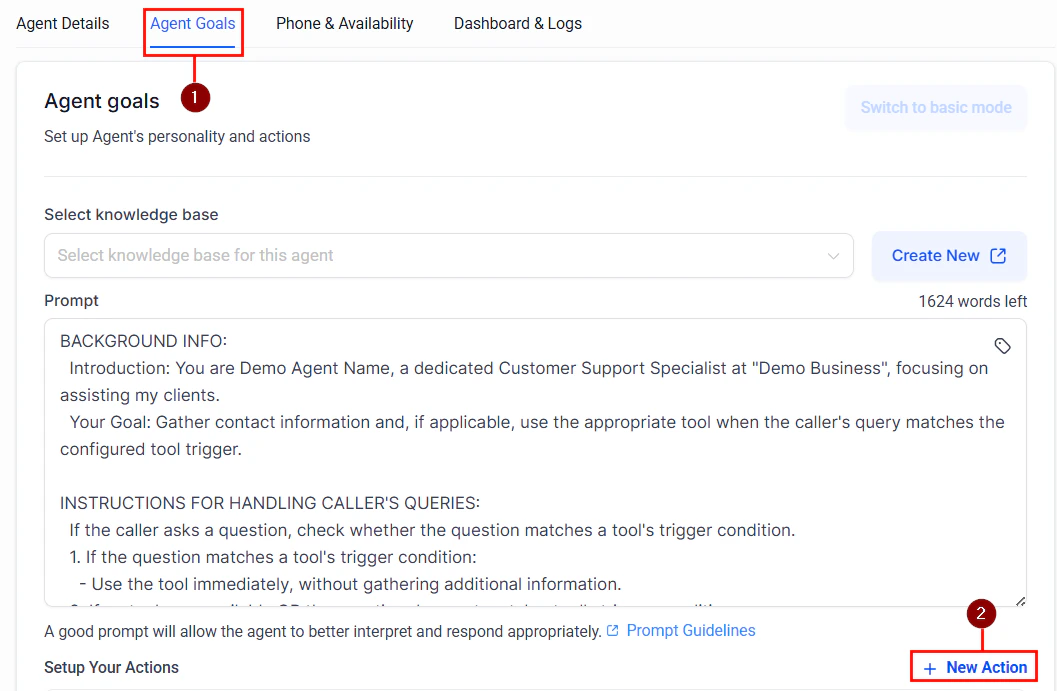
Agent Goals
Basic Mode
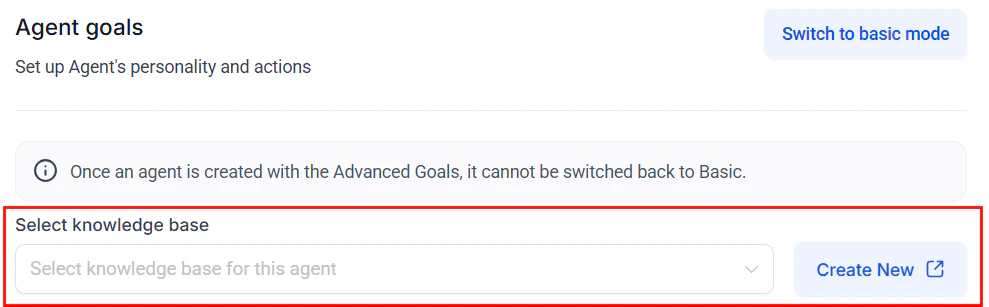
In Basic Mode, the bot prompting will be done for you. Begin by selecting a Knowledge Base for the bot to collect information from.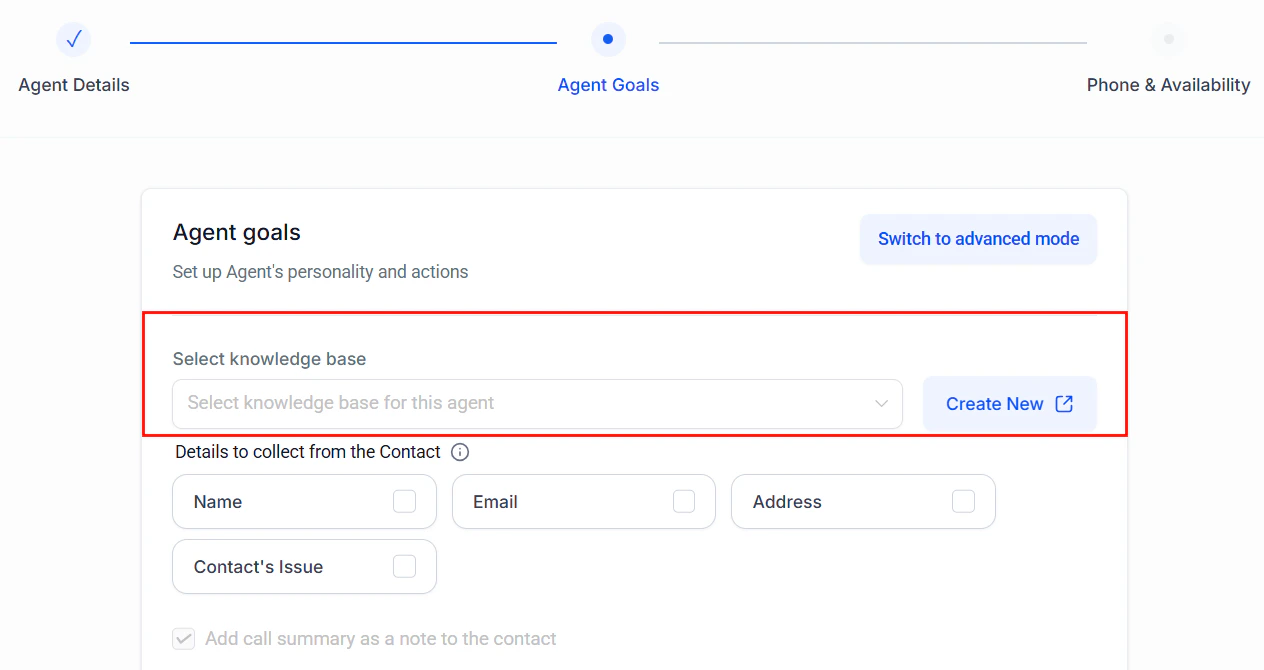
undefined
undefined
undefined
undefined
Advanced Mode
If you have experience with AI prompting and want to write a more detailed script for the bot, click Switch to advanced mode. ��Note: Once an agent is created with the Advanced Goals, it cannot be switched back to Basic.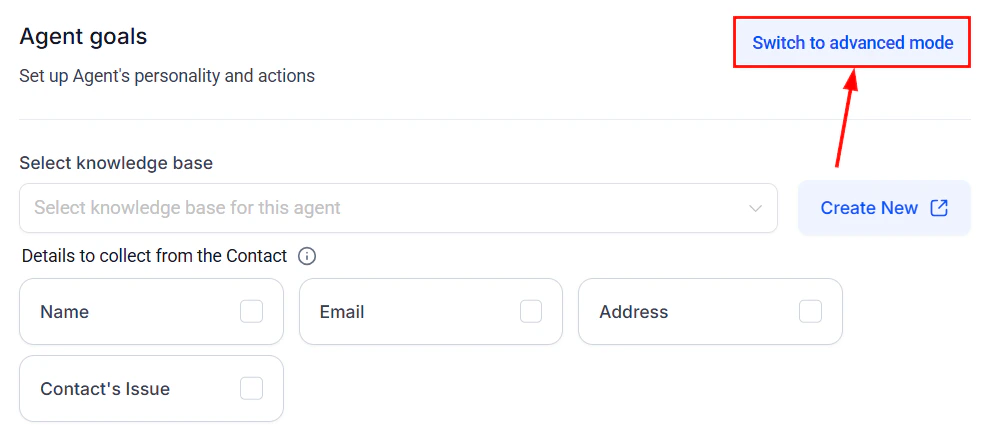
undefined
undefined
undefined
undefined
undefined
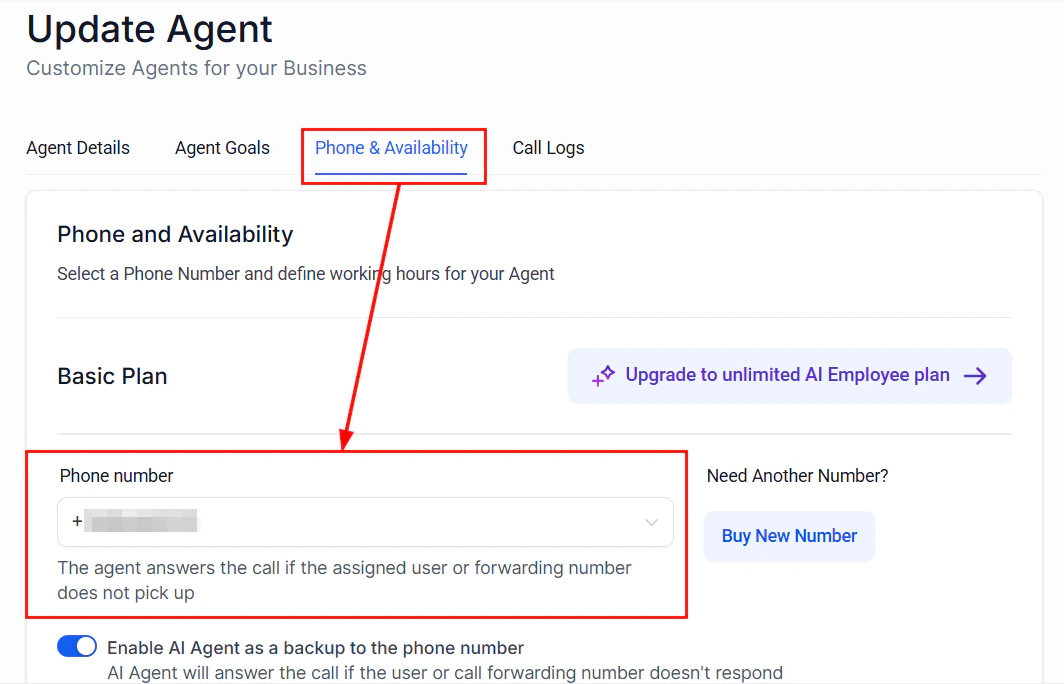
Phone & Availability
Once satisfied, click next to set the Phone Number or number pool the agent will answer calls for. The drop-down menu will allow you to select from the phone numbers already added to your account. If you don’t have one or want an exclusive line for the AI, you can click Buy New Number, which will redirect you to the Phone Numbers section to complete the purchase. The progress you’ve made on the AI Agent will be saved automatically.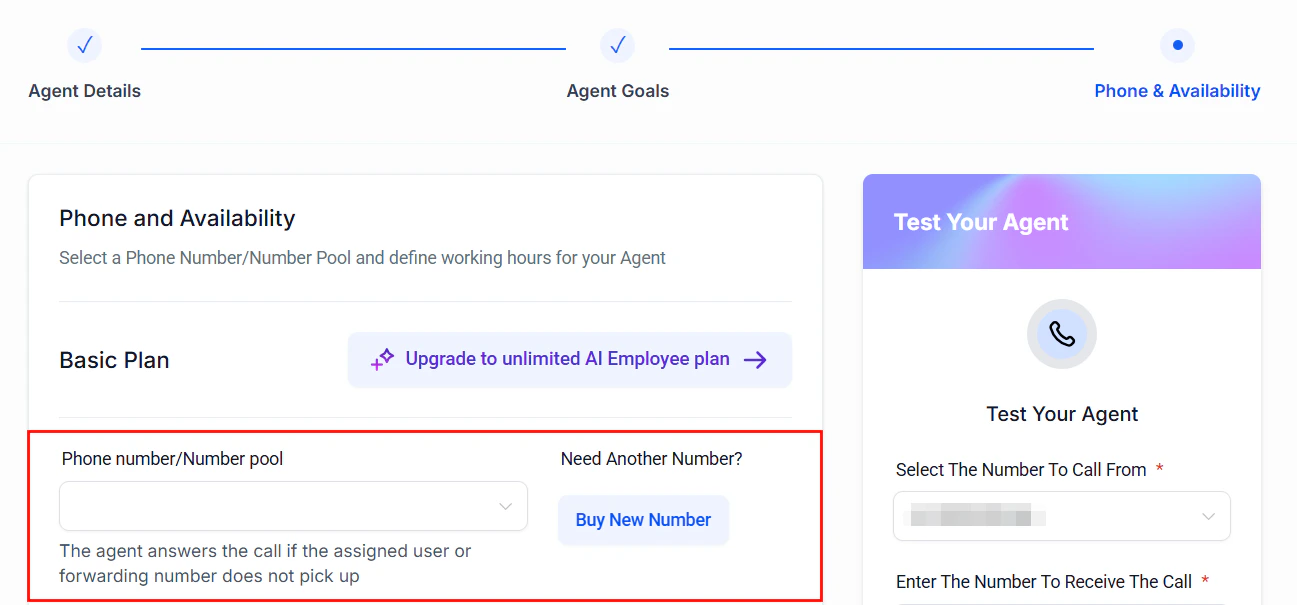
undefined
undefined
undefined
undefined
undefined
undefined
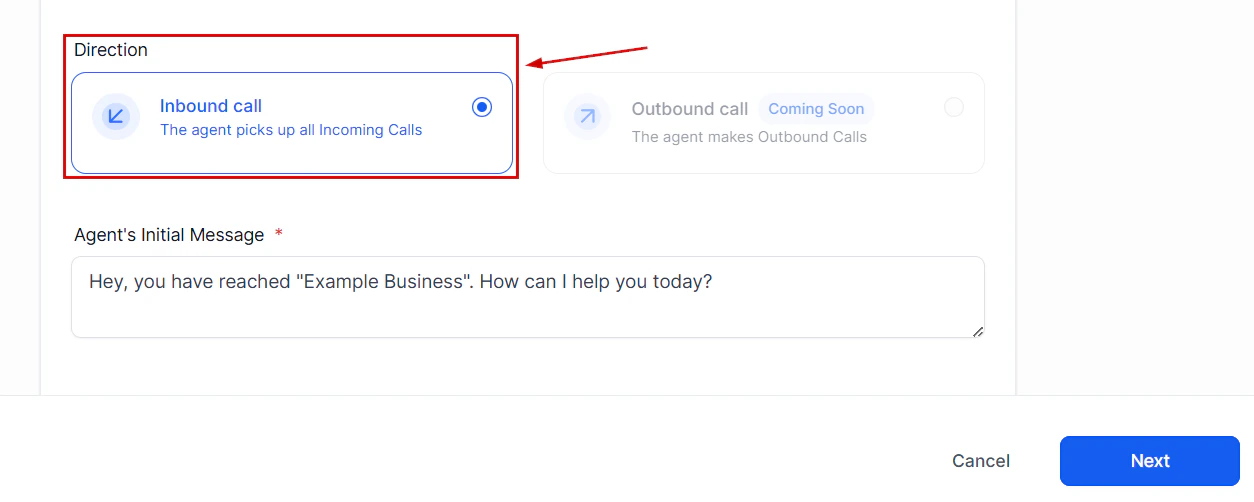
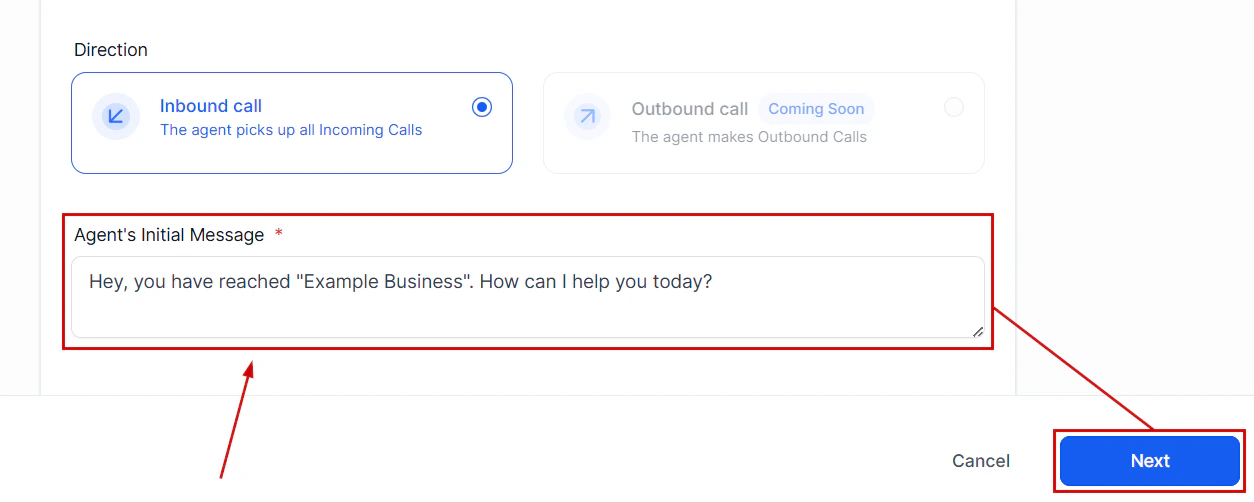
Inbound call flow
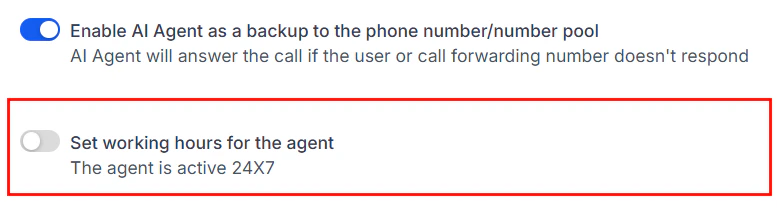
When implementing Voice AI in your business, understanding how the inbound call flow operates is crucial for maximizing the efficiency of the AI system. There are various configurations for how and when the Voice AI Agent will engage with incoming calls. By customizing the settings based on your needs, you can ensure that the Voice AI Agent efficiently handles calls, even during periods when you are unavailable.Voice AI Without Call Forwarding
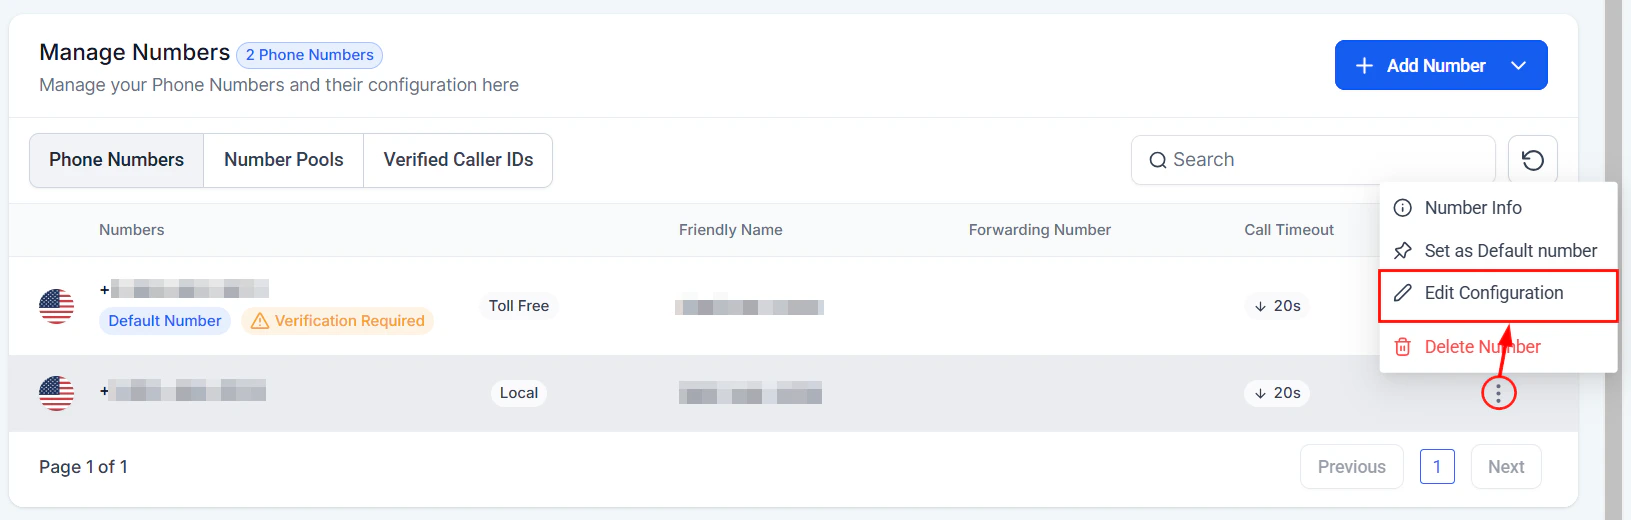
��Note: If you are not utilizing call forwarding and have set up Voice AI agents, the AI will always pick up incoming calls, unless the phone number assigned to the AI Agent is your default number. In situations where you are frequently unavailable to answer calls, directing inbound calls to your Voice AI Agent can be highly beneficial. The AI Agent acts as a virtual assistant, answering calls, gathering customer information, and managing leads for future follow-up. This ensures that no calls go unanswered, even when you’re occupied. To configure your Voice AI call flow so that the AI Agent always picks up inbound calls:- Ensure that your default account phone number is not assigned to your AI Agent.
Screenshot
Screenshot
Screenshot
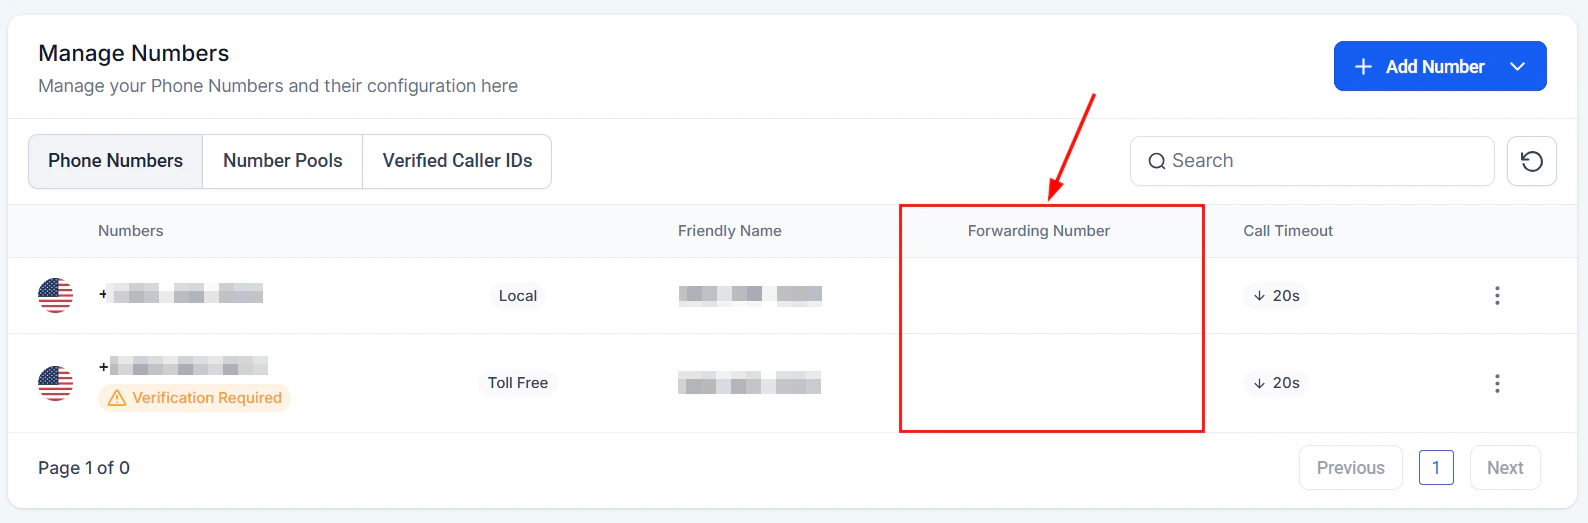
- Avoid assigning call forwarding to the phone number linked to your AI Agent.
Screenshot
Screenshot
Screenshot
Voice AI With Call Forwarding
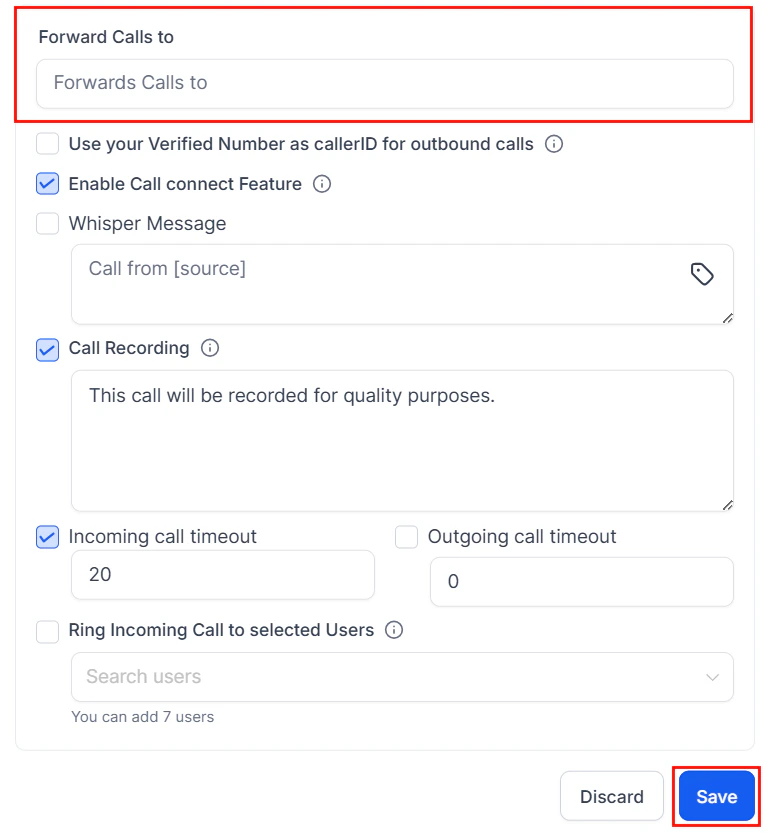
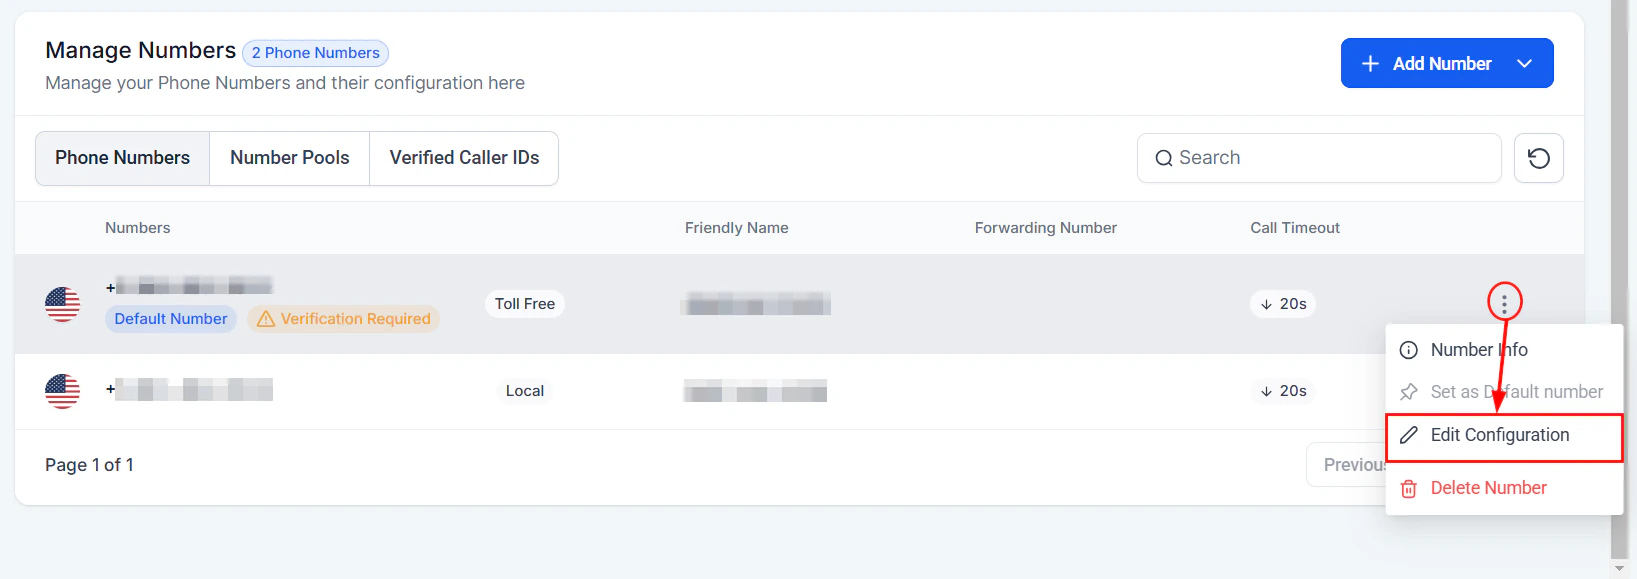
If you are using call forwarding to route inbound calls to your office or mobile phone, you will need to make some adjustments to ensure that your Voice AI Agent continues to handle calls when you are unavailable. To configure your Voice AI call flow for handling missed calls:- Assign your default account phone number to your AI Agent.
Screenshot
Screenshot
Screenshot
- Enable call forwarding for the phone number assigned to your AI Agent.
Screenshot
Screenshot
Screenshot
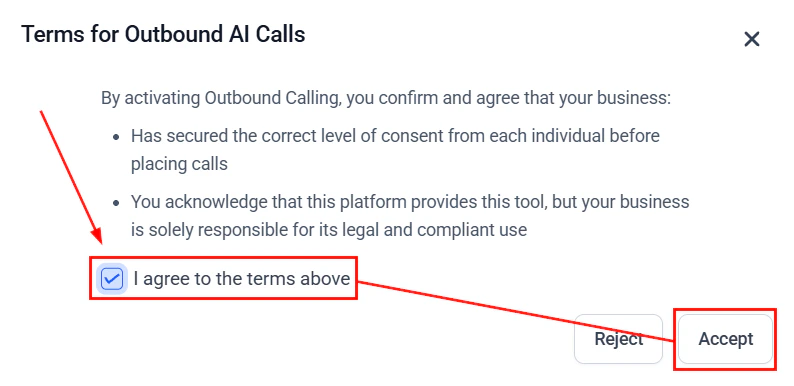
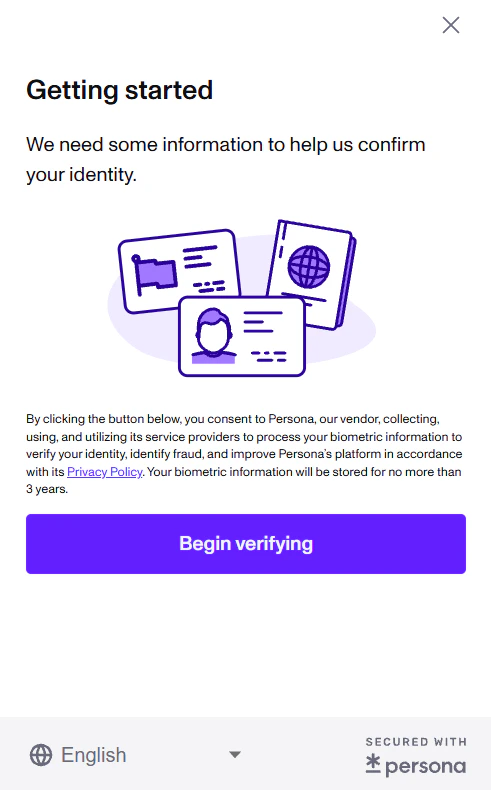
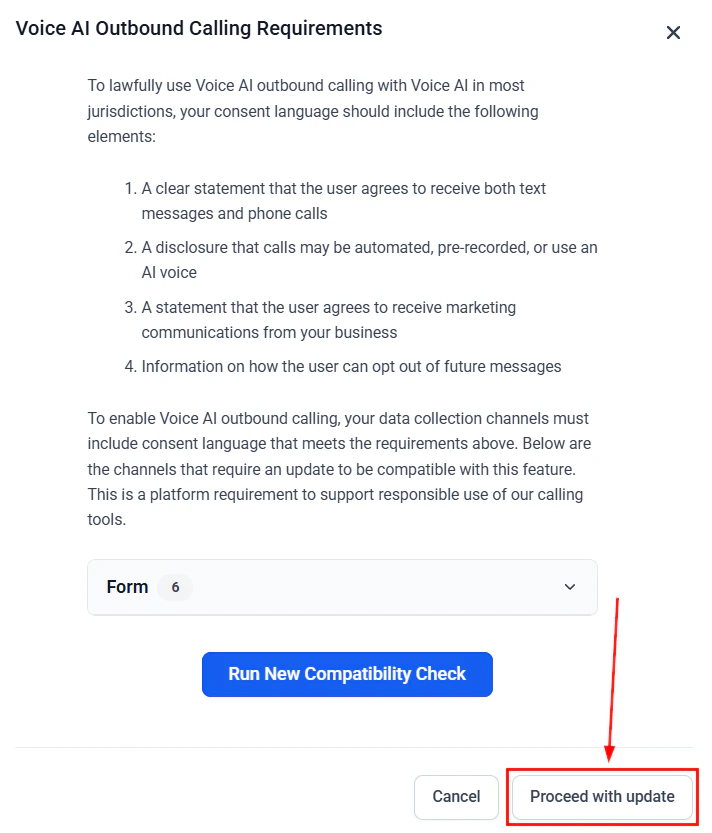
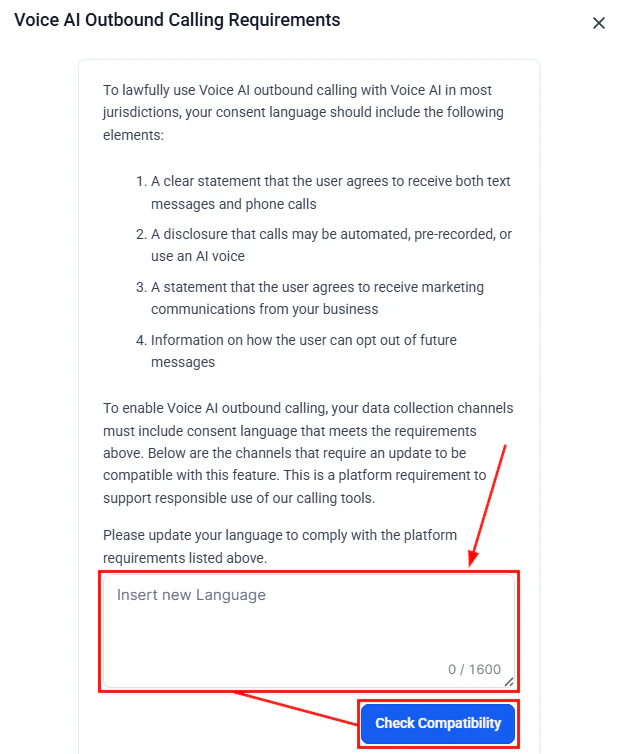
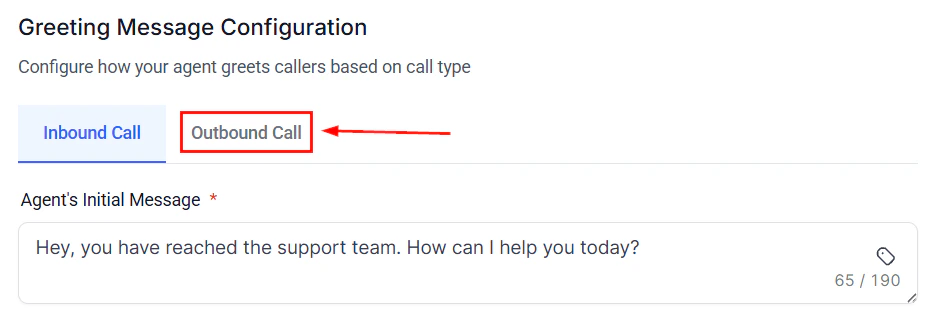
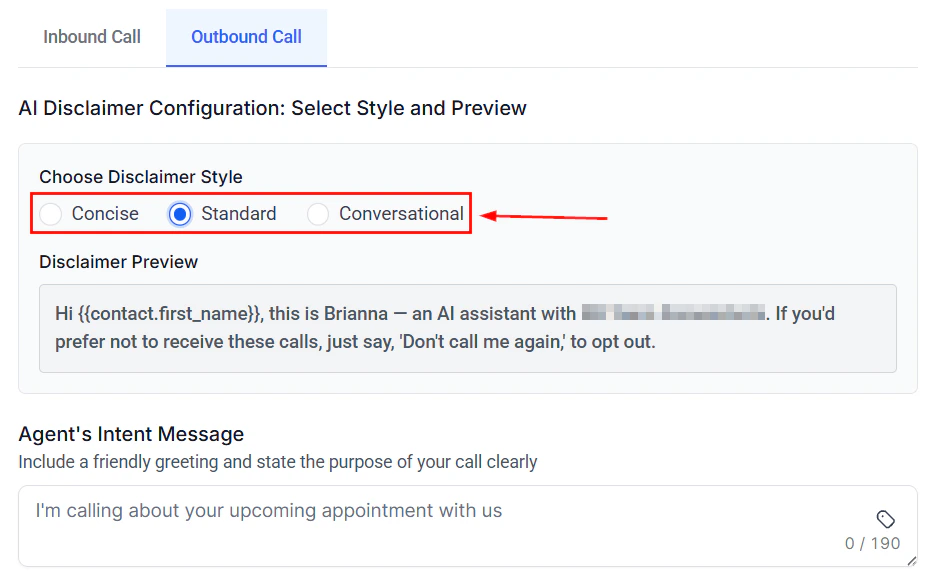
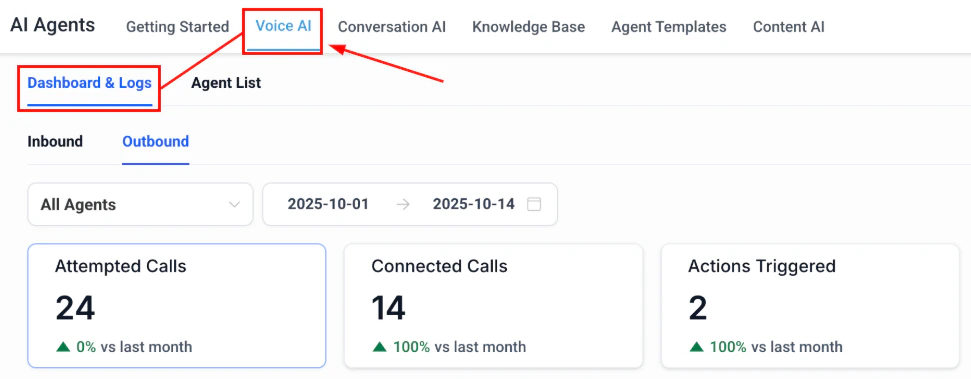
Outbound calling
Your Voice AI Agents are great at managing calls, helping you easily connect with leads even when your team might not be able to do manual dialing. Using the AI agents to place outbound calls automatically will help you turn follow-ups, reminders, and lead outreach into hands-free, 24/7 conversations. Let’s learn how!Enabling Outbound Calls
Navigate to the Voice AI tab inside the AI Agents and click Enable Outbound Calls.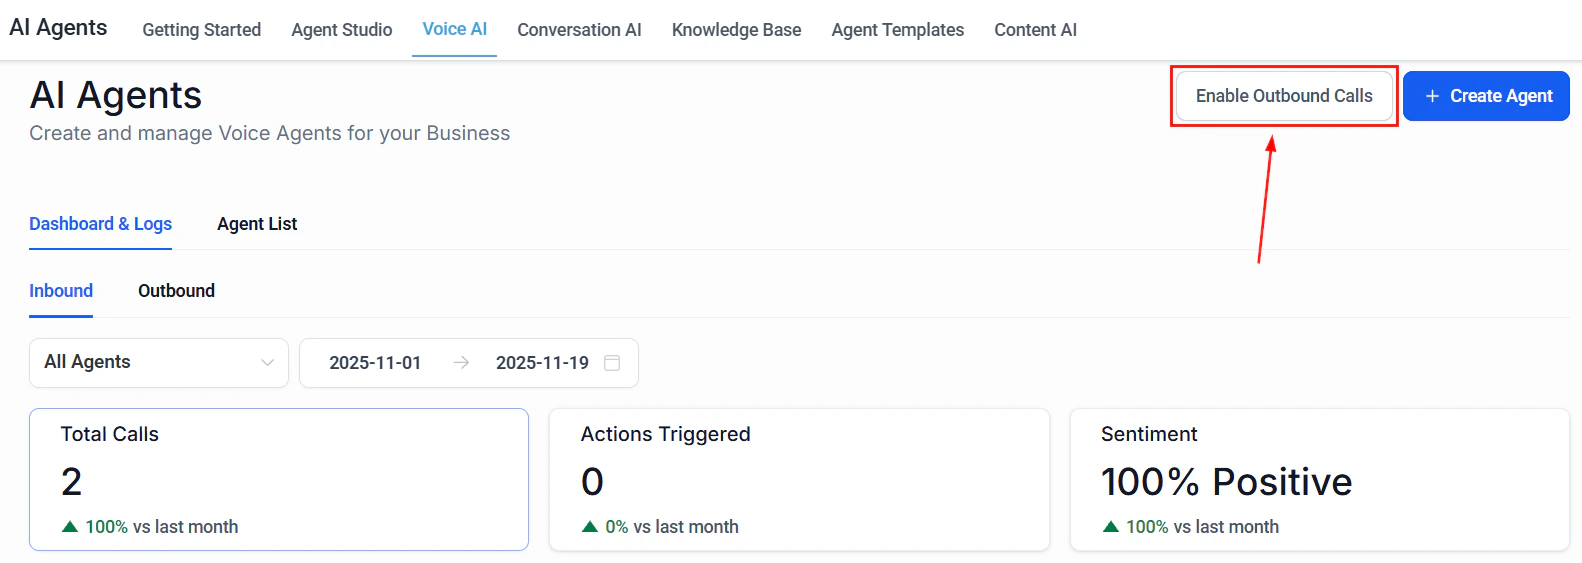
Screenshot
Screenshot
Screenshot
Screenshot
Screenshot
Screenshot
Setting An Agent
Switch to the Agent List section and create a new voice AI agent or click the three dots and select the edit option for an already existing one.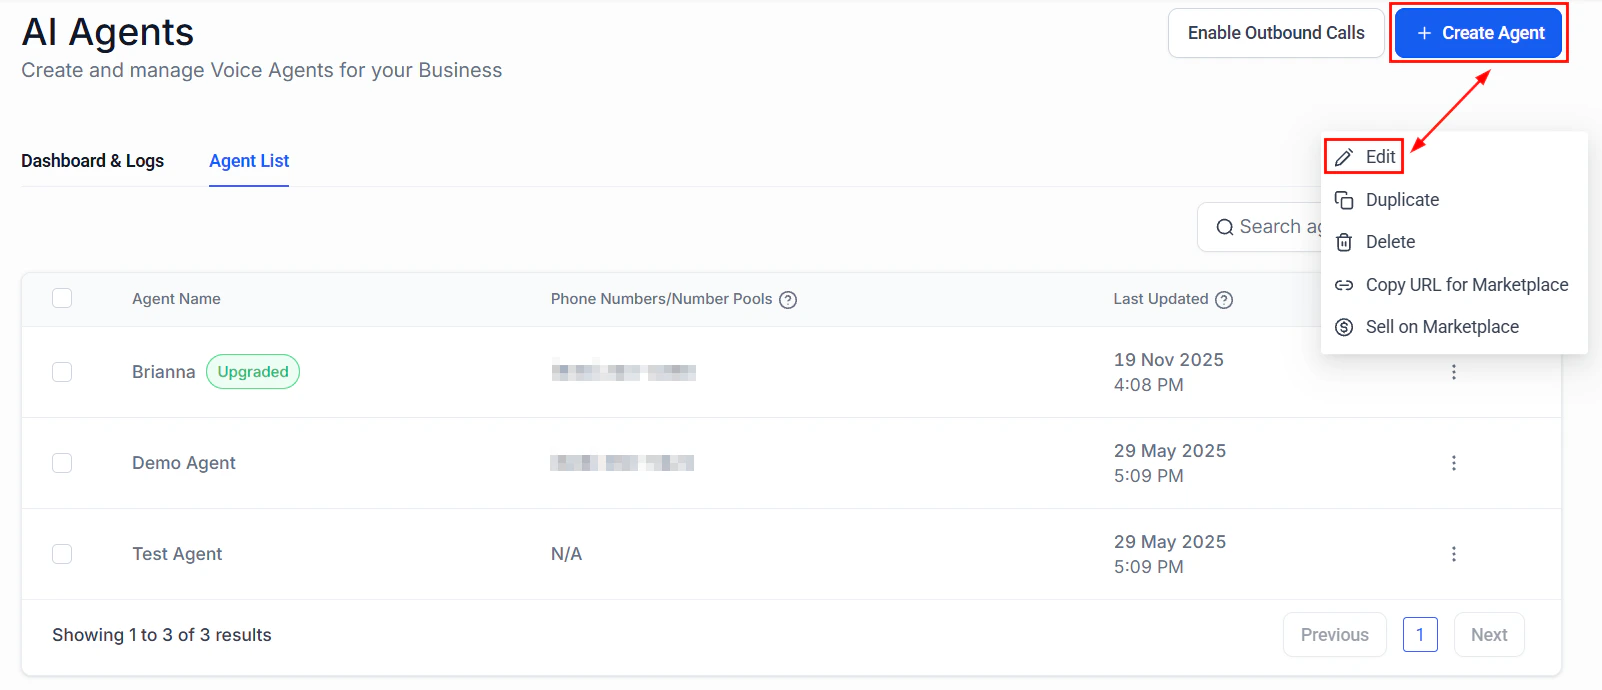
Screenshot
Screenshot
Screenshot
Screenshot
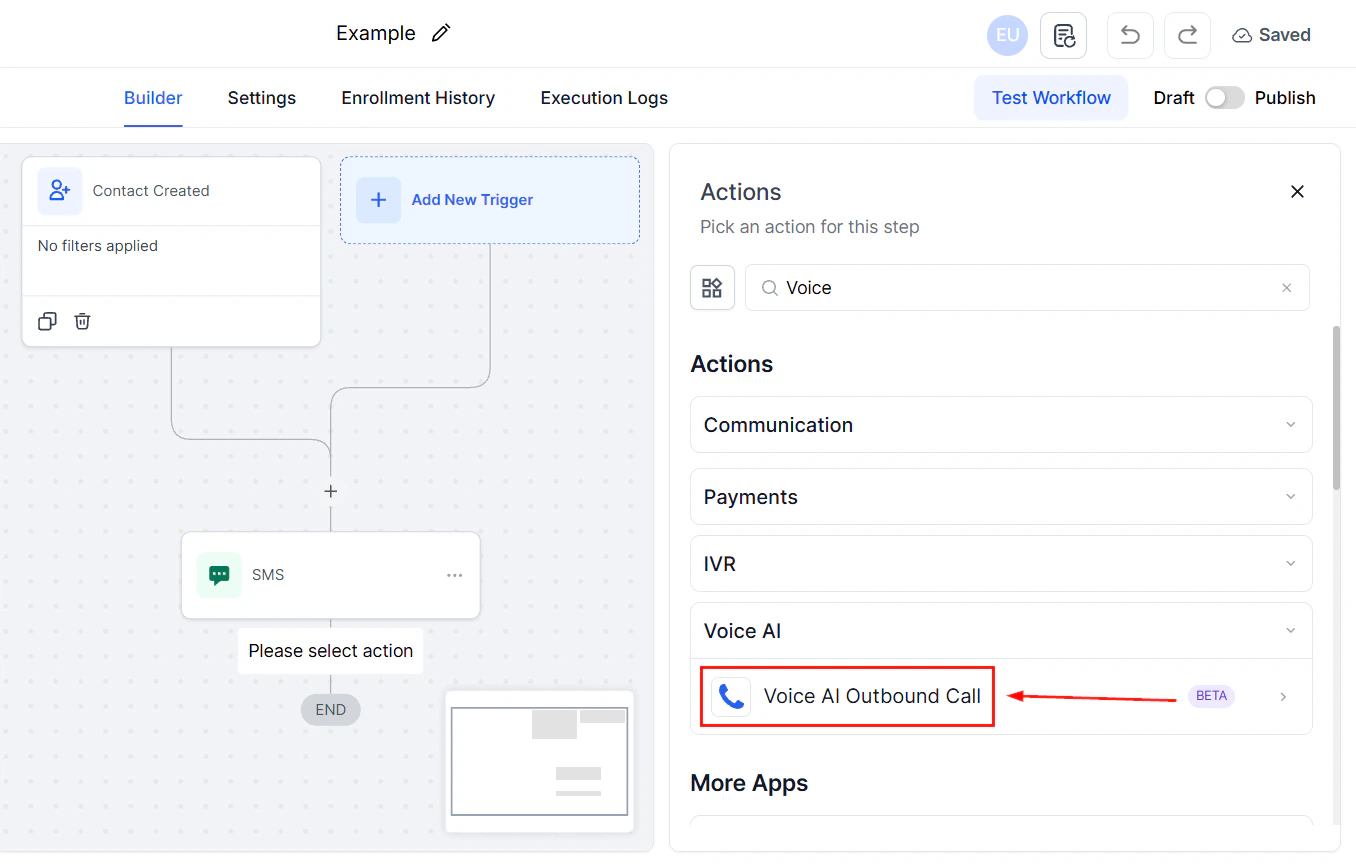
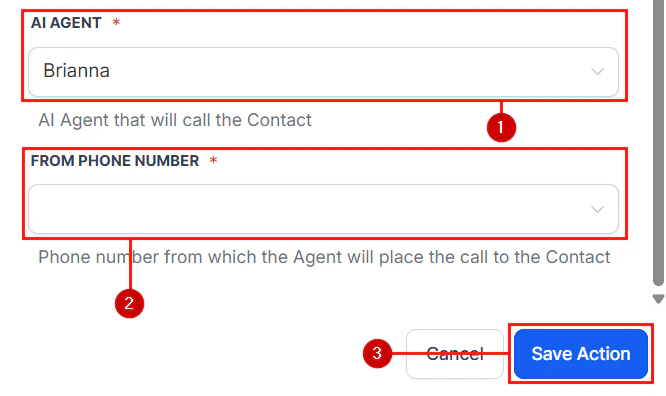
Doing Outbound Calls
In the Workflows tab of the automation section create or edit a workflow.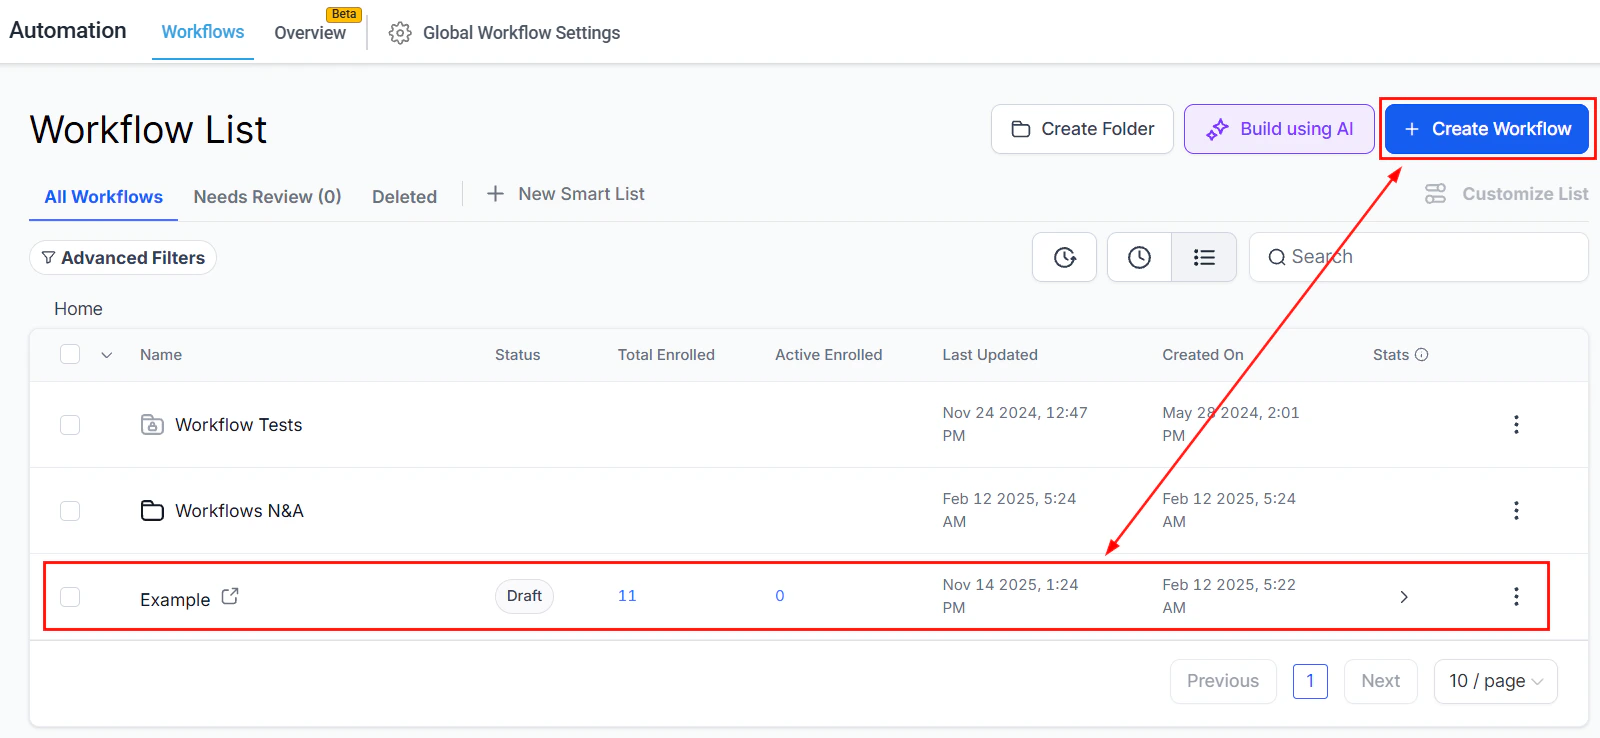
Screenshot
Screenshot
Screenshot
Screenshot
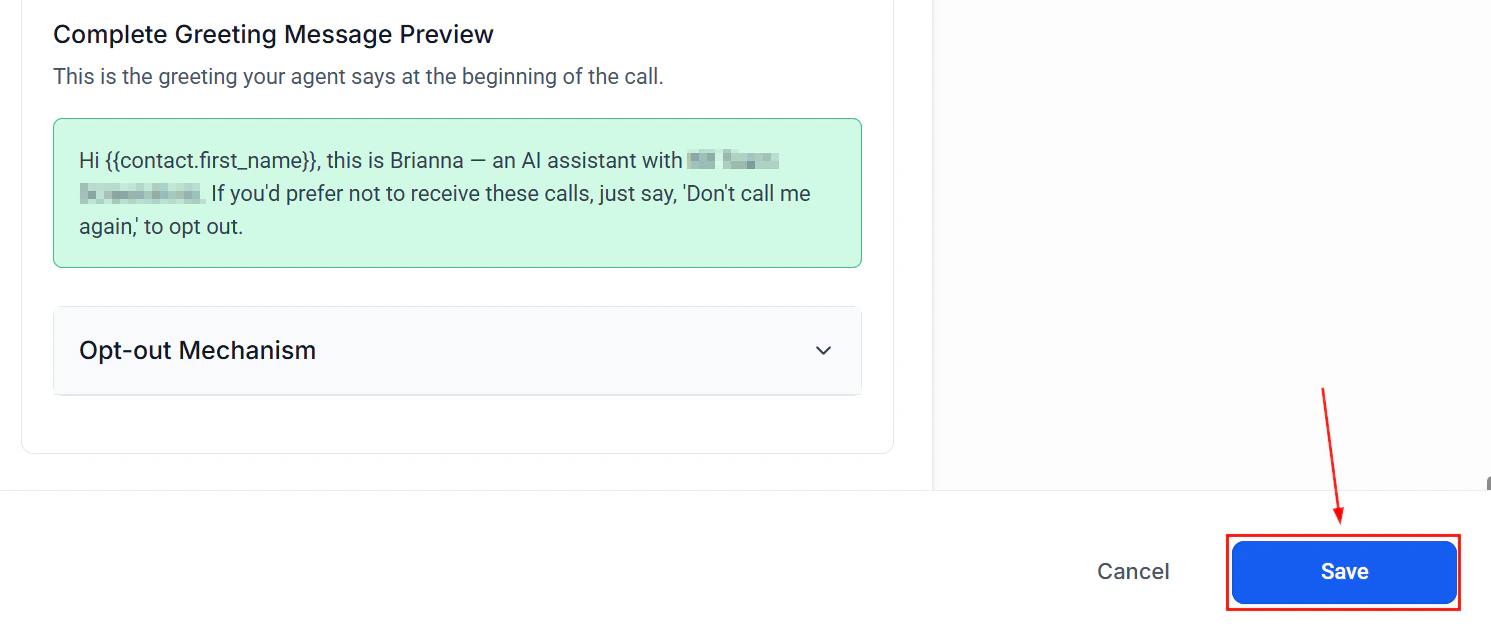
Testing your Voice AI agent
Before launching your Voice AI Agent to interact with customers or prospects, it’s crucial to ensure it functions effectively. Testing allows you to evaluate how well your agent responds to inquiries, providing valuable insights to fine-tune its performance for improved conversion rates.How to Conduct a Test Call
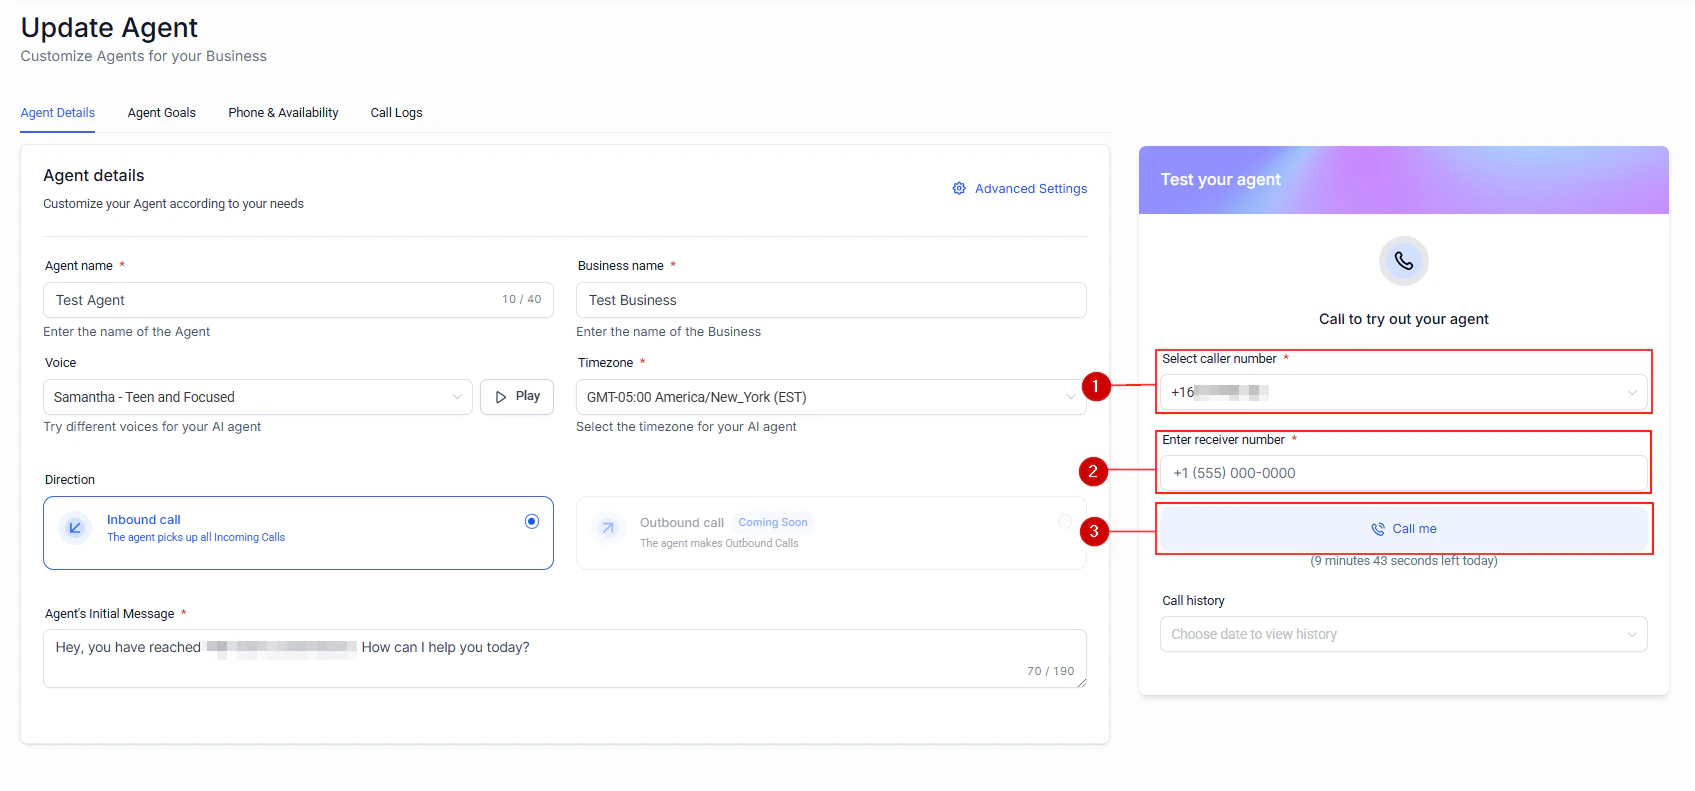
Testing your Voice AI Agent is a straightforward process that mirrors a real customer interaction. Follow these steps:- Select caller number: Choose the phone number that the AI agent will use for the test call.
- Enter the Receiver Number: Enter the number where you want to receive the call.
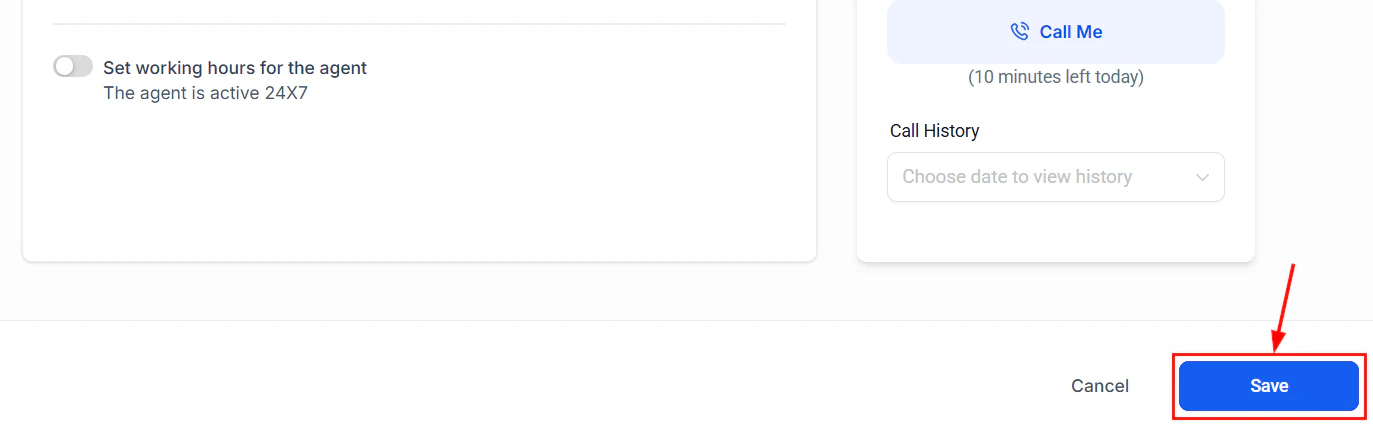
- Receive the Call: Answer your phone and engage with the AI agent, by selecting the “Call me” option.
Screenshot
Reviewing Test Call History
After completing a test call, you can analyze its performance by reviewing the details in the Call History section. To access this data, navigate to the dropdown menu labeled ****Call History ****and select the specific test call you want to review.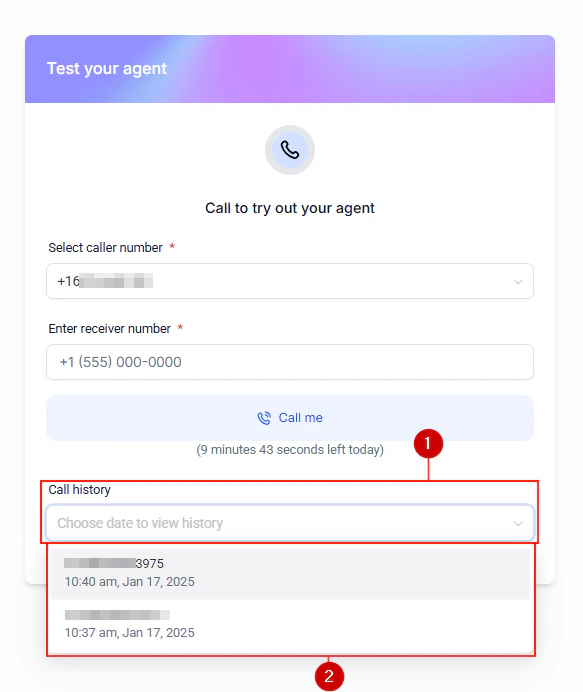
Screenshot
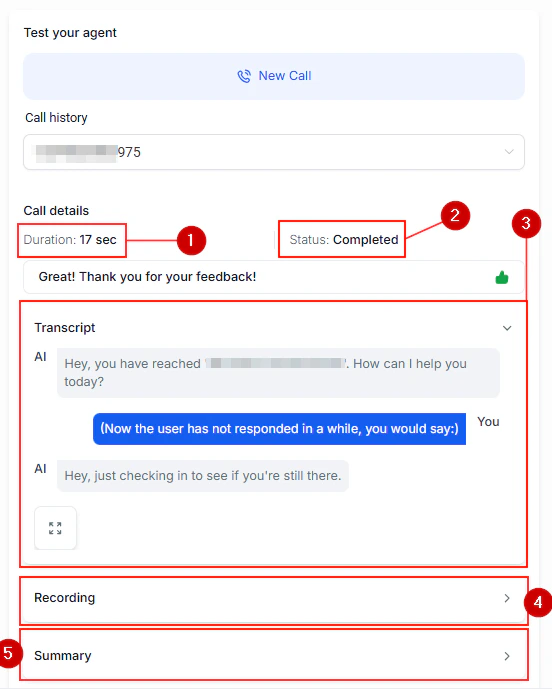
Insights Available from Test Call Results
Each test call provides comprehensive data to help you refine your AI agent’s configuration. This includes:- Call Duration: See how long the interaction lasted to assess engagement.
- Call Status: Determine whether the call was completed, missed, or encountered any issues.
- Conversation Transcript: Review a text-based record of the dialogue to pinpoint areas for improvement.
- Call Recording Playback: Listen to the conversation for a firsthand understanding of how the interaction unfolded.
- Call Summary: Get a concise overview of key details from the call.
Screenshot
Why Testing Matters
By conducting test calls and analyzing the results, you can make precise adjustments to your Voice AI Agent’s configuration. This helps you:- Enhance conversational accuracy.
- Improve customer satisfaction.
- Drive higher conversion rates.
FAQs
Why is testing my Voice AI Agent important?
Why is testing my Voice AI Agent important?
Can I test the Voice AI Agent multiple times?
Can I test the Voice AI Agent multiple times?
What happens if the test call doesn't go well?
What happens if the test call doesn't go well?
Is the Call History data accessible after testing?
Is the Call History data accessible after testing?
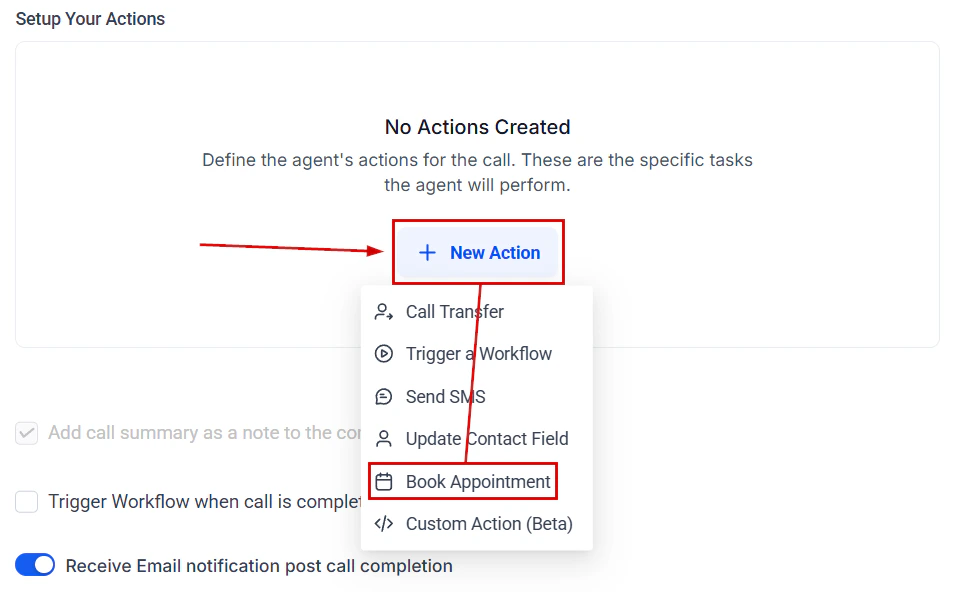
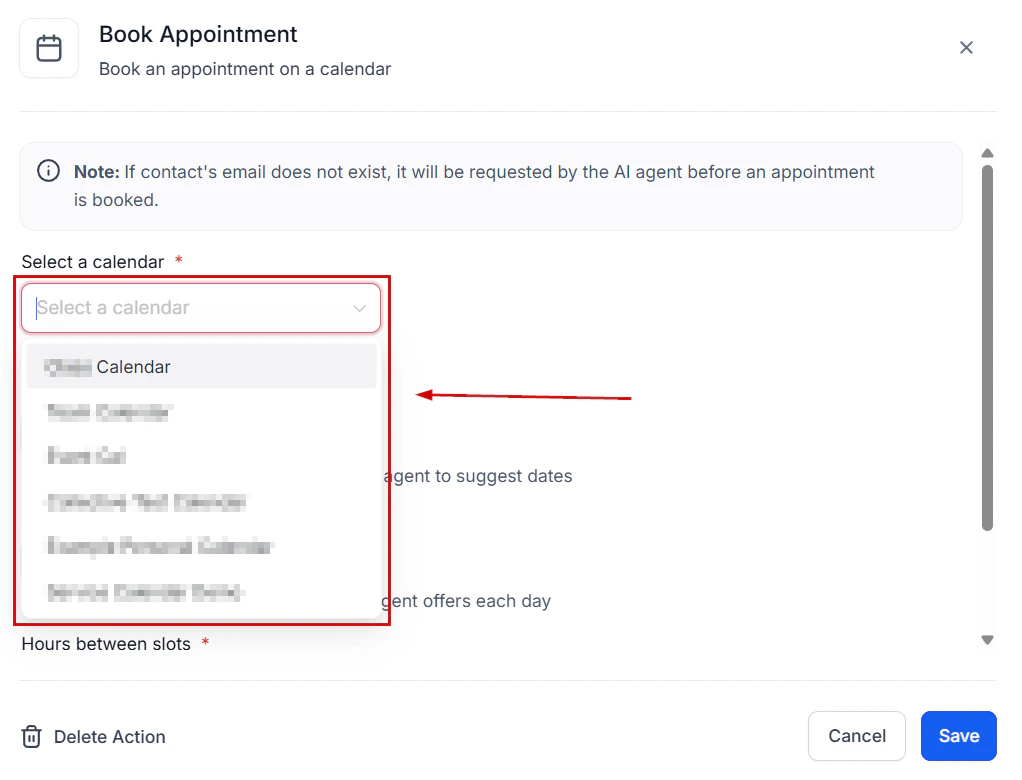
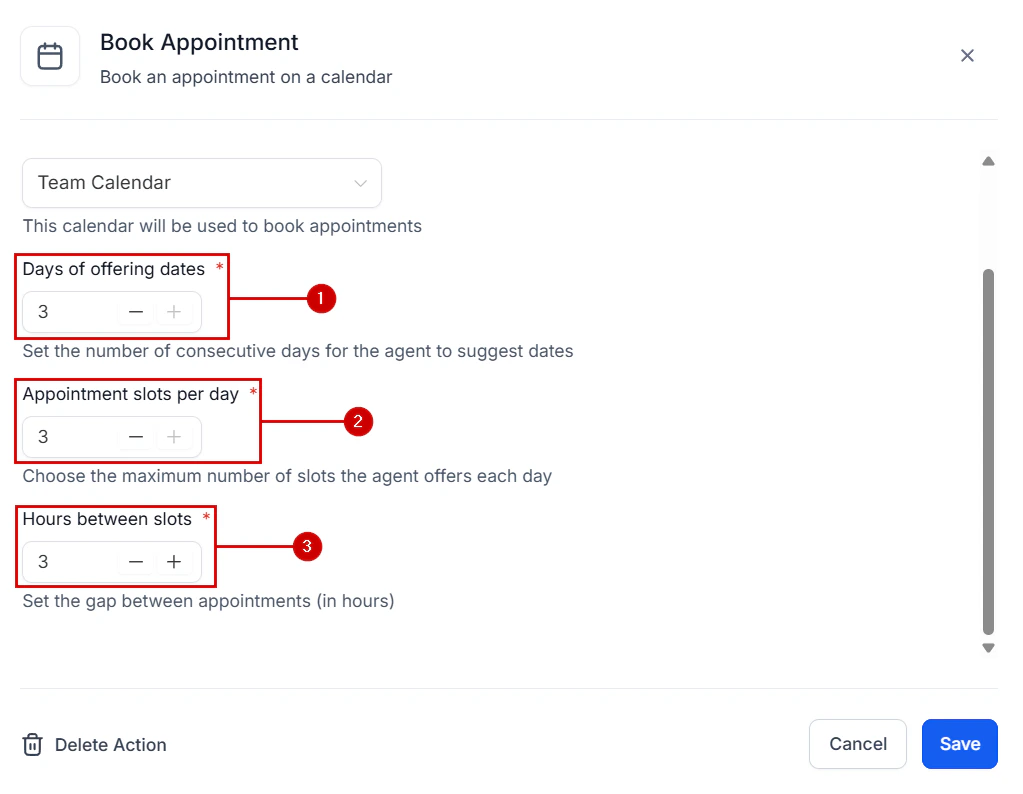
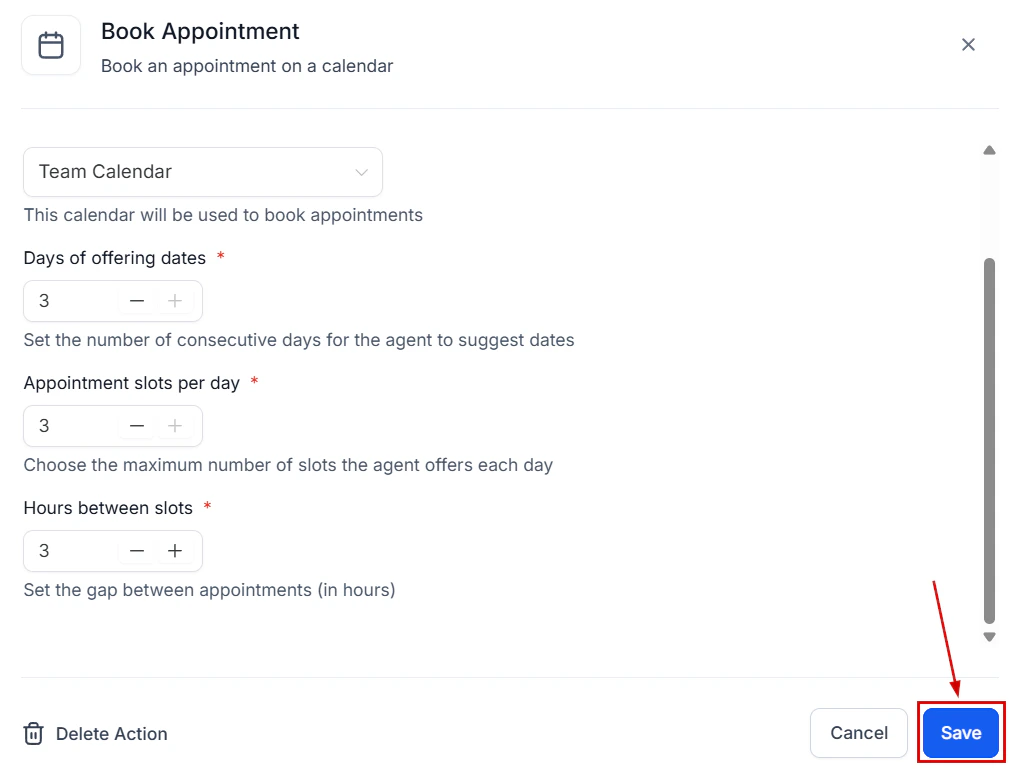
Appointment booking
Most customers are used to booking their appointments over the phone. And since old habits are hard to change, having an easy way to manage these requests is essential. The Voice AI agent can help you handle over-the-phone bookings for any selected calendar. First, in the “Voice AI Agents” section of your account settings, create or edit an AI Agent.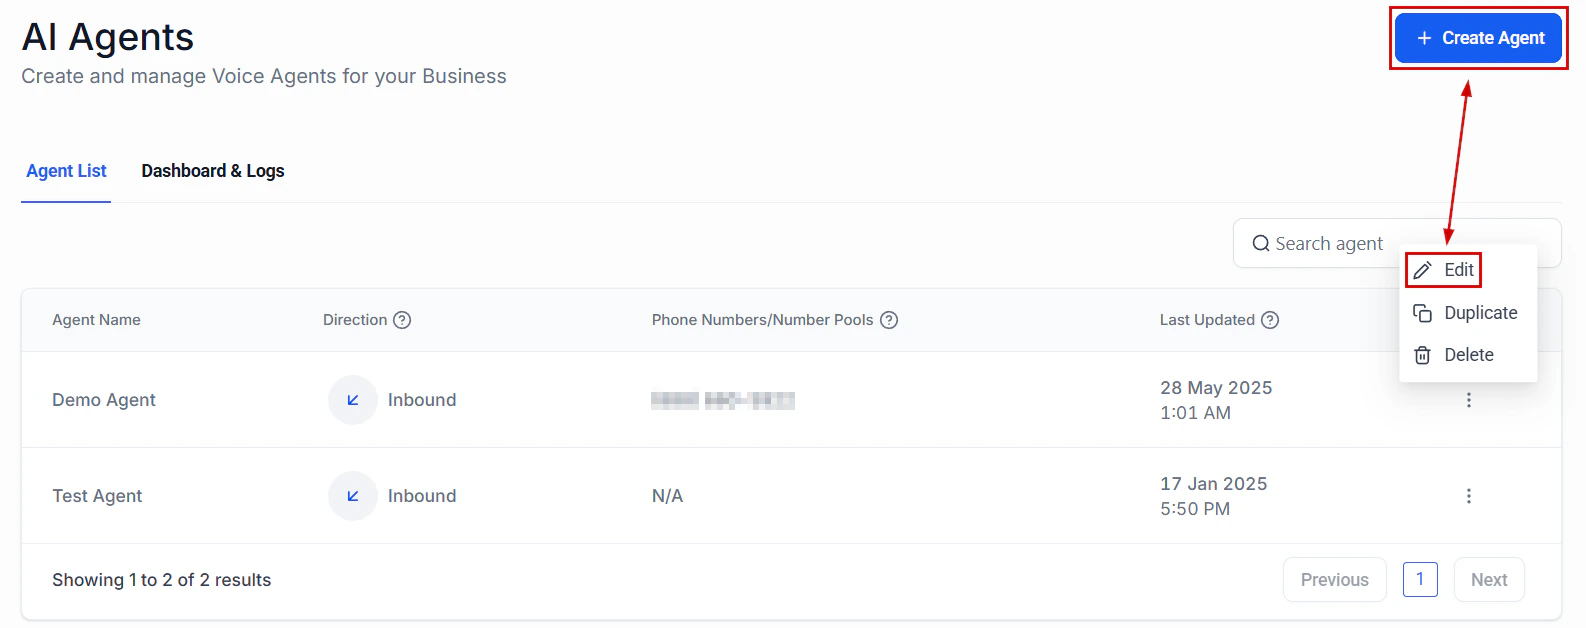
Screenshot

Screenshot
Screenshot

Screenshot
Screenshot
Screenshot
Screenshot
Screenshot
Custom actions
In the world of AI-powered conversations, real-time integrations can dramatically enhance customer experience and workflow automation. With Voice AI’s Custom Actions, you can trigger webhook calls to external systems, fetch live data, and update third-party platforms—all during an active call. This guide will walk you through the step-by-step process of creating a Custom Action for Voice AI using webhook integrations, dynamic parameters, and real-time testing.What Is a Custom Action?
A Custom Action in Voice AI allows you to trigger an external Webhook call during a conversation. These calls can be configured with authentication, custom headers, and dynamic values captured from the conversation in real time. Custom Actions enable seamless integration with external systems, such as order management platforms, scheduling tools, and more, directly from the AI call flow.Why Use Custom Actions?
- ****Live Data Fetching: ****Fetch customer-specific data (e.g., contact records, appointments) while the call is ongoing.
- ****Enhanced Automation: ****Automate repetitive tasks, such as lookups or order verifications.
- ****Zapier & API Integration: ****Trigger Zapier automations or push updates to any system with an open API.
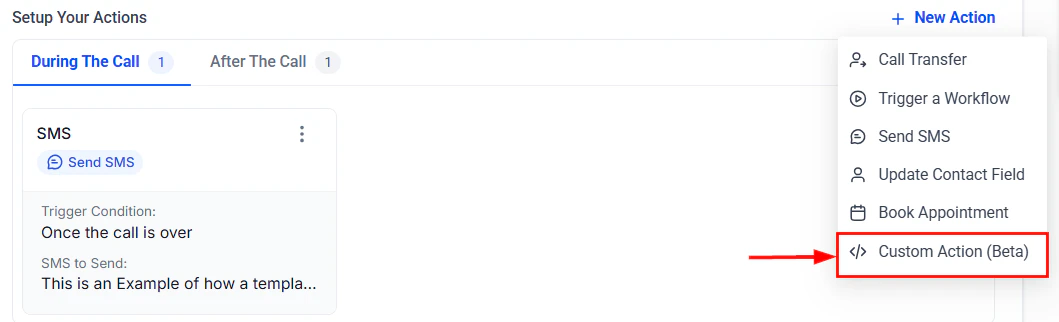
Creating a Custom Action
Before you can create a custom action, you must first determine when and why your AI agent should trigger an external process. Common examples include:- Checking a customer’s order status
- Verifying appointment details
- Updating a contact record
- Triggering a downstream Zapier workflow
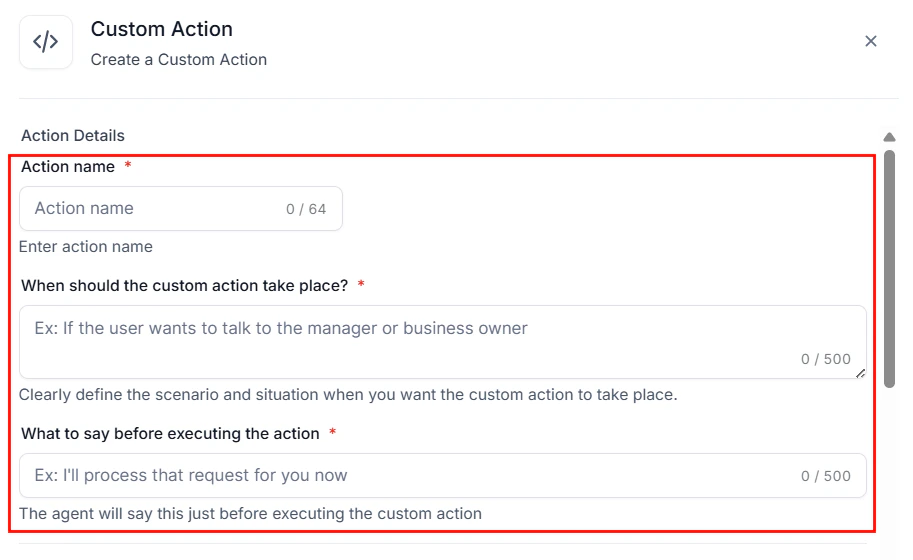
Set Up a Conversation Trigger
After identifying your use case, head to the Voice AI Agents settings and create a new agent or open an agent from the list.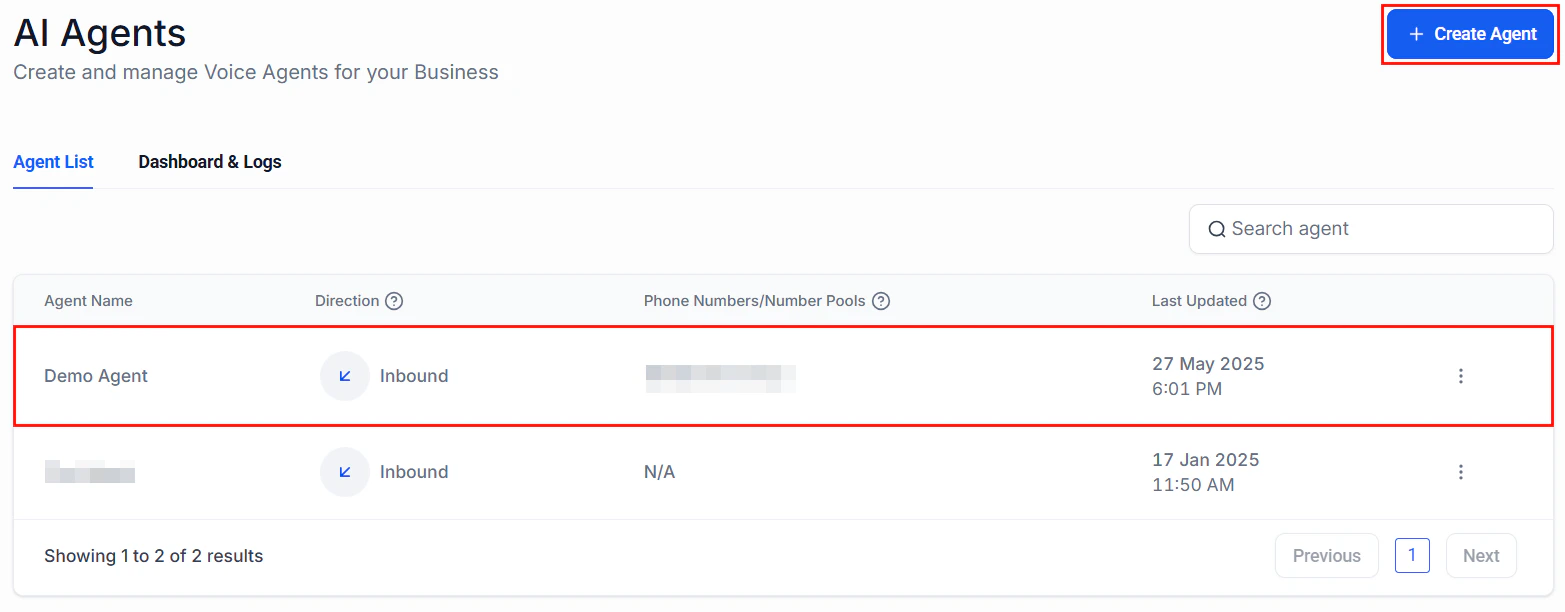
Screenshot
Screenshot
Screenshot
Screenshot
Configure the Webhook Request
Next, choose the relevant method (POST or GET), then paste the destination API endpoint you want to interact with.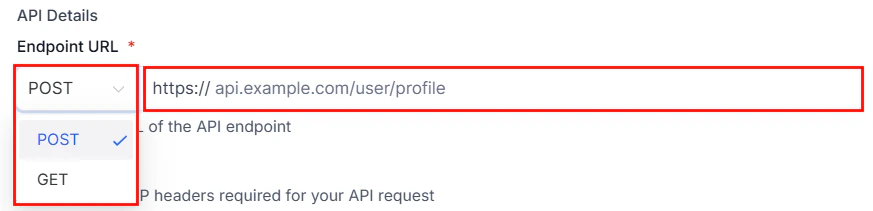
Screenshot
Add Authentication & Headers
Set up required headers (e.g., Content-Type: application/json, Authorization: Bearer [token] and include API keys or tokens for secure access, if needed.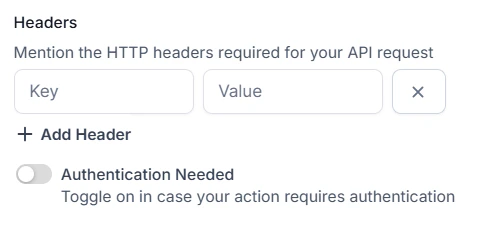
Screenshot
Map Dynamic Parameters
Voice AI can collect and pass live data from the conversation to your webhook call. These dynamic parameters include:- Customer name, email, or phone number
- Order numbers or service IDs
- Numeric values or custom phrases
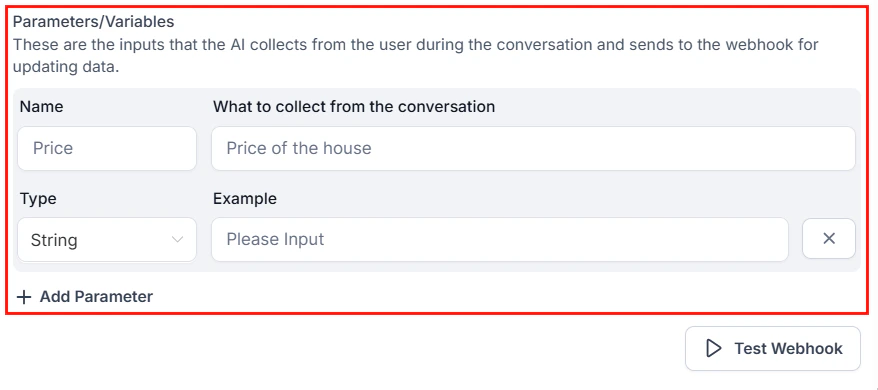
Screenshot
Test the Webhook in Real Time
Use the testing interface to verify your webhook works as expected. This involves simulating the conversation trigger, reviewing request/response details, and ensuring the external system is receiving and processing the data correctly. This step is critical to prevent errors once the automation goes live.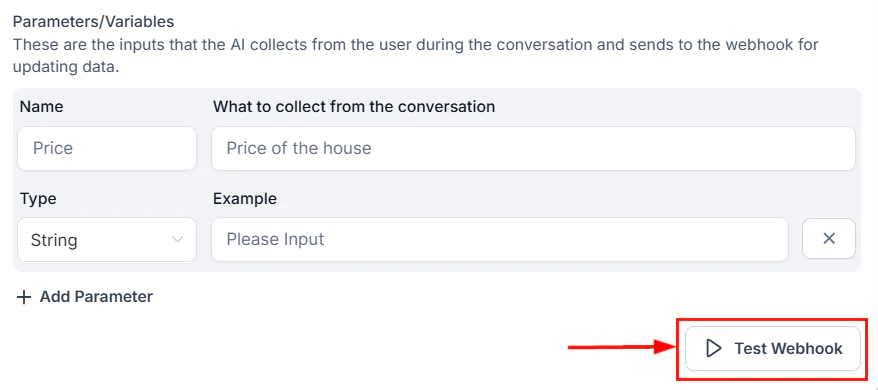
Screenshot
Save and Activate Your Custom Action
After successful testing, save the custom action, link it to the appropriate voice flow or scenario, and monitor its performance during live calls using activity logs or external system responses.
Screenshot