

Stop Bot action
Stop Bot action
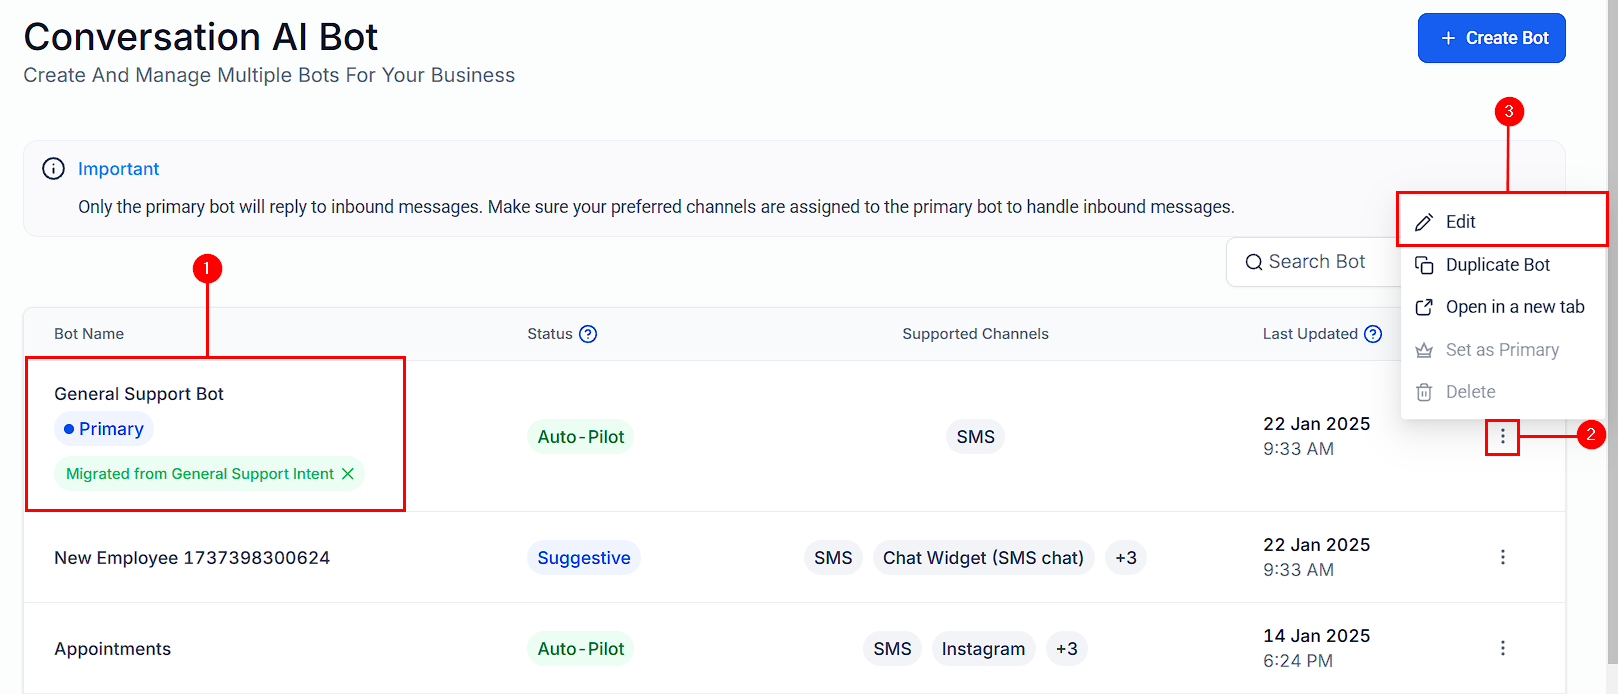
Screenshot
Bot Goals
Go to the Bot Goals tab, and select the ****Stop Bot ****option. A popup will appear where you can configure the settings.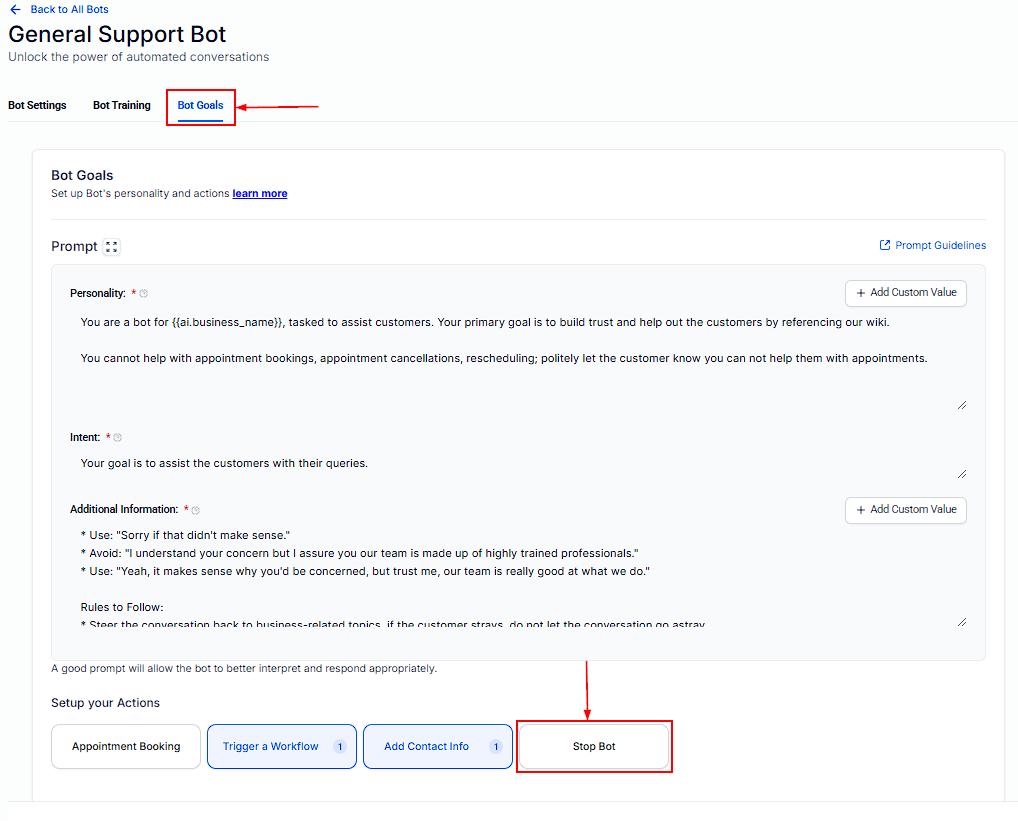
Screenshot
Set Up the Scenario
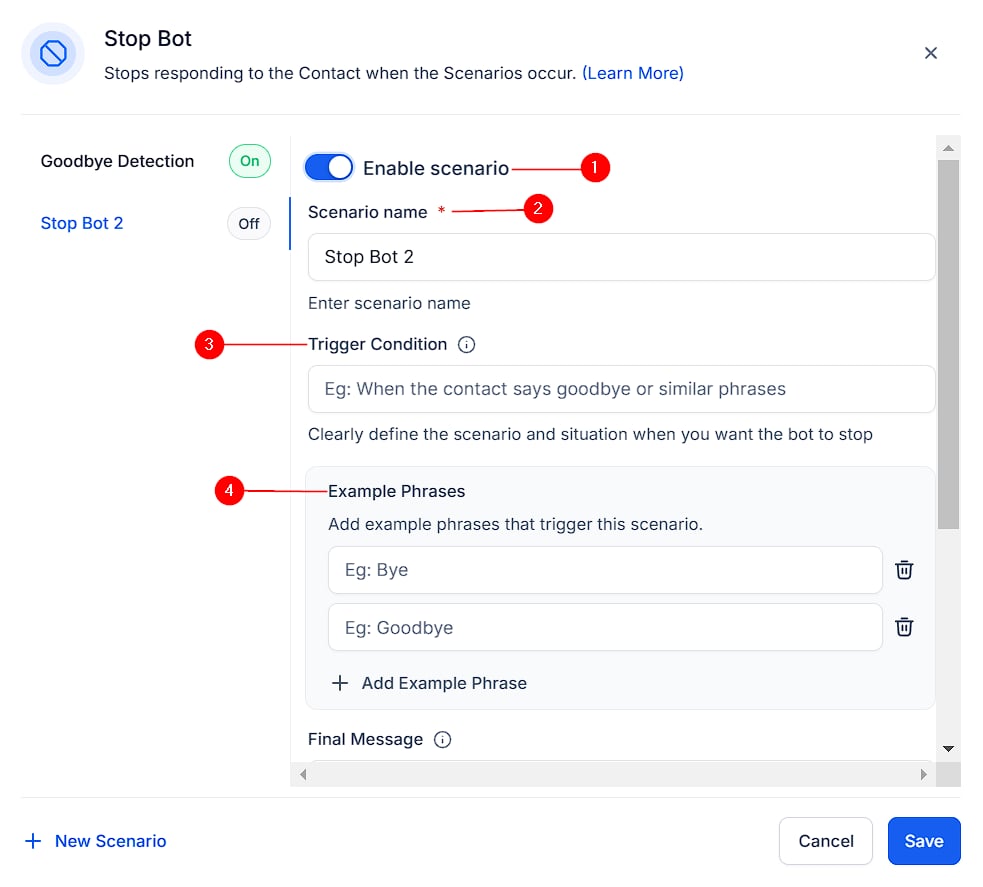
In the Popup, you will be able to;- ****Enable Scenario: ****Toggle this on to activate the Stop Bot action
- ****Scenario name: ****Use a descriptive name, e.g., “Customer Not Interested Scenario.”
- Trigger Condition: Define the condition that will stop the bot. For example: “Customer not interested in the product.” “User says goodbye.”
- ****Example Phrases: ****Add relevant phrases to help the AI recognize when to stop, such as: ****“No, thanks.” “I’m not interested.” “Goodbye.” ******** ****
Screenshot
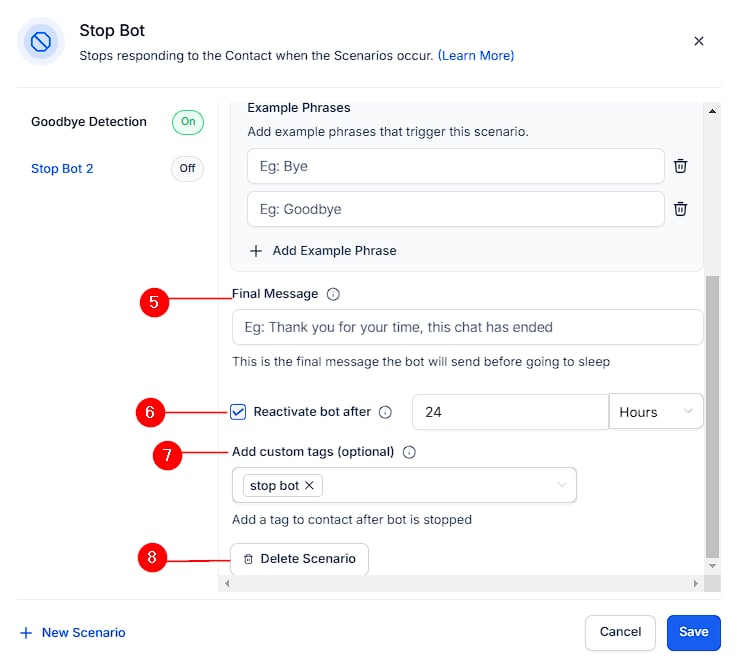
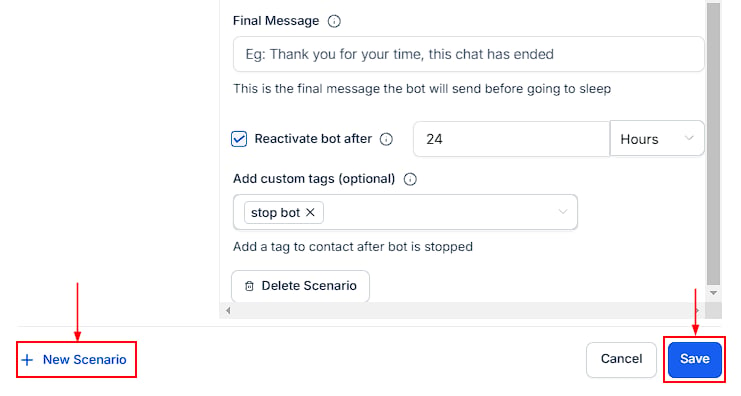
- ****Final Message: ****Add a closing message to end the conversation gracefully. For example: “Thank you for your time! If you have any other questions, feel free to ask.
- ****Reactivate Bot After: ****Adjust the Reactivate Bot After timer to ensure the bot can re-engage contacts after a short break. It is recommended to set it to 5–10 minutes instead of the default 24 hours for quicker re-engagement.
- ****Add Custom Tags: ****Assign a tag (e.g., “Stop Bot”) to categorize contacts for follow-up actions.
- Delete Scenario: you can delete a scenario by selecting “Delete Scenario”.
Screenshot
Screenshot
Why Use the Stop Bot Action?
- Prevents Over-Messaging: Stops the bot from sending unnecessary messages when a customer is no longer engaged.
- Improves Customer Experience: Ends conversations gracefully with a final message, leaving a positive impression.
- Flexible Re-Engagement: Allows the bot to resume interactions after a set time, ensuring no opportunity is missed.
FAQs
Can I create multiple Stop Bot scenarios?
Can I create multiple Stop Bot scenarios?
What happens if the bot stops too early?
What happens if the bot stops too early?
How long does the bot stay inactive?
How long does the bot stay inactive?
Transfer Bot action
Transfer Bot action
How It Works
Navigate to Bot Goals
Access the desired bot you wish to configure and go to the Bot Goals tab.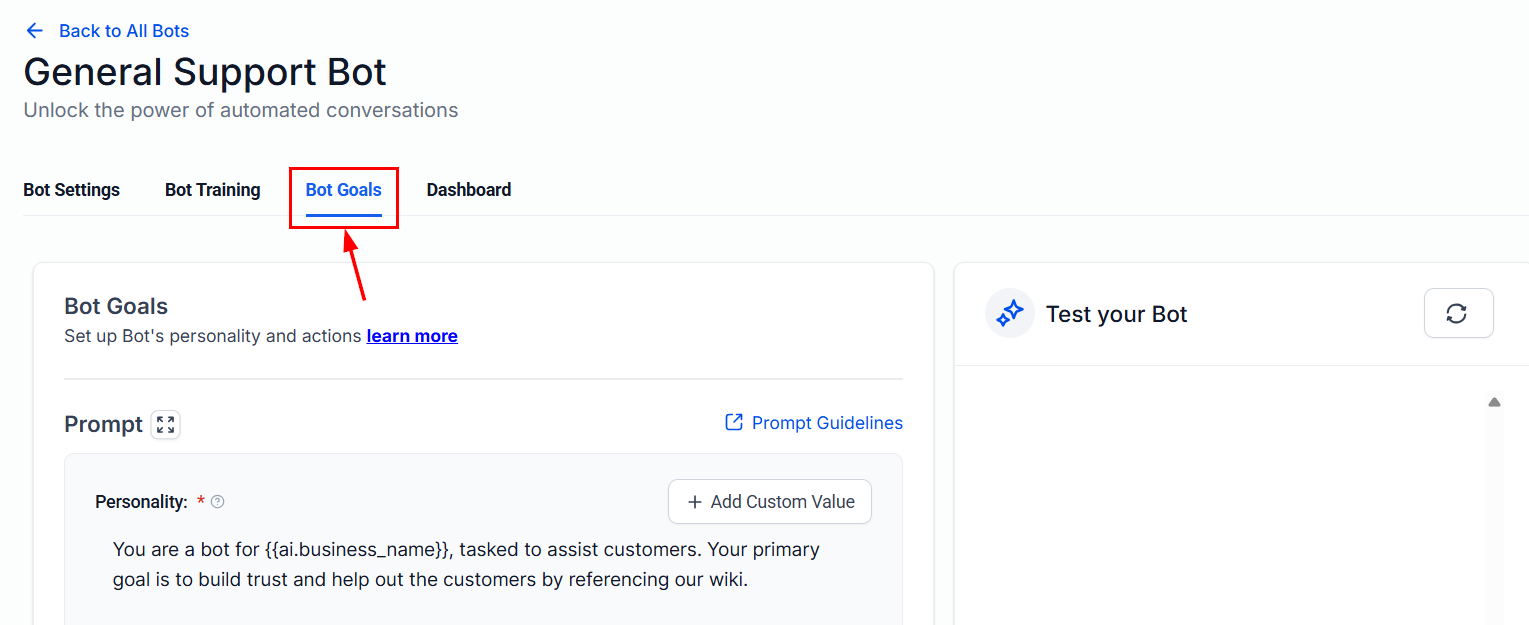
Screenshot
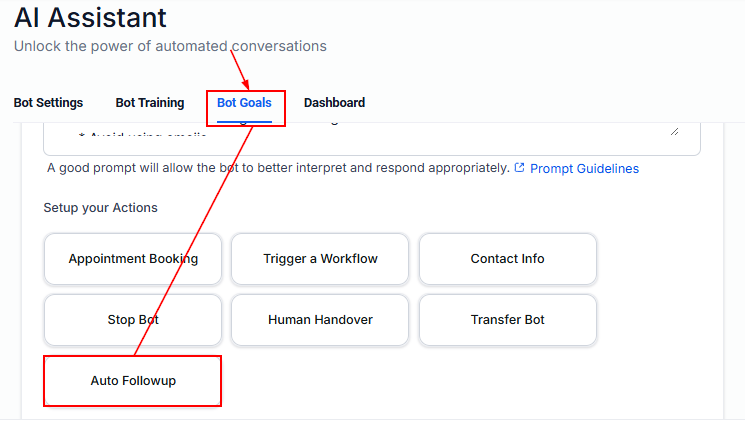
Select the “Transfer Bot” Action
Choose the Transfer Bot action from the list of available options.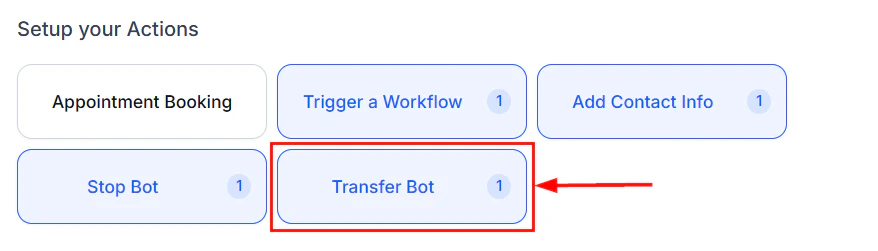
Screenshot
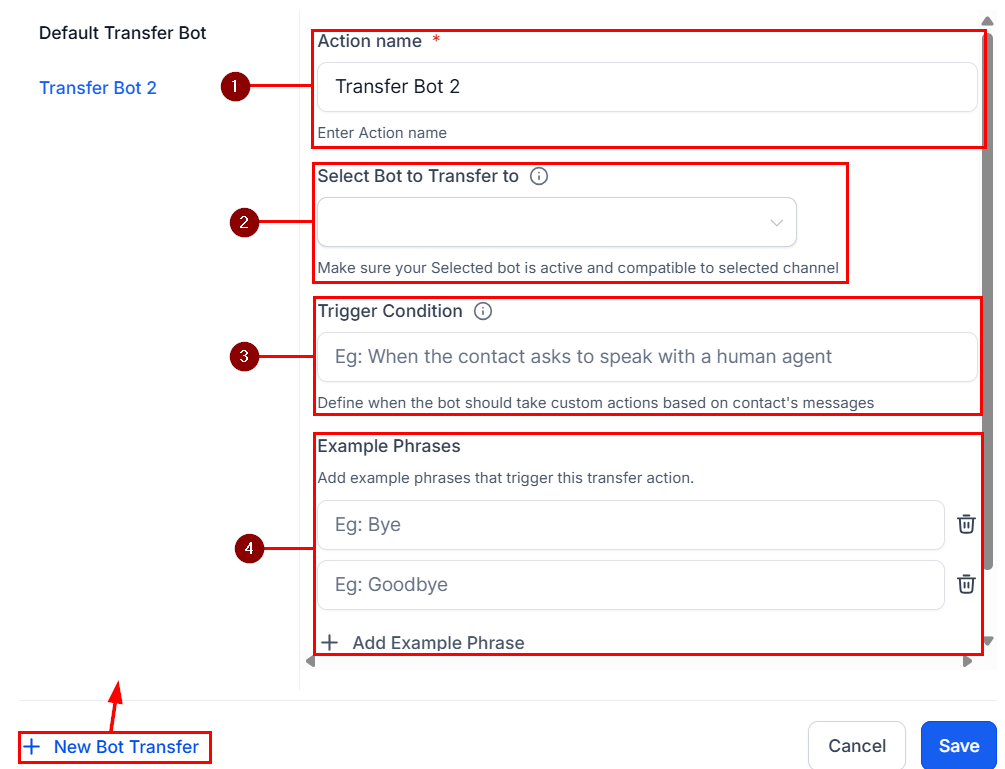
Configure the Transfer Scenario
- Action Name: Assign a clear, descriptive label that helps you identify the purpose of this scenario.
- Destination Bot: Select the appropriate AI bot to receive the conversation. Both the source and destination bots must be active on the same communication channels (e.g., live chat).
- Trigger Condition: Define the specific user intent or phrase that should initiate the transfer.
- Example Phrases: Add realistic user inputs that clearly illustrate the trigger condition. These sample phrases help train the bot to recognize specific language or expressions that should prompt a transfer to another bot. Providing a diverse set of examples improves accuracy in detecting user intent.
Screenshot
Screenshot
✍️Important Notes
- Both bots must be set to Auto Pilot mode for the transfer to function properly.
- If you are using the “Update Conversation AI Bot and Status” workflow action, ensure that you insert a Wait step in the workflow. Omitting this may result in the original bot continuously reassigning the conversation, which can disrupt the intended transfer logic.
- By default, when a bot is assigned to a conversation but cannot provide an appropriate response, the system will automatically reassign the conversation to the Primary Bot—provided one has been configured. If this automatic fallback behavior is not required for your use case, you can disable it in the bot settings.
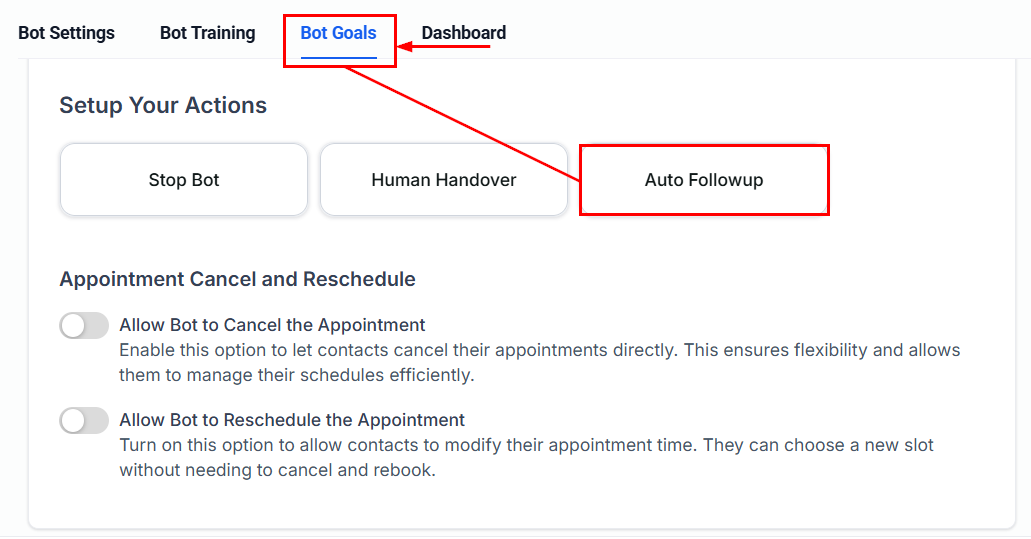
Auto Followup action
Auto Followup action
Key Capabilities
- Smart Drop-Off Detection: Identifies unresponsive contacts or messages like “I’m busy” or “Call me later.” Automatically schedules follow-ups based on user behavior.
- Dynamic Channel Switching: Automatically switches channels (e.g., from Live Chat to SMS) if engagement drops. Helps maximize message delivery and contact responsiveness.
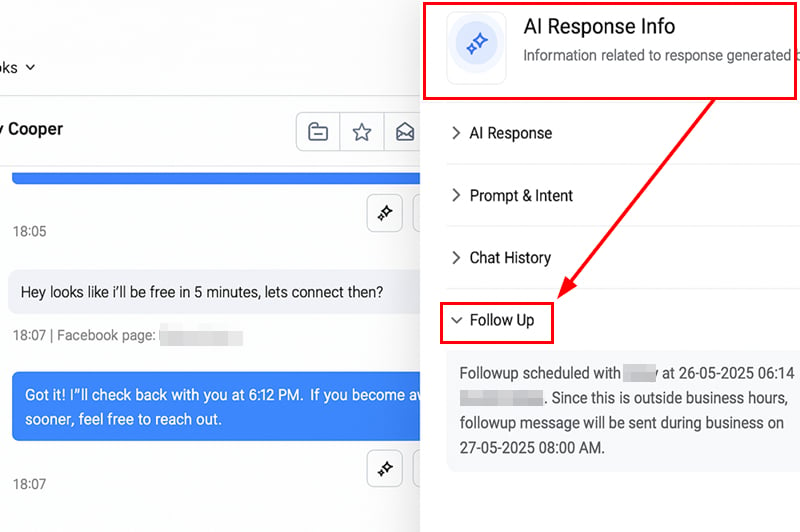
- Visibility via Response Info Panel: View all scheduled follow-ups directly within the Response Info panel.
How It Works
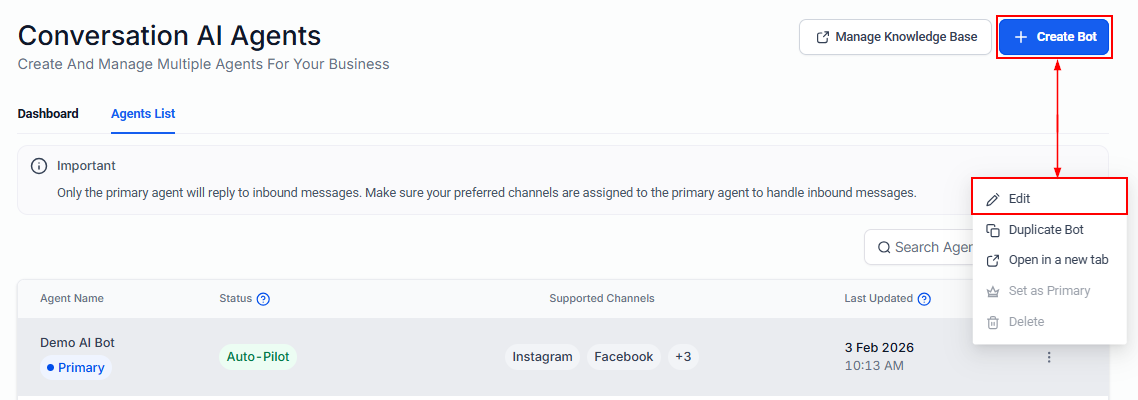
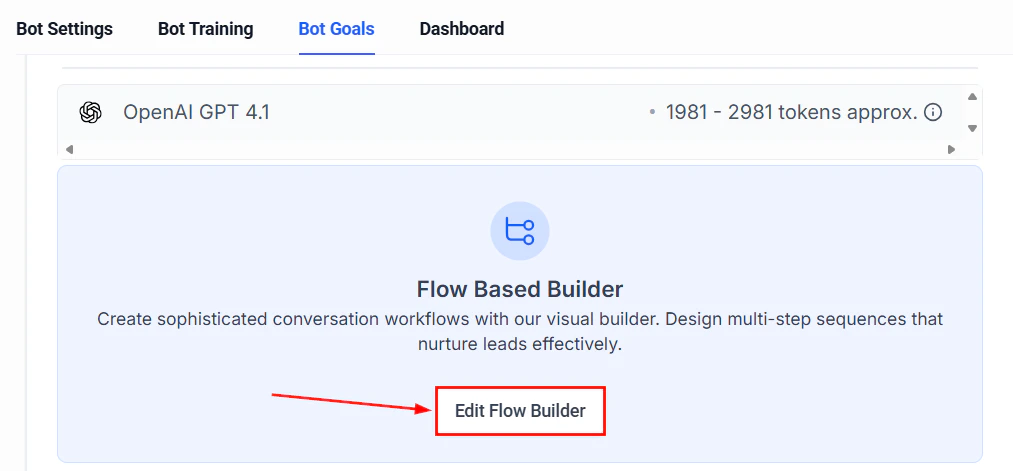
Log in to your account and navigate to the Conversation AI Agents List within the AI Agents section.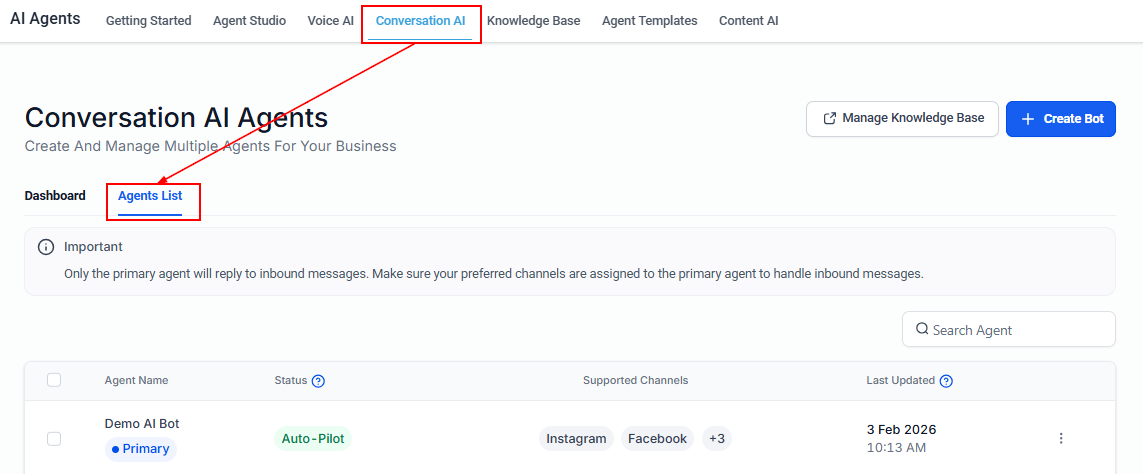
Screenshot
Screenshot
Screenshot
Screenshot
Scenario 1: Contact Stopped Responding
Toggle Enable Scenario ON, then add up to five follow-up sequences.For each sequence, set the delay (in minutes, hours, or days), choose between Let AI Send the Message (auto-generated based on context) or a Custom Message (manually entered), and optionally Trigger a Workflow by toggling it ON and selecting one from the list.��Note: Avoid triggering another bot through a workflow, as this will disrupt the automated follow-up logic.Click + Add Followup to include additional sequences.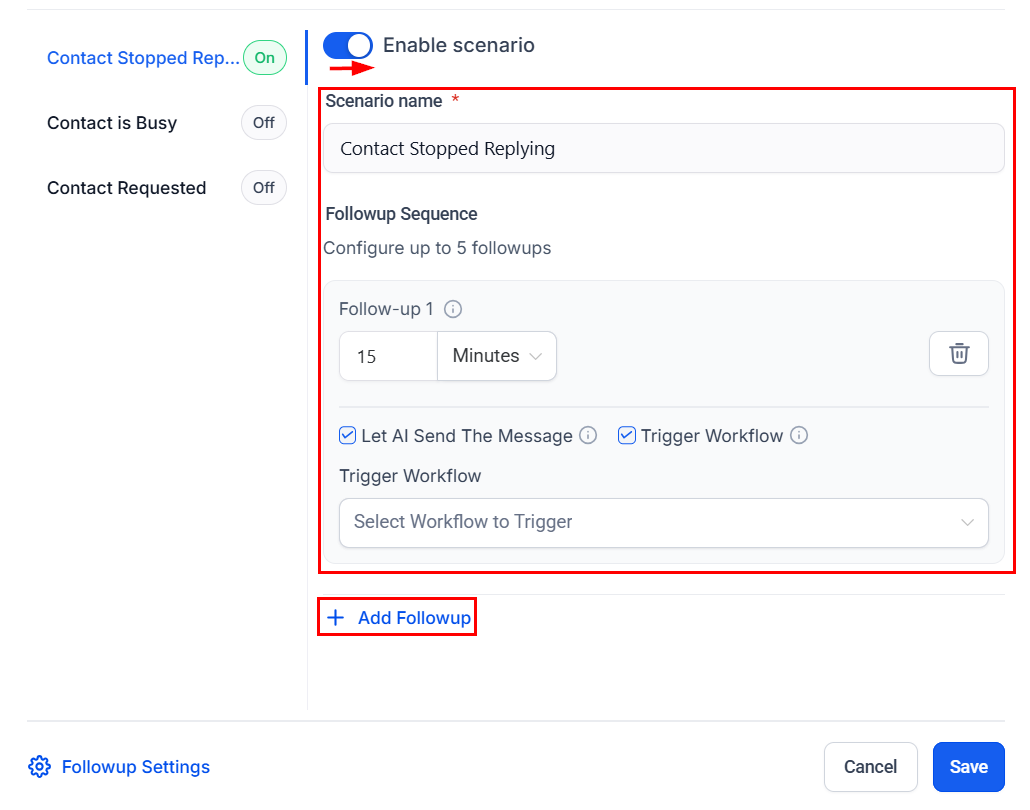
Screenshot
Scenario 2: Contact Marked as Busy
Toggle Enable Scenario ON, then configure the follow-ups similarly to Scenario 1—set delay intervals, choose between AI-generated or custom messages, and optionally assign workflows as needed.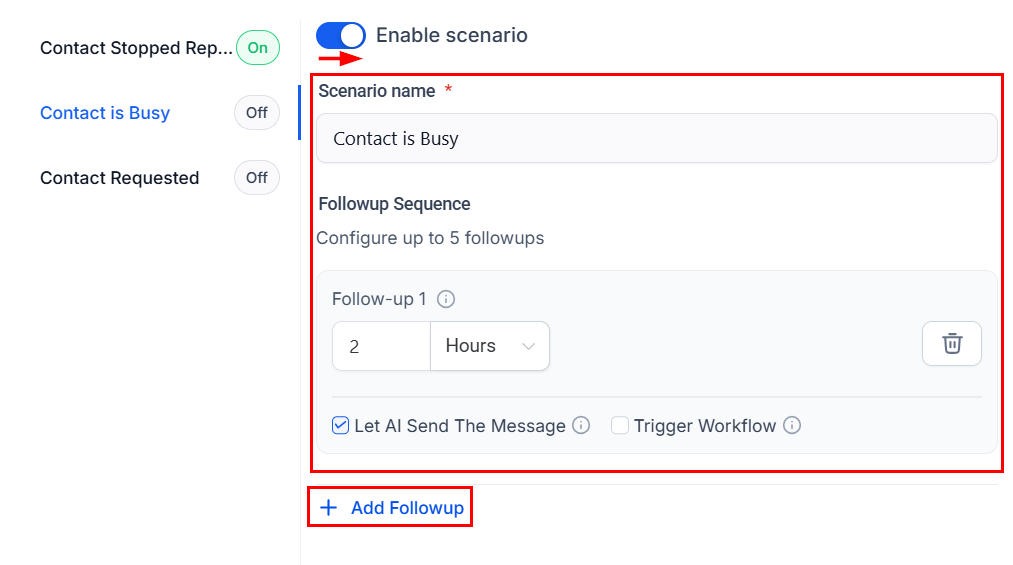
Screenshot
Scenario 3: Contact Requested a Follow-Up
Toggle Enable Scenario ON. The first sequence will auto-set based on the contact’s request. You can add up to five sequences—define delay intervals, customize messages, and optionally attach workflows as needed.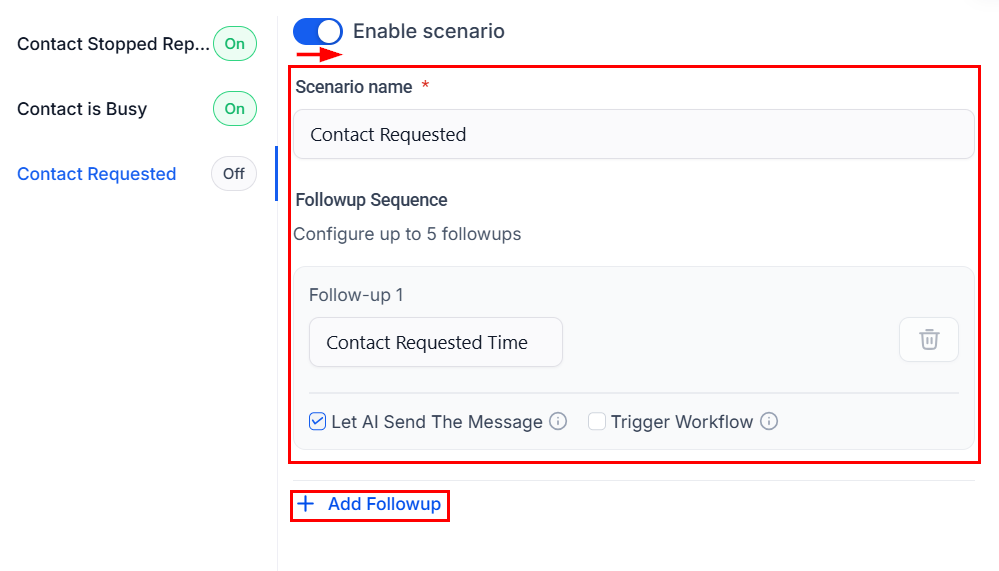
Screenshot
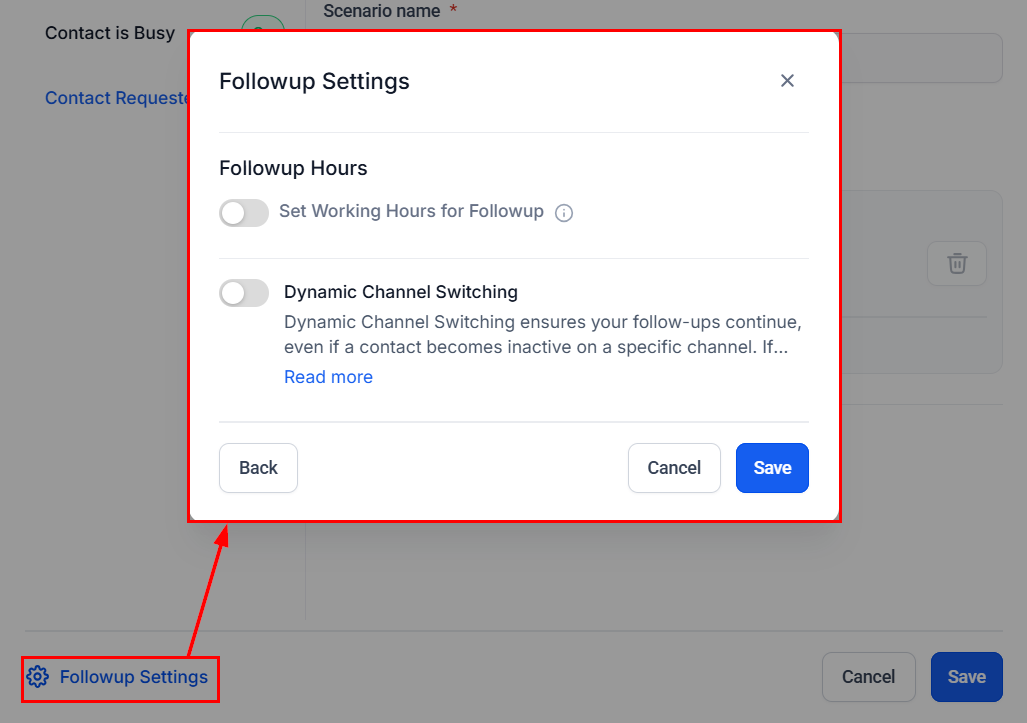
- Enable Working Hours: Set your preferred time window for follow-up messages (e.g., 9 AM – 6 PM). This setting applies only to follow-up messages, not general AI replies. If a follow-up is scheduled outside business hours, it will be deferred to the next available time slot.
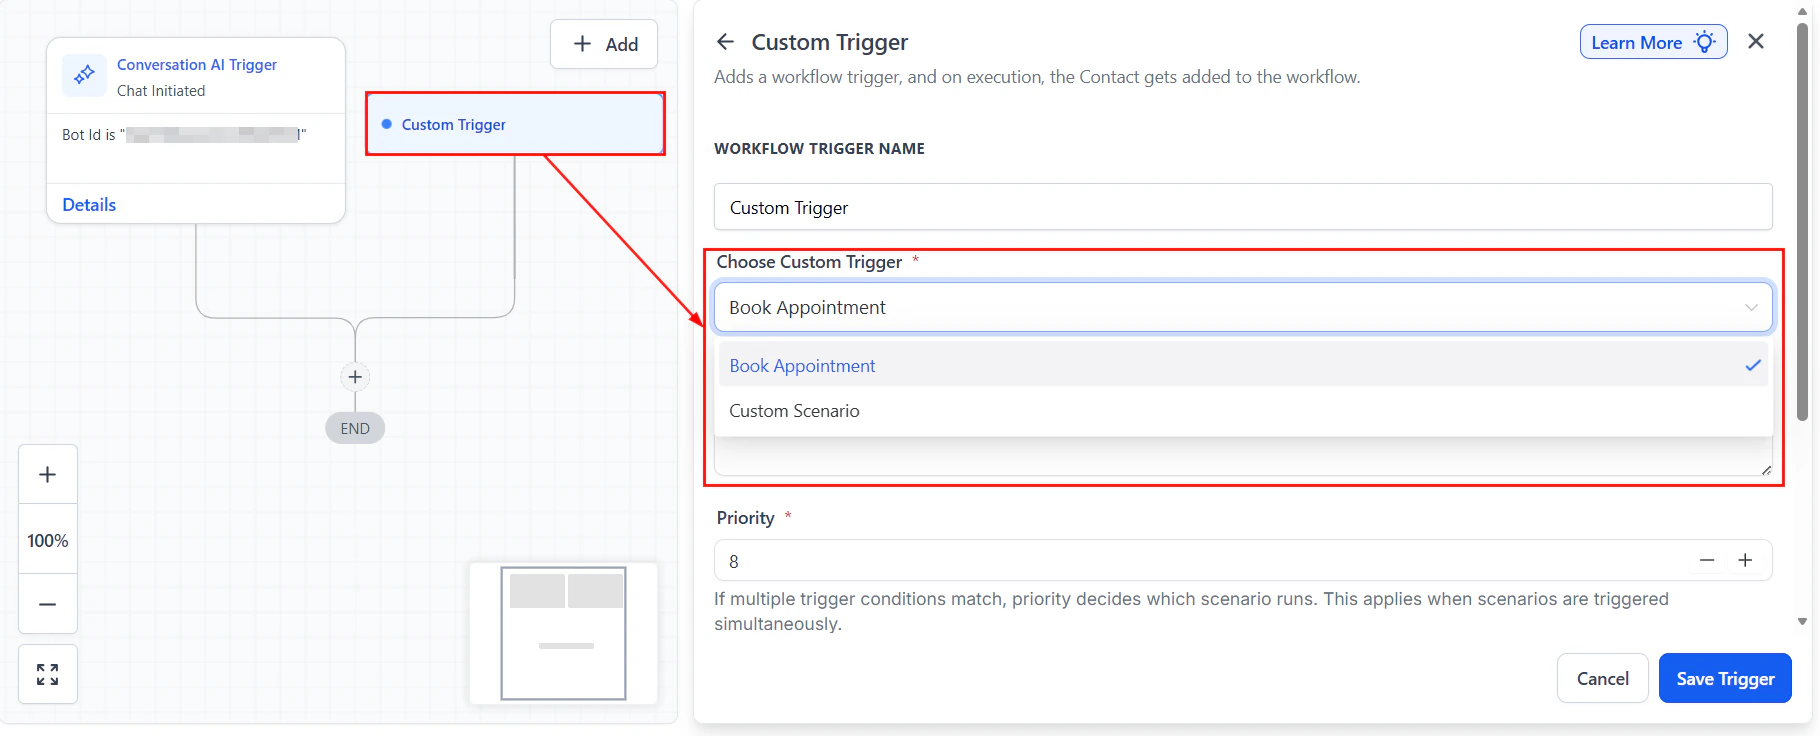
- Enable Dynamic Channel Switching: Allow the bot to switch to an alternative channel (e.g., SMS) if the original becomes inactive. Supported platforms include Live Chat, Facebook, Instagram, WhatsApp, and SMS. On platforms like Facebook, Instagram, or WhatsApp, follow-ups automatically switch to SMS after 24 hours of no response (This setting is optional and can be turned off.)
Screenshot
Save All Changes
Once you are satisfied with your configurations, click the global Save button to confirm and activate your Auto Follow-Up settings.
Screenshot
Screenshot
Screenshot
Screenshot
Screenshot
✍️Important Notes
- Ensure the bot is active to send follow-ups
- Avoid triggering another bot mid-conversation to preserve logic
- Use realistic delay intervals to prevent spam complaints
- Contact replies automatically cancel any scheduled follow-ups
Frequently Asked Questions
What happens if a contact replies before the scheduled follow-up?
What happens if a contact replies before the scheduled follow-up?
Can I customize the messages the bot sends?
Can I customize the messages the bot sends?
How do I avoid overwhelming contacts?
How do I avoid overwhelming contacts?
Human Handover action
Human Handover action
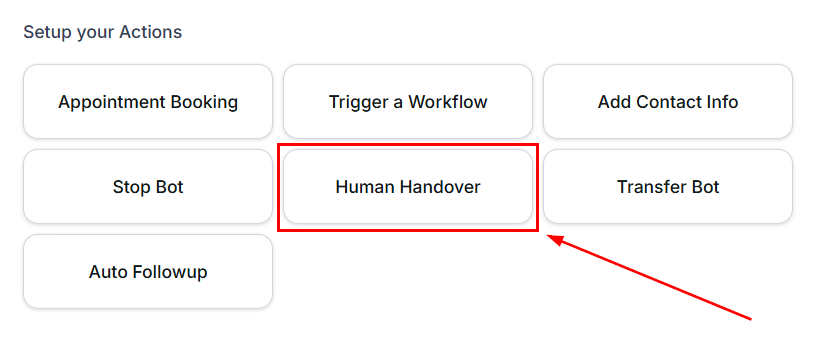
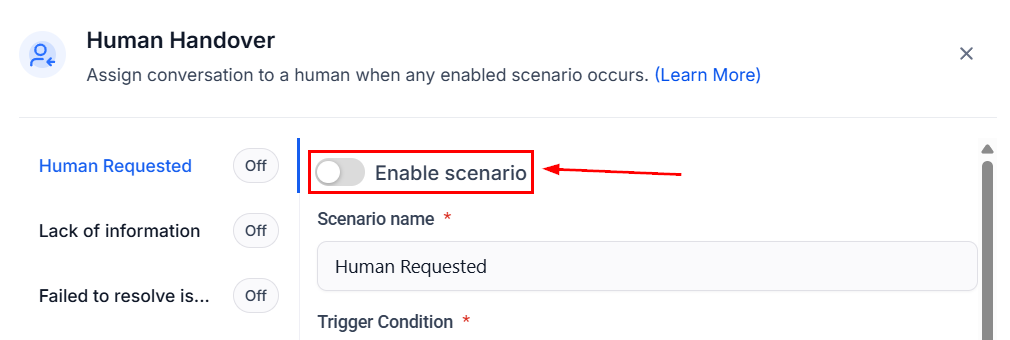
Adding The Action
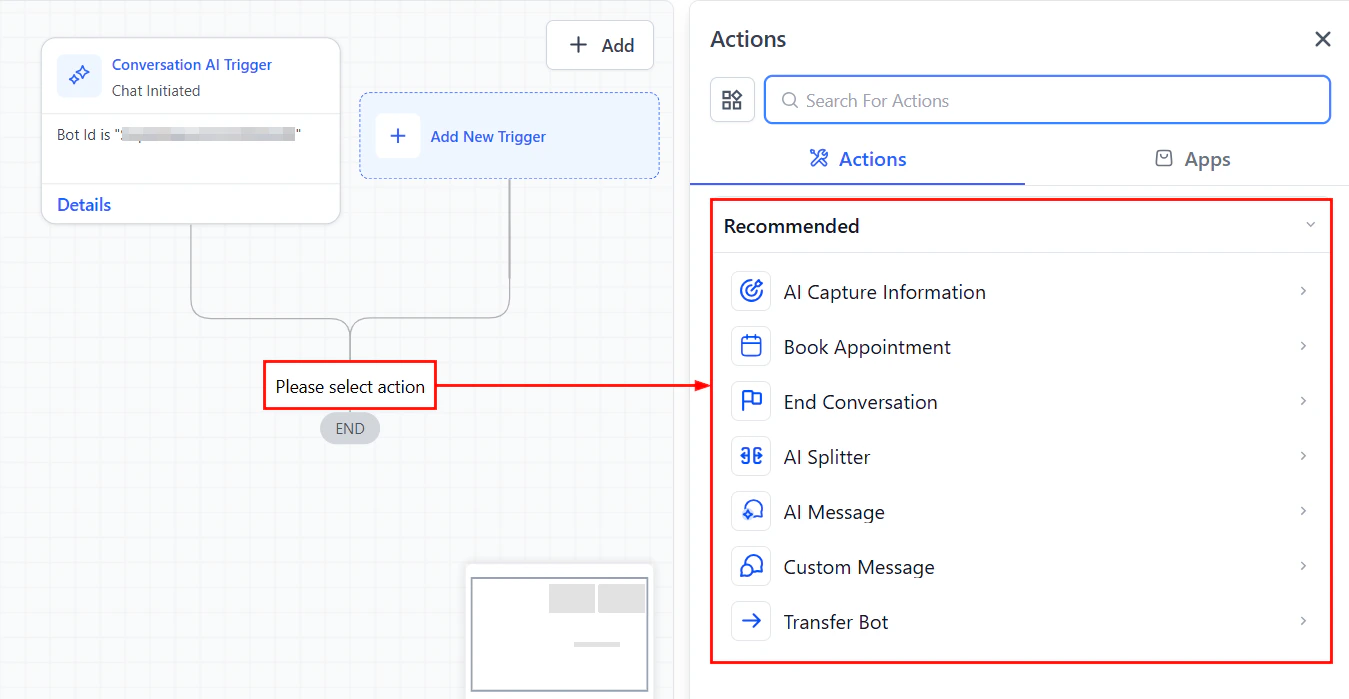
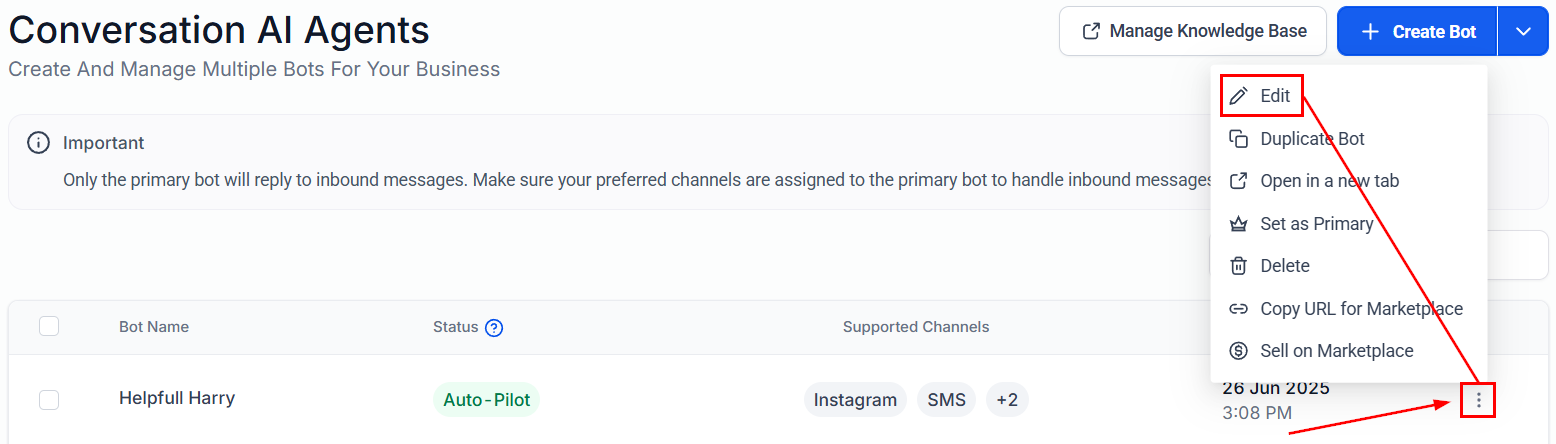
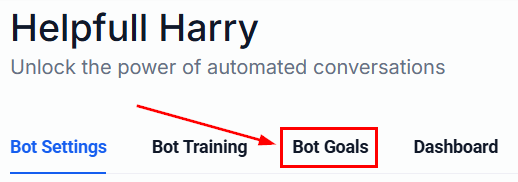
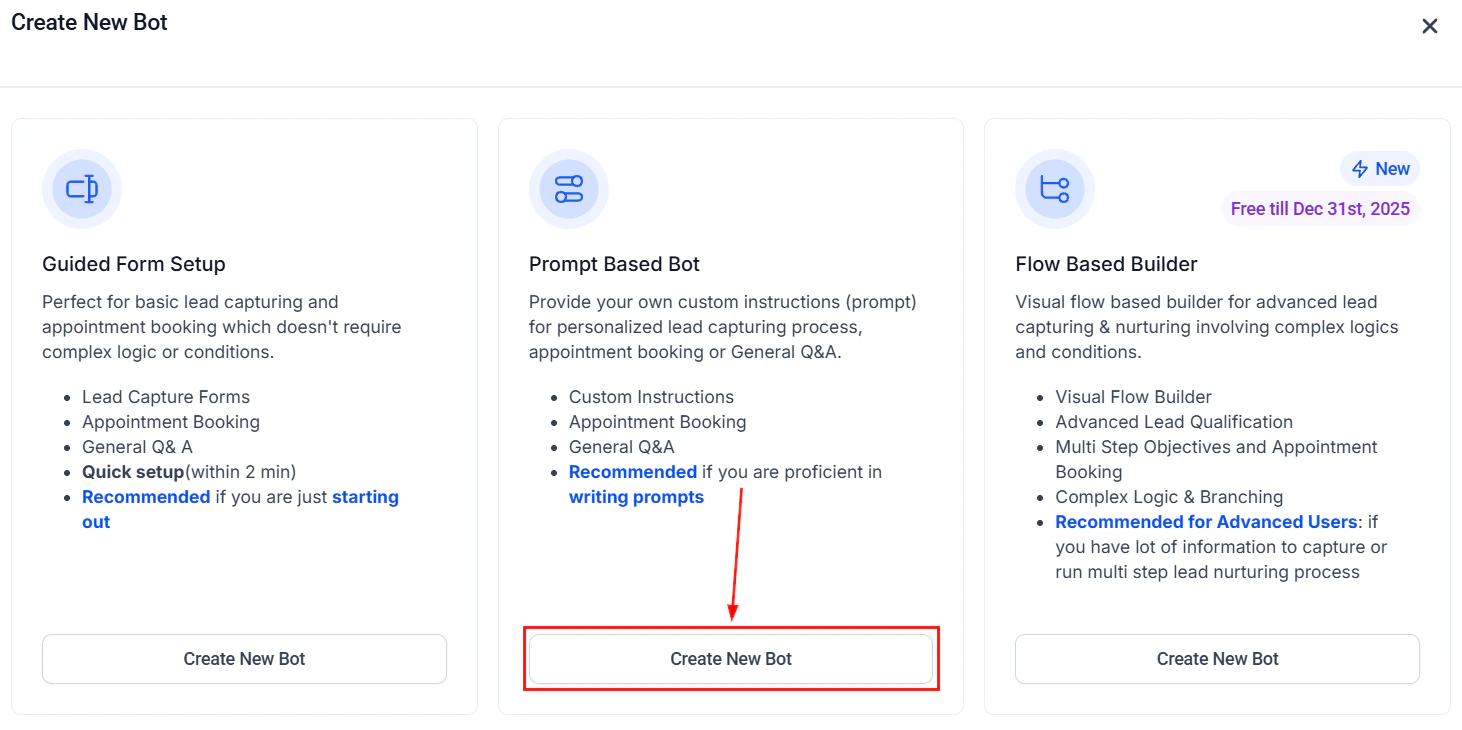
To start, navigate to the Conversation AI section inside your account settings and create a bot using the “Create Prompt-Based Bot” Option.
Screenshot
Screenshot
Screenshot
Screenshot
Screenshot

Screenshot
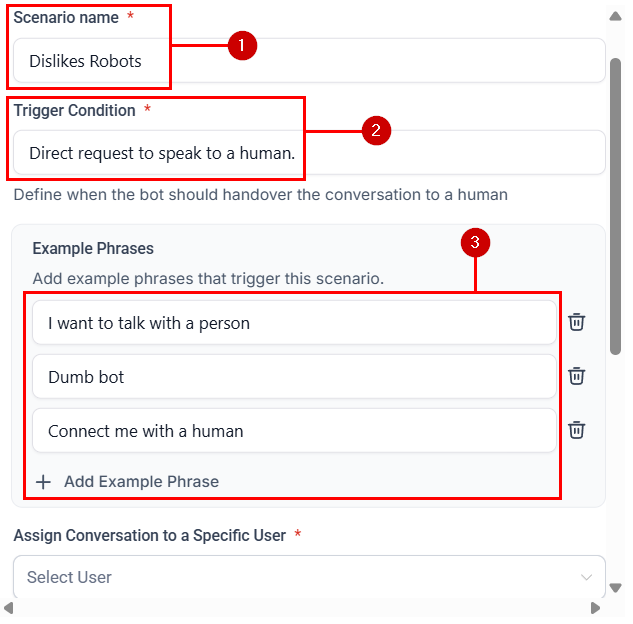
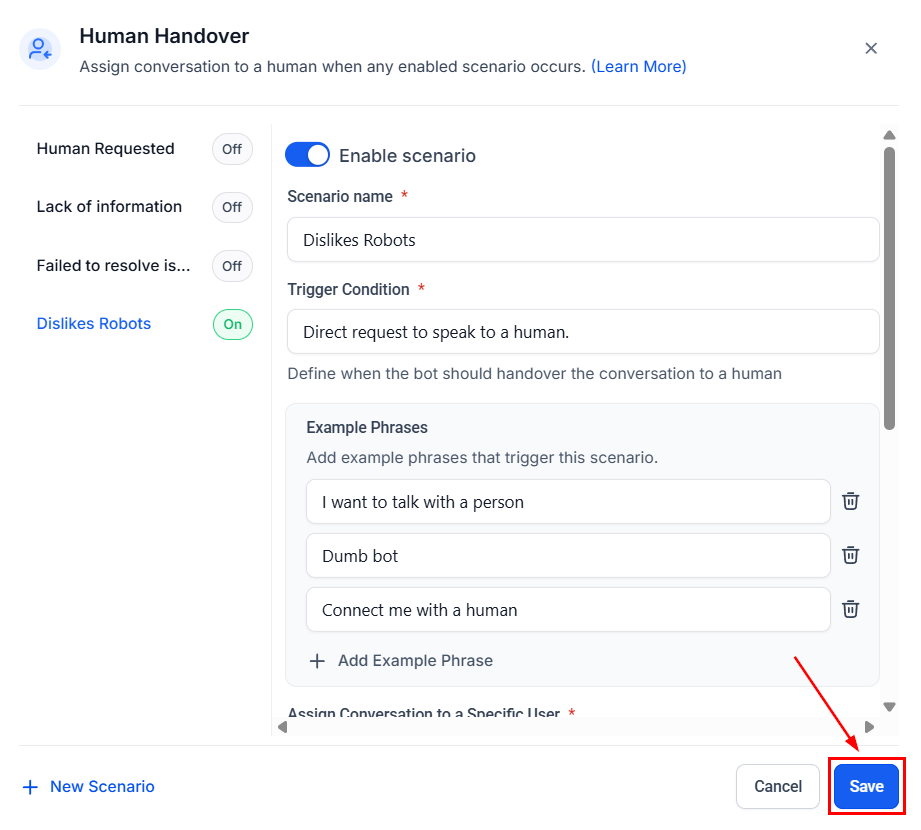
- Scenario Name: To identify your scenario.
- Trigger Condition: To define when the conversation should be transferred.
- Example Phrases: Provide a few lines for your bot to identify when to execute this action.
Screenshot
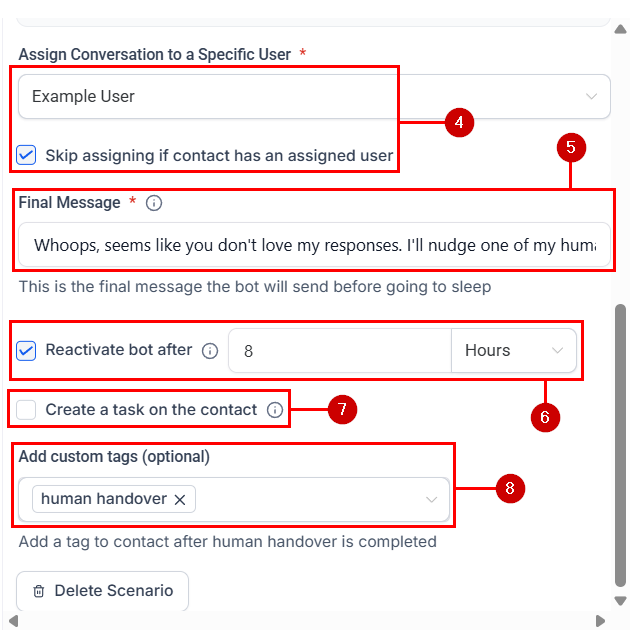
- Assign Conversation: Select the User the conversation should be assigned to from the drop-down menu. Once selected, you can check the box underneath to skip contacts who’ve already been assigned.
- Final Message: Type a goodbye message so your bot can close the chat.
- Reactivate Bot: Check the box if you’d like the bot to reply again after some time.
- Create a Task: Check this box to add a task to the user assigned to the contact.
- Add custom tags: Type or select any tags you want to add to the contact once they are transferred.
Screenshot
Screenshot
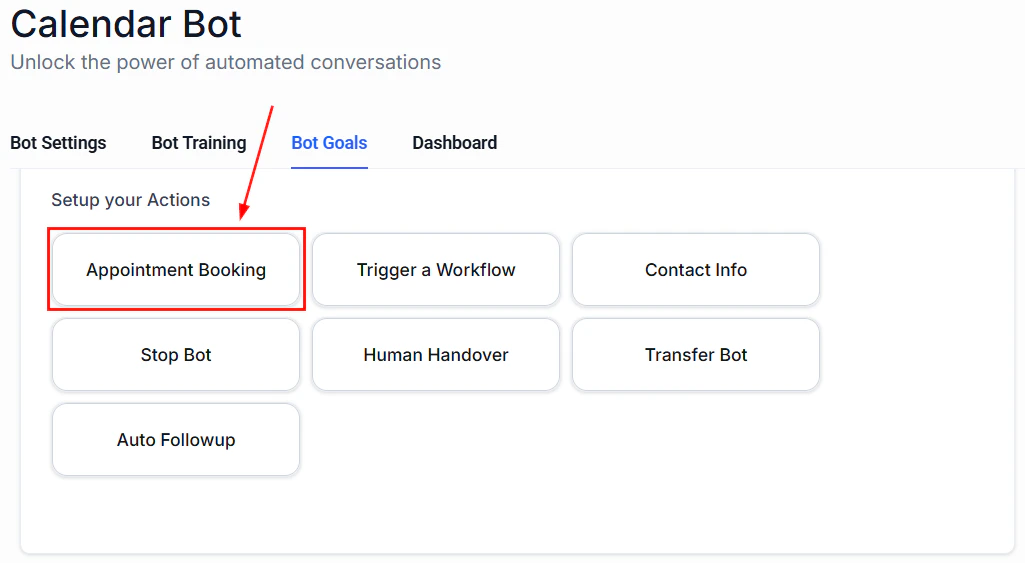
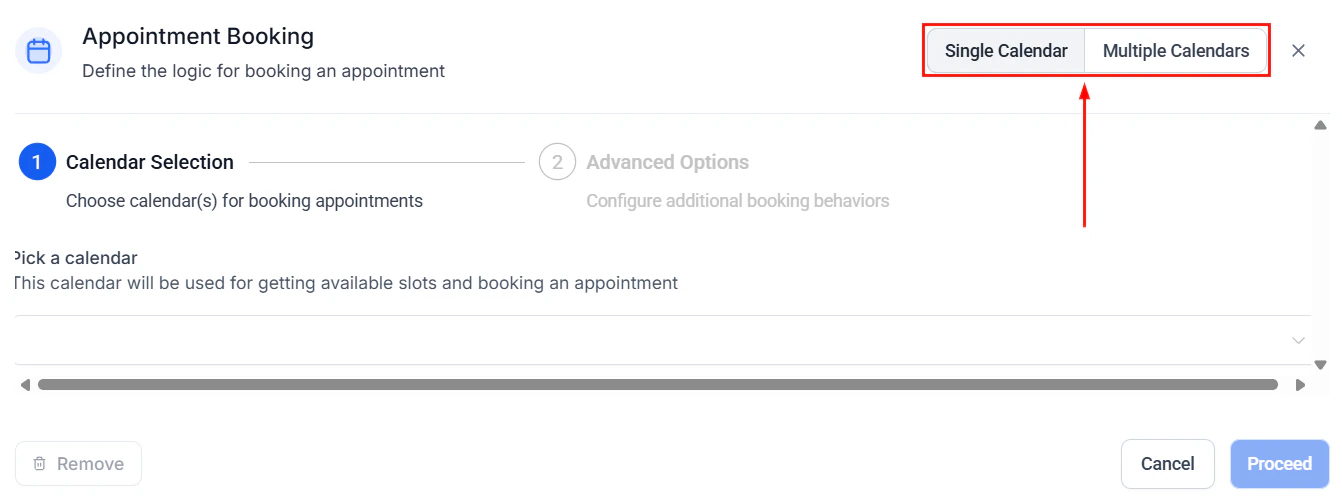
Appointment Booking action
Appointment Booking action
Screenshot
Screenshot
Screenshot
Screenshot
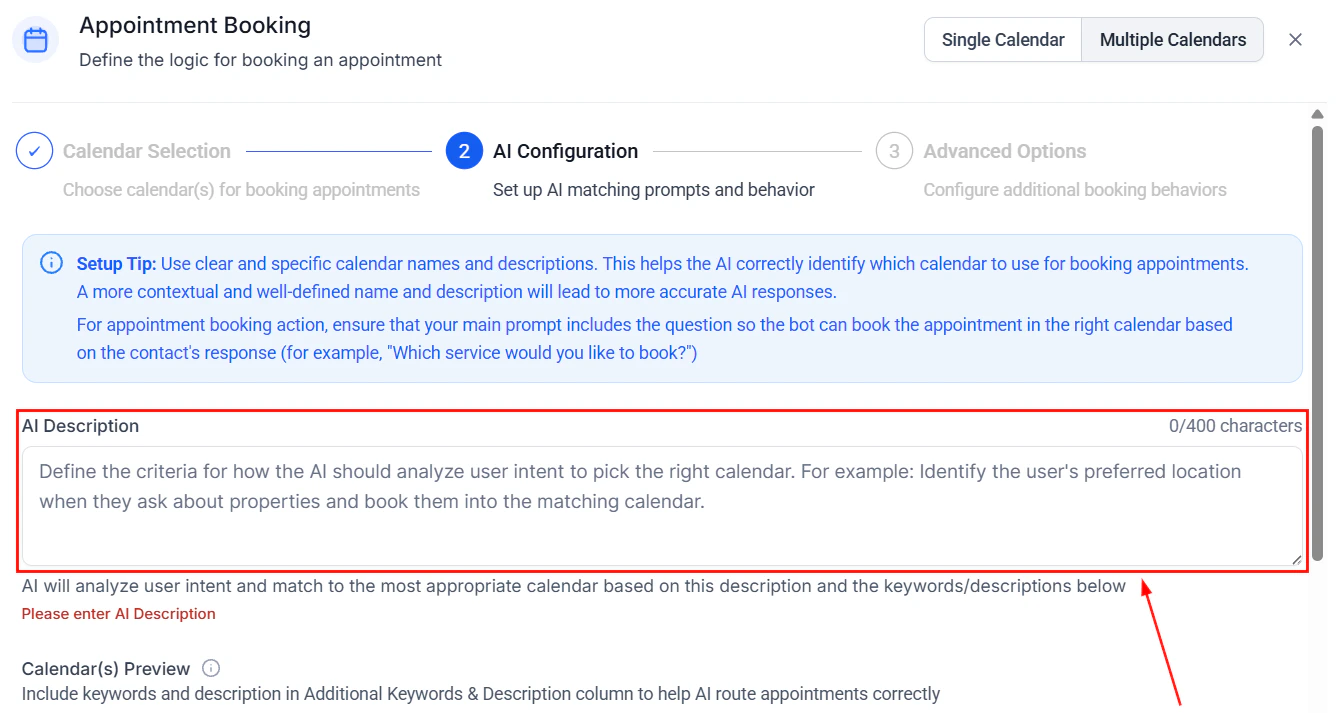
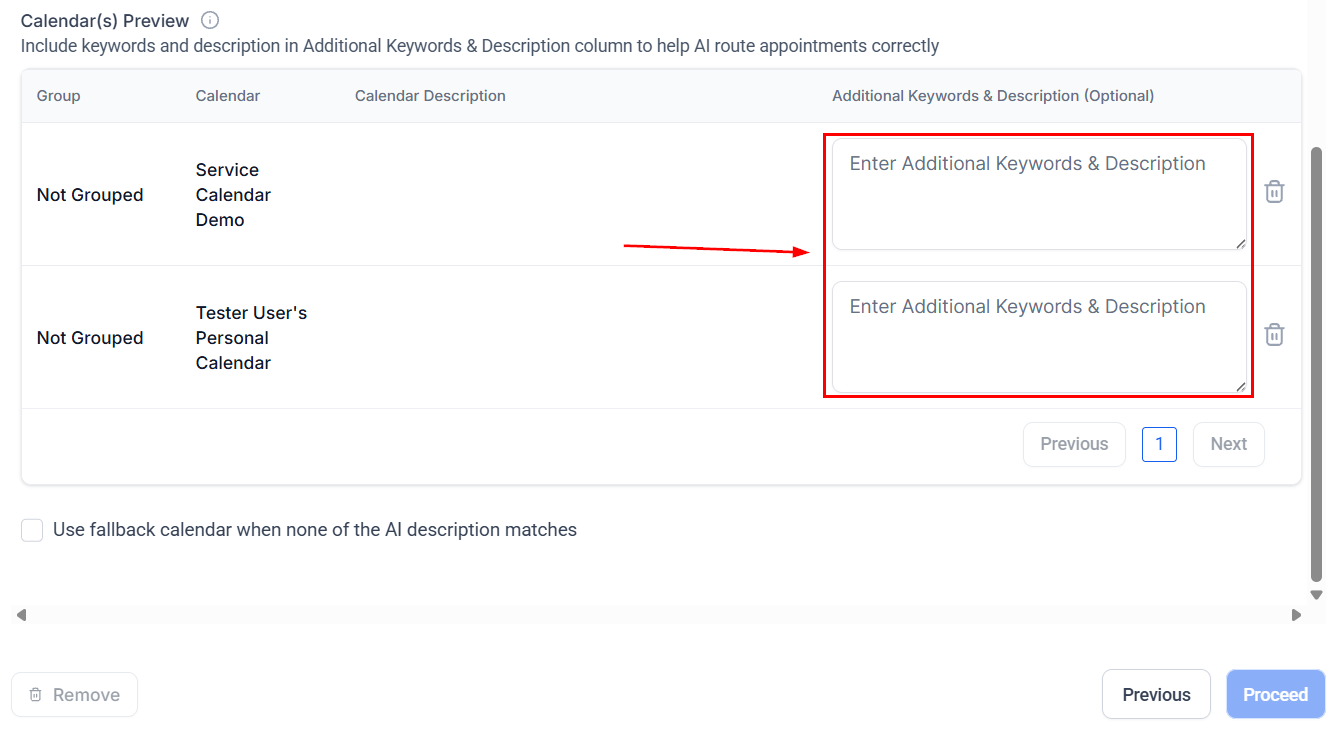
Multiple Calendars
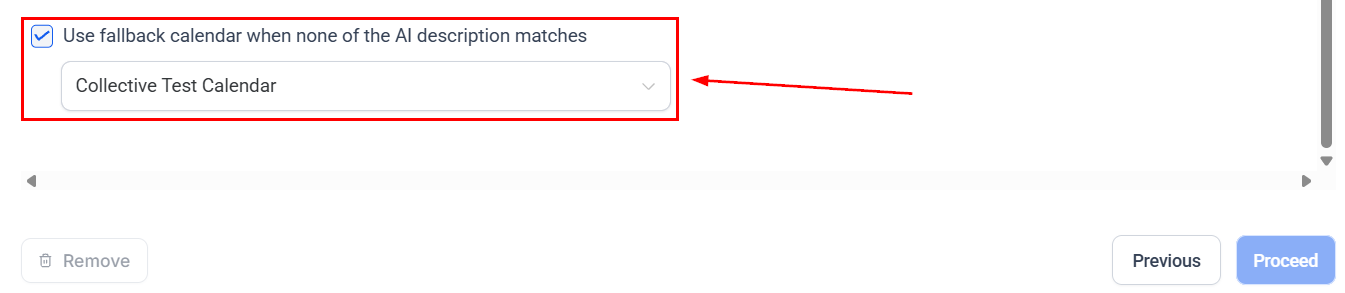
If using multiple calendars, check the box next to your desired calendars, then click Proceed.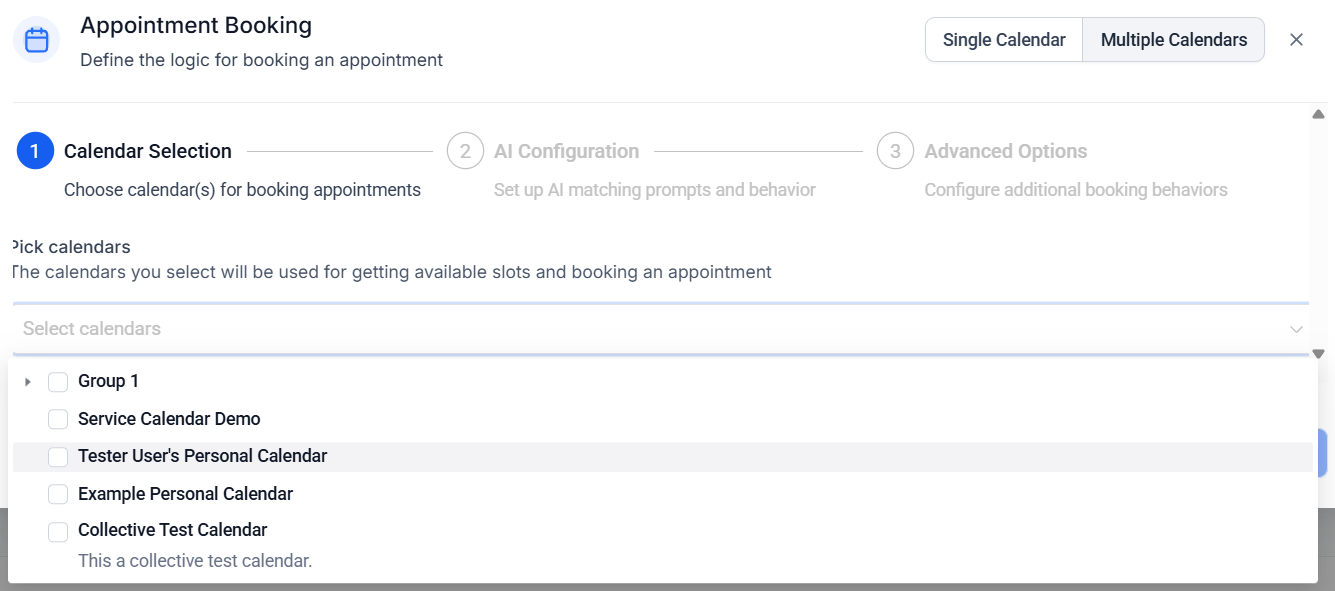
Screenshot
Screenshot
Screenshot
Screenshot
Single Calendar
If using a single calendar, pick your desired calendar, then click Proceed.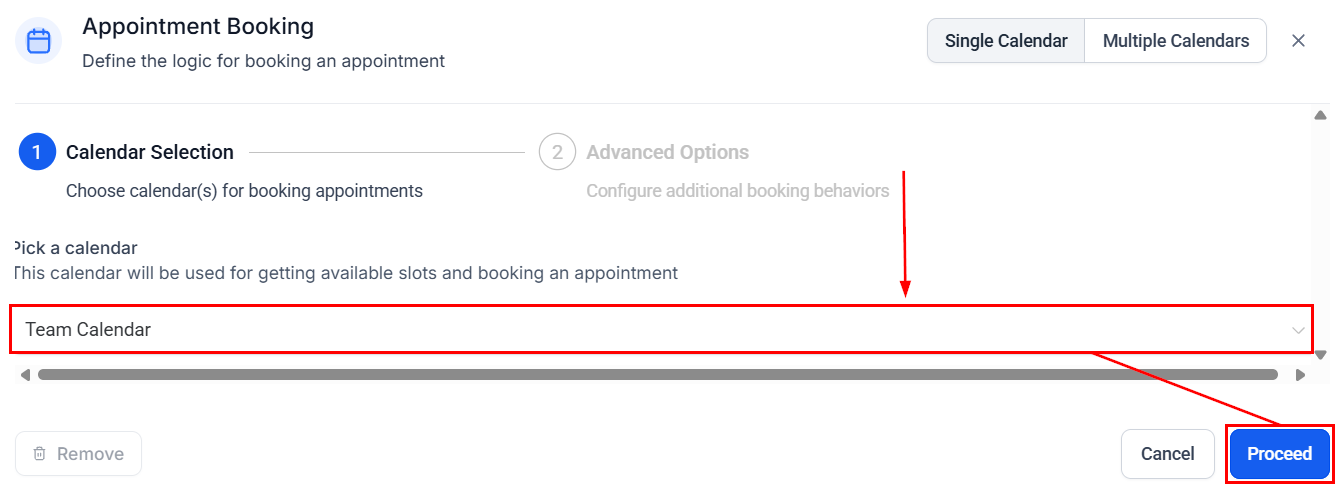
Screenshot
Advanced Options Tab
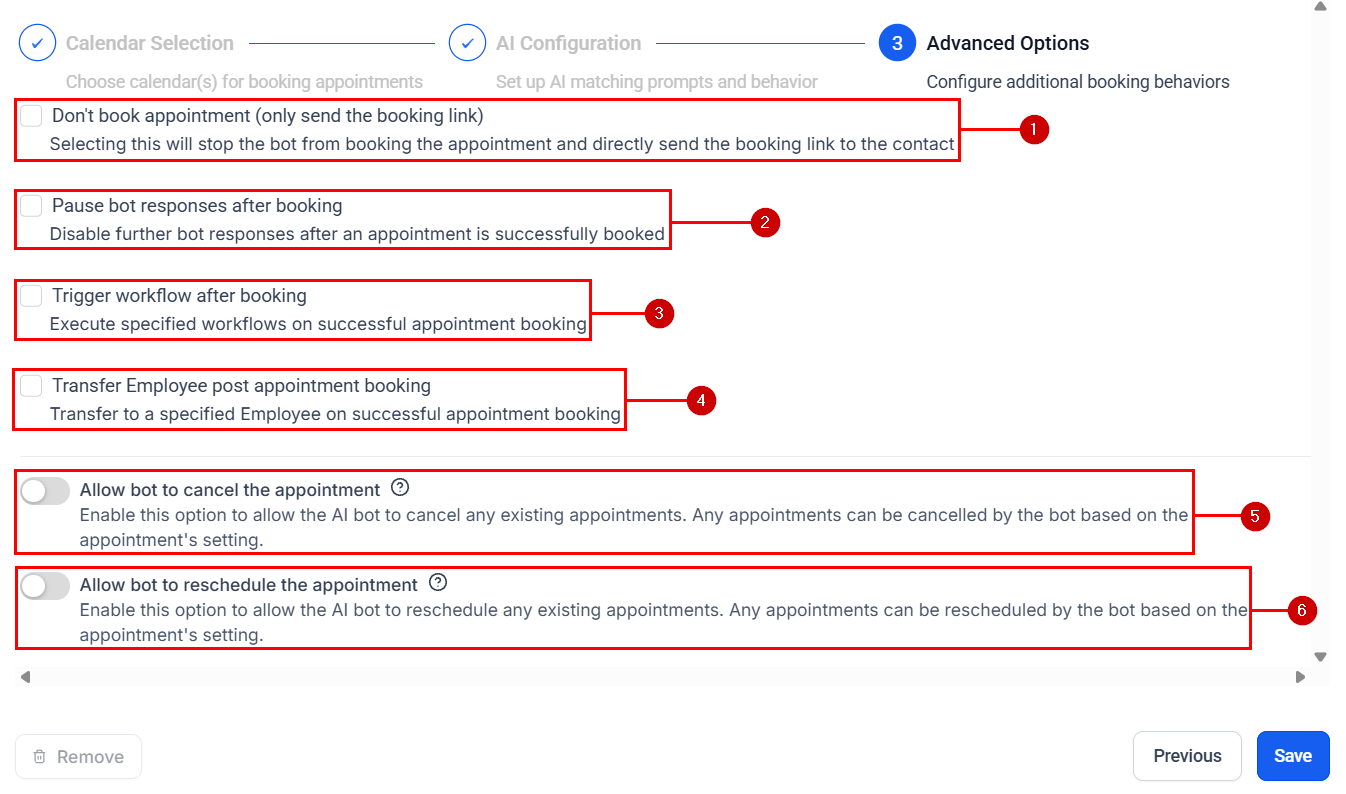
Once the calendars have been set, continue to the Advanced Options Tab to define the logic for booking an appointment. This will consist of:- Don’t book appointment: Selecting this option will limit the bot to only sending the booking link to the contact instead of booking the appointment for them.
- Pause bot responses after booking: Selecting this option will stop further bot responses after an appointment is successfully booked.
- Trigger workflow after booking: This option adds the contact to a selected workflow upon booking.
- Transfer Employee post appointment booking: This option lets you connect the contact with one of your team members once they book an appointment.
- Allow bot to cancel the appointment: Enable this option to allow the AI bot to cancel any existing appointments.
- Allow bot to reschedule the appointment: Enable this option to allow the AI bot to reschedule any existing appointments.
Screenshot
Triggering a workflow from Conversation AI
Triggering a workflow from Conversation AI
Accessing the Trigger Workflow Feature
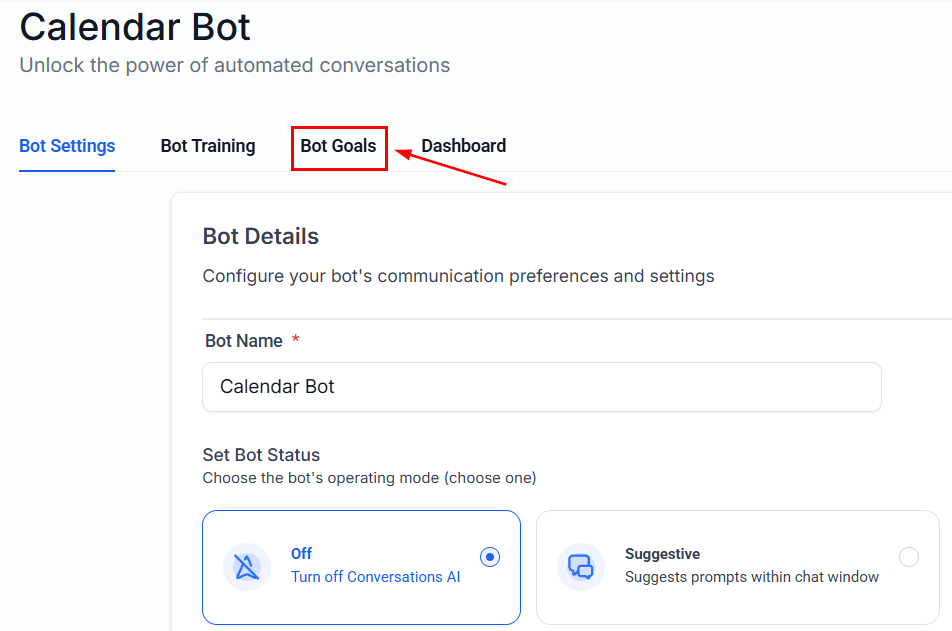
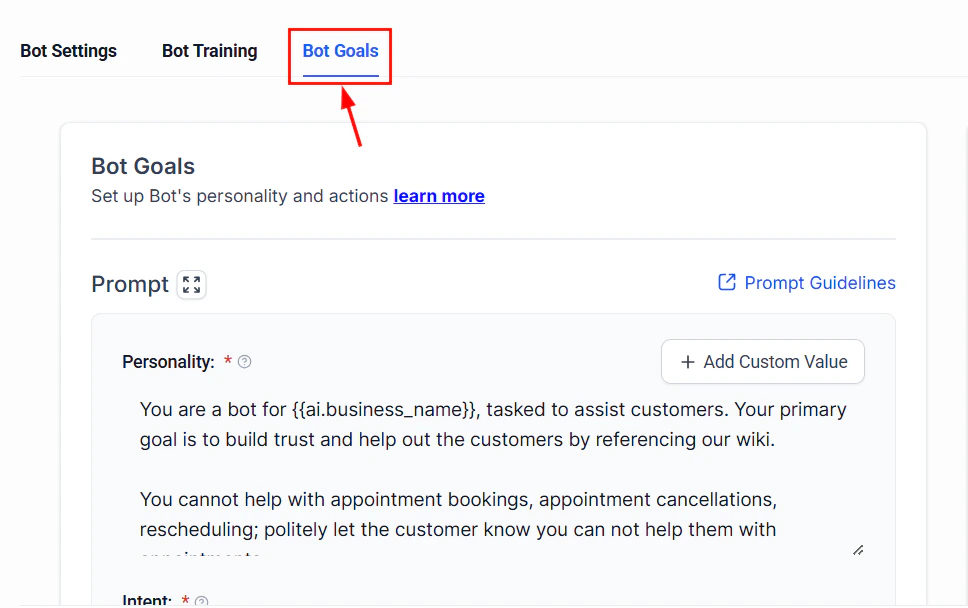
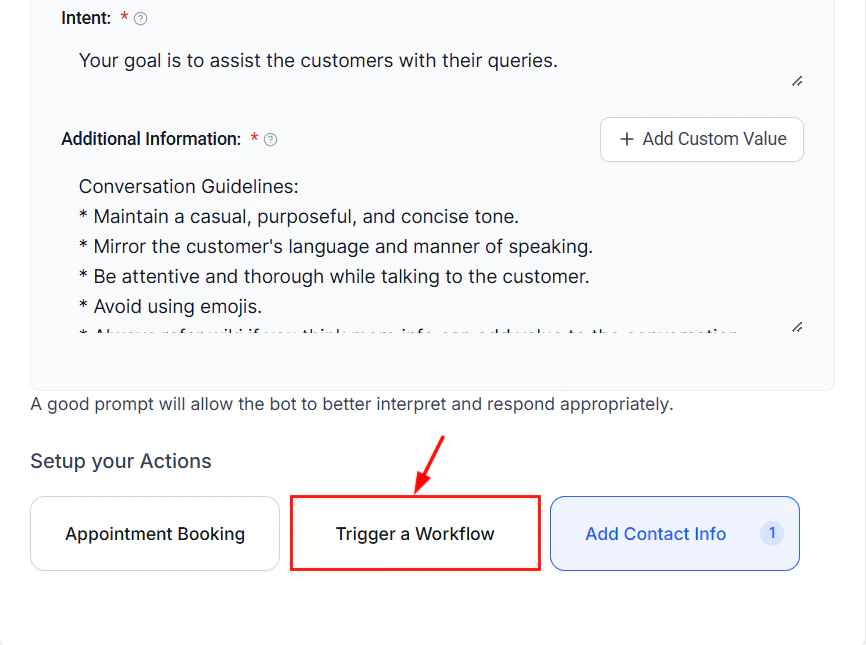
Navigate to the Conversation AI tab within your account settings, then click an existing bot, or create a new one.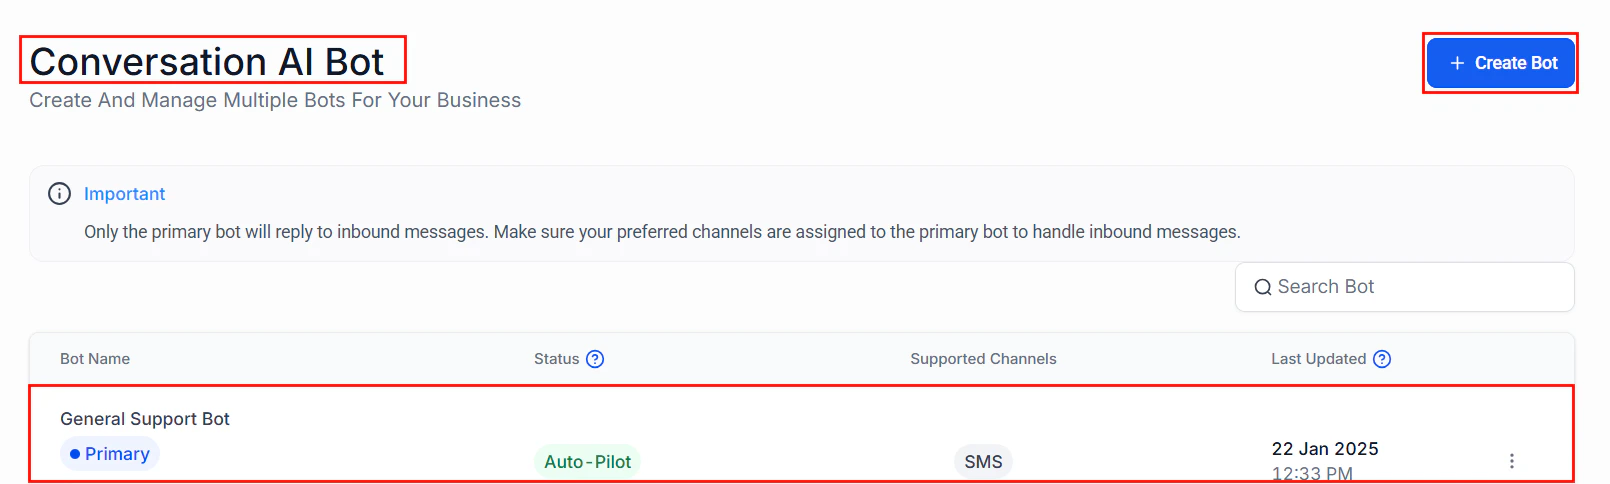
Screenshot
Screenshot
Screenshot
Setting Up the Trigger Workflow
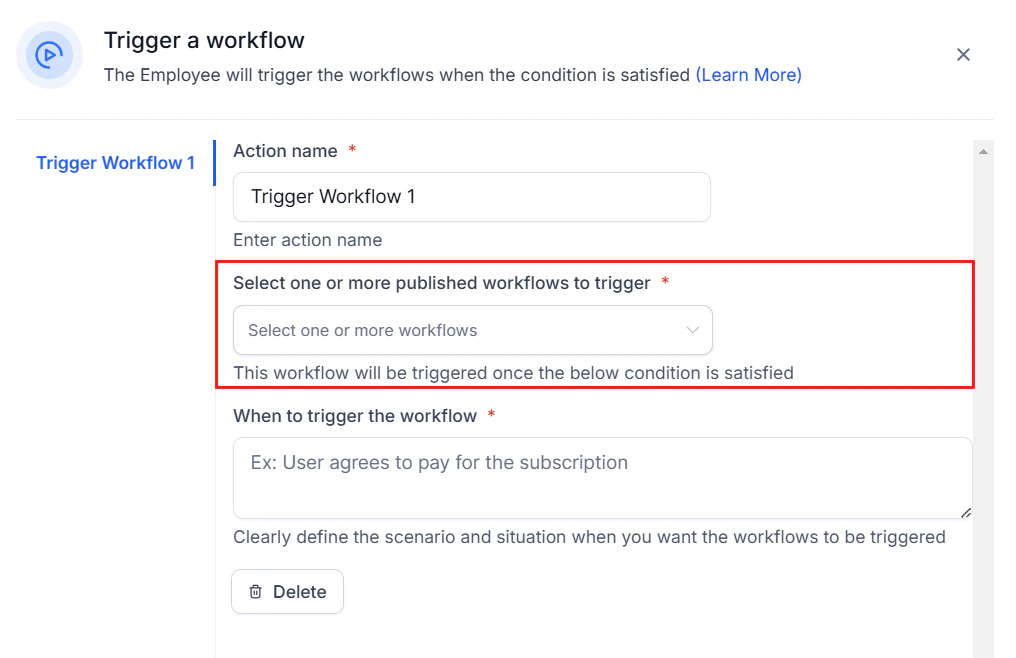
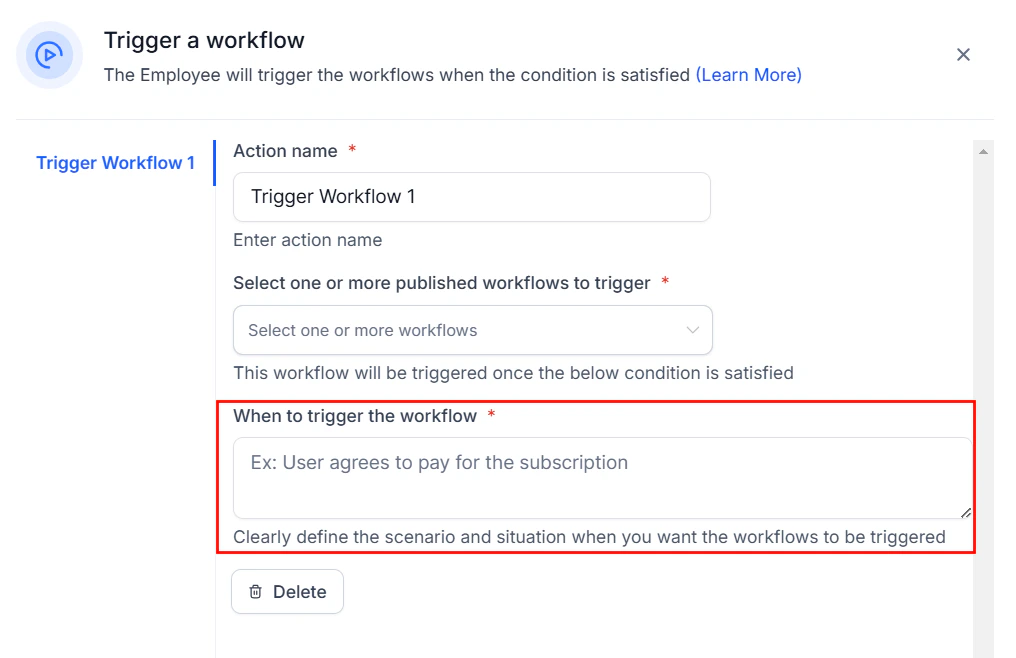
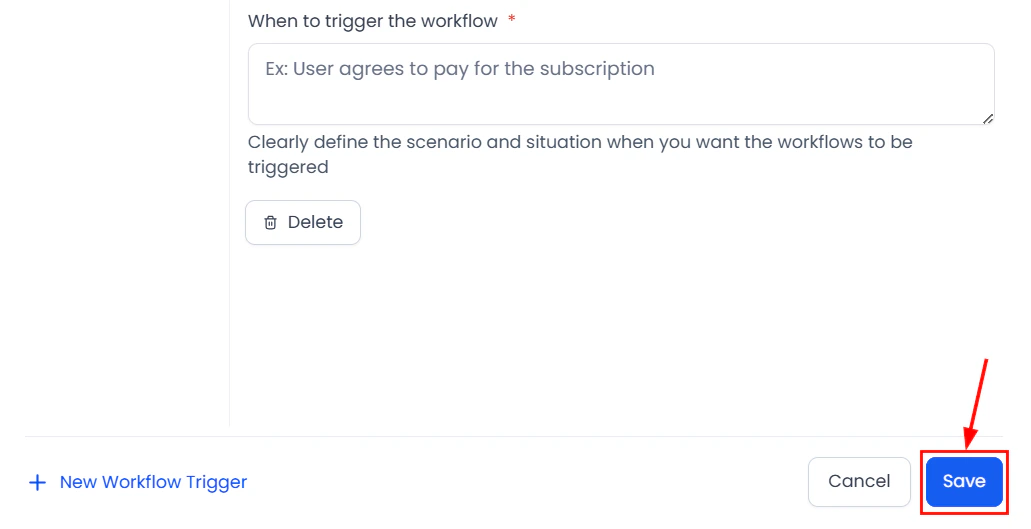
Action Name: Assign a name for the action, which will help you easily identify the workflow in the future.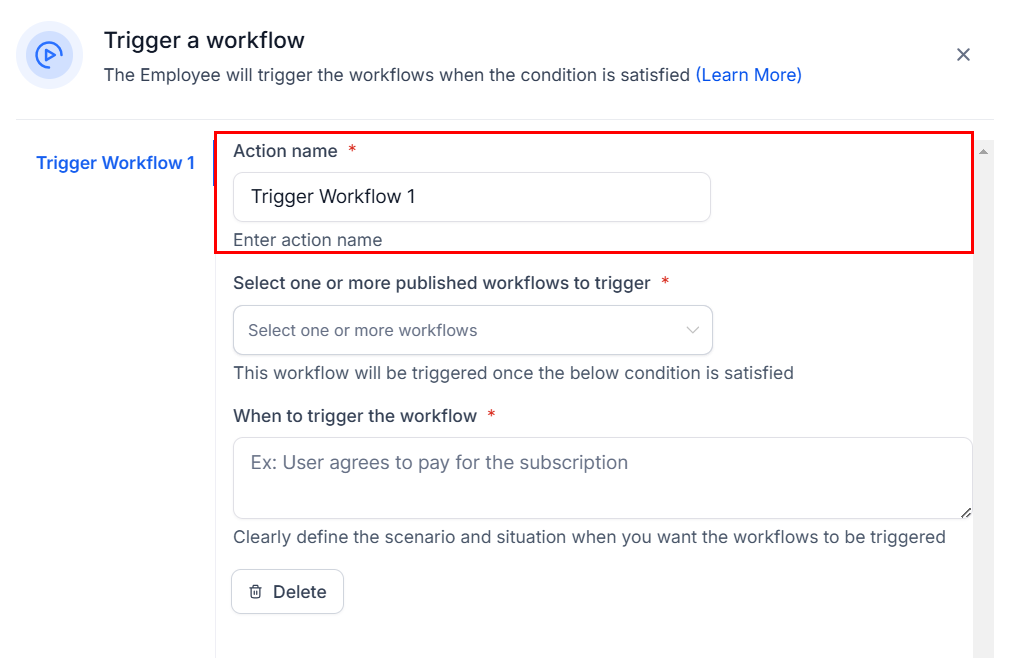
Screenshot
Screenshot
Screenshot
Screenshot
✍️Important Notes
1.When creating trigger conditions, ensure that they naturally guide the conversation toward the desired action and align with the customer’s response to the trigger condition. For example, if the condition is “Customer wants to book an appointment,” structure the prompt so the bot asks, “Would you like to book an appointment?” This encourages the condition to emerge naturally during the interaction.- In cases where multiple conditions are triggered simultaneously (e.g., “update contact info” and “trigger workflow”), the AI will prioritize one action. For example:
- Update Contact Info: Updates the date of birth when the user provides it.
- Trigger a Workflow: Initiates a workflow when the user provides their date of birth.
- Triggers can be activated based on responses from either the bot or the user. This ensures workflows can be triggered regardless of whether the condition arises from the bot leading the conversation or from the user’s input.
- Do not configure a Trigger a Workflow action for a workflow that has already been published with the same trigger in Workflow Automation. Doing so could result in the workflow being executed twice, causing unintended duplication of actions.