

Choosing your agent type
The first decision you will make is whether your agent handles inbound calls, outbound calls, or both. This choice affects the configuration options available to you and how the agent behaves during conversations.- Inbound agents answer calls from customers who dial your business number. Common use cases include reception, customer support, and after-hours answering.
- Outbound agents place calls on your behalf. Common use cases include appointment reminders, lead follow-ups, and satisfaction surveys.
Appointment booking in action during a Voice AI call
Select the calendar and time slot preferences for appointment booking
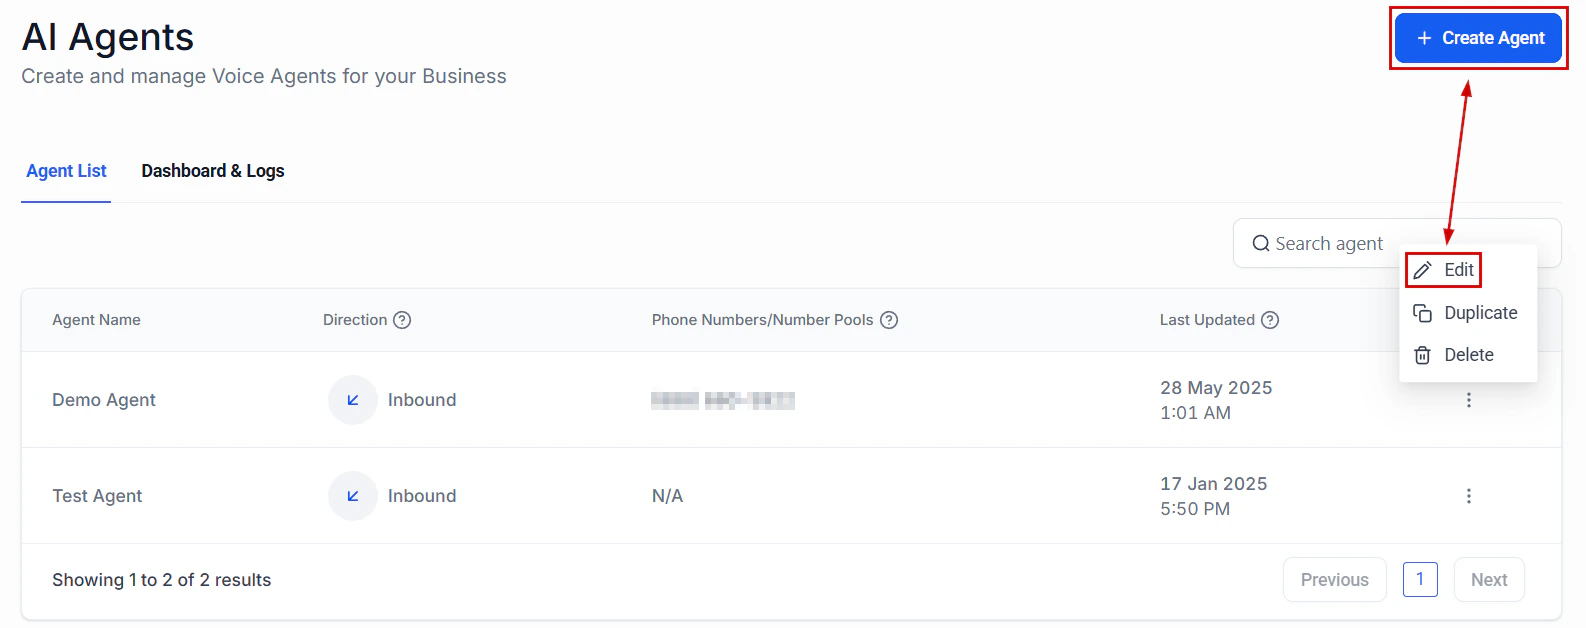
Step-by-step agent creation
Navigate to Voice AI

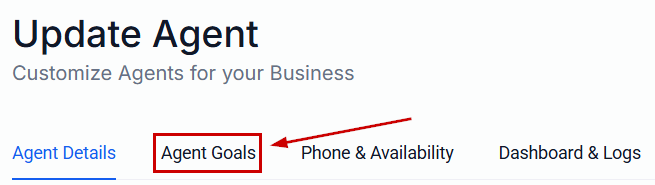
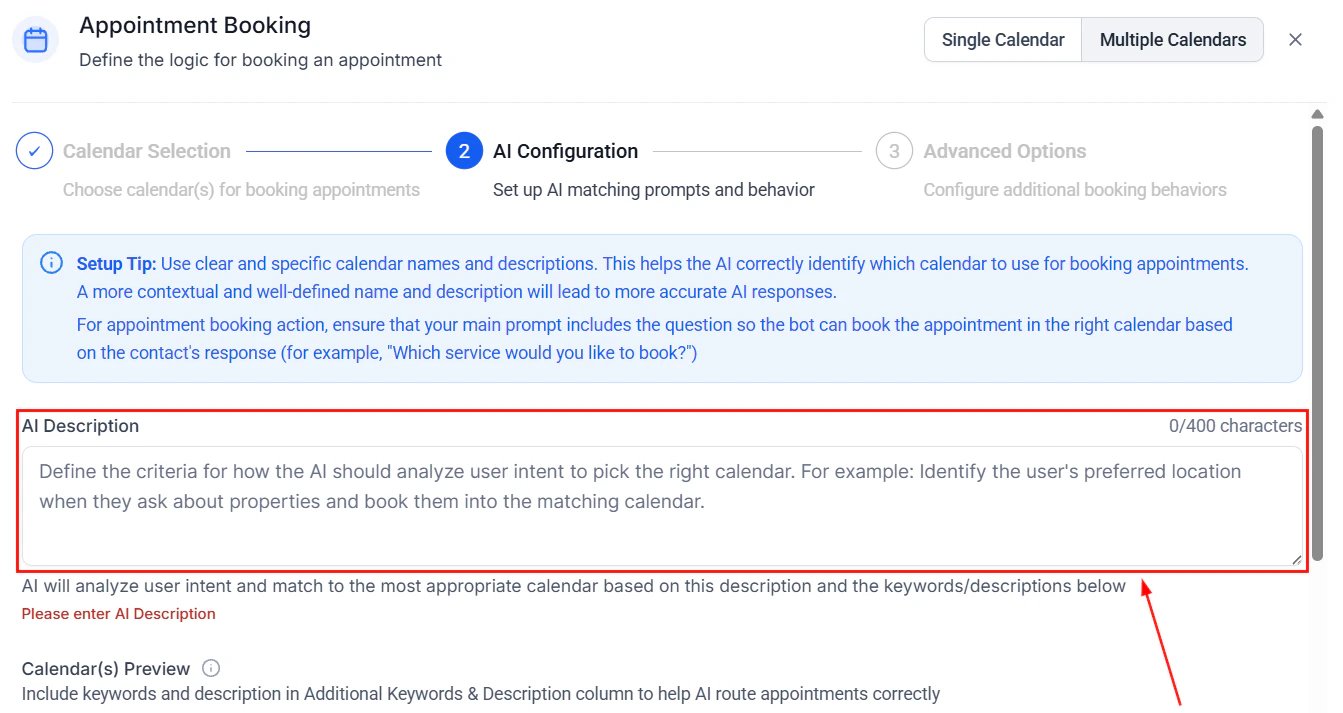
Voice AI agent setup with appointment booking capabilities
Name your agent and choose a direction
Select a voice
- Brand alignment — Pick a voice that matches your brand personality. A law firm may prefer a calm, measured tone, while a fitness studio might choose something more energetic.
- Clarity — Some voices perform better for technical or medical terminology. Test a few options with your specific vocabulary.
- Speed — Each voice has a natural cadence. You can adjust speaking speed in advanced settings, but starting with a voice that naturally matches your desired pace produces better results.
Choose a language
Assign a phone number
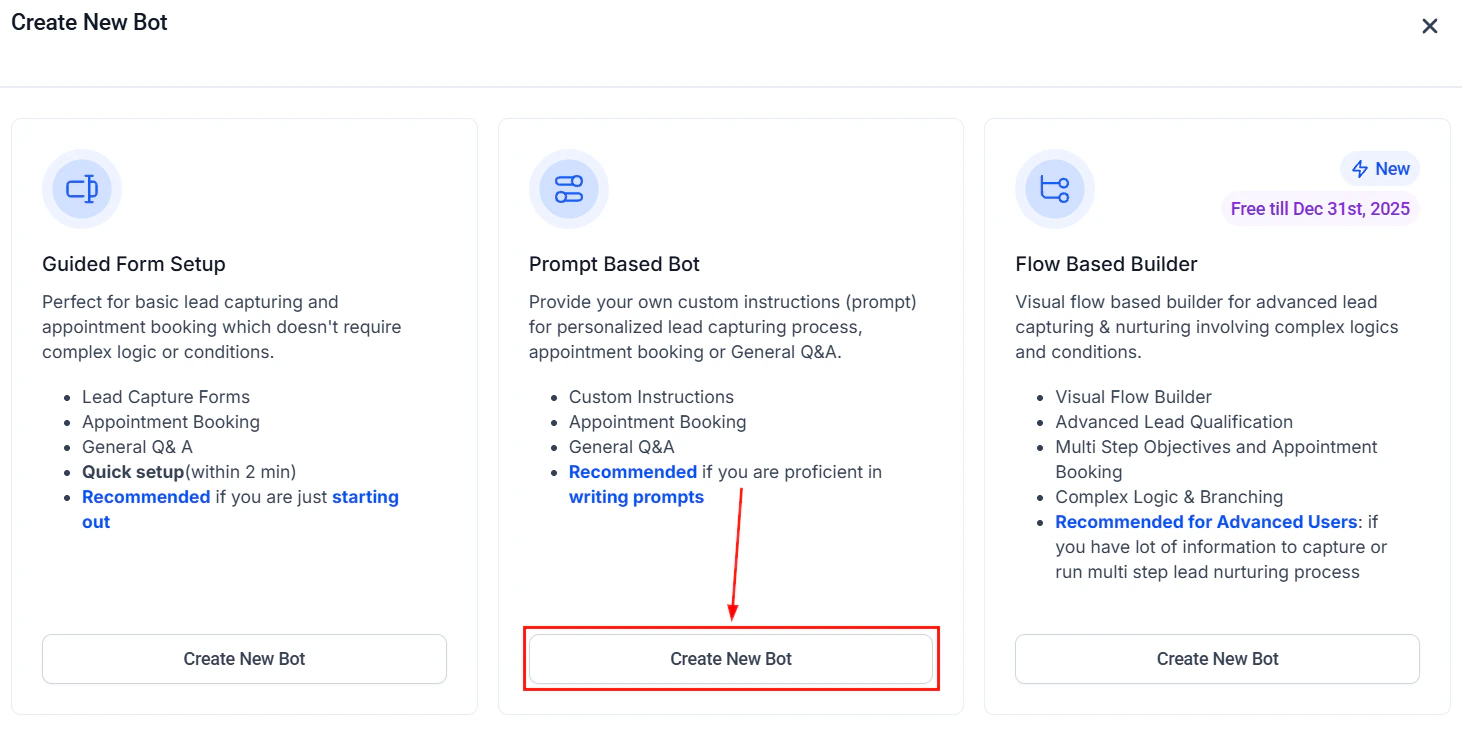
Write your agent prompt
Basic mode
Basic mode provides a structured form where you fill in key fields:- Agent role — A short description like “You are a friendly receptionist for Sunrise Dental.”
- Business information — Key facts about your business (hours, location, services).
- Greeting message — What the agent says when it first answers or the caller picks up.
- Objective — The primary goal of the call (book an appointment, answer questions, collect information).
Advanced mode
Advanced mode gives you a single freeform text area where you write a complete system prompt. This provides full control over the agent’s personality, conversation flow, decision-making logic, and response style.Advanced mode is recommended when you need:- Complex branching conversation flows
- Specific objection handling scripts
- Detailed persona instructions
- Custom escalation rules
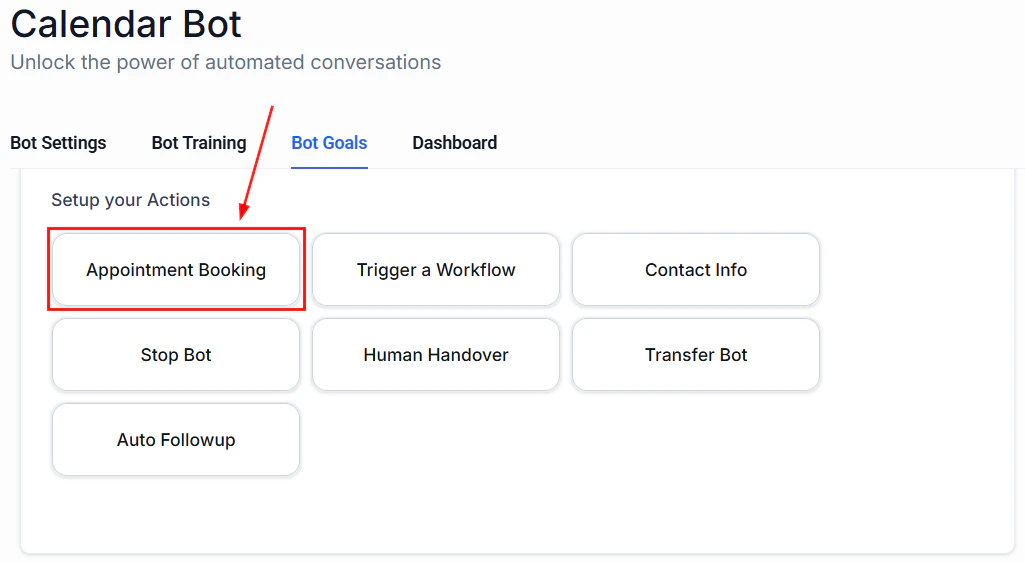
Configure actions
- Book appointment — Check calendar availability and schedule meetings. See Voice AI appointment booking.
- Transfer call — Hand off to a human team member. See Call escalation and transfer.
- End call — Gracefully wrap up the conversation.
- Send SMS — Text the caller a link, confirmation, or follow-up message.
- Add to workflow — Enroll the contact in an automation workflow after the call.
- Update contact — Save information collected during the call to CRM custom fields.
Select the Book Appointment action to enable calendar booking during calls
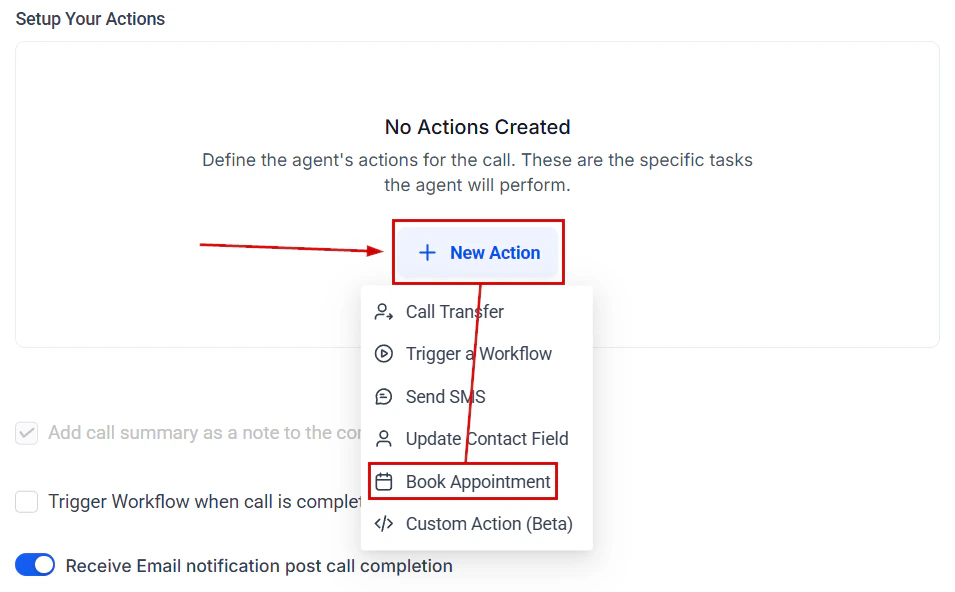
Add the Book Appointment action to your Voice AI agent
Configure appointment booking action with calendar selection and availability rules
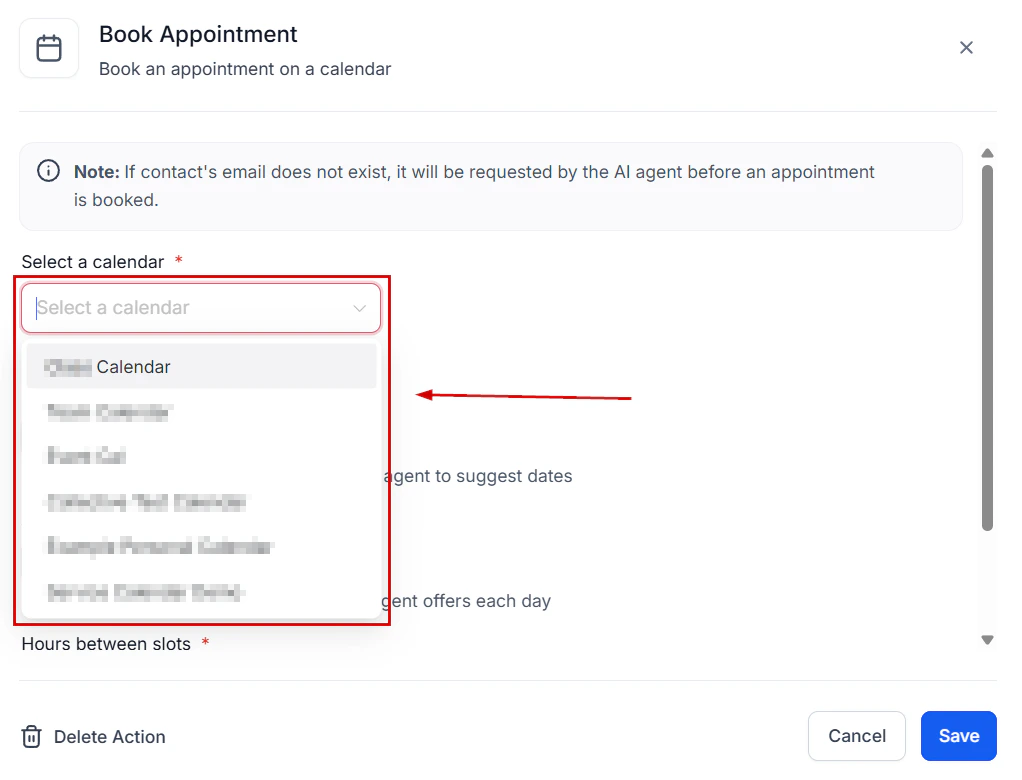
Select the calendar for appointment booking
Set advanced options
- Call timeout — How long the phone rings before going to voicemail or failover (default: 30 seconds for inbound).
- Max call duration — Set a maximum length to prevent unexpectedly long calls (recommended: 10-15 minutes for most use cases).
- Silence threshold — How long the agent waits during silence before prompting the caller (default: 5 seconds).
- Recording — Enable or disable call recording. Recorded calls are stored in the call logs for review.
- Transcription — Enable real-time transcription for all calls (recommended for debugging and quality assurance).
- Working hours — Define when the agent is active. Outside of working hours, calls route to voicemail or a fallback action.
Save and test your agent
- Does the greeting sound natural?
- Does the agent understand your questions?
- Does it correctly perform actions (booking, transferring)?
- Is the conversation flow logical?
After creation: what to do next
Once your agent is live, there are several important next steps to ensure it performs well in production.Monitor early calls
Check your call logs daily for the first week. Listen to recordings and read transcripts to identify areas where the agent struggles. Common early adjustments include:- Adding FAQ answers the agent does not yet know
- Refining the greeting to set better expectations
- Adjusting the prompt to reduce unnecessary verbosity
Connect your calendar
If your agent books appointments, make sure your calendar integration is properly configured and the correct calendar is selected. See Voice AI appointment booking for setup instructions.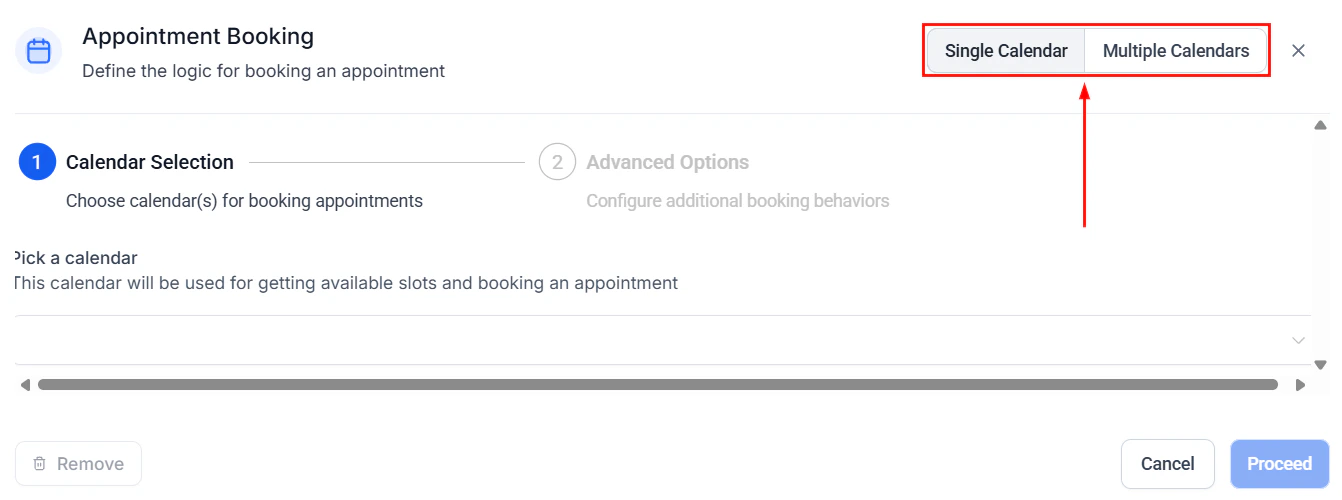
Select the calendar and configure availability for appointment booking
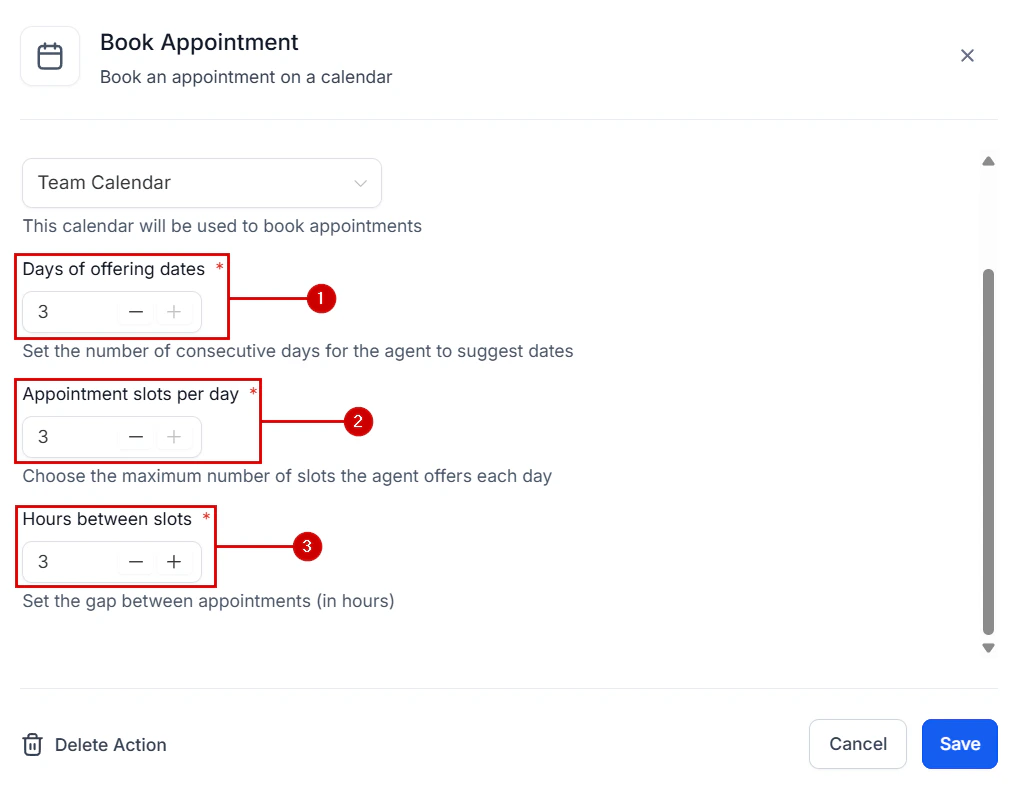
Configure available days, time slots, and gap between appointments
Set up escalation paths
No AI agent can handle every situation. Configure call escalation rules so that complex or sensitive calls are routed to the right human team member. See Call escalation and transfer.
Appointment booking confirmation shown during a live Voice AI call
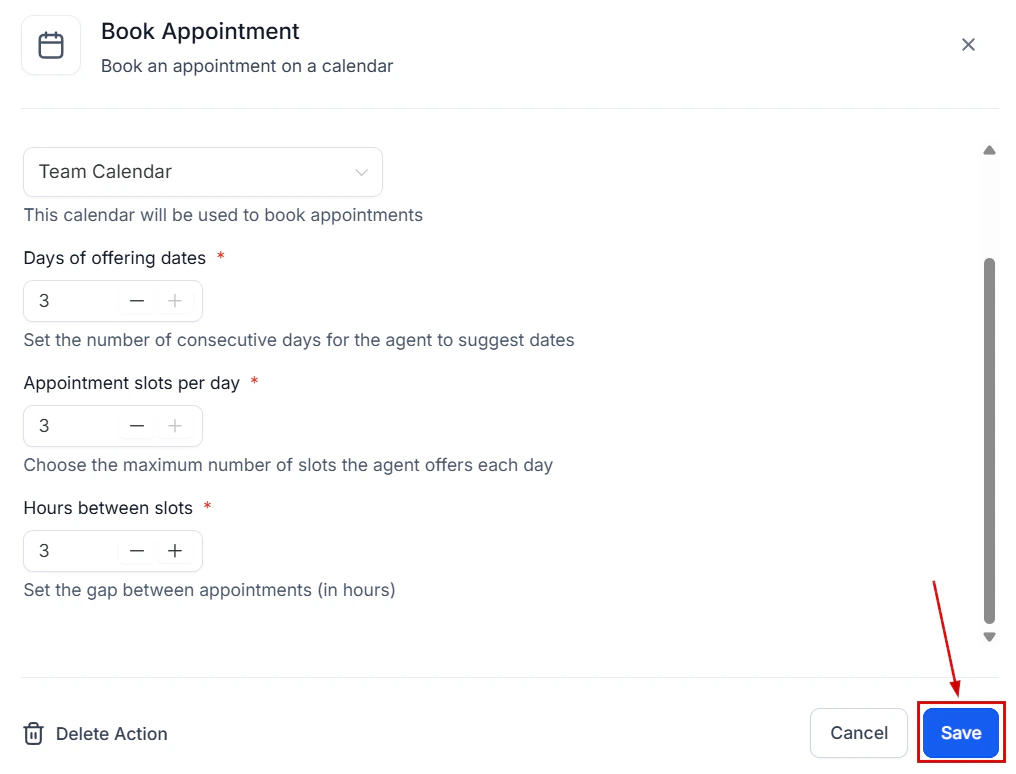
Save your appointment booking configuration
Add the website widget
Let website visitors call your Voice AI agent directly from their browser without dialing a phone number. See Voice AI widget for websites.Tips for success
Start simple and iterate
Start simple and iterate
Use realistic test scenarios
Use realistic test scenarios
Keep your prompt concise
Keep your prompt concise
Appointment booking action settings showing buffer time and confirmation message options
Update regularly
Update regularly