

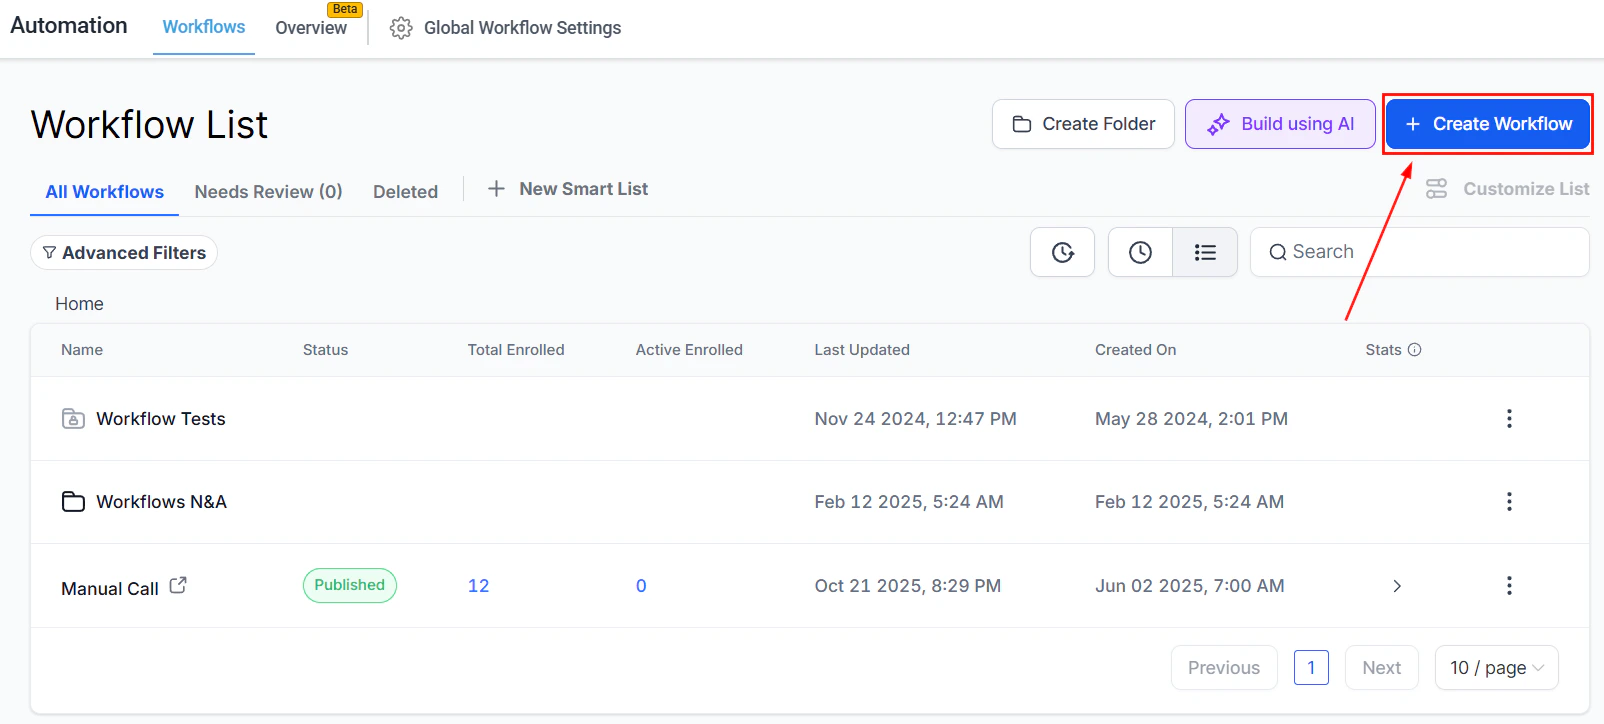
Trigger Links — list of active trigger links with click tracking and analytics
How trigger links work
- A contact receives an email or SMS containing a trigger link
- When the contact clicks the link, the HoopAI Platform records the click event
- Any workflow with a “Trigger Link Clicked” trigger activates automatically
- The workflow can tag the contact, send follow-ups, update a pipeline stage, and more
Inserting a trigger link into an email button — select from the link URL dropdown in the email builder
Using trigger links in email campaigns
Create a trigger link
Add a button element to your email
Set the button action to a trigger link
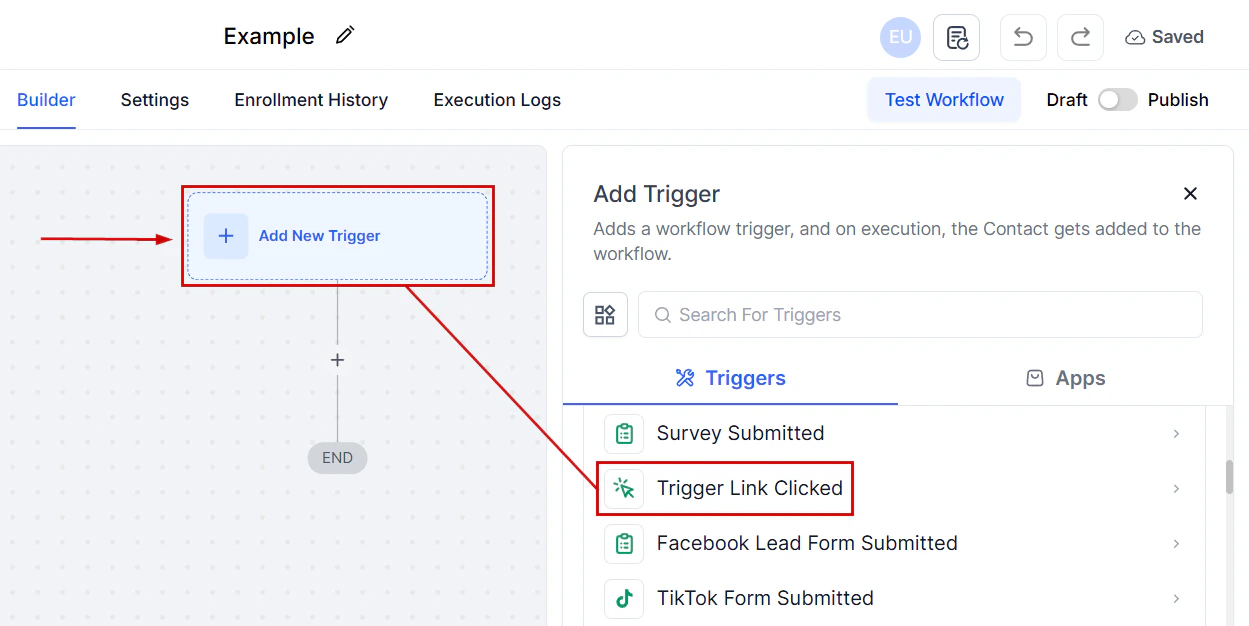
Build the automation workflow
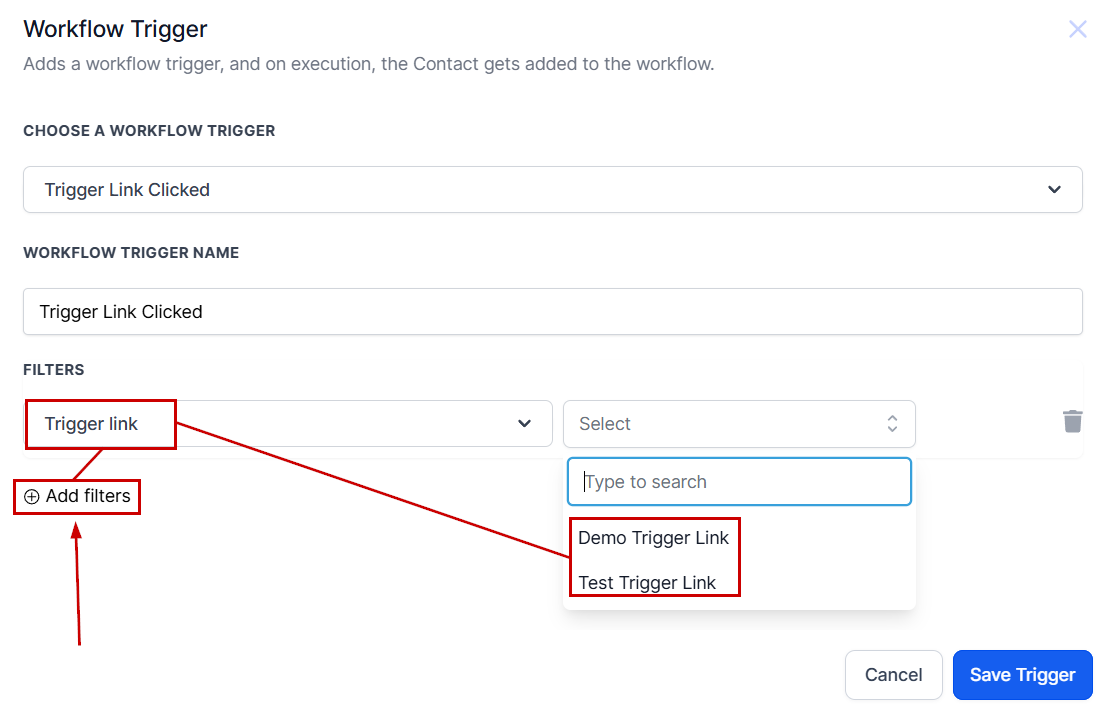
- Add the trigger “Trigger Link Clicked”
- Click Add Filter, set the filter to Trigger Link, and select your link
- Click Save Trigger
- Add the workflow actions (tag contact, send follow-up, update opportunity, etc.)
Send or schedule your campaign
Creating a trigger link — name it and set the destination URL for click tracking and workflow automation
Example: Follow-up automation with a trigger link
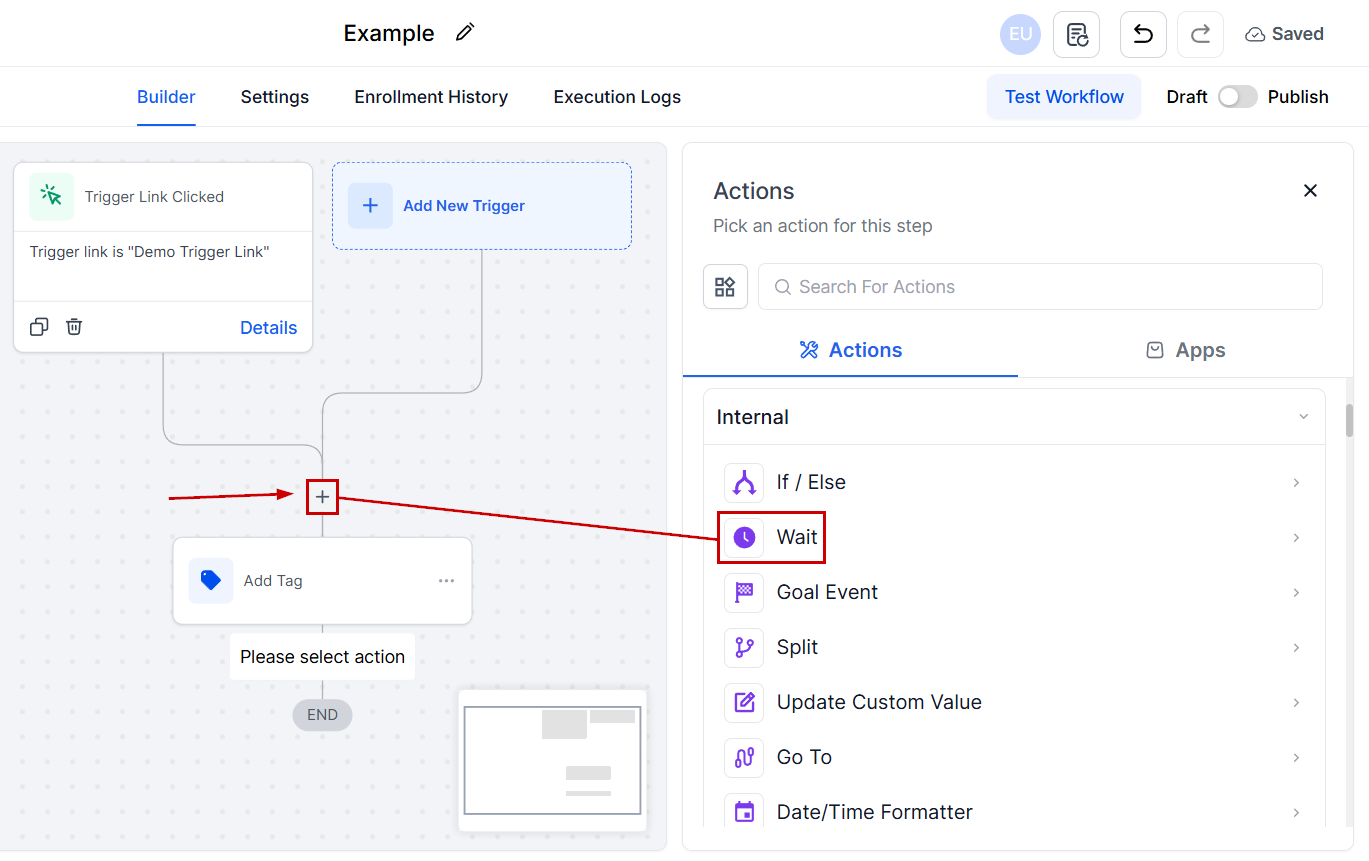
A common pattern is to send an email with a trigger link and follow up with contacts who click it but do not complete a desired action (such as booking a call or filling out a form).Set up the trigger link workflow
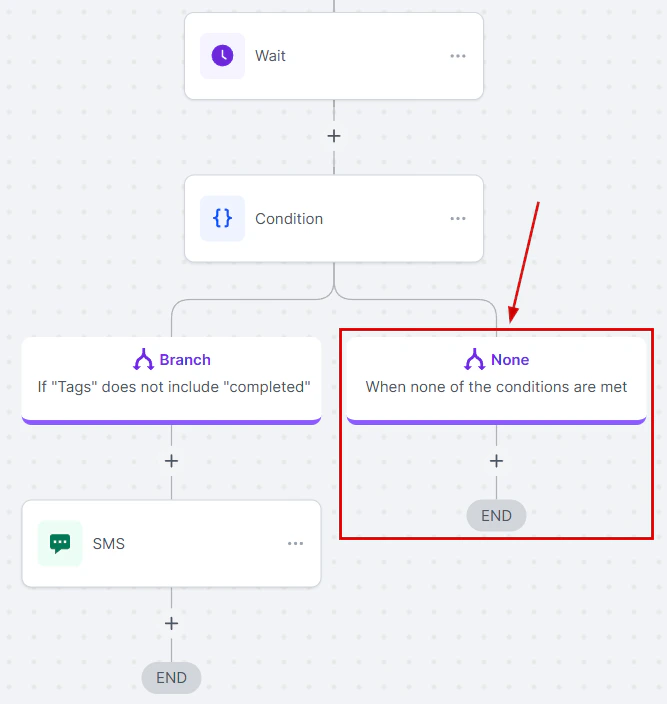
Add a Wait action
Add an If/Else condition
- Yes (has tag) → Remove from workflow (no follow-up needed)
- No (no tag) → Proceed to follow-up messages
Add follow-up actions
Create a completion tag workflow
- Triggers when the desired action is completed (e.g., Form Submitted)
- Adds the completion tag to the contact
Trigger link analytics — click counts, contact engagement, and workflow trigger history
Workflow automation with trigger links
Trigger link workflow — manage trigger links, view click tracking, and automate follow-up actions

Trigger link tracking — workflow automation that fires when a contact clicks the link
Best practices
Personalize your follow-ups
Personalize your follow-ups
Use descriptive names
Use descriptive names
Avoid over-messaging
Avoid over-messaging
Monitor and adjust
Monitor and adjust
Frequently asked questions
Can I use trigger links in SMS campaigns?
Can I use trigger links in SMS campaigns?
How long should I wait before sending a follow-up?
How long should I wait before sending a follow-up?
What if a contact clicks the link but does not complete the action?
What if a contact clicks the link but does not complete the action?
Can I use the same trigger link in multiple campaigns?
Can I use the same trigger link in multiple campaigns?