

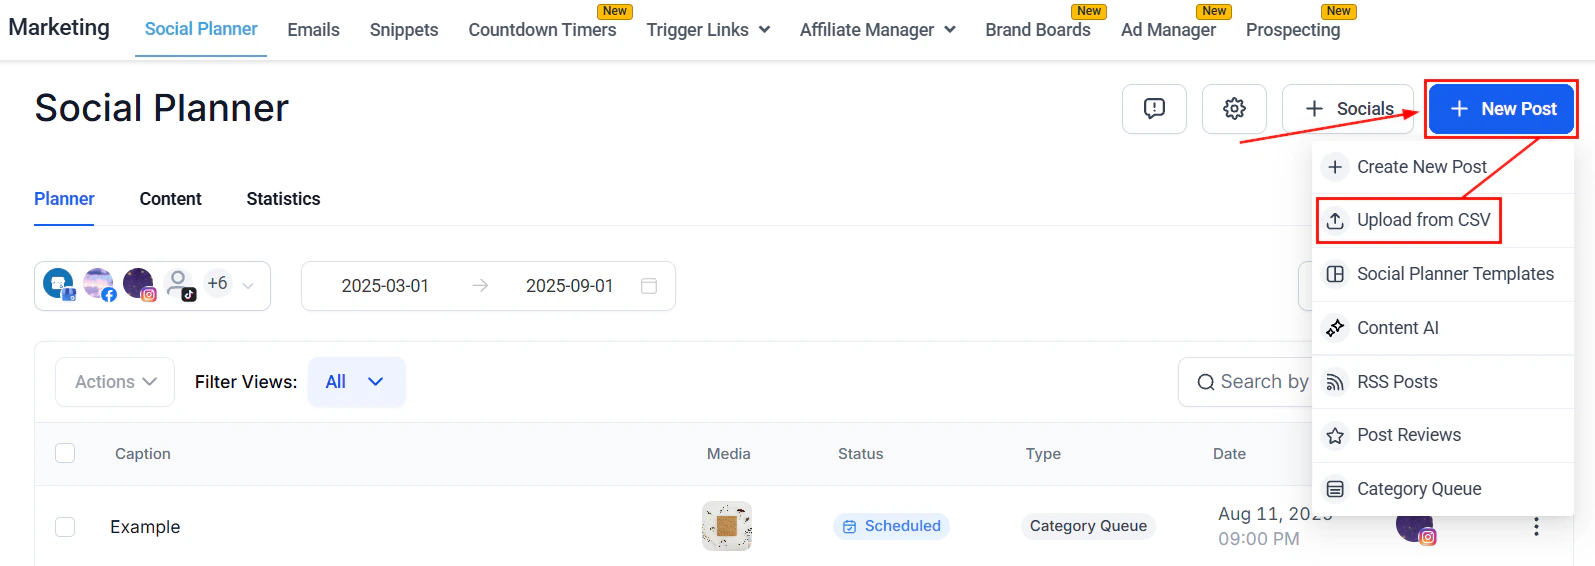
Bulk scheduling via CSV
Upload a CSV or XLSX file to schedule up to 90 posts at once — including platform-specific post types, watermarks, hashtags, and more.Open the bulk upload
Choose a format
- Basic Format — supports date, content, OG meta URL, image links, video links, and GIFs
- Advanced Format — adds platform-specific post types (Story, Reel, Shorts), watermarking, tags, categories, follow-up comments, and extended options for GMB, YouTube, TikTok, LinkedIn, and Pinterest
Download the sample file
Upload your file
Select posting accounts
Review and correct errors
Bulk CSV upload format selection
Hashtag groups
Create and save groups of up to 30 hashtags to apply consistently across posts, keeping your content strategy organized and efficient.Open the hashtag panel
Create a new hashtag group
Save the group
Apply saved groups to future posts
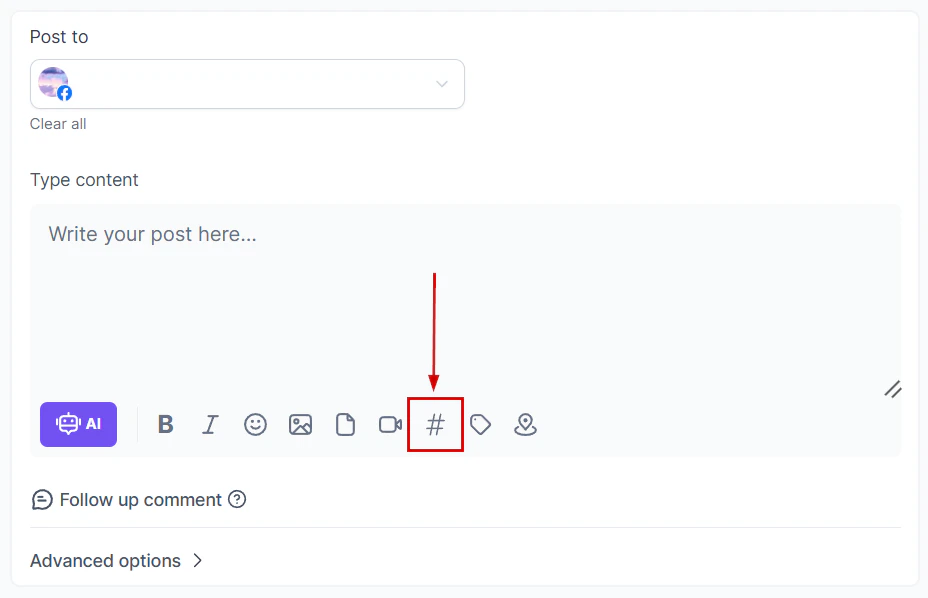
Creating a hashtag group in the Social Planner composer
RSS auto-posting
Automatically publish content from any RSS feed to your connected social accounts — ideal for blogs, news sites, and content-heavy businesses.Create an RSS post
Add the RSS feed URL
- WordPress: add
/feedto the end of the site URL - Tumblr: add
/rssto the URL - Blogger: add
feeds/posts/defaultto the URL - Medium: insert
/feed/before the publication name - YouTube: paste the channel URL into your RSS reader
Select social accounts
Configure the feed settings
- End with — add custom text, hashtags, or links appended to each post
- Frequency — set how often the feed is checked (from every 5 minutes to once a day)
- Posts per update — choose 1–5 posts to generate per feed check
- Initial RSS posts sync — check to fetch future posts automatically; uncheck to sync older posts instead
- Post content — toggle to include the RSS item description along with the title
Preview and create
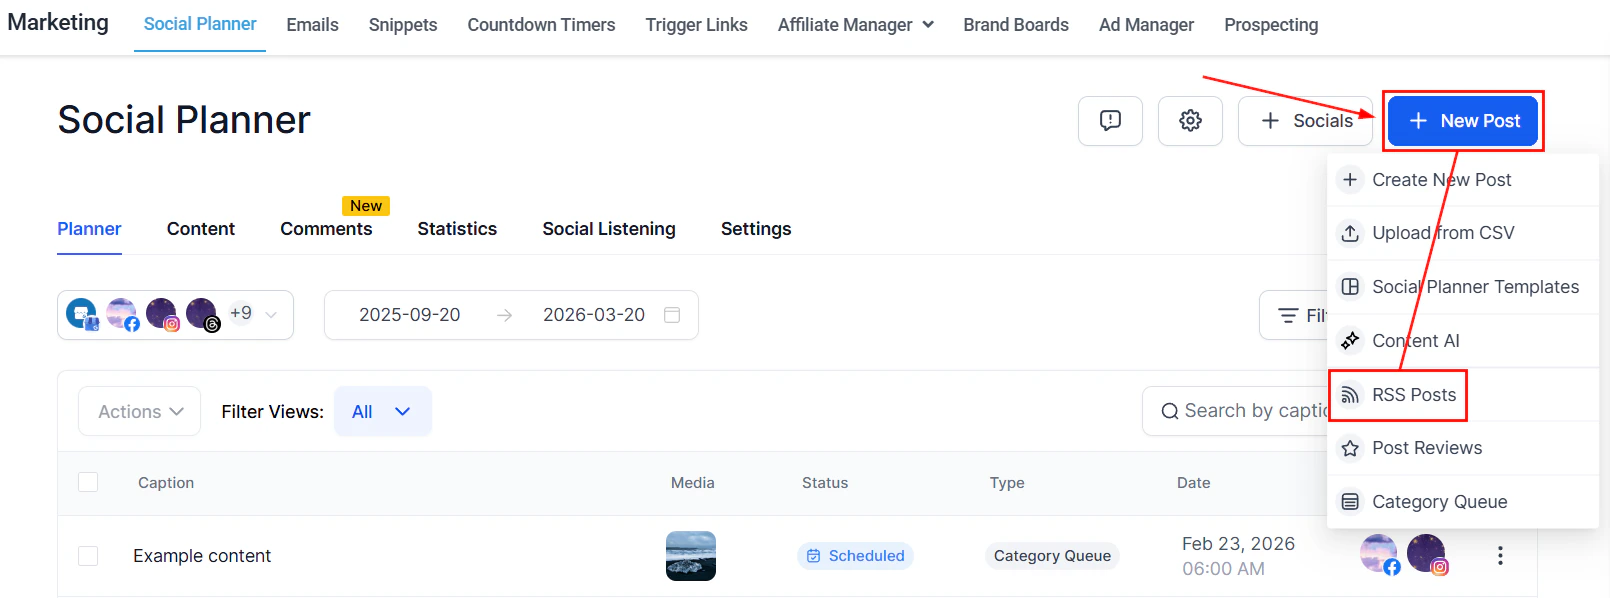
RSS auto-posting configuration in Social Planner
Recurring posts
Schedule posts to repeat automatically at your preferred frequency — daily, weekly, monthly, or yearly — without recreating them each time.Create your post
Choose Recurring Post
Configure the schedule
- Frequency — daily, weekly, monthly, or yearly
- Time — when the post goes live
- Date range — the period over which the post repeats
- For weekly: specify the day of the week
- For monthly: select the day of the month
- For yearly: select the month and day
Schedule
- In the List or Calendar view, click the three dots next to a post to edit a single instance without affecting others
- In the Content view, click the three dots on any post in the series to edit all instances at once
Evergreen content and category queues
Category queues let you organize posts into themed buckets that automatically cycle and republish, keeping your profiles active without constant content creation.Why use category queues
- Repurpose older content automatically, extending its lifespan
- Maintain consistent posting cadence during busy periods
- Reinforce brand messaging by cycling key content
- Algorithms that favor recent content will treat recycled posts as new
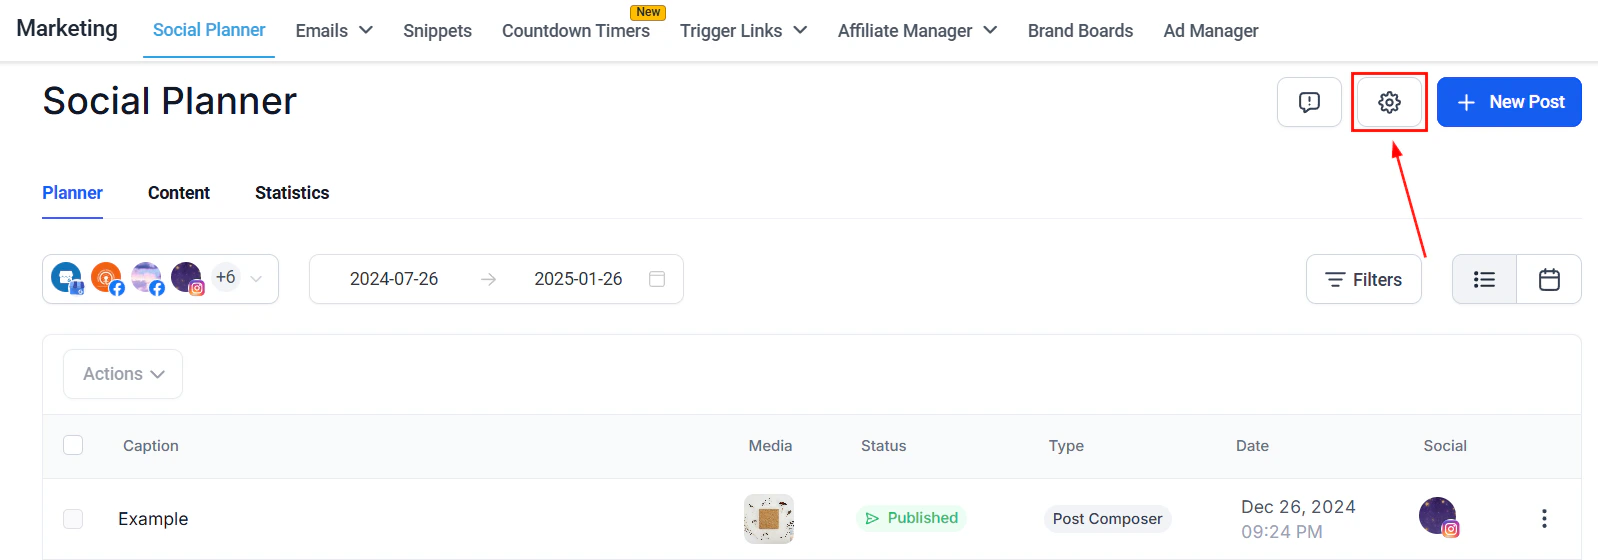
Creating categories
Open Social Planner settings
Add a new category
Name and color the category
Creating a new content category in Social Planner settings
Adding posts to categories
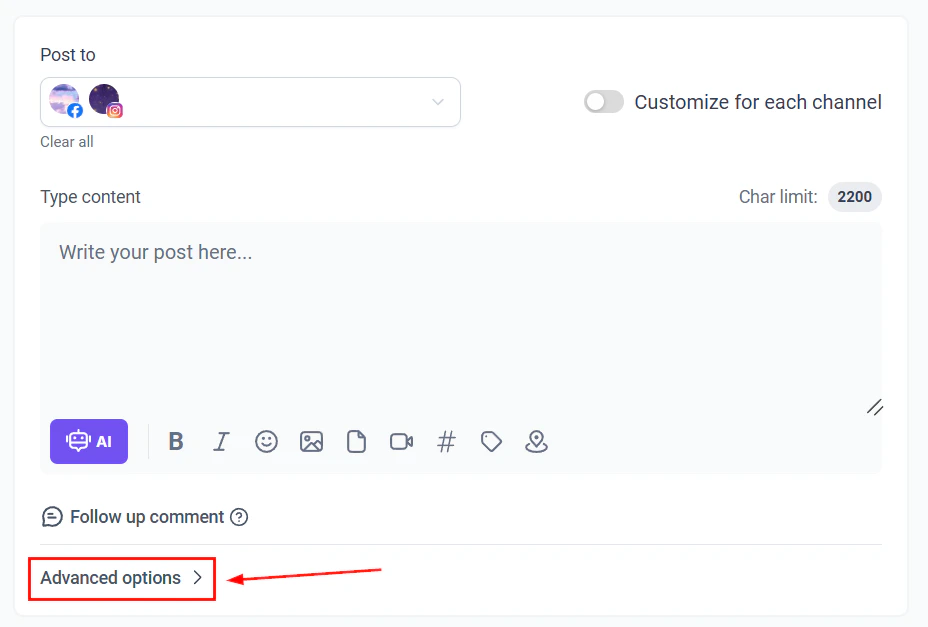
When creating or editing any post, scroll to Advanced Options and select the category to assign the post. Only one category can be selected per post. Alternatively, click Add to Queue in the post builder, select a category from the dropdown, and click Add to Queue.Running a category queue
Start a category queue
Select a category
Configure queue options
- Future Posts Queuing — automatically adds new posts assigned to this category to the queue
- Prioritize New Content — places newly added posts at the front of the queue so they publish first
Set the schedule
Review and activate
Category queue configuration with days and times
Image editor
Edit images directly within the Social Planner before publishing — no external tools needed.Accessing the image editor
Create a new post and add your image, then click the mini image thumbnail in the bottom-left of the composer. Select Edit to open the image editor.Editing tools
Crop
Crop
Filters
Filters
Adjustments
Adjustments
Text overlay
Text overlay
Stickers
Stickers
Brush
Brush
Undo and Redo
Undo and Redo
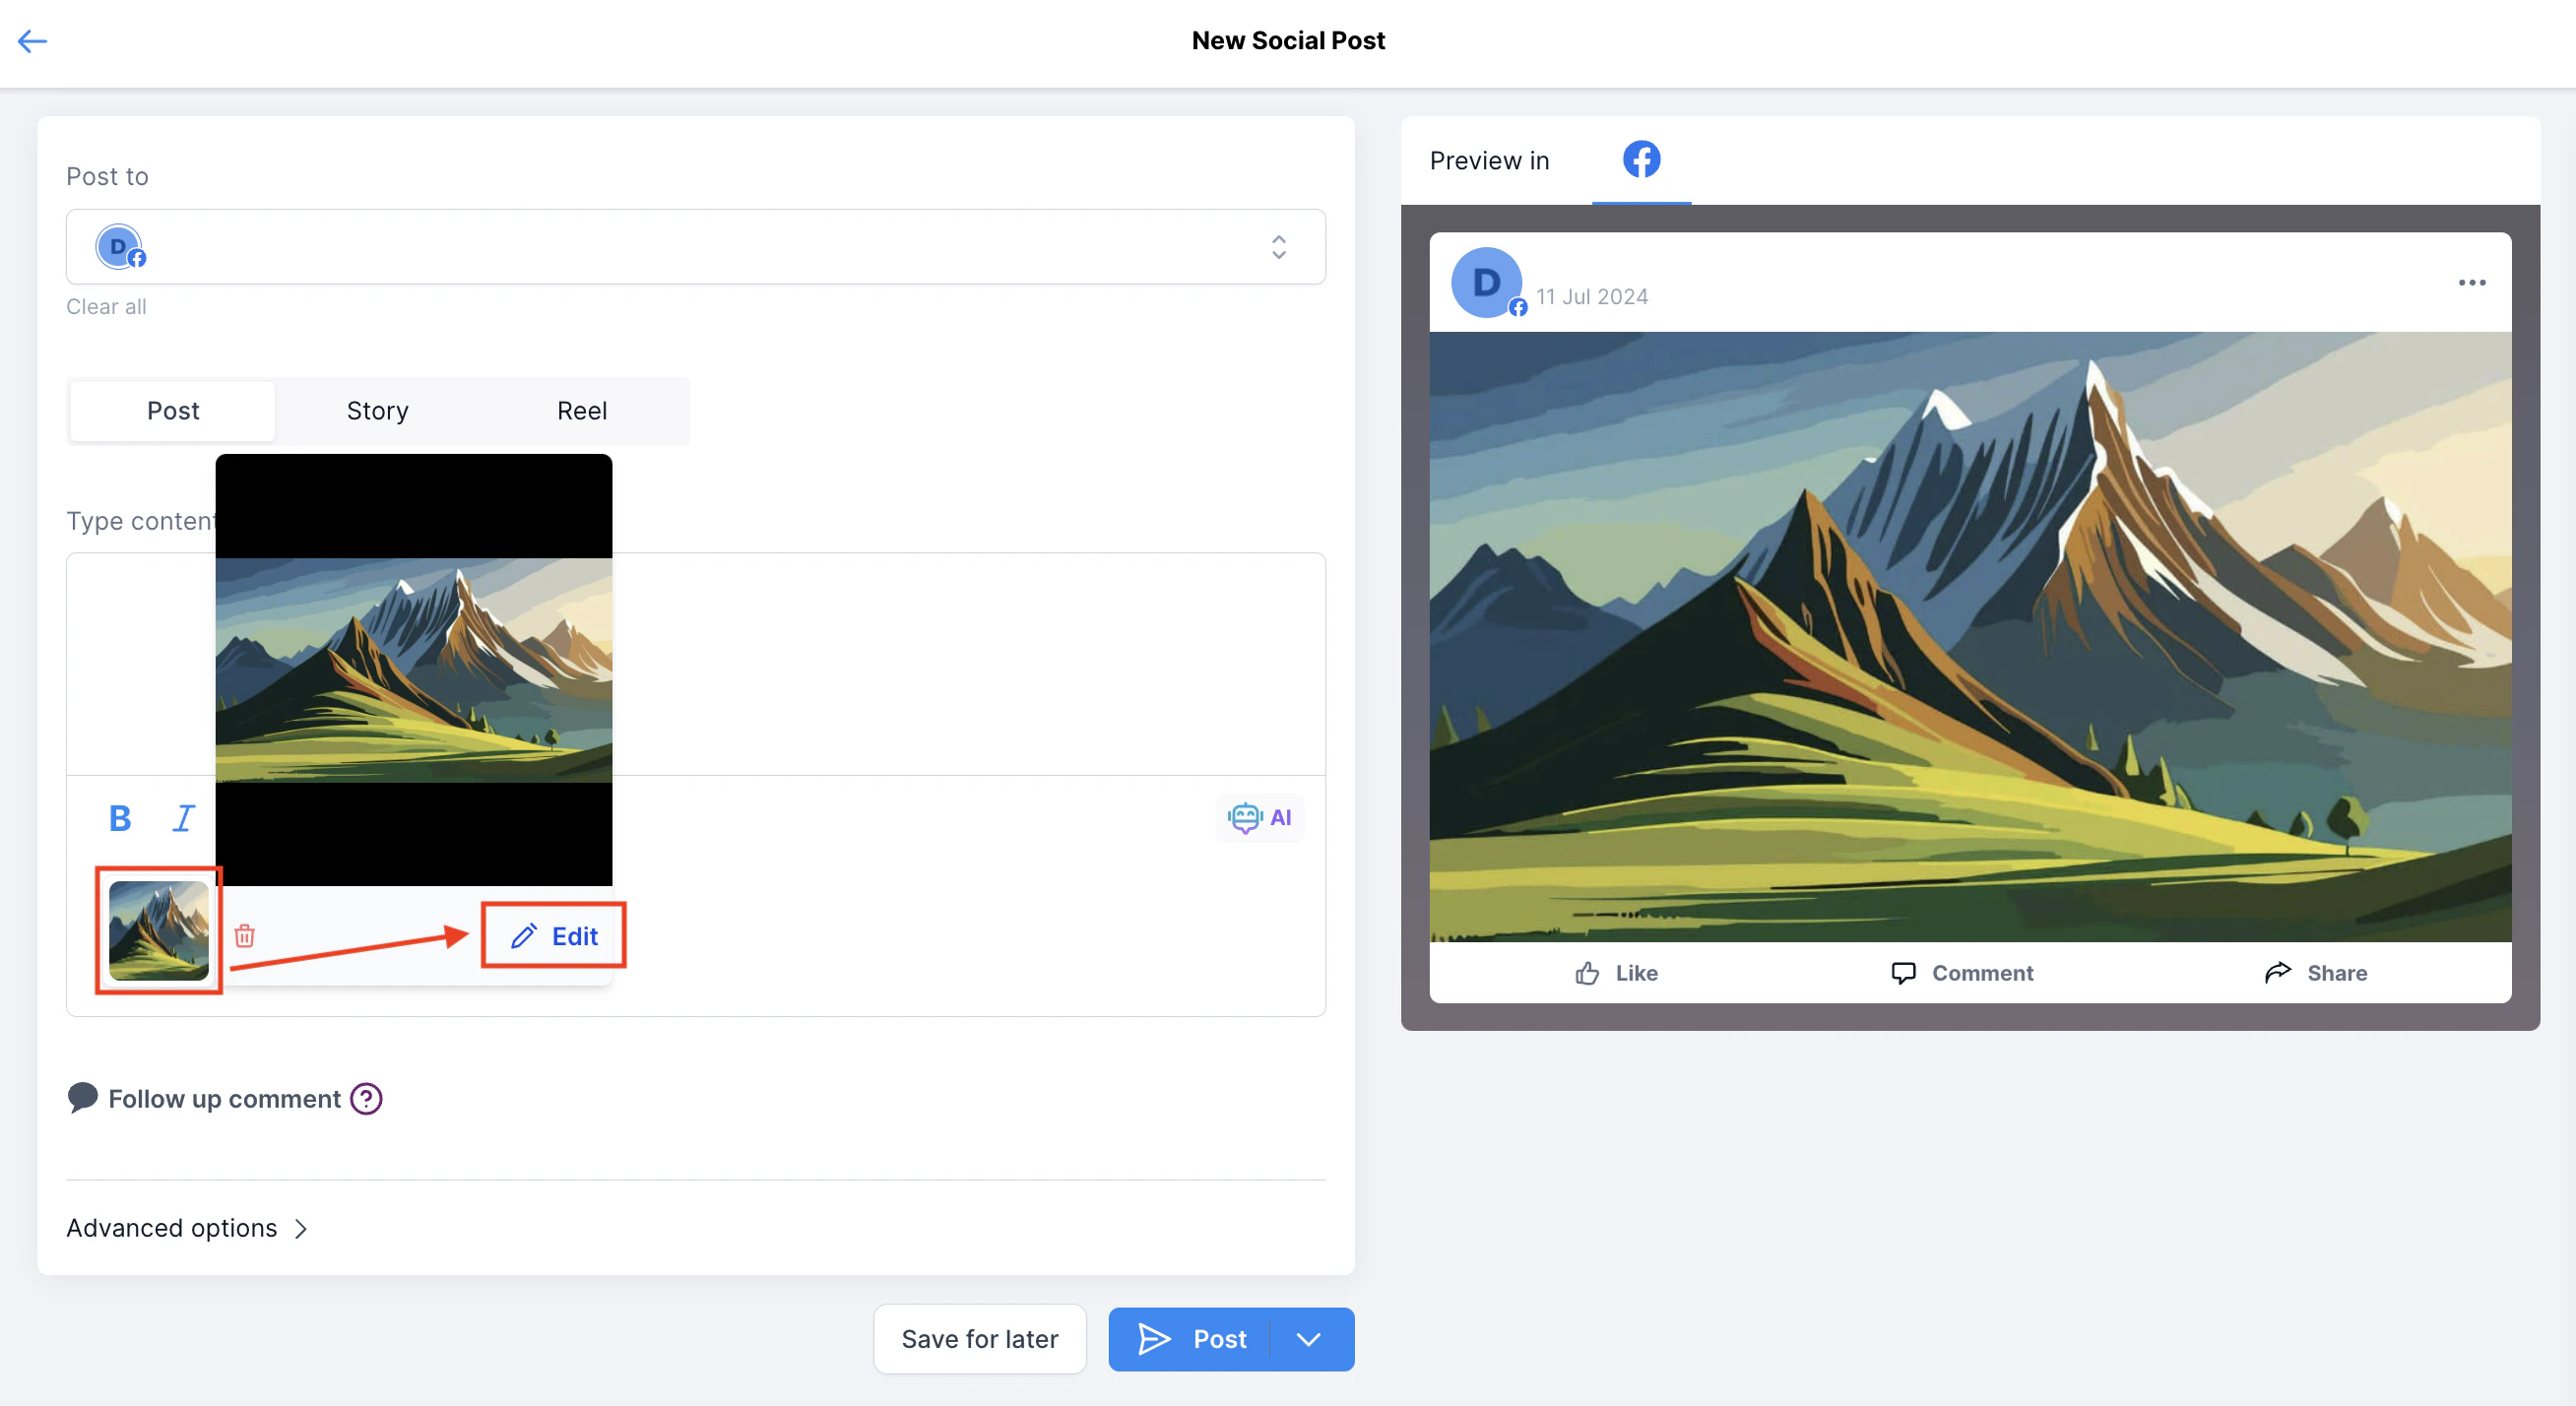
Image editor with crop, filter, and text tools
Watermarks
Automatically apply a branded watermark to images in your posts to protect content and reinforce brand identity. Benefits of watermarks:- Protects content from being shared without attribution
- Increases brand awareness on every post
- Establishes consistent brand recognition across platforms
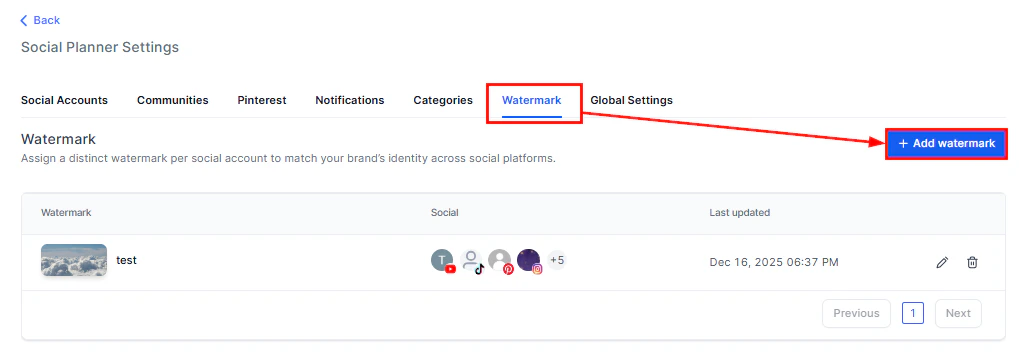
Creating a watermark
Open Social Planner settings
Add a new watermark
Name and upload
Configure positioning and appearance
- Alignment — choose left, right, center, top, or bottom
- Opacity — adjust visibility from subtle to prominent
- Scale — resize to fit images proportionally
- Auto Padding — enable to keep the watermark away from the image edges
Select accounts and save
Watermark configuration showing alignment and opacity settings
Applying watermarks to posts
When creating a post, go to Advanced Options and toggle the watermark feature on. The watermark you configured will be applied automatically to the post’s images.Why isn't my watermark showing on the post?
Why isn't my watermark showing on the post?
Can I use different watermarks for different posts?
Can I use different watermarks for different posts?
Which platforms support watermarks?
Which platforms support watermarks?
Post approval workflow
Route posts through a review process before they go live, ensuring quality control for your team. How it works:- When creating or bulk uploading a post, check the Submit for approval option and select an approver
- The approver receives a notification to review the post
- They can approve (the post is scheduled) or reject (the post is returned for edits)
- Only approved posts are published
Content AI
Use the built-in AI writing assistant to generate or refine post copy directly in the Social Planner composer. Accessing Content AI:- In the post composer, click Edit with Ask AI
- Provide a natural language instruction (e.g., “Make this more engaging”, “Shorten to two sentences”, “Rewrite for LinkedIn”)
- The AI generates a revised version that you can accept, modify, or discard
Frequently asked questions
How many posts can I upload in a single bulk CSV?
How many posts can I upload in a single bulk CSV?
What is the difference between Basic and Advanced CSV formats?
What is the difference between Basic and Advanced CSV formats?
Can I set up recurring posts without a CSV?
Can I set up recurring posts without a CSV?
What happens if a post in a category queue fails to publish?
What happens if a post in a category queue fails to publish?
Can I use different watermarks for different clients or brands?
Can I use different watermarks for different clients or brands?
How does RSS auto-posting differ from category queues?
How does RSS auto-posting differ from category queues?
Can Content AI write posts from scratch?
Can Content AI write posts from scratch?
Best time to post
The Social Planner can suggest optimal posting times based on historical engagement data from your connected accounts.How it works
- The platform analyzes when your followers are most active and when your posts have historically received the most engagement
- Suggested times appear when you create a new post — look for the Best Time indicator next to the time selector
- Select a suggested time to schedule your post at the optimal window
Per-platform optimization
Different platforms have different peak times. The best time suggestions are calculated per connected account, so your Instagram optimal time may differ from your LinkedIn optimal time. When posting to multiple platforms, consider using platform-specific scheduling to optimize each one independently.Category queues (advanced)
Beyond the basic category queue setup covered above, advanced queue management includes:- Pause and resume — pause a category queue during holidays or off-seasons without deleting the posts. Resume when ready.
- Queue reordering — drag and drop posts within the queue to change their publishing order
- Post variations — add multiple versions of a post within the queue. The platform cycles through variations to keep content fresh.
- Queue analytics — view engagement metrics for posts published through queues to identify which categories and content types perform best
Link shortener
The Social Planner includes a built-in link shortener for tracking click performance on links in your posts.Using the link shortener
- When composing a post, paste your destination URL
- Click the Shorten Link option (or toggle auto-shortening in settings)
- The platform generates a shortened link using your configured tracking domain
- Click data for shortened links appears in your post analytics
Custom tracking domain
For branded short links, configure a custom tracking domain:- Go to Settings > Domains > URL Redirects
- Add a subdomain (e.g.,
go.yourdomain.com) and point it to the platform - Enable the custom domain for social planner link shortening in Social Planner > Settings
Content approval flow (advanced)
The approval workflow supports multi-level approvals for teams:Setting up approval rules
- Go to Social Planner > Settings > Approval
- Configure:
- Who requires approval — all users, specific roles, or specific team members
- Who can approve — account admins, designated approvers, or specific users
- Notification method — email, in-app, or both
Approval process
- A team member creates a post and checks Submit for Approval
- The designated approver receives a notification
- The approver reviews the post and either:
- Approves — the post is scheduled for the selected date and time
- Rejects — the post is returned to the creator with feedback notes
- Edits and approves — the approver can make changes before approving
- The creator is notified of the decision