

Email services — connect Gmail, Outlook, SendGrid, Mailgun, or a dedicated sending domain
Connecting an email service
Supported integrations
Gmail / Google Workspace
Outlook / Microsoft 365
SendGrid
Mailgun
Custom SMTP
Dedicated sending domain
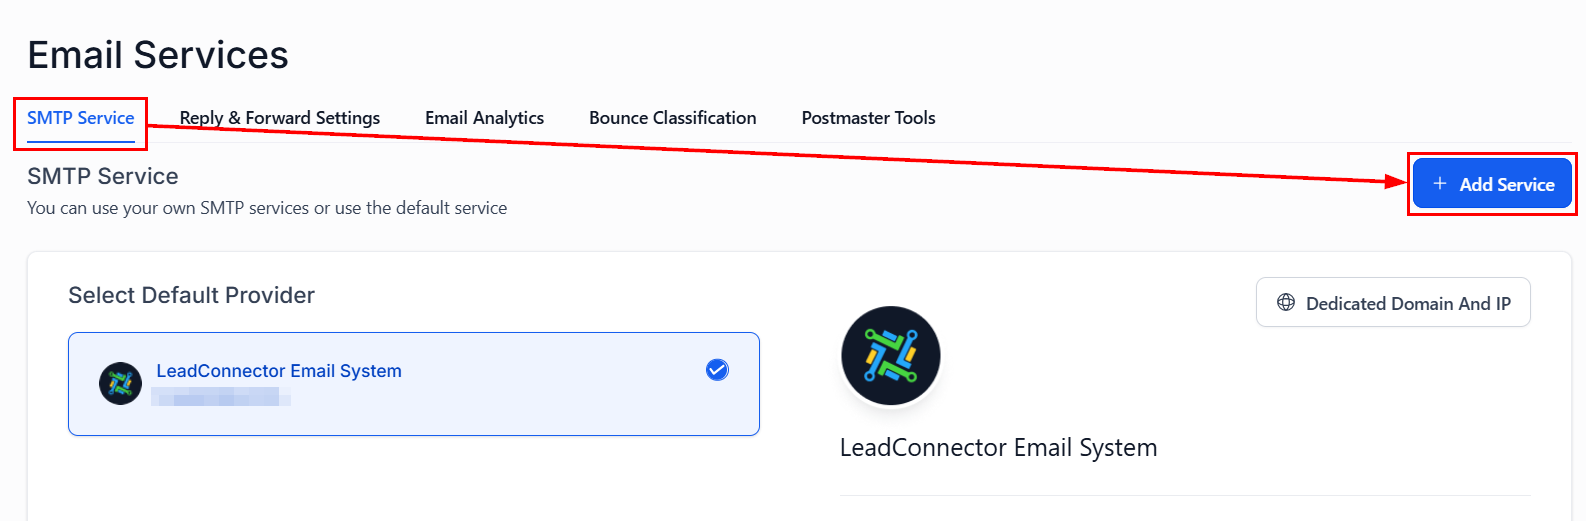
Adding a third-party SMTP account
Go to email services
Select your provider
Enter credentials
Send a test email
Dedicated sending domain
A dedicated sending domain (e.g.,mail.yourdomain.com) gives your emails their own sending reputation, separate from shared infrastructure.
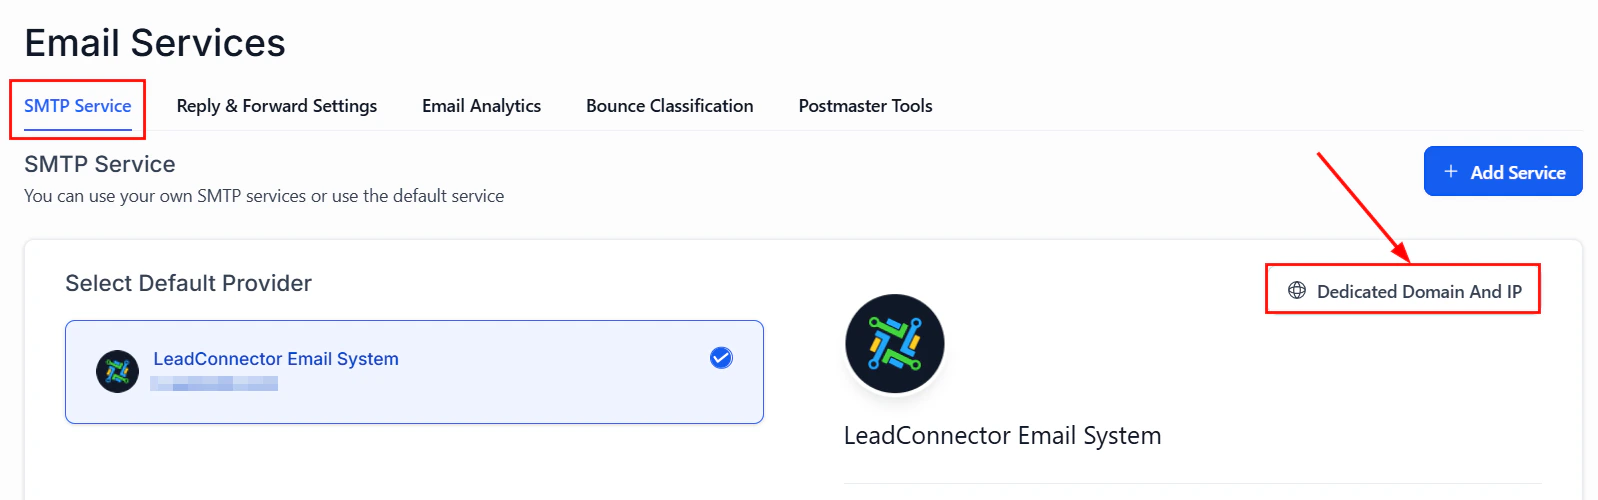
Dedicated sending domain setup — add your subdomain and configure DNS records for SPF, DKIM, DMARC, and MX
Add your domain
Add DNS records
- MX record — for receiving bounces and replies
- SPF record — authenticates your sending domain
- DKIM record — adds a cryptographic signature to your emails
- DMARC record — sets policy for failed authentication
Verify the domain
Set as default
Email authentication
Proper authentication is essential for inbox delivery.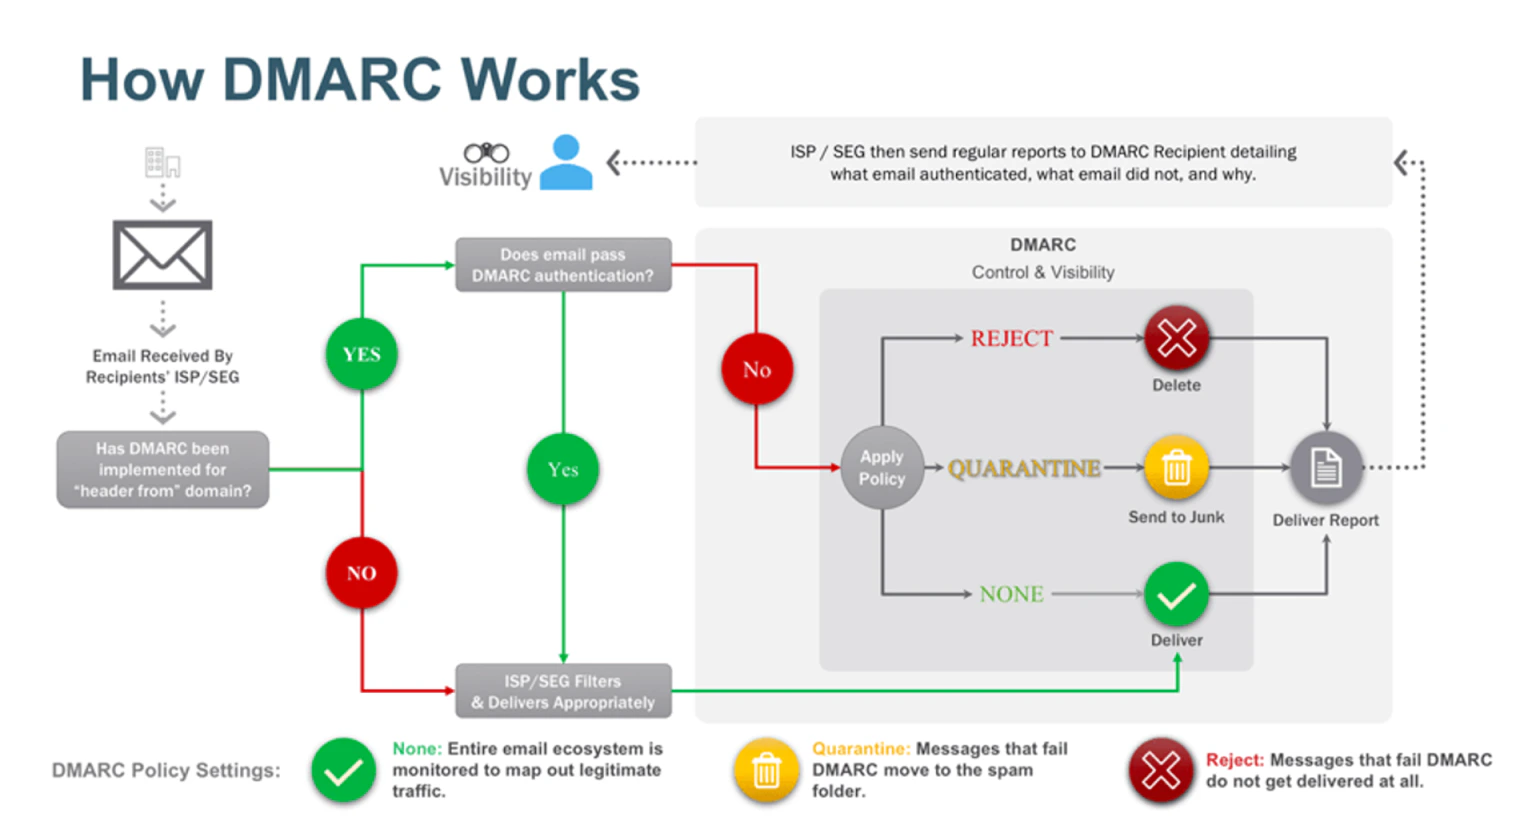
DMARC policy configuration — set up domain-based authentication to protect your sending reputation
SPF (Sender Policy Framework)
Tells receiving mail servers which IP addresses are authorized to send email for your domain. Add an SPF record to your DNS.DKIM (DomainKeys Identified Mail)
Adds a cryptographic signature to outgoing emails so recipients can verify they haven’t been tampered with. The platform generates your DKIM keys.DMARC (Domain-based Message Authentication)
Sets a policy for what happens when emails fail SPF or DKIM checks. Recommended minimum policy:p=none (monitoring mode) to start, then tighten to p=quarantine or p=reject.
SSL certificate for dedicated domains
Once your dedicated sending domain is verified, an SSL certificate is automatically provisioned to enable secure email transmission.Forwarding address and BCC
- Forwarding address — set a forwarding address to receive a copy of all inbound replies
- BCC — automatically BCC a specific address on all outgoing emails for audit or compliance purposes
Custom reply address
Set a custom Reply-To address so that when recipients reply to your emails, their replies go to a different address than the From address.Masking sender emails
Configure a From Name and From Address that differs from your actual sending account — useful for sending on behalf of team members or client brands.Two-way email sync
Gmail 2-way sync
Gmail 2-way sync
Outlook 2-way sync
Outlook 2-way sync
Troubleshooting
Test email errors
Test email errors
Gmail / Google Workspace error codes
Gmail / Google Workspace error codes
Outlook error codes
Outlook error codes
Emails going to spam
Emails going to spam
Bounce classifications
Bounce classifications
Microsoft SNDS integration
Connect Microsoft SNDS (Smart Network Data Services) to monitor your sending IP’s reputation as seen by Microsoft/Outlook. This helps you identify delivery issues before they affect your campaigns.Google Postmaster Tools integration
Link your Google Postmaster Tools account to see your domain reputation, spam rate, and feedback loop data as seen by Gmail directly in the HoopAI Platform dashboard.Dedicated IP guide
For high-volume senders, a dedicated IP address gives you exclusive control over your sending reputation. Contact support to set up a dedicated IP for your account.Understanding email verification
Email verification checks whether an address is valid and likely to receive email before you send to it. Use the verification tool to clean your list and reduce bounce rates.Frequently asked questions
Which sending service should I use?
Which sending service should I use?
How long does DNS propagation take after adding records?
How long does DNS propagation take after adding records?
Can I connect multiple sending services?
Can I connect multiple sending services?
What is the difference between a Forwarding address and a Reply-To address?
What is the difference between a Forwarding address and a Reply-To address?
What does masking the sender email do?
What does masking the sender email do?
Do I need a dedicated IP for my account?
Do I need a dedicated IP for my account?
SMTP provider setup guides
Google / Gmail / Google Workspace setup
- App passwords (recommended)
- OAuth connection
Generate an app password
Enter SMTP settings
- Host:
smtp.gmail.com - Port:
587(TLS) or465(SSL) - Username: your full Gmail/Workspace email address
- Password: the app password you generated (not your Google login password)
Send a test email
SendGrid setup
Create a SendGrid API key
Enter SMTP settings
- Host:
smtp.sendgrid.net - Port:
587 - Username:
apikey(literally the word “apikey”) - Password: your SendGrid API key
Verify your sender
Zoho setup
Enable SMTP in Zoho
Enter SMTP settings
- Host:
smtp.zoho.com(orsmtp.zoho.eufor EU accounts) - Port:
587(TLS) - Username: your full Zoho email address
- Password: your Zoho password (or app-specific password if 2FA is enabled)
Why free email addresses cannot be used as SMTP senders
Free email addresses (gmail.com, yahoo.com, hotmail.com, outlook.com) cannot be used as the “From” address for bulk email sending because:- These providers enforce strict DMARC policies (
p=reject) that cause emails sent from third-party SMTP servers to be rejected - Using a free email as a sender triggers spam filters and authentication failures
- It violates the terms of service of most free email providers