

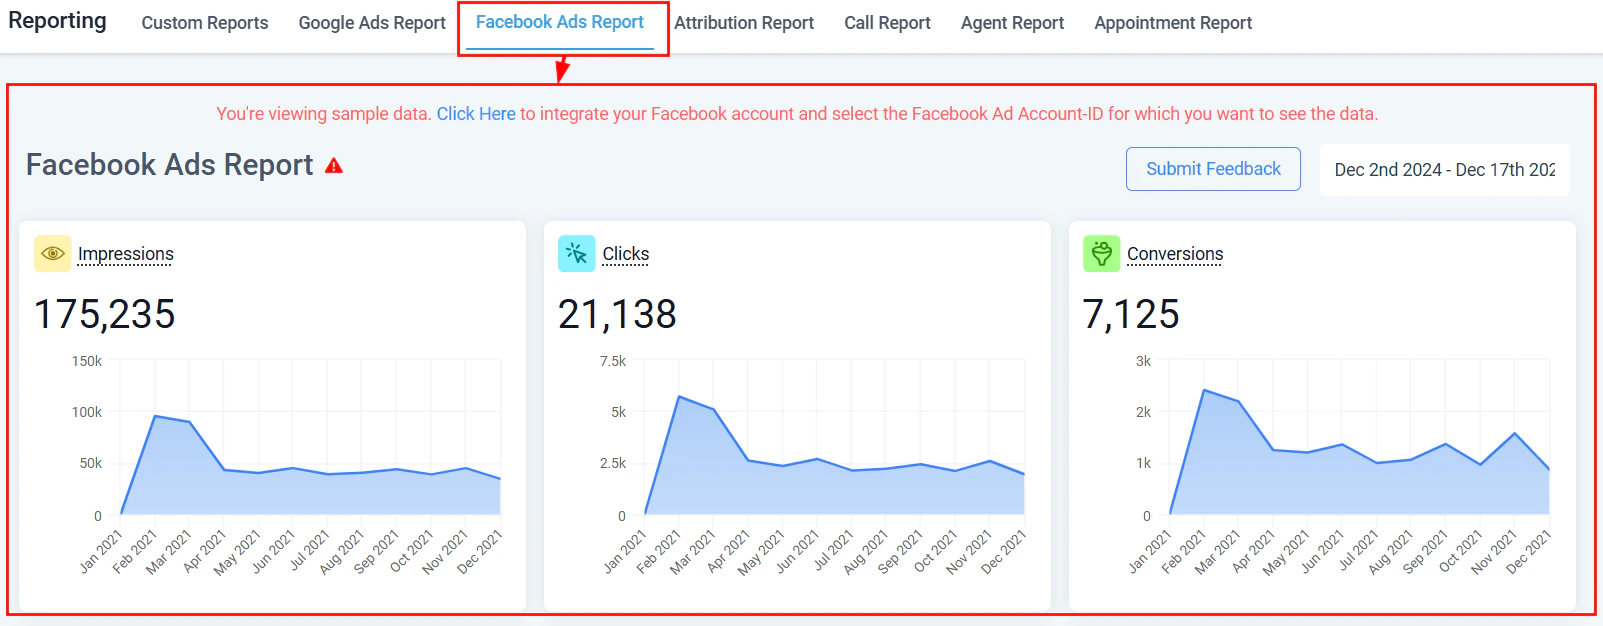
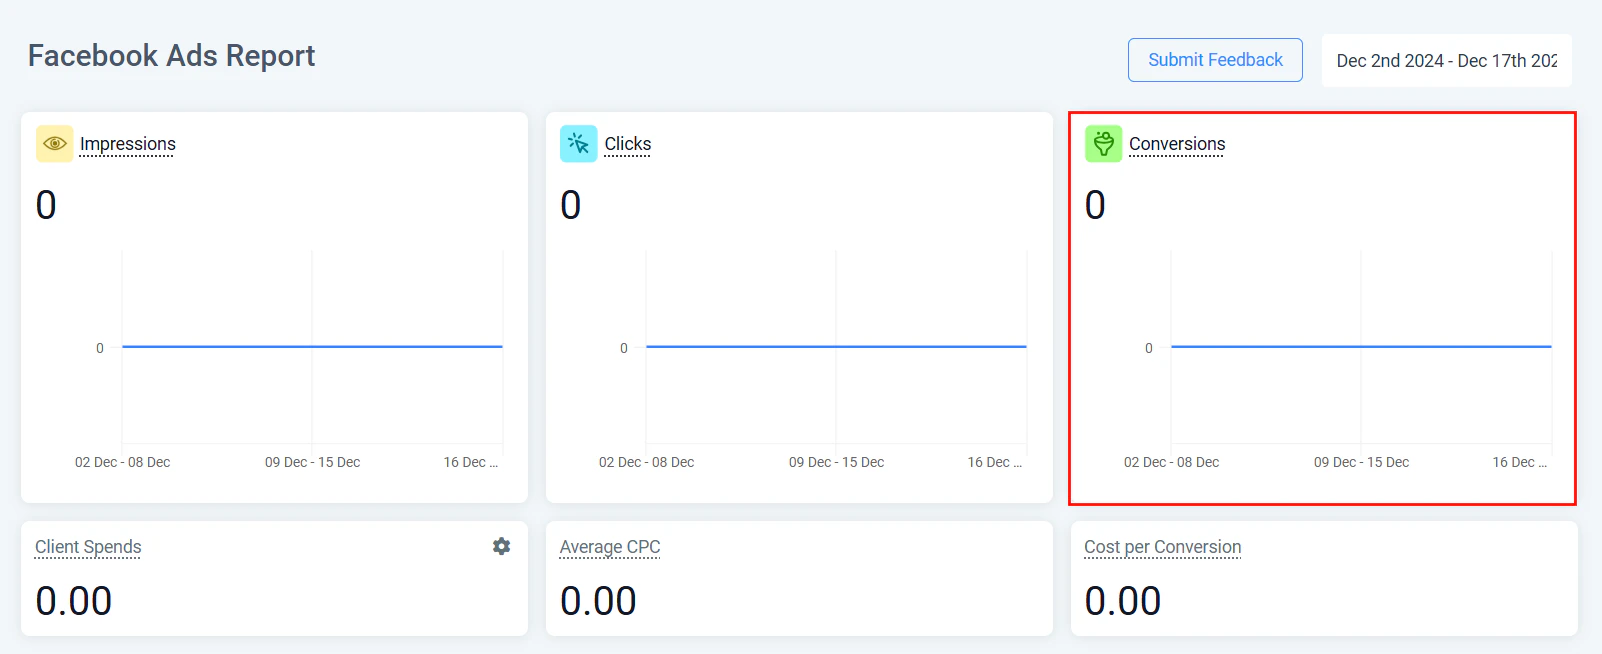
Facebook Ads reporting dashboard showing campaign performance data
Pixel vs. Conversions API
HoopAI supports both tracking methods, and using them together is the recommended approach:- Facebook Pixel — a browser-based JavaScript snippet that fires when visitors interact with your pages. It is easy to install but can be blocked by ad blockers or lost when users opt out of browser tracking.
- Conversions API (CAPI) — a server-side integration that sends conversion events directly from HoopAI to Meta’s servers. Because it does not rely on the browser, it is not affected by ad blockers, iOS privacy changes, or browser-based tracking restrictions.
Step 1: Create a Meta Pixel
- Log in to Meta Business Suite and navigate to Events Manager.
- Click Connect Data Sources and select Web.
- Choose Meta Pixel and Conversions API as your connection method.
- Name your pixel, verify your domain, and select the events you want to track (for example, Lead, Purchase, Schedule).
- Enable customer parameters including email, first name, last name, and client IP address for better match quality.
- Copy the Pixel ID shown in Events Manager — you will need this in HoopAI.
Step 2: Add the Pixel to your funnels
To install the Facebook Pixel on pages built in HoopAI:- In HoopAI, navigate to Sites → Funnels and open the funnel you want to track.
- Go to Settings for the funnel (not an individual page).
- Locate the Header Tracking Code field.
- Paste your complete Facebook Pixel base code (including the
fbq('init', 'PIXEL_ID')andfbq('track', 'PageView')lines) into the field. - Save the settings. The pixel will now fire on every page in the funnel.
If you use the same pixel across multiple funnels, paste the same base code into the header tracking settings of each funnel. There is no central site-wide pixel field in HoopAI — each funnel or website is configured independently.
Step 3: Set up Conversions API events via workflows
The Conversions API integration in HoopAI uses workflows to send conversion events to Meta at the moment a key action happens in your CRM — not just when a page is viewed.- In Automations, open or create a workflow.
- Add a trigger — for example, Form Submitted, Customer Booked Appointment, Survey Submitted, or Order Form Submission.
- Add an action and search for Facebook Conversion API.
- Select Funnel Event as the event type.
- From Meta Business Suite → Events Manager → Settings, copy your Access Token and Dataset ID (also called Pixel ID).
- Paste both values into the corresponding fields in the workflow action.
- Select the Meta standard event to send — common choices include
Leadfor form submissions and bookings, andPurchasefor order completions. - Optionally, enter an event value (numeric) to represent the estimated or actual value of the conversion for campaign optimization.
- Save the action and activate the workflow.
Conversions API workflow action configuration with event mapping
Supported trigger events for CAPI
The following HoopAI triggers can be used to fire Facebook Conversion API events:Verifying your setup
After activating the workflow, test the integration by submitting a form or booking an appointment using a test contact. Then:- In Meta Business Suite, go to Events Manager → Test Events.
- Enter your website URL and click Open Website to start a test session.
- Complete the conversion action and verify that the event appears in the Test Events panel within a few minutes.
Custom mapping for advanced users
HoopAI supports custom parameter mapping for Facebook Conversion API events. When enabled, you can map additional data fields from your CRM — such as Facebook Click ID (FBCLID) or Facebook Lead ID — to the corresponding Meta parameters. This improves event matching and attribution accuracy. To enable custom mapping, toggle on the Custom Mapping option in the Facebook Conversion API workflow action configuration.Reading conversion data in Meta Ads Manager
Once events are flowing from HoopAI to Meta:- Open Meta Ads Manager and navigate to the campaign, ad set, or ad you want to evaluate.
- In the columns selector, add the custom events you have configured (for example, Lead, Schedule, Purchase) as conversion columns.
- Review your cost per result for each conversion type to evaluate campaign efficiency.
- Use the event data in Custom Audiences to create retargeting lists based on users who completed specific conversion events.

Facebook Ads performance table with campaign metrics
Frequently asked questions
Why are my events showing in Meta but not matching to ad campaigns?
Why are my events showing in Meta but not matching to ad campaigns?
Event matching requires that the Pixel fires on the same session where the ad click occurred, and that customer parameters (email, name) are passed correctly. If the contact navigated away from the landing page before converting, or if customer parameters are missing, match rates will be lower. Using CAPI alongside the browser pixel improves overall match coverage.
How do I avoid double-counting events?
How do I avoid double-counting events?
HoopAI sends a unique event ID with each CAPI event. When you also have the browser pixel installed on the same page, Meta uses the event ID to deduplicate browser and server events automatically. Make sure both methods use the same event name (for example,
Lead) so deduplication works correctly.Can I use the same pixel across multiple funnels?
Can I use the same pixel across multiple funnels?
Yes. Use the same Pixel ID in the header tracking code of every funnel and in every Conversions API workflow action. All events across funnels will be attributed to the same Meta dataset, giving you a unified view in Events Manager.
Is the Conversions API required, or is the pixel enough?
Is the Conversions API required, or is the pixel enough?
The pixel alone is sufficient for basic tracking, but CAPI is strongly recommended. iOS privacy changes and ad blockers can suppress 20–40% of browser-based pixel events in some audiences. CAPI events are not affected by these restrictions, making your conversion data more complete and your campaign optimization more accurate.