

Creating a new dashboard
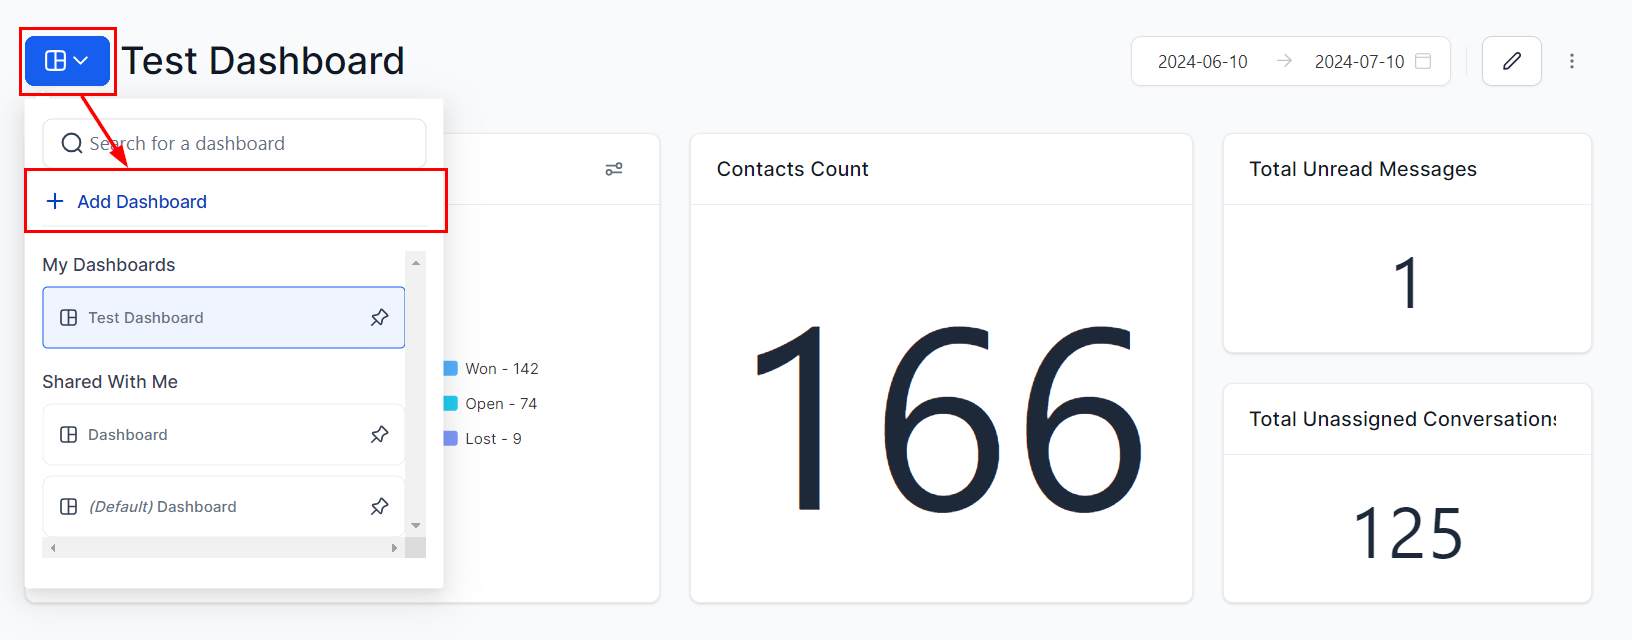
Click Add a Dashboard to start creating a new dashboard
Click Add a Dashboard
Choose a starting point
- Create from blank dashboard — start with a clean slate
- From template library — choose a pre-made template from the shared library or your own saved templates
- Clone existing dashboard — duplicate an existing dashboard including all its widgets and layout
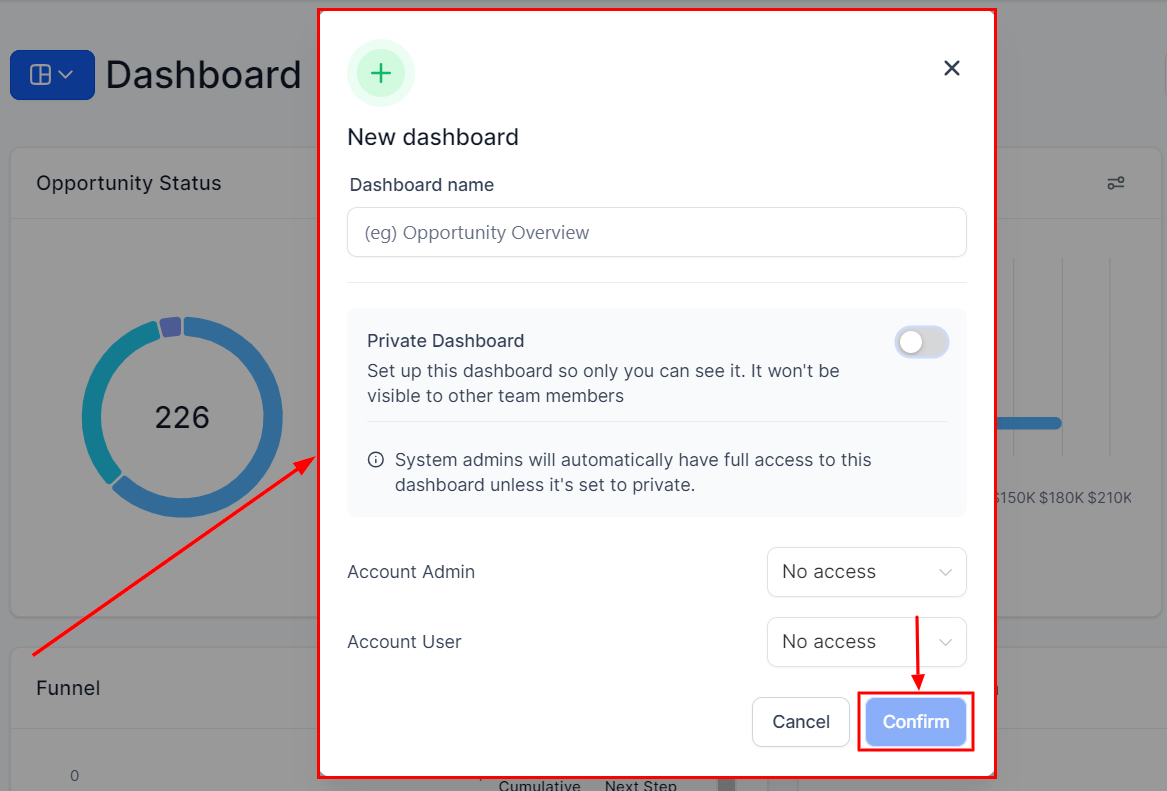
Name and configure permissions
Add widgets
Choose pre-configured widgets or build manually during dashboard creation
Arrange and save
Setting a default dashboard
The default dashboard is the first view all users see when they log into the platform. Any user with Full dashboard access can set a default dashboard.Select the dashboard
Open the options menu
Confirm
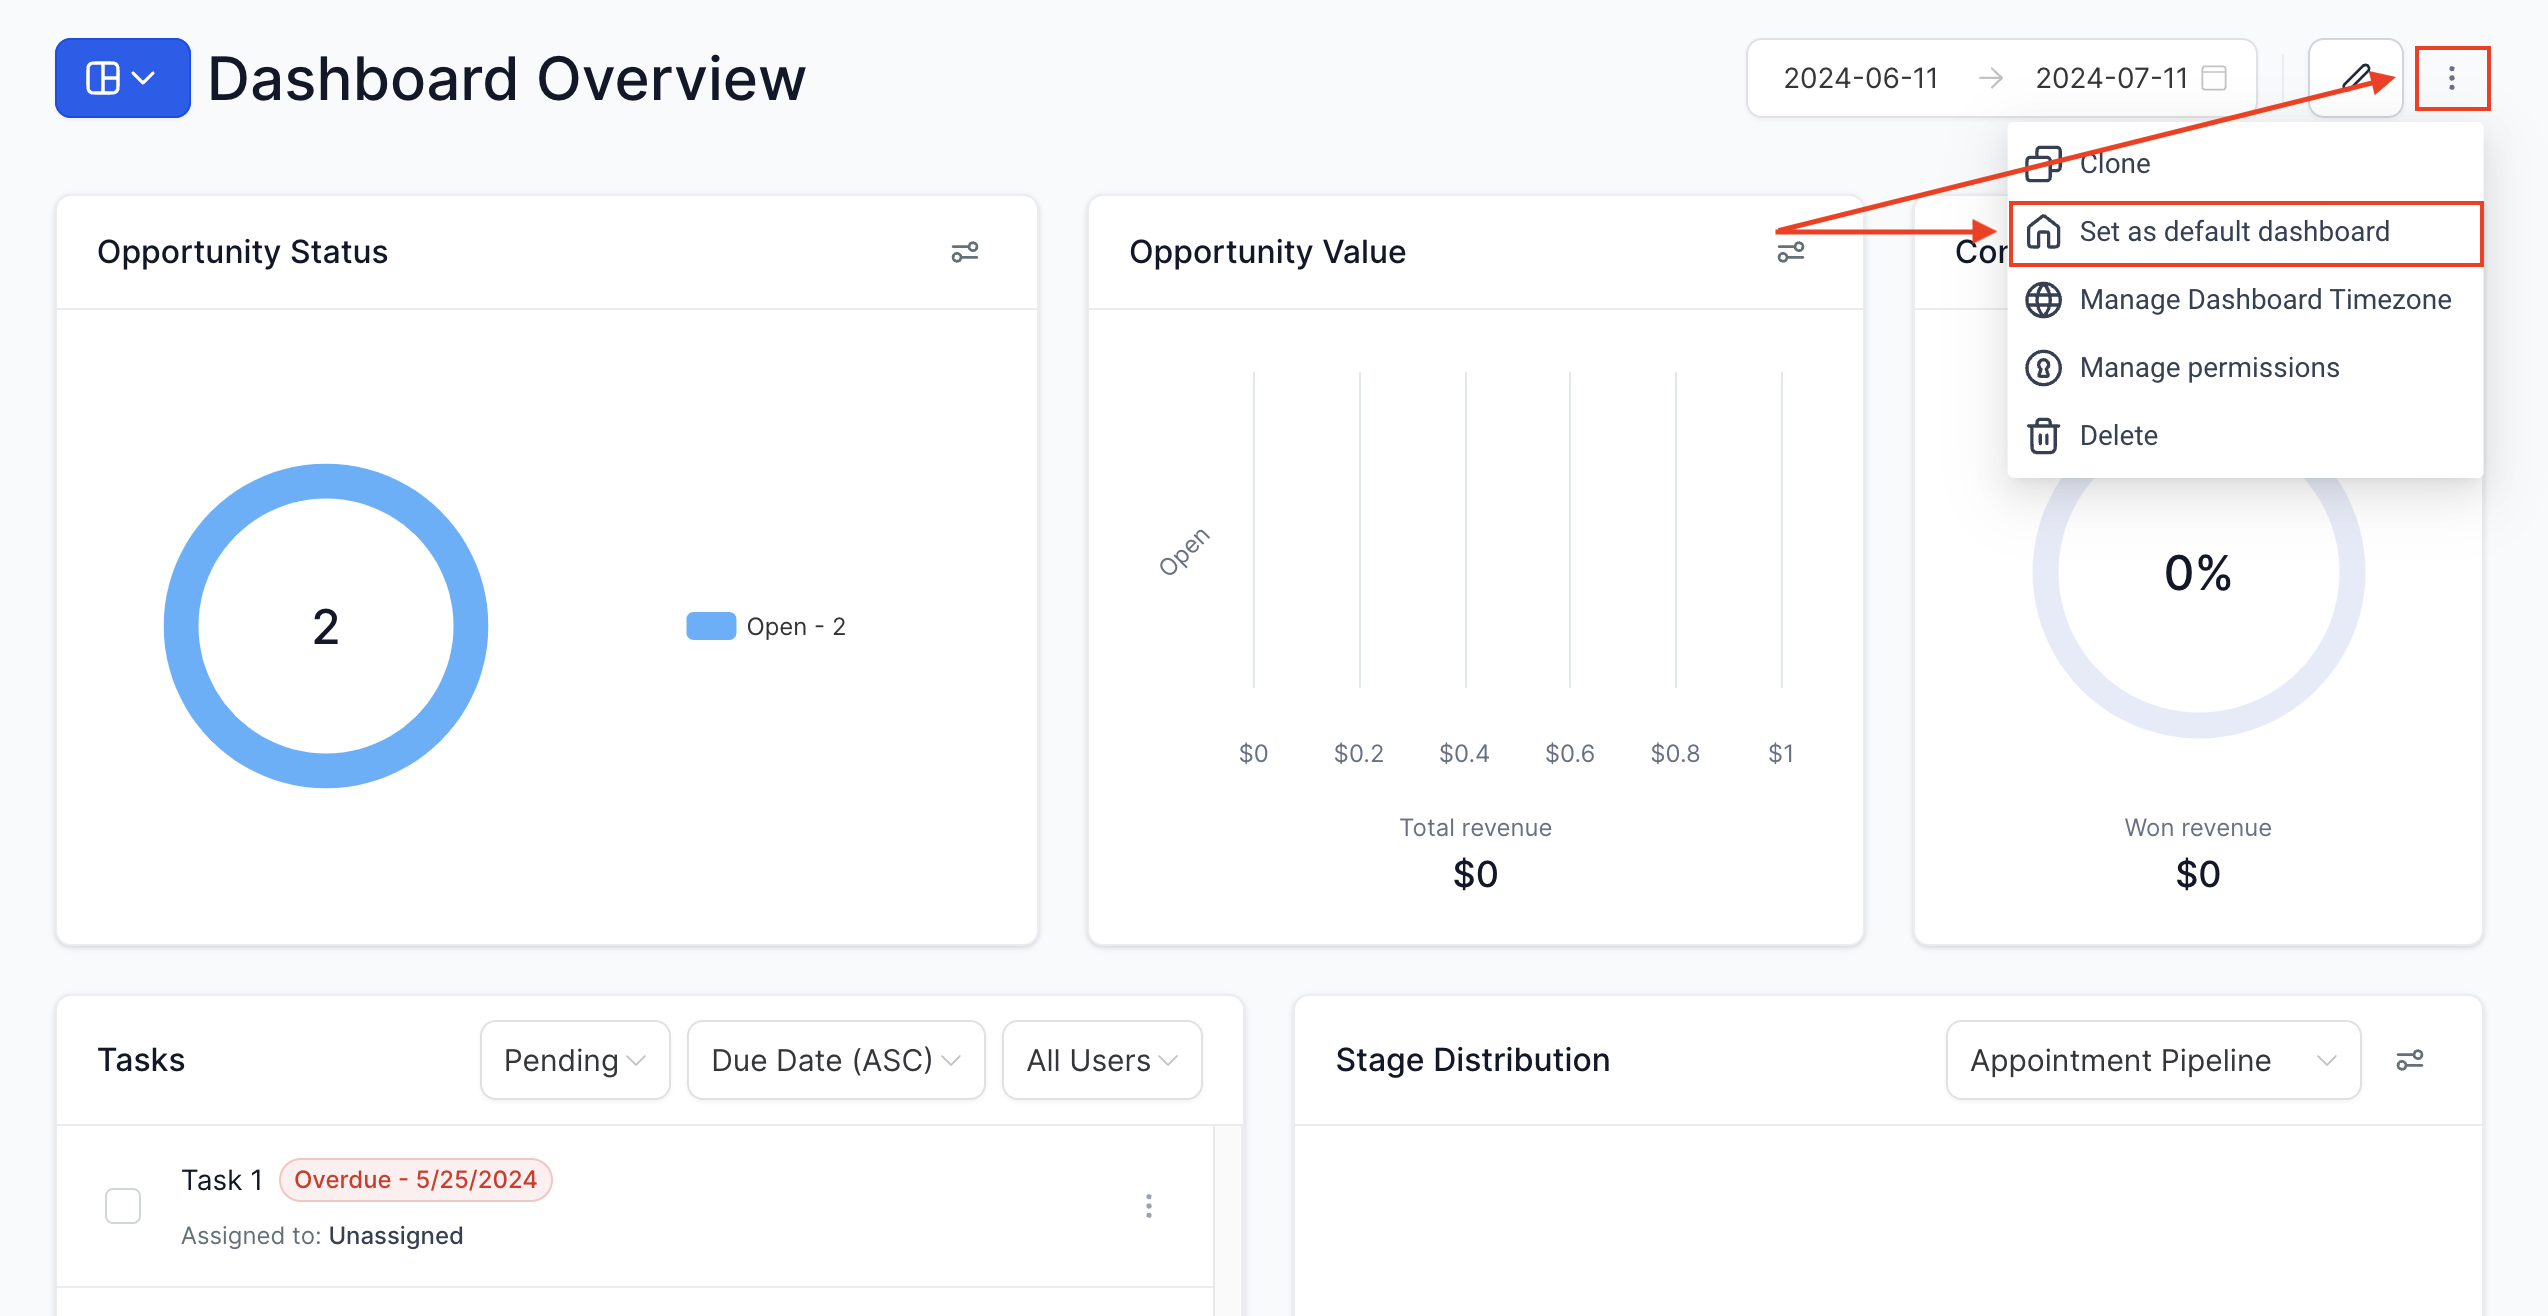
Set a dashboard as the default for all users to see on login
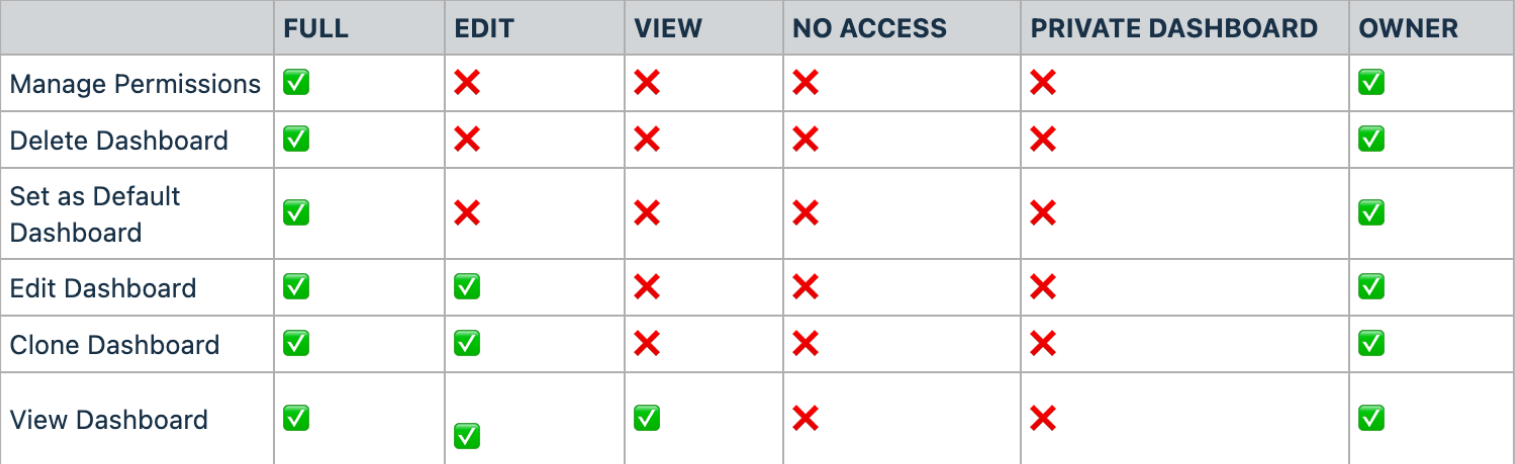
Dashboard permissions
Hoop offers four permission levels for dashboards:Setting permissions when creating a dashboard
During the dashboard creation process, toggle the Private Dashboard option if needed, and assign permission levels to individual users before clicking Confirm.Updating permissions on an existing dashboard
Open the options menu
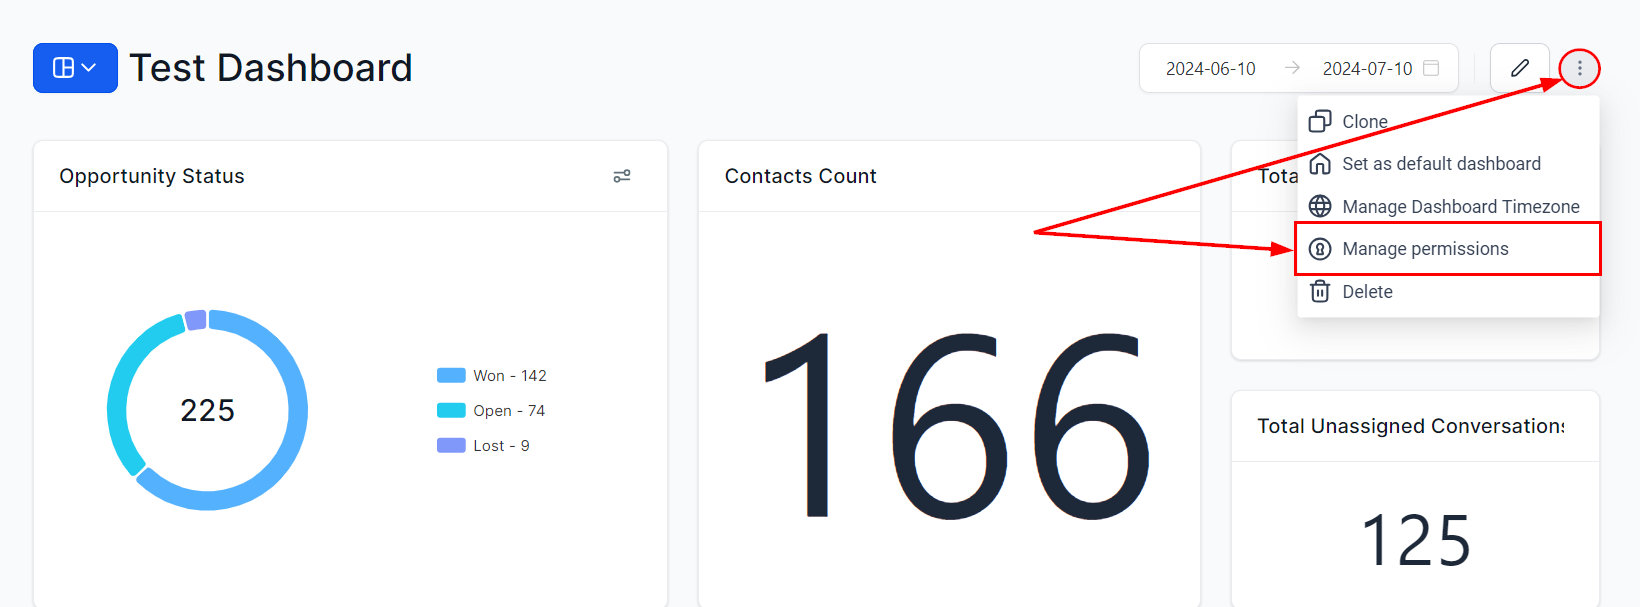
Access Manage Permissions from the dashboard options menu
Update permissions
Dashboard permissions panel showing all four permission levels
Save
Pinning dashboards
Pin your most important dashboards for quick personal access. Pinned dashboards are personal favorites that appear in the dashboard switcher. They differ from the default dashboard, which is the shared landing page for all users when they log in.Renaming a dashboard
Open the options menu
Enter a new name
Save
Cloning dashboards
Users with Full or View-only access can clone (duplicate) an existing dashboard. Cloning retains the original layout, widget configuration, and custom theme colors, saving you setup time.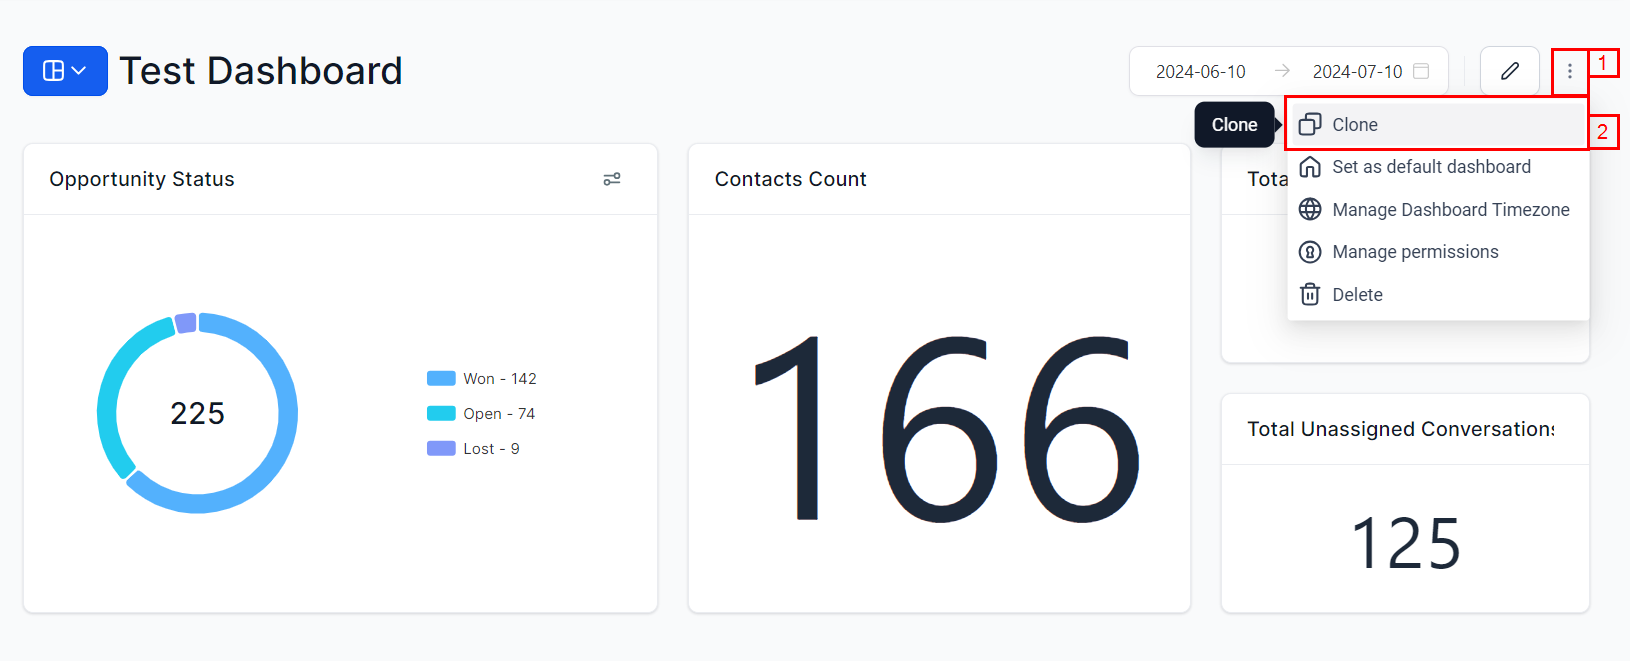
Clone an existing dashboard to create a copy with the same layout
Sharing dashboards
Sharing a dashboard means granting other users access to view or edit it. This is managed through dashboard permissions.Open the options menu
Assign access levels
Save
Deleting dashboards
Dashboard owners can delete dashboards that are no longer needed. You cannot delete the current default dashboard — set another dashboard as default first.Exporting data
Click any data point within a chart or widget to view detailed records in the Granular Insights view. Use the export icon to download records as a CSV file.Time zone synchronization
Dashboard data can be synchronized with your local time zone for accurate reporting. From the main dashboard, click the three dots menu and select “Manage Dashboard Time Zone”. You can switch between your location’s time zone and your personal time zone. The selected time zone applies to all dashboards you view.Dashboard AI summary
The AI Summary feature generates a natural-language overview of your dashboard’s key metrics and trends. Instead of interpreting charts manually, the AI analyzes your widgets and provides actionable insights in plain language. To generate an AI summary:- Open the dashboard you want to summarize
- Click the AI Summary button (sparkle icon) in the top toolbar
- The AI analyzes all visible widgets and generates a summary highlighting key trends, notable changes, and areas that may need attention
Frequently asked questions
Can I clone an existing dashboard?
Can I clone an existing dashboard?
What is the primary dashboard?
What is the primary dashboard?
What happens when I delete a dashboard?
What happens when I delete a dashboard?
How do I pin a dashboard?
How do I pin a dashboard?
What if a widget shows 'no data'?
What if a widget shows 'no data'?