Create and manage reusable SMS, email, and WhatsApp message templates for consistent, fast replies in the HoopAI platform.
Message templates in the HoopAI platform — called Snippets for SMS and email, and WhatsApp Templates for WhatsApp — let your team insert pre-written messages into any conversation with a single click. Templates save time, ensure brand consistency, and can include dynamic personalization fields so every message still feels tailored to the individual.
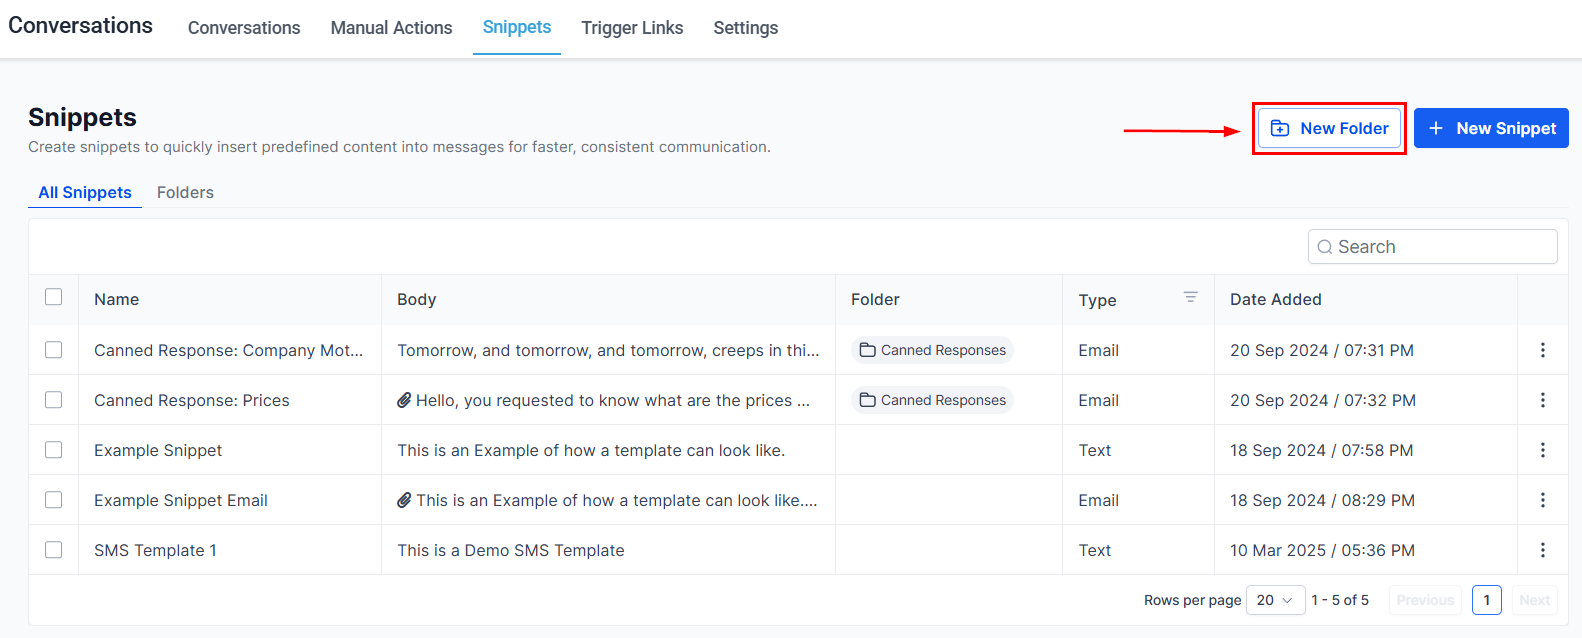
The Snippets library showing all saved text and email snippets
Text snippets are short-form templates for SMS, Instagram DMs, Facebook Messenger, and Google My Business messages. They support plain text, emoji, custom values, trigger links, and file attachments.
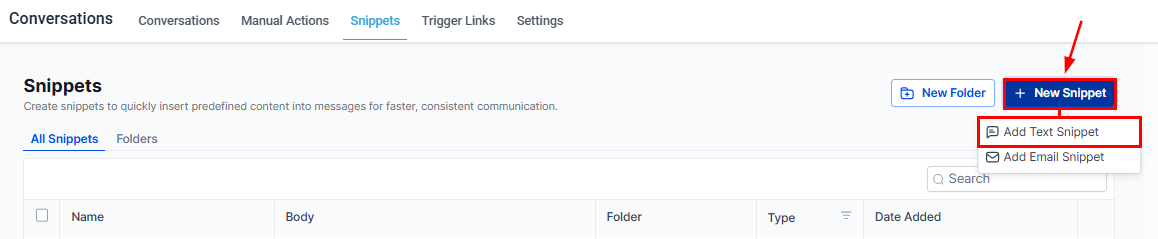
Creating a new text or email snippet from the Snippets page
1
Navigate to Snippets
Go to Conversations → Snippets in the left navigation.
2
Click New Snippet
Click + New Snippet in the top right and select Add Text Snippet.
3
Name the snippet
Enter a descriptive name. Your team sees this name in the snippet selector during conversations, so make it easy to find quickly. For example: “Follow-up after missed call” or “Appointment confirmation.”
4
Write the body
Type the message text. Enhance it with:
Custom values (tag icon) — insert merge fields like {{contact.first_name}} or {{appointment.date}}
Trigger links (lightning bolt icon) — add trackable links that fire automations when clicked
Attachments — click Add Attachment to include an image or document
5
Test the snippet
Enter a phone number in the Test SMS field and click Send Test to preview exactly how the snippet appears when received on a mobile device.
6
Save
Click Save. The snippet is available immediately to all team members.
The Snippets library showing all saved text and email snippets with folder organization
Inserting a saved snippet into the message composer
1
Open the conversation and select your channel
Navigate to the contact’s conversation and choose SMS, Instagram, Facebook, or another text channel.
2
Open the snippets panel
Click the paper icon in the message toolbar. The snippet library slides open.
3
Choose a snippet
Browse by folder or search by name. Click the snippet you want — it populates the message box instantly.
4
Customize if needed
Make any final edits. Custom value fields are resolved automatically — for example, {{contact.first_name}} becomes the contact’s actual first name. Review the populated text before sending.
Email snippets work identically to text snippets but include a subject line and support rich text formatting — ideal for confirmation emails, follow-ups, and templated responses that do not warrant a full email campaign.
From Conversations → Snippets, click + New Snippet and choose Add Email Snippet.
2
Add a name and subject
Name — internal identifier for your team.
Subject — the email subject line the contact sees.
3
Write and format the body
Use the rich text editor to format the message body. Apply bold, italics, bullet lists, links, and custom merge fields. The tag icon inserts custom values; the thunderbolt icon inserts trigger links.
4
Attach files (optional)
Click Add Attachment to include a file from your computer.
5
Send a test email
Fill in a From and To address, then click Send Test to see how the email renders in an actual inbox.
6
Save
Click Save.
The New Snippet dropdown with Add Text Snippet and Add Email Snippet options
In the email composer, click the paper icon to open the snippet selector. Templates are organized in folders. Click a template to apply both the subject and body to the current email. Edit the populated content before sending if any personalization is needed.
Navigate to Settings → Integrations → WhatsApp and select the Templates tab.
2
Click New Template
Click + Create Template.
3
Fill in template details
Name — lowercase letters, numbers, and underscores only; no spaces.
Category — Marketing, Utility, or Authentication.
Language — select the language the template is written in.
4
Write the template body
Write the message text. Use double curly braces for dynamic variables: {{1}}, {{2}}, etc. These are filled in at send time.Example: Hi {{1}}, your appointment is confirmed for {{2}} at {{3}}. Reply STOP to opt out.
5
Add header and footer (optional)
Header — text, image, document, or video displayed above the message body.
Footer — small text displayed below the body; often used for opt-out instructions.
6
Add buttons (optional)
Choose from:
Quick reply buttons — up to 3 one-tap reply options.
Call-to-action buttons — link to a URL or trigger a phone call.
7
Submit for approval
Click Submit. Meta reviews the template. You will see the status update to Approved or Rejected in the Templates list.
Rejected templates display a reason for rejection. Common reasons include missing opt-out language in marketing templates or variable usage that does not match the declared category. Edit and resubmit after addressing the feedback.