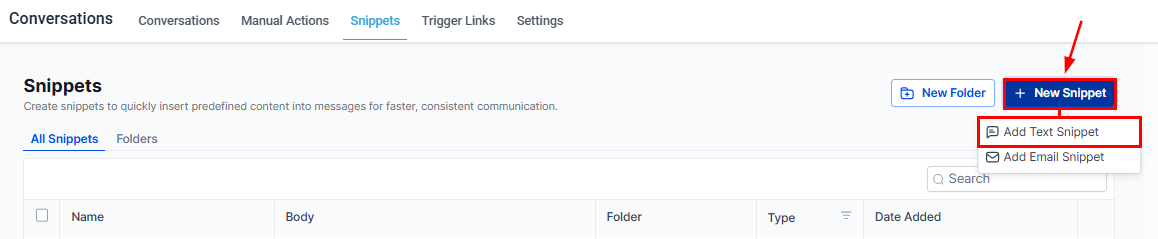
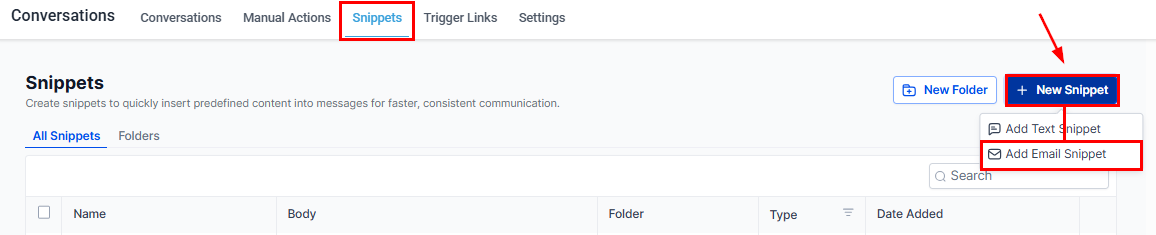
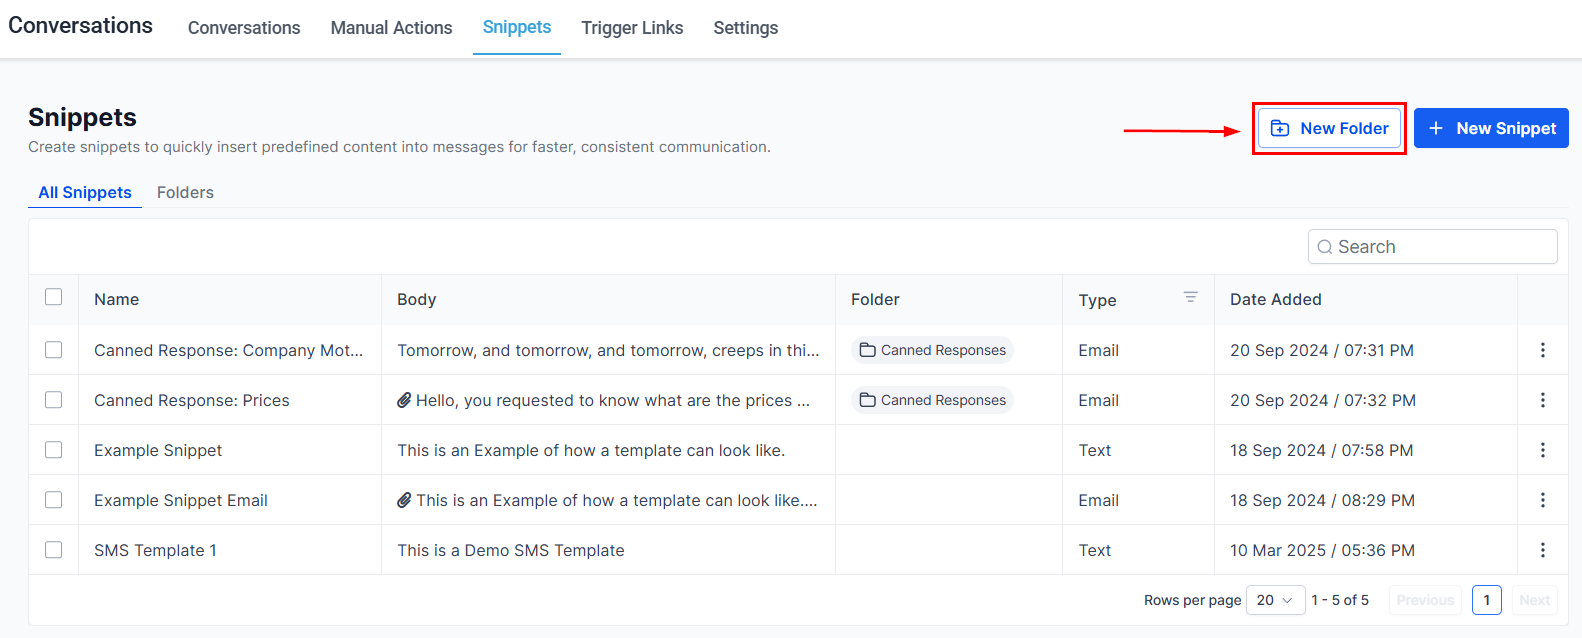
Snippets are pre-written message templates that you can insert into any conversation with a single click. They save time, ensure consistency, and can include dynamic elements like custom values and trigger links. Snippets are shared across the CRM — changes made in Conversations are reflected in Email Marketing and vice versa.
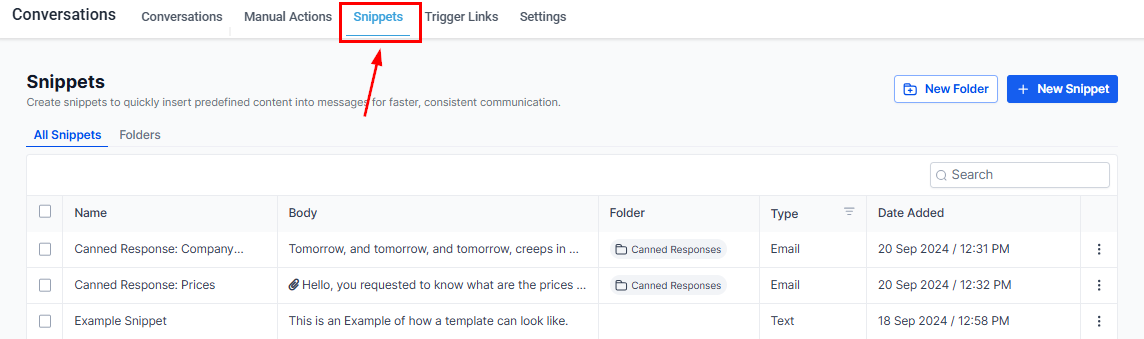
Snippets overview
Depending on your user permissions, you may not have access to all snippet features.

Creating a snippet

1

Go to Snippets

Navigate to Conversations → Snippets in your account.
2

Click New Snippet

Click the + New Snippet button in the top right. A dropdown appears — choose either Add Text Snippet or Add Email Snippet.
New snippet menu
3

Fill in snippet details

Complete the form for your chosen snippet type (see below).
4

Save

Click Save to add it to your snippet library.

Text snippets

Text snippets are used for SMS, Facebook DMs, Instagram DMs, and short chat messages.
Text snippet form
Required fields:
  • Name — displayed in the snippet list so your team can find it quickly.
  • Snippet Body — the message content. Add custom values (tag icon) and trigger links (lightning bolt icon) for dynamic personalization.
Optional:
  • Attachments — click Add Attachment or paste a file URL and click + Add to include images or documents.
  • Test SMS — enter a phone number and click Send Test to preview how the snippet looks when received.

Email snippets

Email snippets are for quick email replies — confirmation messages, follow-ups, and similar responses that do not need a full campaign template.
Email snippet form
Required fields:
  • Name
  • Subject — the email subject line shown to recipients.
  • Snippet Body — the email content. Use the tag icon for custom values and thunderbolt icon for trigger links.
Optional:
  • Add Attachment — attach files from your computer.
  • Test Email — enter From and To addresses, then click Send Test to verify how the email renders.

Using snippets in conversations

SMS / chat channels

1

Open the conversation

Navigate to the contact’s conversation and select the SMS or chat channel.
2

Open snippets panel

Click the paper icon in the message toolbar.
SMS snippets use
3

Select and send

Click a snippet to insert it into the message box. Customize if needed, then click Send.

WhatsApp

1

Select WhatsApp channel

Open the conversation and switch to WhatsApp.
2

Open snippets panel

Click the paper icon.
3

Choose a snippet

Select the snippet — it populates the message field automatically.
WhatsApp snippets
4

Send

Add any additional text and click Send.

Email

Click the paper icon in the email composer to open the snippet selector. Snippets are organized in folders — click the template you want to apply it to the message body.

Managing snippets

Click the three-dot icon (⋮) next to any snippet for management options:
ActionDescription
Move to FolderOrganize snippets into topic-based folders
Edit SnippetModify name, body, or attachments
Duplicate SnippetCopy as a starting point for a new variant
Delete SnippetPermanently remove (cannot be undone)
To bulk-move or bulk-delete snippets, check the boxes next to multiple snippets and choose the desired action.

Organizing snippets with folders

1

Create a folder

Click + New Snippet → Add Folder (or the folder button), enter a name, and click Save.
2

Move snippets

Click the three-dot icon next to a snippet → Move to Folder → select the folder → Move.
3

Search folders

Use the search bar on the Folders tab to find a specific folder by name.
Deleting a folder may also delete the snippets it contains. Move snippets to another folder first if you want to keep them.

Snippet library columns

When viewing all snippets, four columns help you identify each one at a glance:
ColumnDescription
NameSnippet identifier — make it descriptive
Snippet BodyPreview of the message content
FolderWhich folder the snippet belongs to
TypeText or Email
Click the three-line icon next to Type to sort snippets by type.
Last modified on March 4, 2026