

How lost reasons work
When a team member marks an opportunity as Lost — either by dragging it to the Lost column on the kanban board, changing the status dropdown, or updating the stage to a lost stage — the platform prompts them to select a lost reason before the change is saved.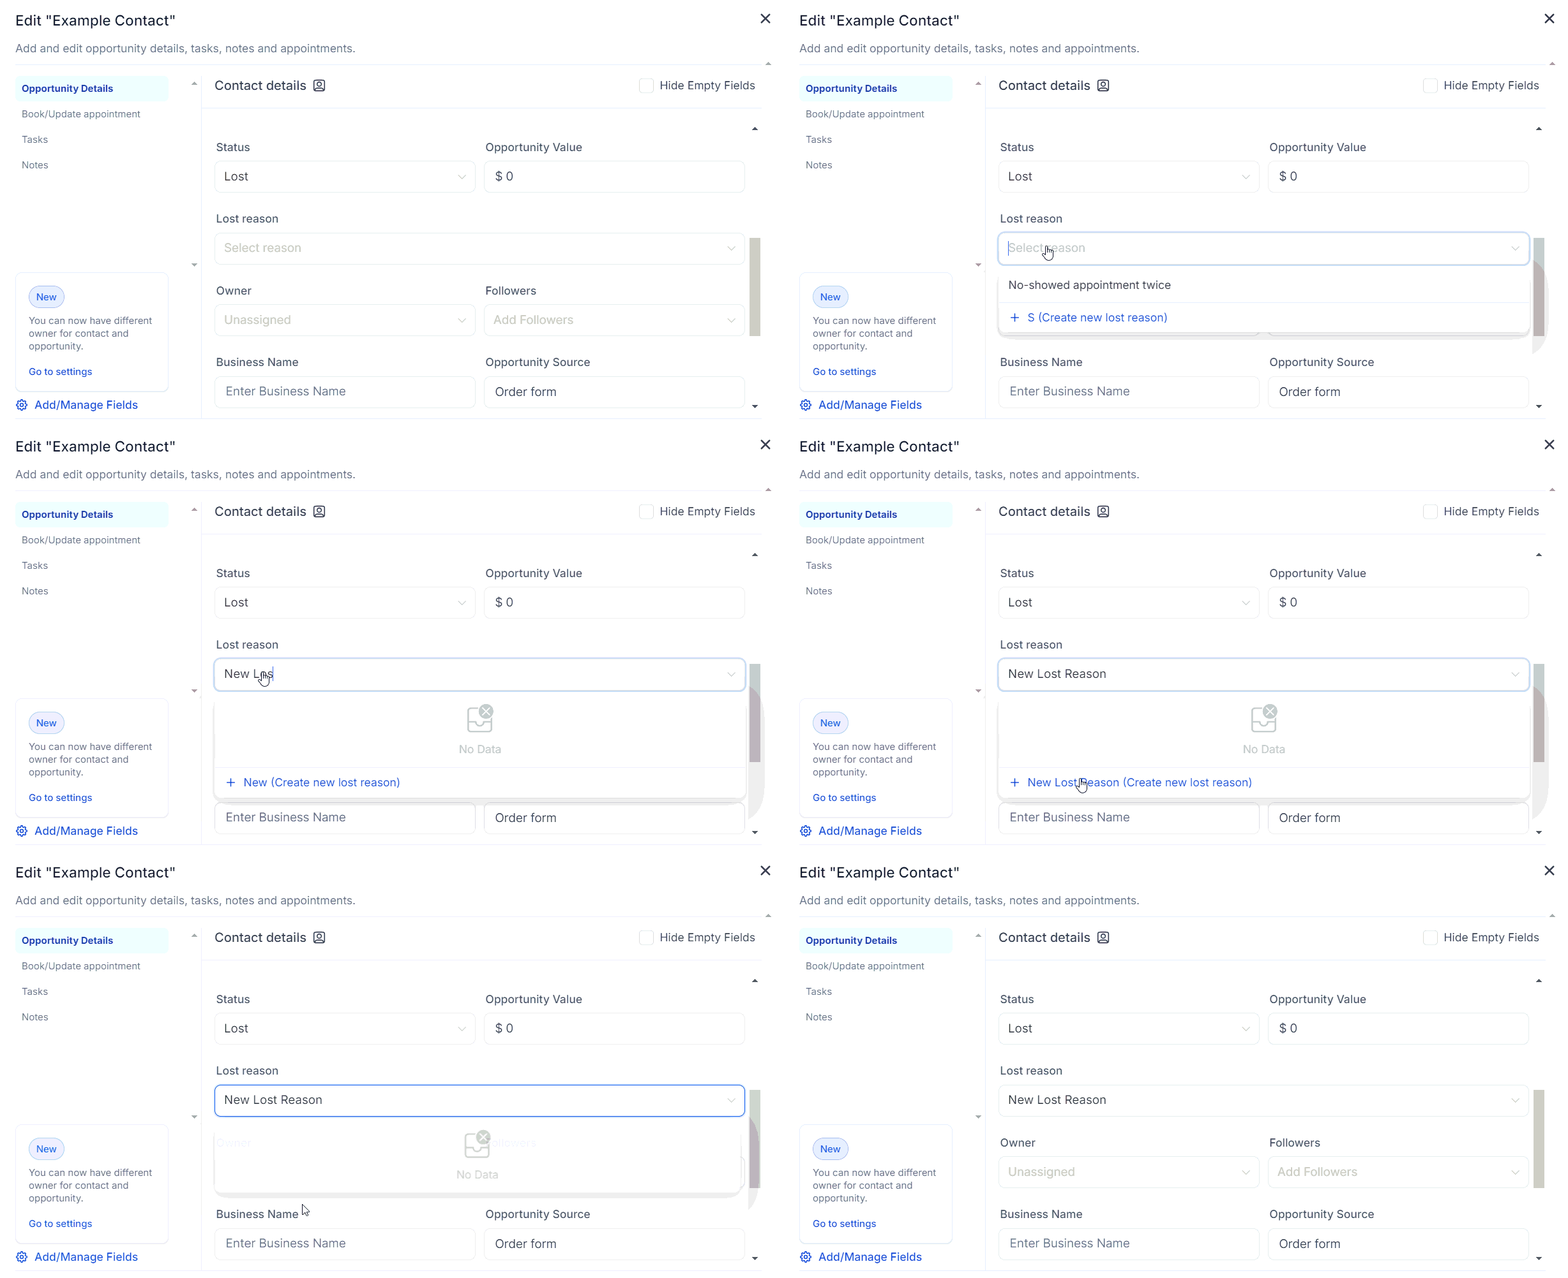
The lost reason prompt appearing when marking a deal as Lost
- Stored on the opportunity record
- Visible on the opportunity card and detail panel
- Available as a filter in the Opportunities view
- Included in CSV exports
- Usable as a trigger or filter condition in workflow automations
Setting up lost reasons
Lost reasons are managed in Opportunities > Opportunity Settings > Lost Reasons.1
Navigate to Lost Reasons
Go to Opportunities, then click Opportunity Settings (the gear icon). Select the Lost Reasons tab.
2
Add a lost reason
Click + Add Lost Reason and enter a name for the reason. Keep names concise and specific enough to be distinct from one another.Examples of well-defined lost reasons:
- Price too high
- Chose a competitor
- No budget at this time
- No response after follow-up
- Timing not right
- Feature not available
- Decided not to proceed
3
Save
Click Save. The reason is now available in the lost reason prompt and in filters throughout the platform.
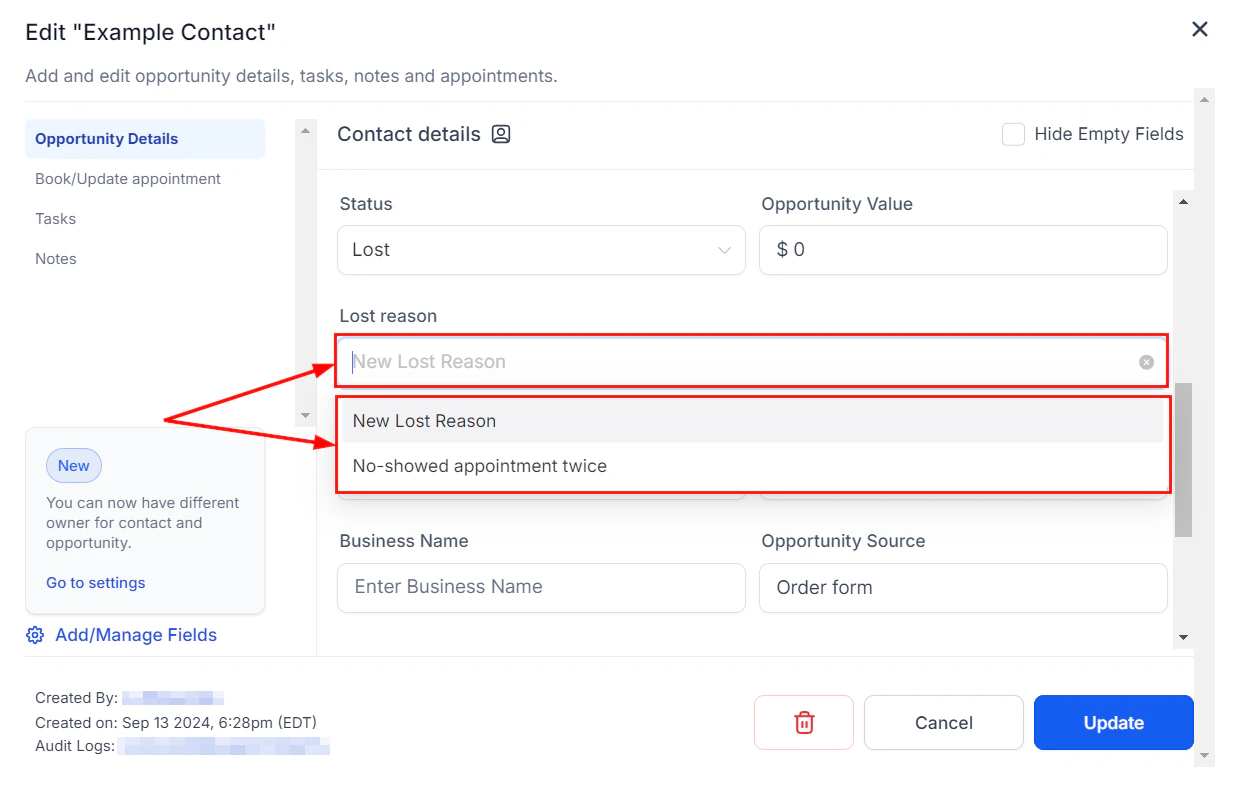
The Lost Reasons settings page showing configured reasons
Editing lost reasons
To rename an existing lost reason:- Go to Opportunities > Opportunity Settings > Lost Reasons
- Click the reason you want to edit
- Update the name and save
Editing a lost reason name updates it everywhere — on existing opportunity records, in filters, and in exports. If you need to track both the old and new names separately, create a new reason instead of renaming.
Deleting lost reasons
To delete a lost reason:- Go to Opportunities > Opportunity Settings > Lost Reasons
- Click the delete icon next to the reason
- Confirm the deletion
Requiring a lost reason
By default, the lost reason prompt appears when a deal is marked Lost, but team members can dismiss it without selecting one. If you want to enforce consistent data entry, you can make the lost reason field required:- Go to Settings > Custom Fields
- Find the Lost Reason field under Opportunity fields
- Enable the Required toggle
- Save
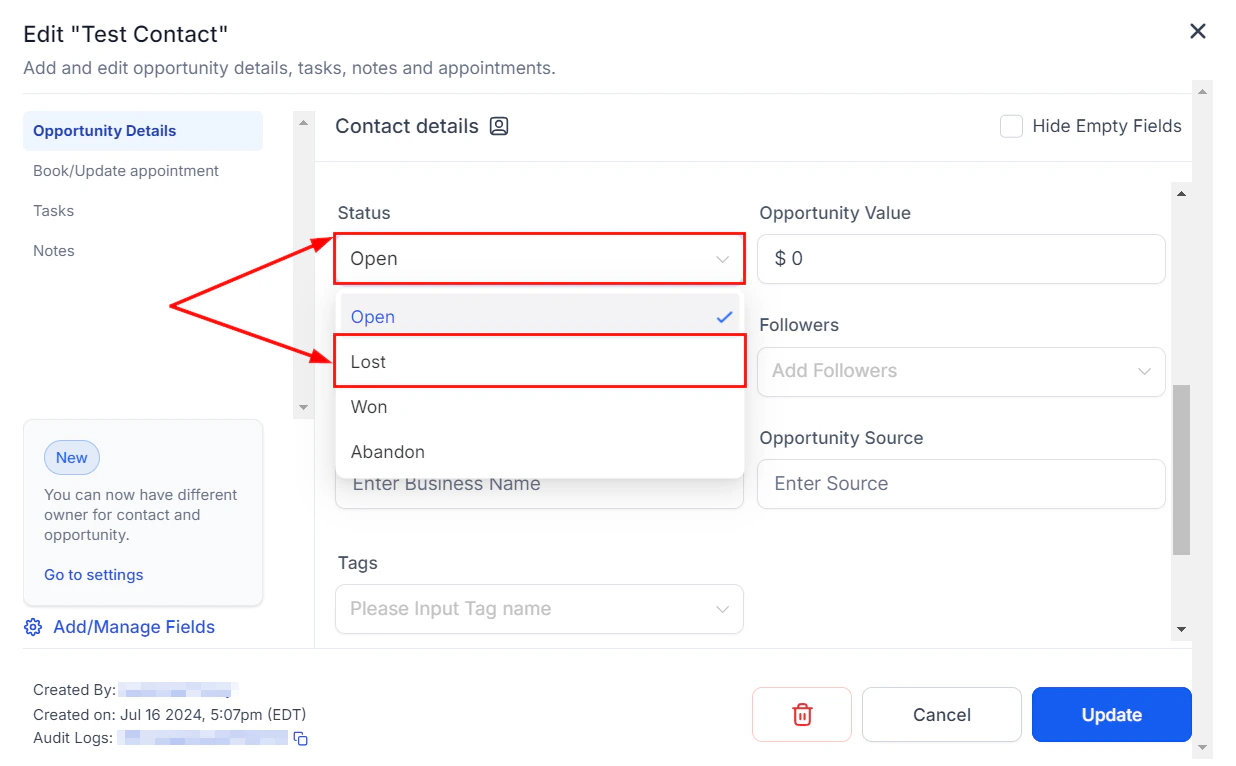
Opportunity status showing the Lost status with a recorded reason
Using lost reasons in filters
Once opportunities have lost reasons recorded, you can filter by them across the platform:- Opportunities view — add a Lost Reason filter to see all deals lost for a specific reason
- List view — add Lost Reason as a column and sort or filter by it
- Dashboard widgets — build opportunity widgets that show counts or values broken down by lost reason
Using lost reasons in automations
Lost reasons can trigger or filter workflows, making it possible to respond automatically based on why a deal was lost. Examples:- When Lost Reason = “Timing not right” → wait 90 days → send a re-engagement email to the contact
- When Lost Reason = “Chose a competitor” → add a “Competitor Loss” tag to the contact → enroll in a competitor-comparison nurture sequence
- When Lost Reason = “No response after follow-up” → create a task for the manager to review after 30 days
Analyzing lost reason data
Review your lost reasons regularly to identify patterns: Key questions to ask during review:- Which lost reason appears most often? Is it controllable (like pricing or feature gaps) or external (like timing)?
- Are deals being lost at a particular stage? That might indicate a problem with the sales conversation or materials at that step.
- Has the distribution of lost reasons changed over time? A sudden spike in “Chose a competitor” losses might signal a competitive shift worth investigating.
- Are high-value deals being lost for different reasons than lower-value ones?
FAQs
Is selecting a lost reason mandatory?
Is selecting a lost reason mandatory?
By default, the prompt appears but can be skipped. To enforce it, make the Lost Reason field required in Settings > Custom Fields.
Can I filter and report on lost reasons?
Can I filter and report on lost reasons?
Yes. Lost reason is available as a filter in the Opportunities view, as a column in list view, and as a filter in dashboard widgets and CSV exports.
What happens to historical data if I rename a lost reason?
What happens to historical data if I rename a lost reason?
The new name updates everywhere, including on existing opportunity records. If you need to distinguish between the old name and the new name historically, create a new reason rather than renaming.
Can I trigger an automation based on a specific lost reason?
Can I trigger an automation based on a specific lost reason?
Yes. Use the Opportunity Status Changed or Pipeline Stage Changed workflow trigger with a Lost Reason filter condition to trigger automations for specific reasons.
How many lost reasons can I create?
How many lost reasons can I create?
There is no hard limit. Most teams use between 6 and 10 to keep selection fast and data meaningful.
Can I use lost reasons across multiple pipelines?
Can I use lost reasons across multiple pipelines?
Yes. Lost reasons are global — the same list is available when marking deals lost in any pipeline.