

Accessing businesses
Navigate to Contacts and click the Businesses tab at the top of the section. The businesses list shows all company records with their associated contact counts and key details.Creating a business
1
Open the Businesses tab
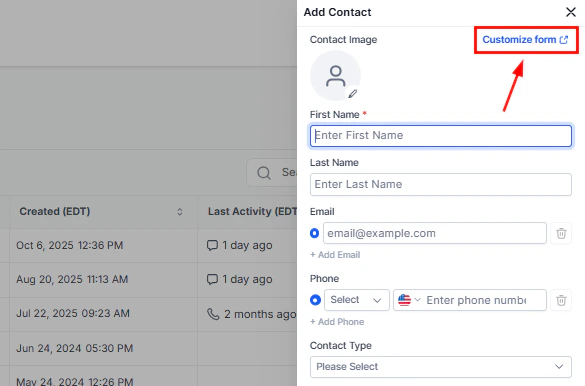
Go to Contacts > Businesses and click + Create Business (or the + Add button, depending on your account view).
2
Enter business details
Fill in the company information:
- Business name — the company’s legal or trading name (required)
- Phone number — main business phone
- Email address — main business email
- Website — company URL
- Address — street, city, state, zip, and country
- Description — free-text notes about the company
3
Save the business
Click Save to create the business record. It appears immediately in the Businesses list.
Creating a new business record
Linking contacts to a business
After creating a business record, associate individual contacts with it so you can view all people at that company in one place.From the business record
1
Open the business record
In Contacts > Businesses, click the business name to open its record.
2
Add a contact
In the Contacts section of the business record, click + Add Contact.
3
Search and select
Type the contact’s name or email to search. Select the matching contact from the dropdown to create the association.
From a contact record
1
Open the contact record
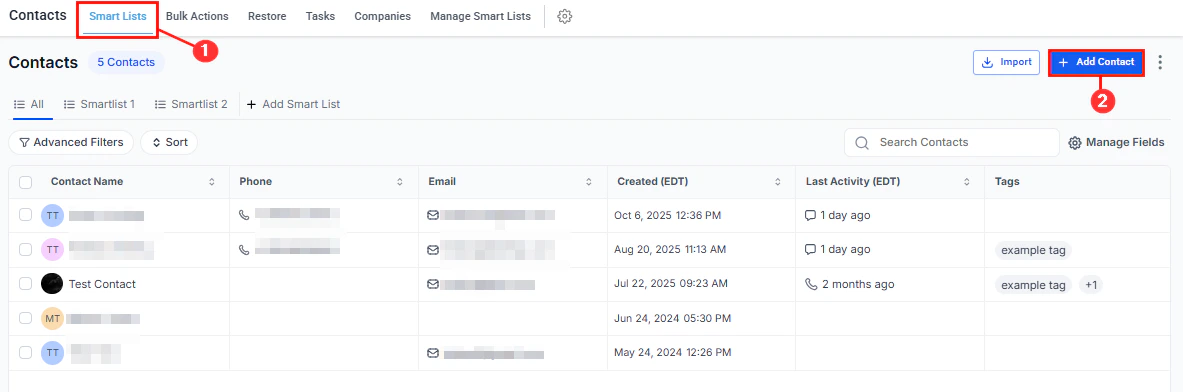
Navigate to Contacts > Smart Lists and click the contact’s name.
2
Go to General Info
Click the General Info tab in the left panel. Locate the Business Name field.
3
Enter or select the business
Type the business name. If it already exists in your Businesses list, select it from the suggestions. If it does not exist, type the name and save — a new business record may be created automatically, or you can create it separately in the Businesses tab.
Viewing a business record
A business record consolidates everything related to that company in one view:- Overview panel — name, phone, email, website, address, and description
- Contacts — all individual contacts linked to this business
- Opportunities — all open and closed deals associated with the business
- Notes — company-level notes visible across the team
- Activity — a timeline of interactions linked to the business or any of its contacts
- Custom fields — business-level custom fields configured in Settings
A business record overview showing contacts and details
Editing a business record
1
Open the business record
Click the business name in the Businesses list.
2
Edit fields
Click the pencil icon next to any field to edit it, or click directly into editable fields. Changes save automatically when you click outside the field.
Removing a contact from a business
1
Open the business record
Navigate to Contacts > Businesses and click the business name.
2
Remove the association
In the Contacts section, click the X or the trash icon next to the contact you want to remove. This removes the link between the contact and the business but does not delete the contact record.
Deleting a business
In the Businesses list, click the three-dot icon next to the business and select Delete. Confirm the deletion when prompted.Business custom fields
Custom fields settings for business records
Frequently asked questions
Can a contact be linked to more than one business?
Can a contact be linked to more than one business?
A contact’s primary business name field holds one company. However, through the Associations feature, you can link a contact to multiple business records using custom association labels.
Can I import businesses from a CSV?
Can I import businesses from a CSV?
Yes. During the contact import wizard, select both Contacts and Businesses as import objects. Map the business fields during the field-mapping step. New business records are created automatically for company names that do not already exist.
Can I filter contacts by their business in smart lists?
Can I filter contacts by their business in smart lists?
Yes. Use Advanced Filters in Smart Lists and filter by the Business Name field to find all contacts associated with a specific company.
Are opportunities linked at the business level or contact level?
Are opportunities linked at the business level or contact level?
Opportunities can be linked to both a contact and a business simultaneously. When you associate an opportunity with a contact who belongs to a business, the opportunity appears on both the contact record and the business record.