While the full workflow builder lives on the desktop platform, the HoopAI mobile app lets you monitor automation activity, receive internal workflow notifications, and trigger select workflow actions directly from your phone. This keeps your automations working for you even when you are away from your desk.

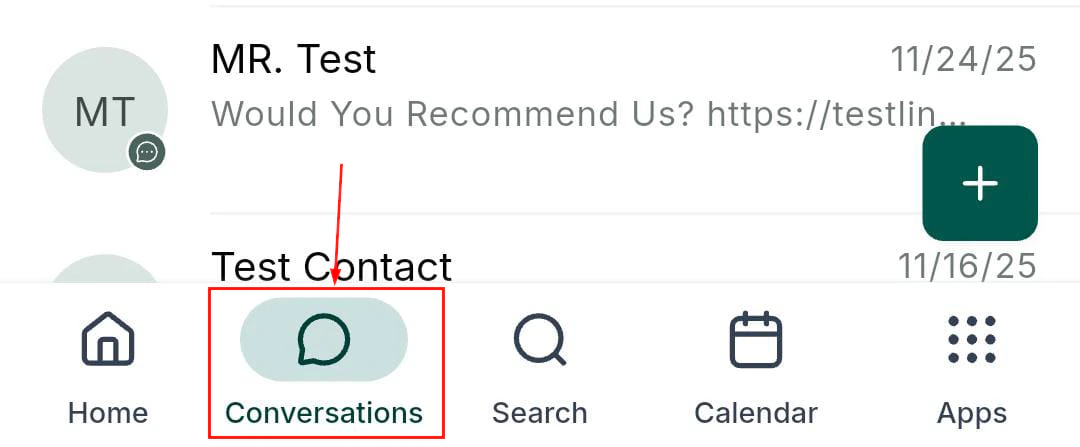
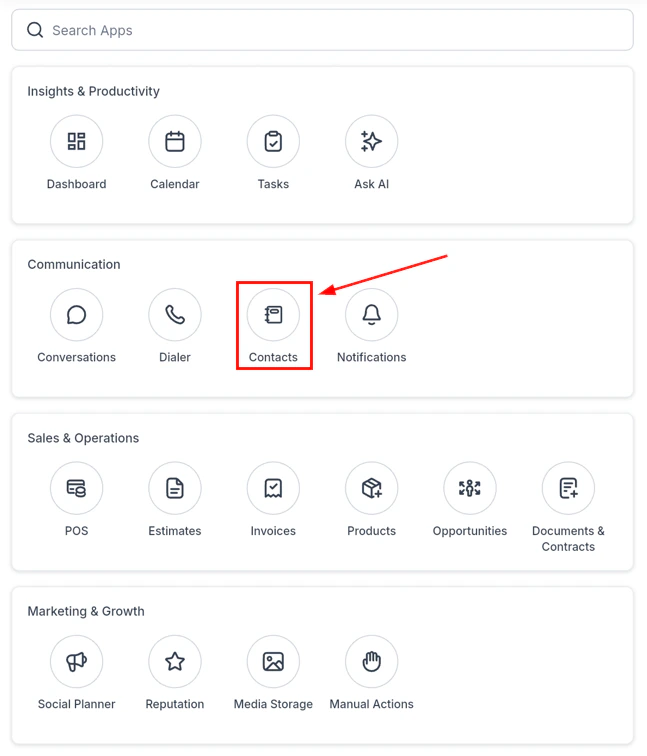
What you can do from mobile

The mobile app supports the following workflow-related actions:
ActionAvailable on mobile
View workflow listYes
Enable or disable a workflowYes
Receive internal workflow notificationsYes
Manually trigger a workflow for a contactYes
View workflow history and execution logYes
Build or edit workflow stepsNo — requires desktop
Create new workflow triggersNo — requires desktop

Accessing workflows

  1. Open the HoopAI mobile app.
  2. Tap the App Drawer (swipe up or tap All Apps).
  3. Select Automations under the Marketing and Growth category.
The Automations screen shows all workflows in your sub-account, with their current status (active, inactive, or draft) and a count of recent enrollments.

Enabling and disabling workflows

Tap any workflow in the list to open its detail view. At the top of the screen, you will see a toggle switch showing whether the workflow is currently Active or Inactive. Tap the toggle to flip the status. The change takes effect immediately — an active workflow will stop processing new enrollments until re-enabled.
Disabling a workflow does not cancel contacts already enrolled in it. Contacts mid-workflow will continue to receive scheduled actions (emails, SMS) until the workflow completes or they are manually unenrolled. To stop all pending actions, use the desktop platform to unenroll contacts in bulk.

Manually triggering a workflow for a contact

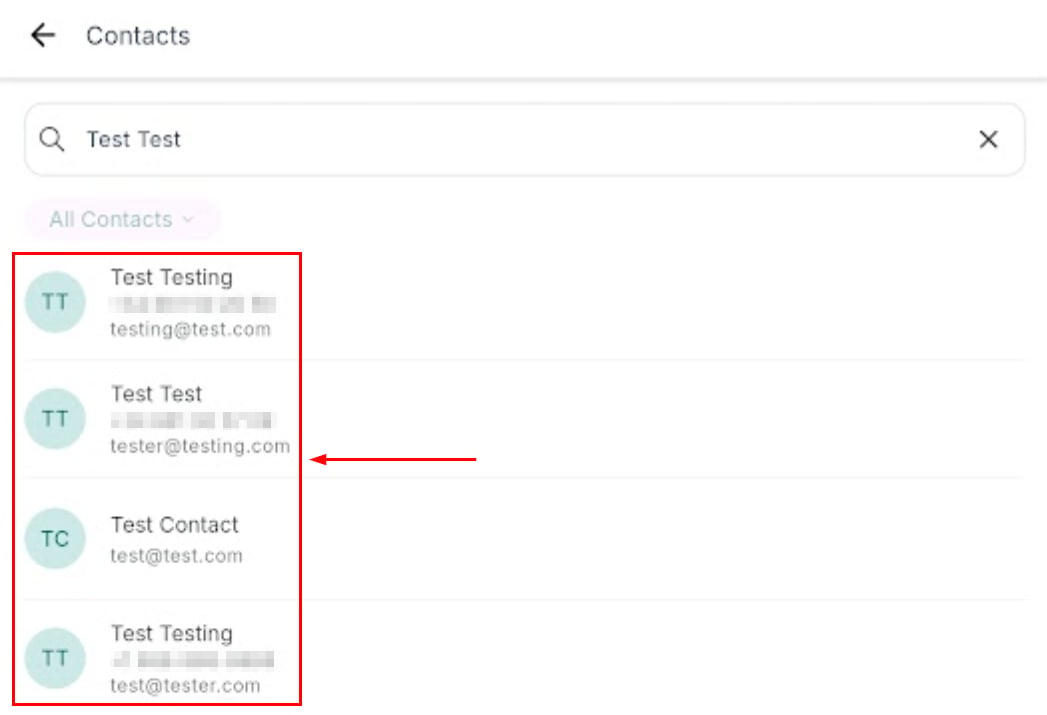
You can manually enroll a single contact into a workflow from their contact record:
  1. Open Contacts and search for the contact.
  2. Tap the contact to open their record.
  3. Scroll to the Automations section and tap Add to workflow.
  4. Select the workflow from the list and confirm.
The contact is immediately enrolled and will begin progressing through the workflow steps.

Receiving internal notifications from workflows

Workflows can include an Internal Notification action step, which sends an alert to specific team members when a trigger fires — for example, when a high-value lead fills out a form or when a deal reaches a critical stage. These internal notifications are delivered to your mobile app as push notifications in real time. When a workflow internal notification fires, you will receive:
  • A push notification with the subject line and message configured in the workflow step
  • A deep link that opens the relevant contact or conversation directly in the app
Configure which team members receive internal notifications from the workflow builder on the desktop platform. Notifications can be delivered by email, push, SMS, or WhatsApp.

Viewing workflow execution history

Tap a workflow in the Automations list and then tap History to see a log of recent executions. The history log shows:
  • Contact name — who triggered the workflow
  • Enrollment date and time
  • Current step — where the contact is in the workflow
  • Status — active, completed, or errored
Tap any row in the history log to open that contact’s record and review their activity timeline.

Workflow notifications in conversations

When a workflow sends an SMS or email to a contact, that message appears in the contact’s conversation thread in your mobile inbox — just like a manually sent message. This means you can see what your automations are sending and jump in to take over the conversation manually at any time.
If you want to pause automation for a specific contact and handle them personally, open their conversation, tap Actions, and select Disable automation for this contact. The workflow will stop sending to them while you manage the relationship directly.

What requires the desktop platform

Building and editing workflows requires the desktop platform. The mobile app does not include the drag-and-drop workflow builder. To create new automations, add triggers, configure wait steps, or connect third-party integrations, log in to the desktop platform and navigate to Automations > Workflows.
Last modified on March 5, 2026