

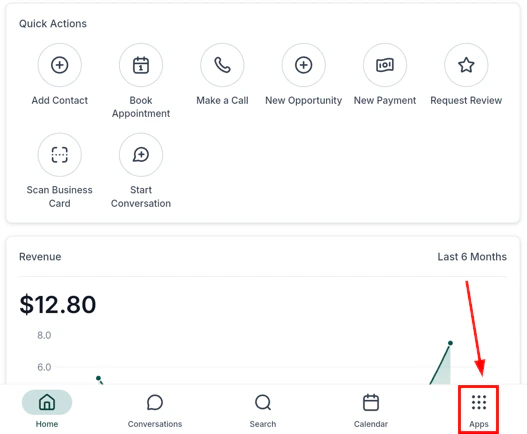
HoopAI mobile app — payments section navigation
Point of sale (POS)
The POS is designed for fast in-person sales — enter a custom amount or select products from your catalog, add a customer, apply discounts or taxes, and collect payment in seconds.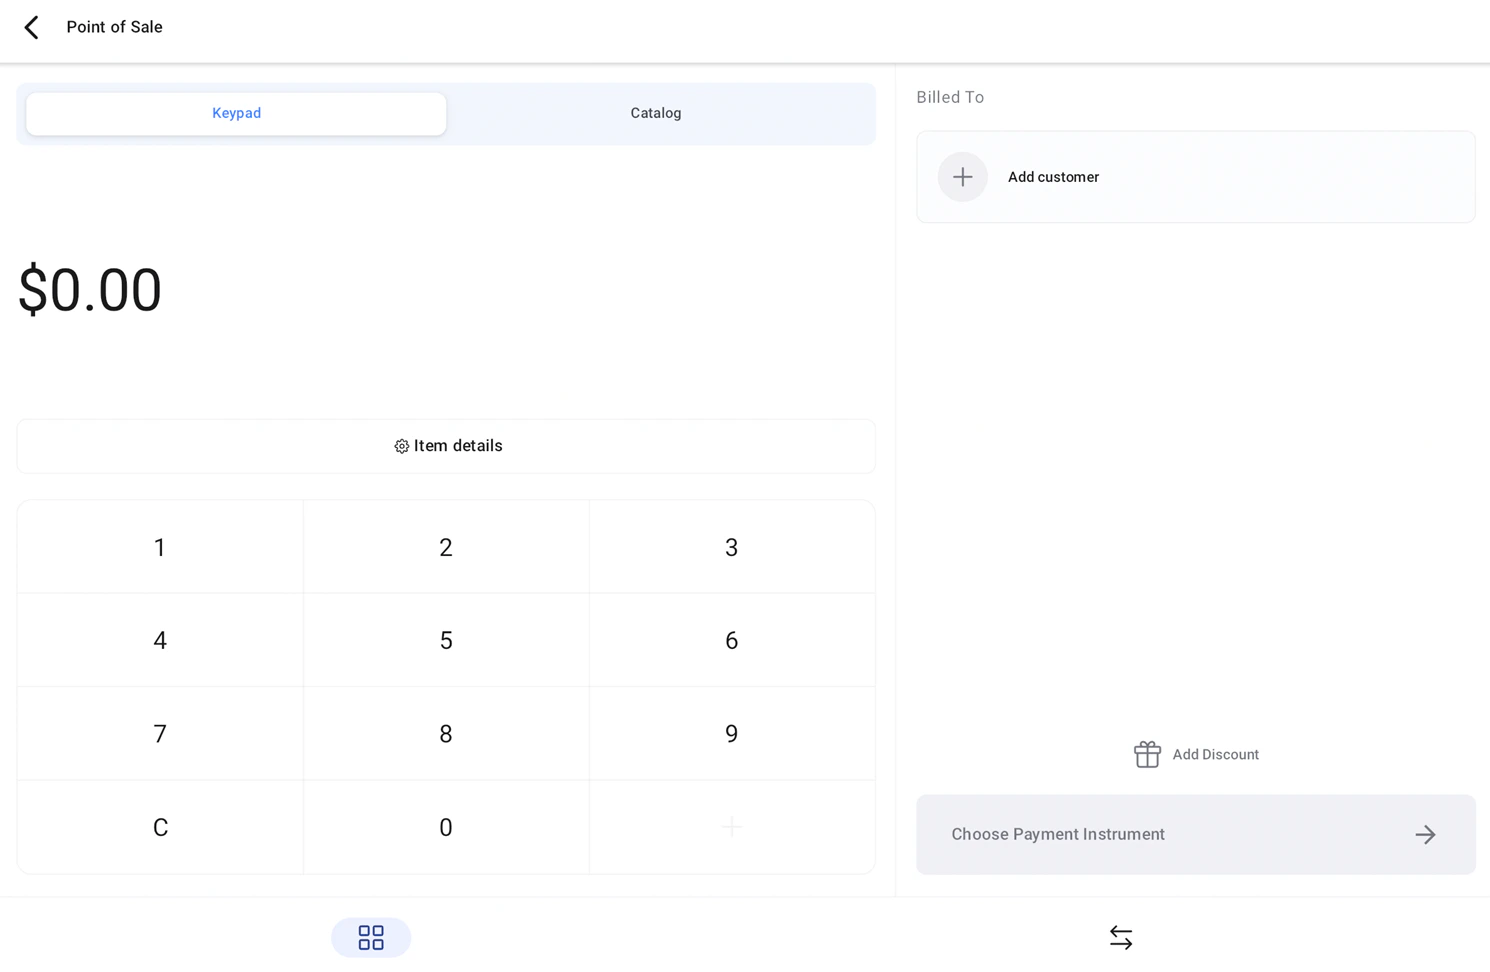
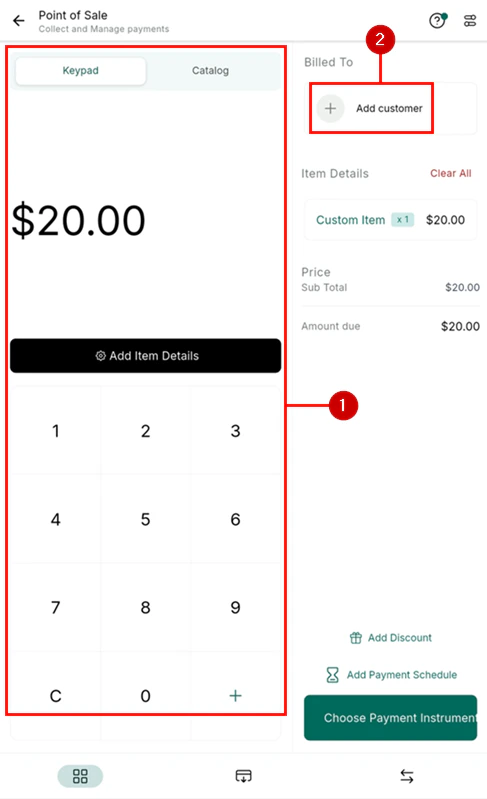
POS main screen — keypad and catalog view
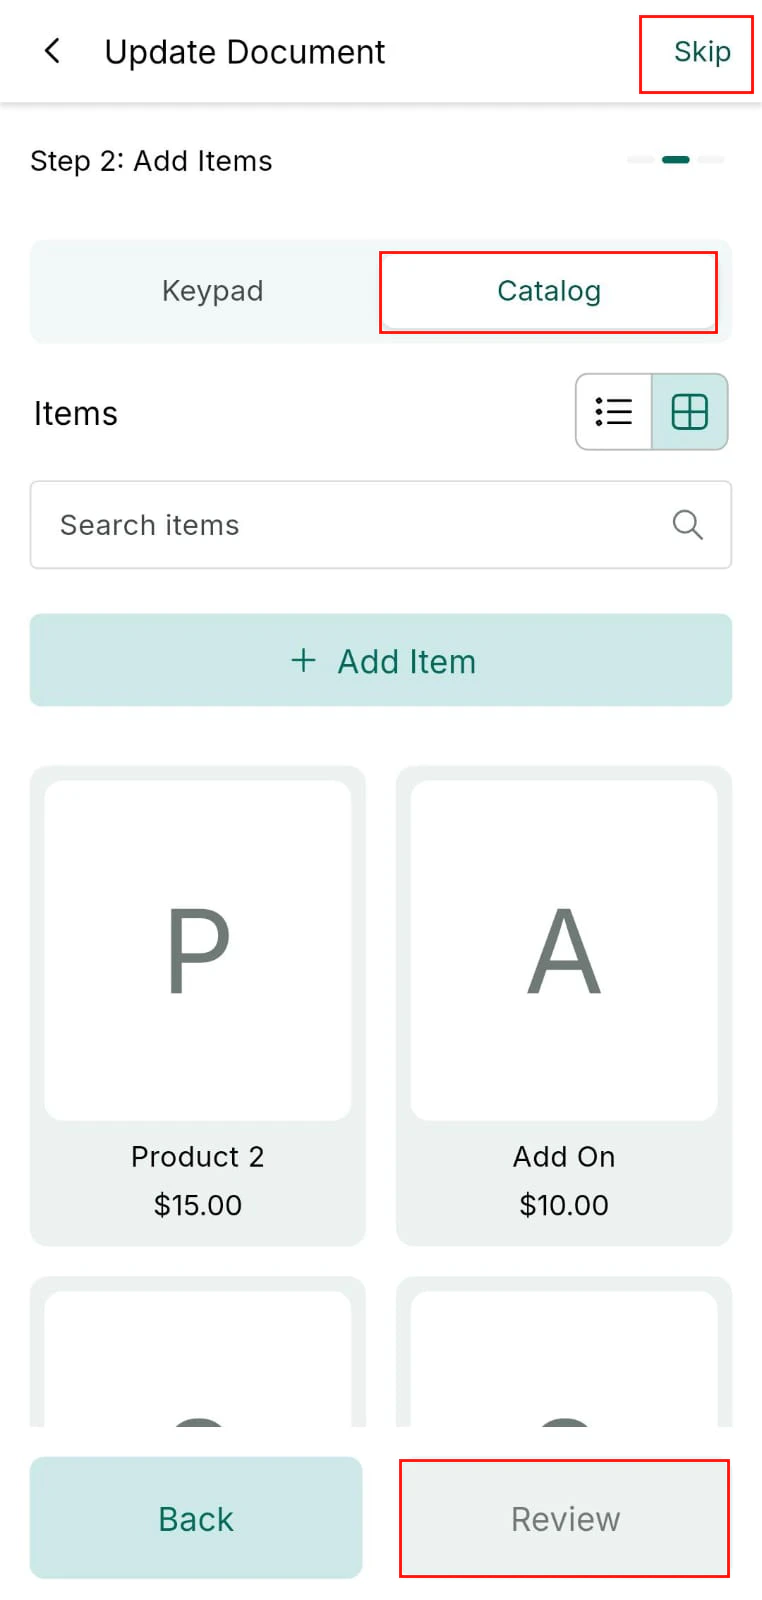
Adding items to a sale
The POS screen has two panels:- Keypad — enter a custom dollar amount directly
- Catalog tab — select from your saved products and services inventory
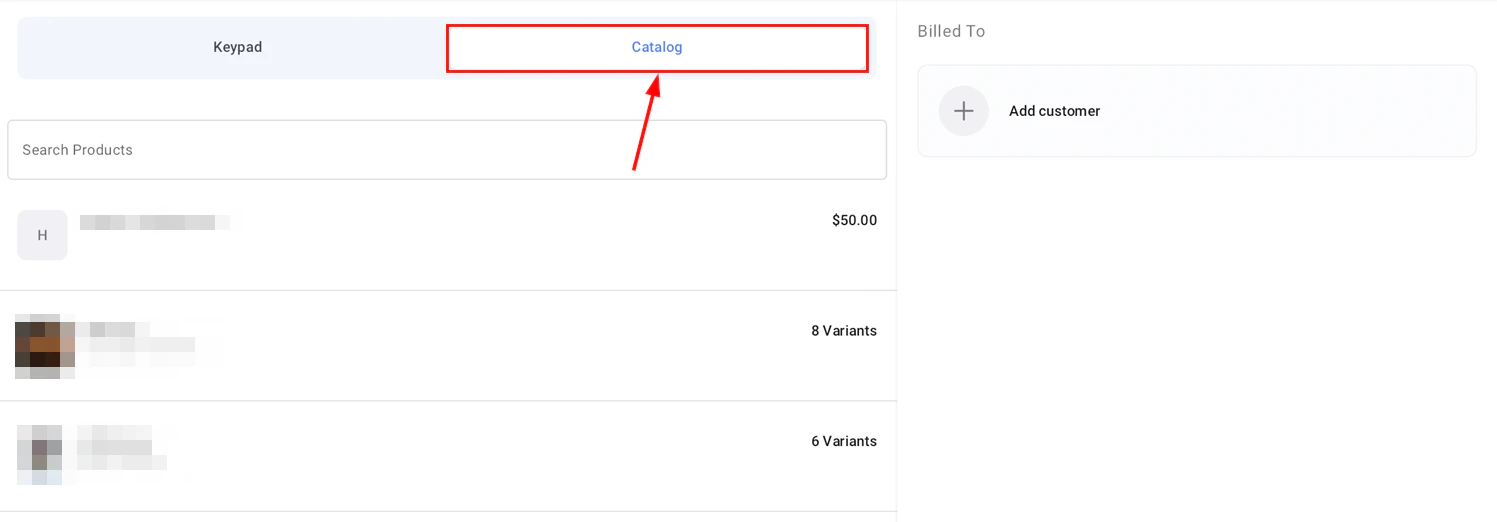
Product catalog — select from saved inventory

Add a product to the current sale
Adding a customer
Linking a customer to the sale allows you to track the transaction on their contact record.
Add or search for a customer to link to the sale
Payment methods
Tap Choose Payment Instruments to select how to collect payment: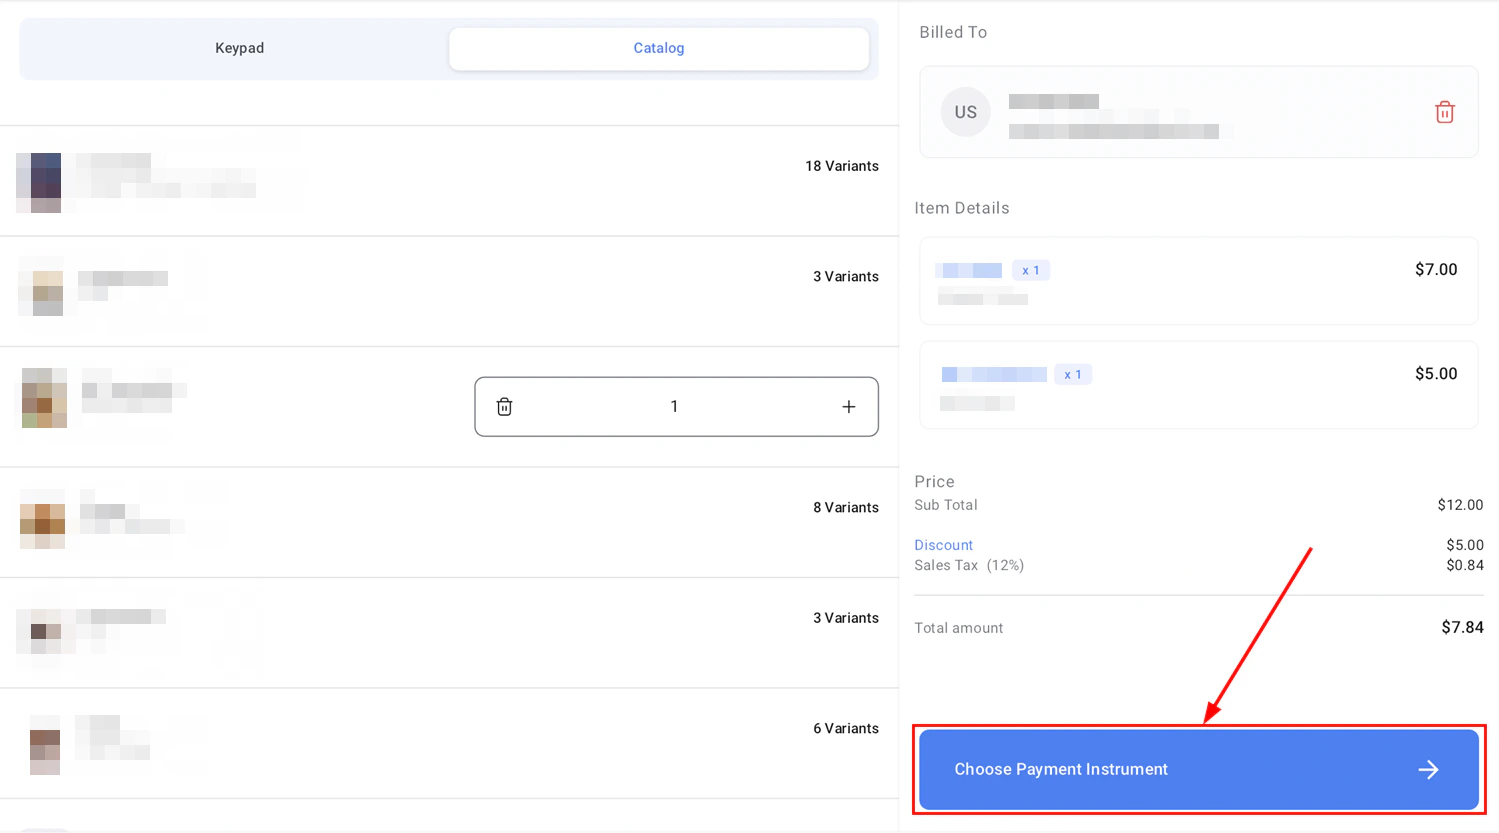
Payment method options — Tap to Pay, card on file, manual entry, hardware, cash, or invoice
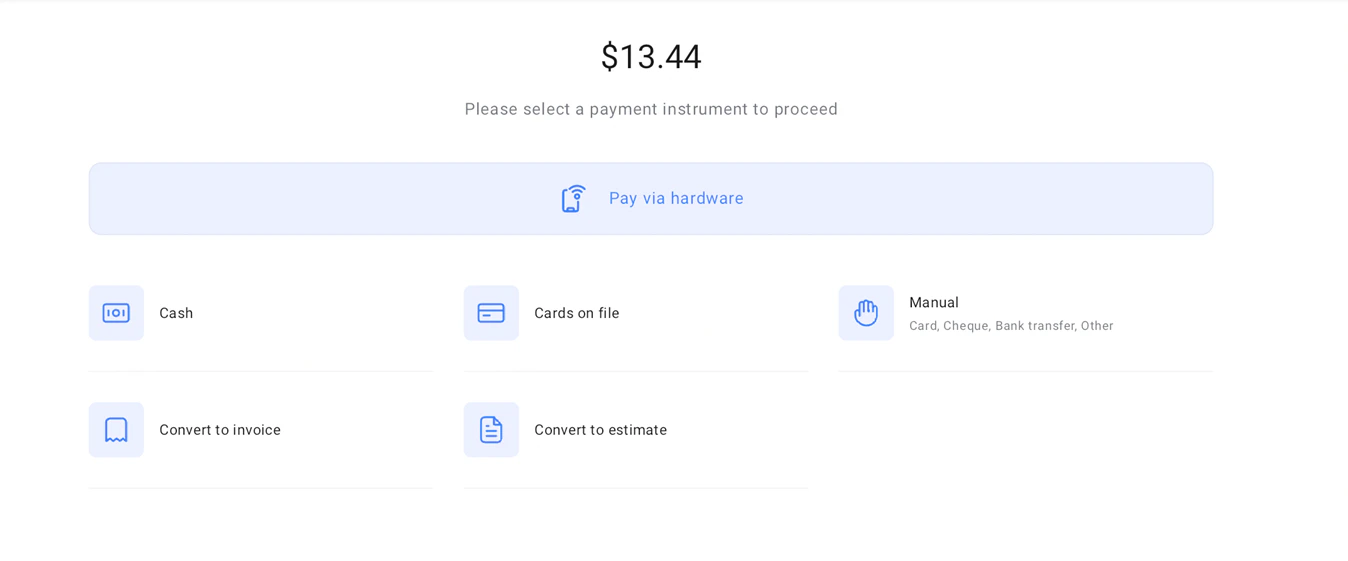
Additional payment options
Viewing POS transaction history
Tap Transaction History inside the POS to see a record of all completed transactions. Tap any transaction to view a breakdown or issue a refund.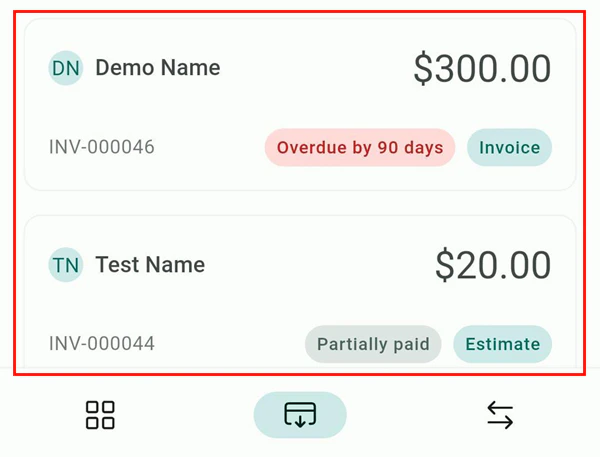
POS transaction history — all completed sales
POS on iPads and tablets
The POS is optimized for larger devices with a split-screen layout — left panel for the keypad or catalog, right panel for live checkout details. Supports both landscape and portrait orientations, making it compatible with tablet docks and external payment hardware.Tap to Pay
Tap to Pay uses NFC technology built into your iPhone or Android device to accept contactless card payments — no card reader required.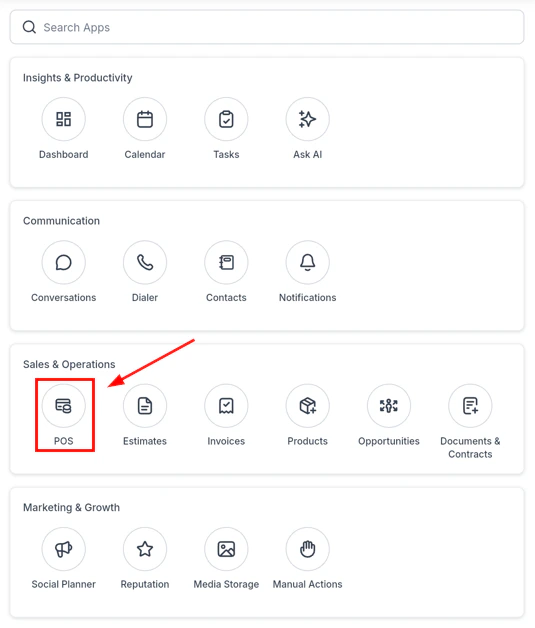
Tap to Pay — setup and configuration

Tap to Pay — navigate to payment settings
Tap to Pay — activate contactless payments
Open the POS
Add items and review the sale
Select Tap to Pay as the payment method
Collect payment
Automatic taxes
Automatic Taxes in Mobile Payments calculates tax rates instantly based on customer details and product tax codes — across multiple countries and jurisdictions, for invoices, POS transactions, and estimates.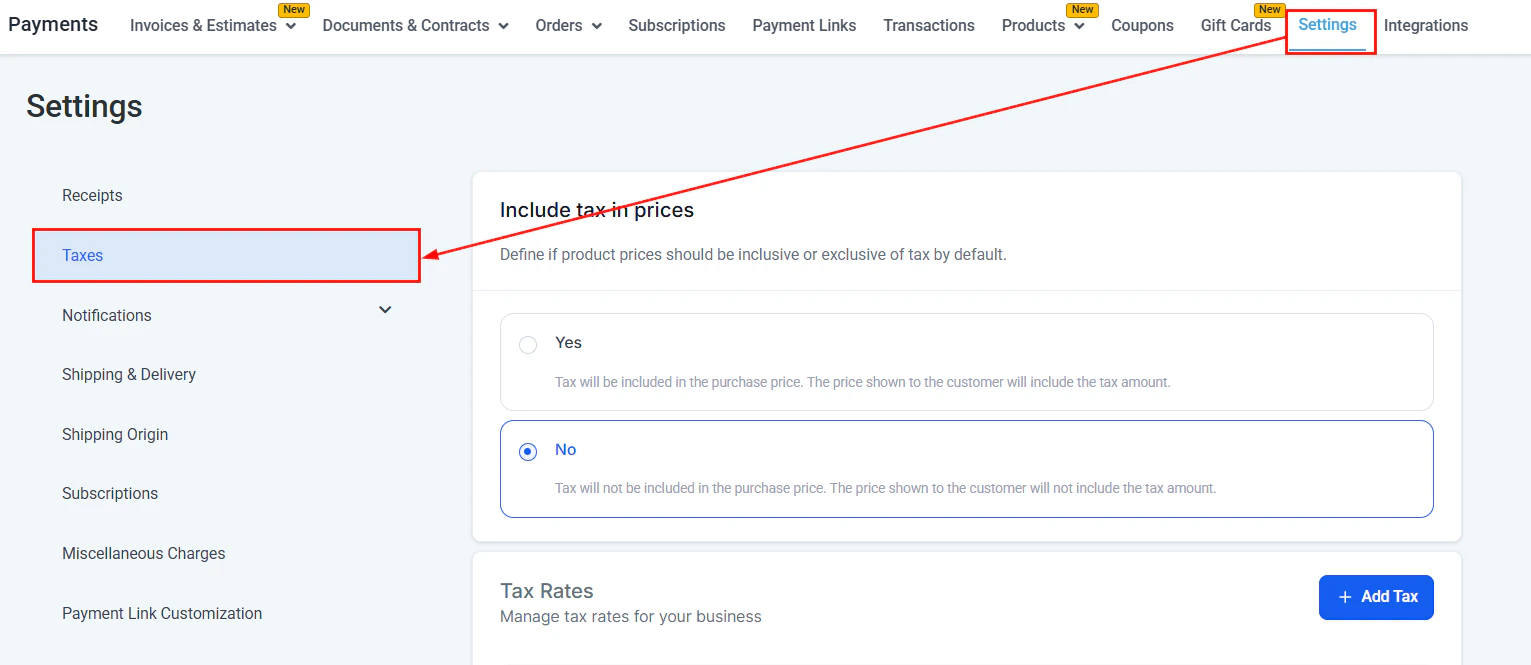
Automatic taxes — calculated based on product and customer location
Taxes and discounts
When creating a sale or invoice on mobile, you can:- Add discounts — apply a percentage or fixed-amount discount
- Apply taxes — select applicable tax rates configured in your account settings
- Automatic taxes — if configured, taxes are calculated automatically based on product and location
Invoices
The Invoices section provides full invoice management on your mobile device — create, send, track, and collect payment on invoices wherever you are.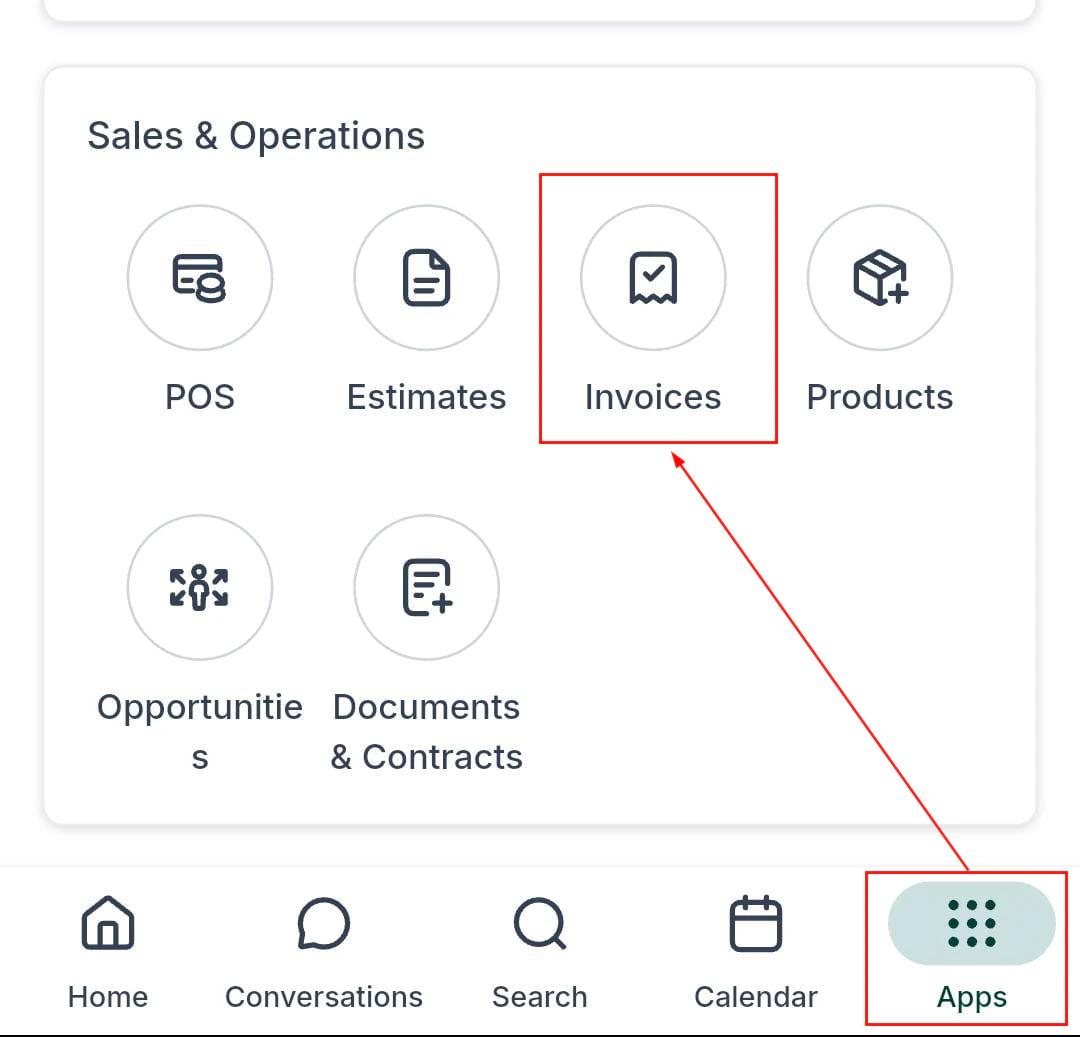
Invoices section — overview of paid and outstanding invoices
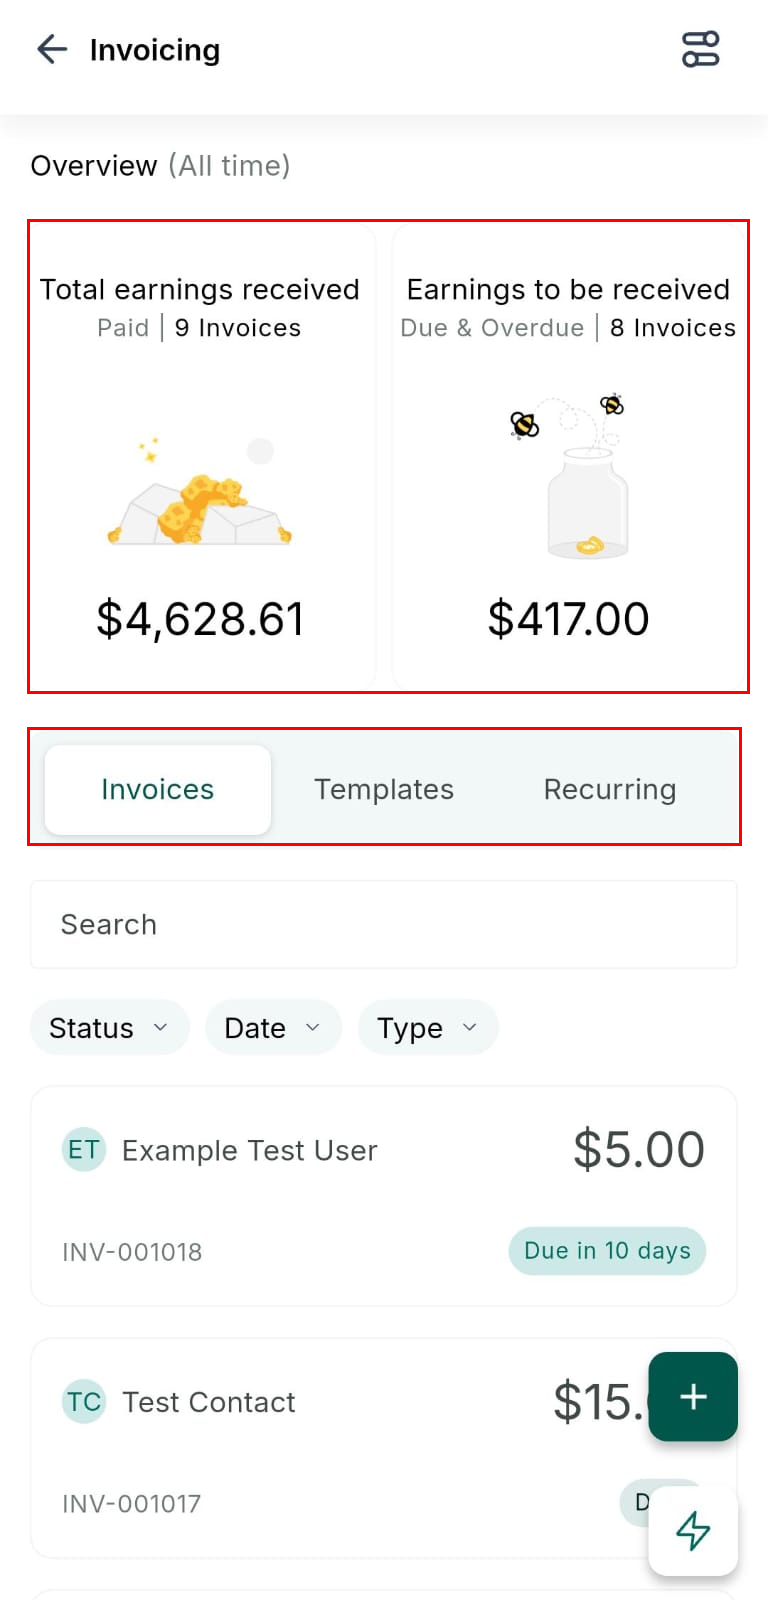
Invoice overview — paid, due, and overdue amounts at a glance
Searching invoices
Filter by Invoices, Templates, or Recurring using the tabs at the top.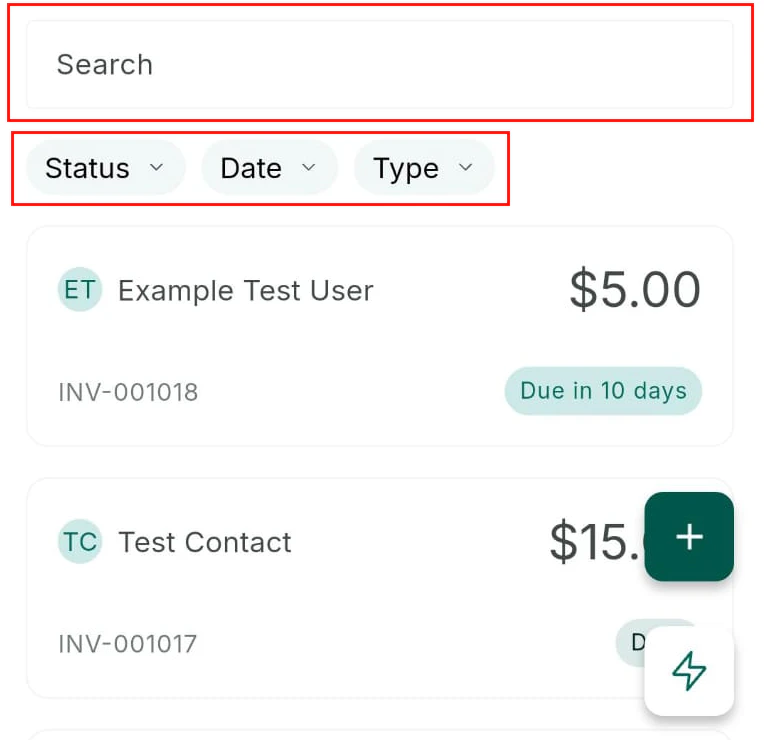
Search for a specific invoice by contact or amount
Creating and sending an invoice
Tap the + button to create a new invoice. Add line items, link a contact, set an issue date and due date, add terms and notes, then send via email or SMS.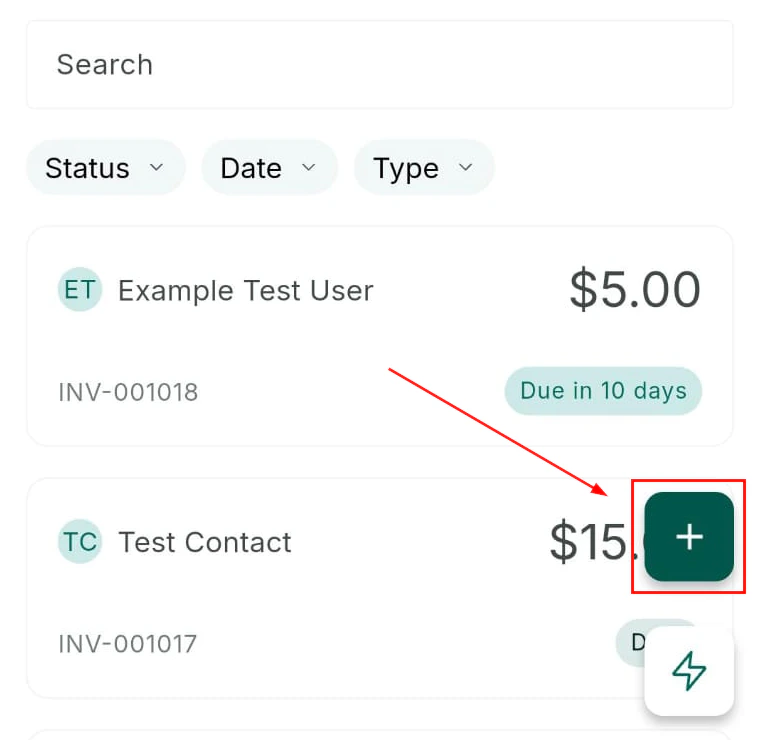
Add line items to a new invoice
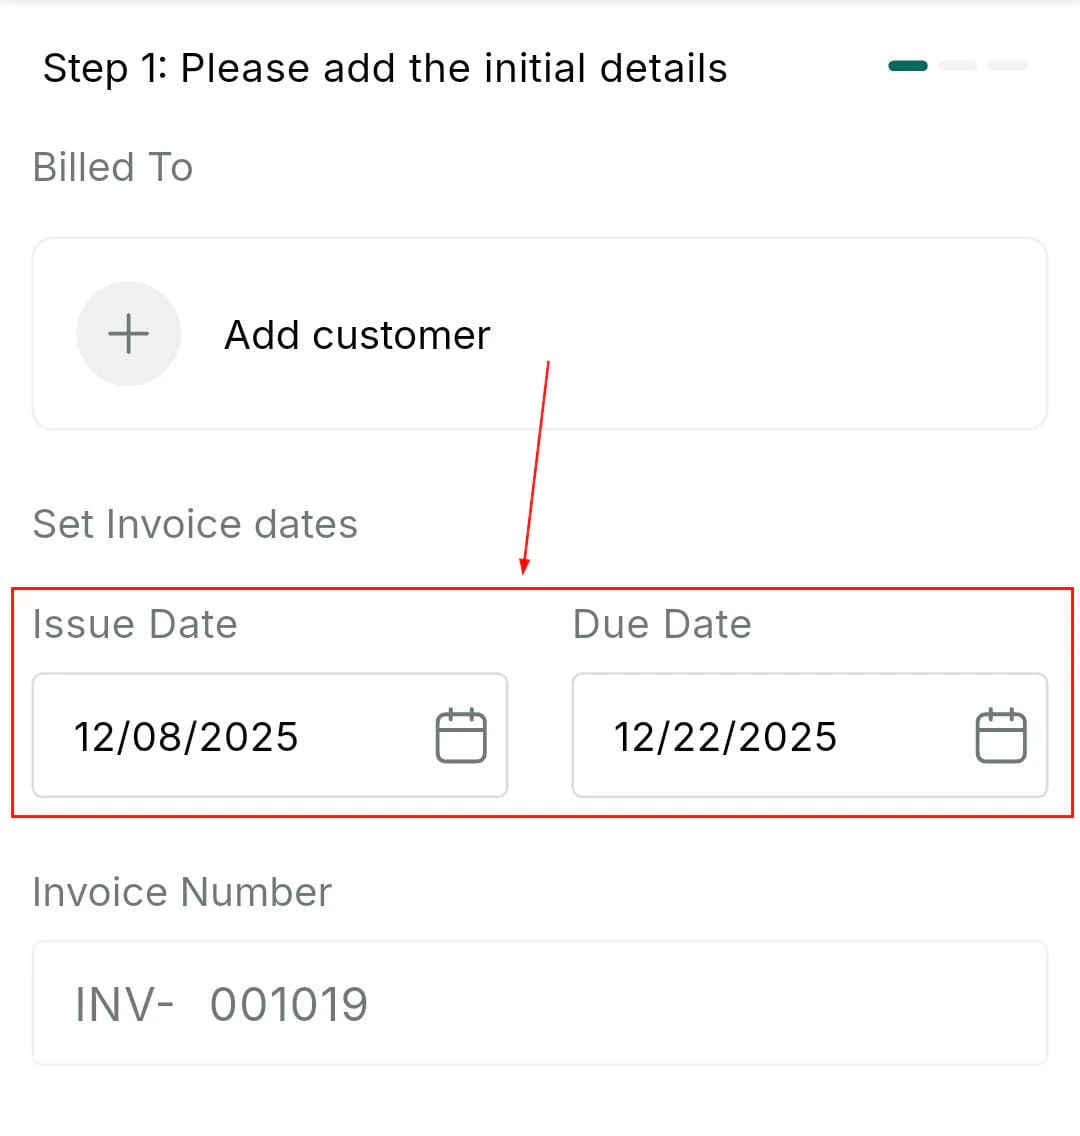
Set issue and due dates on the invoice
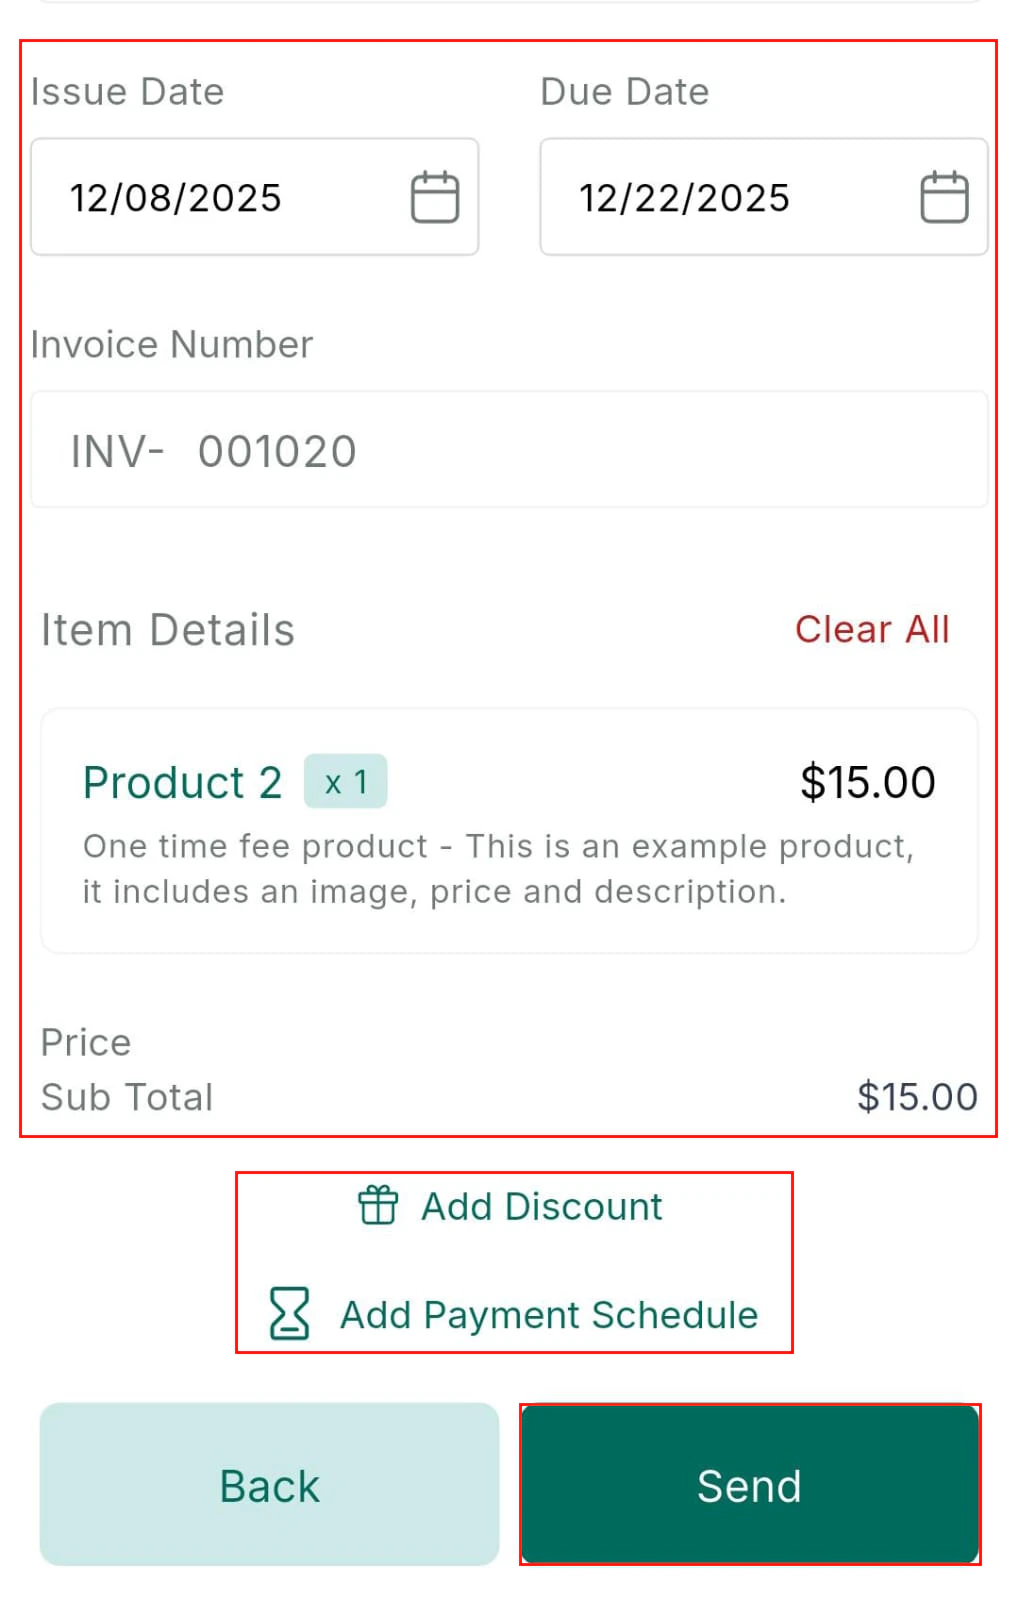
Review invoice before sending
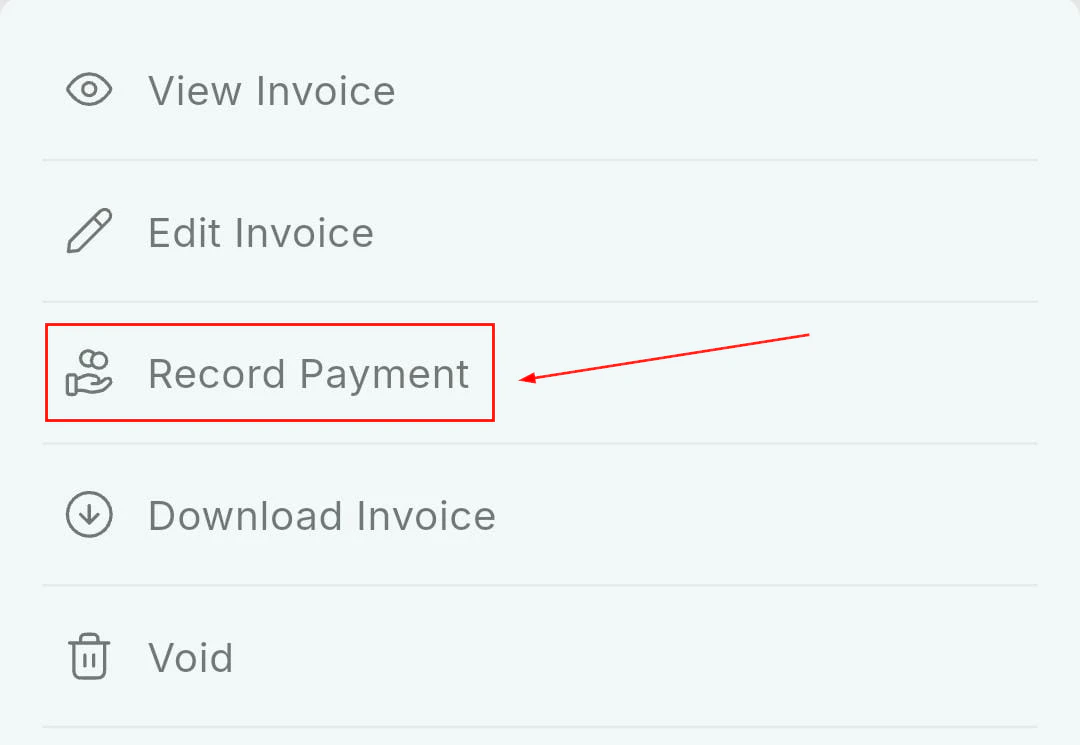
Recording payments
Open an invoice and tap Record Payment to manually record a payment received outside the platform (e.g., cash, bank transfer, or check).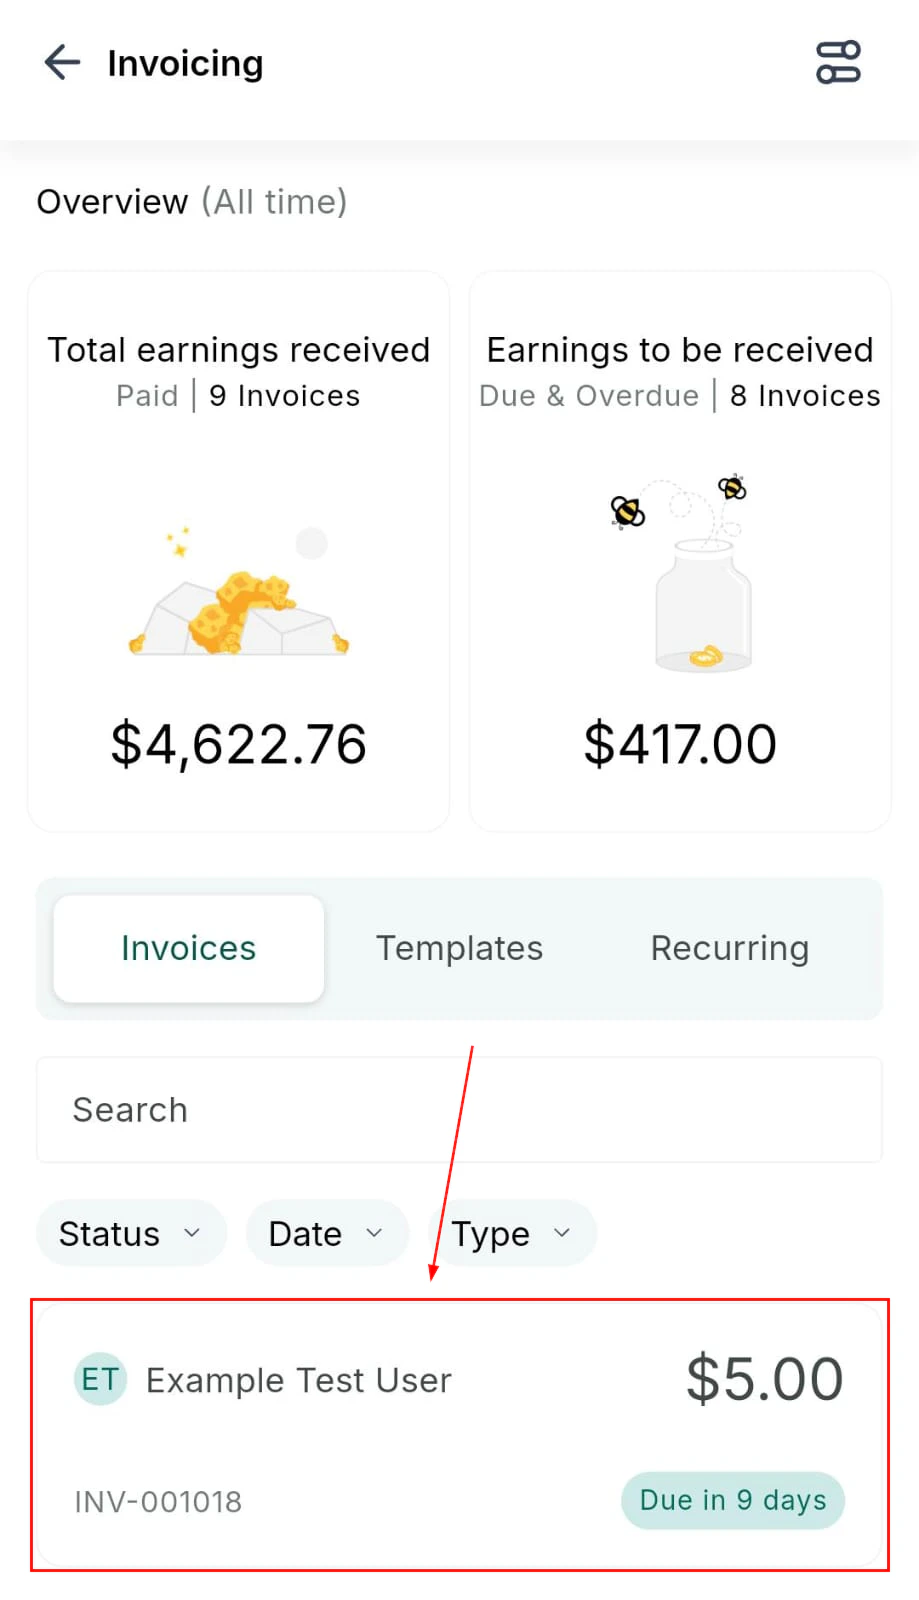
Invoice payment — select payment card on file
Record payment — confirm the payment instrument
Refunds
From Transaction History, tap any completed transaction to view the itemized breakdown or issue a full or partial refund.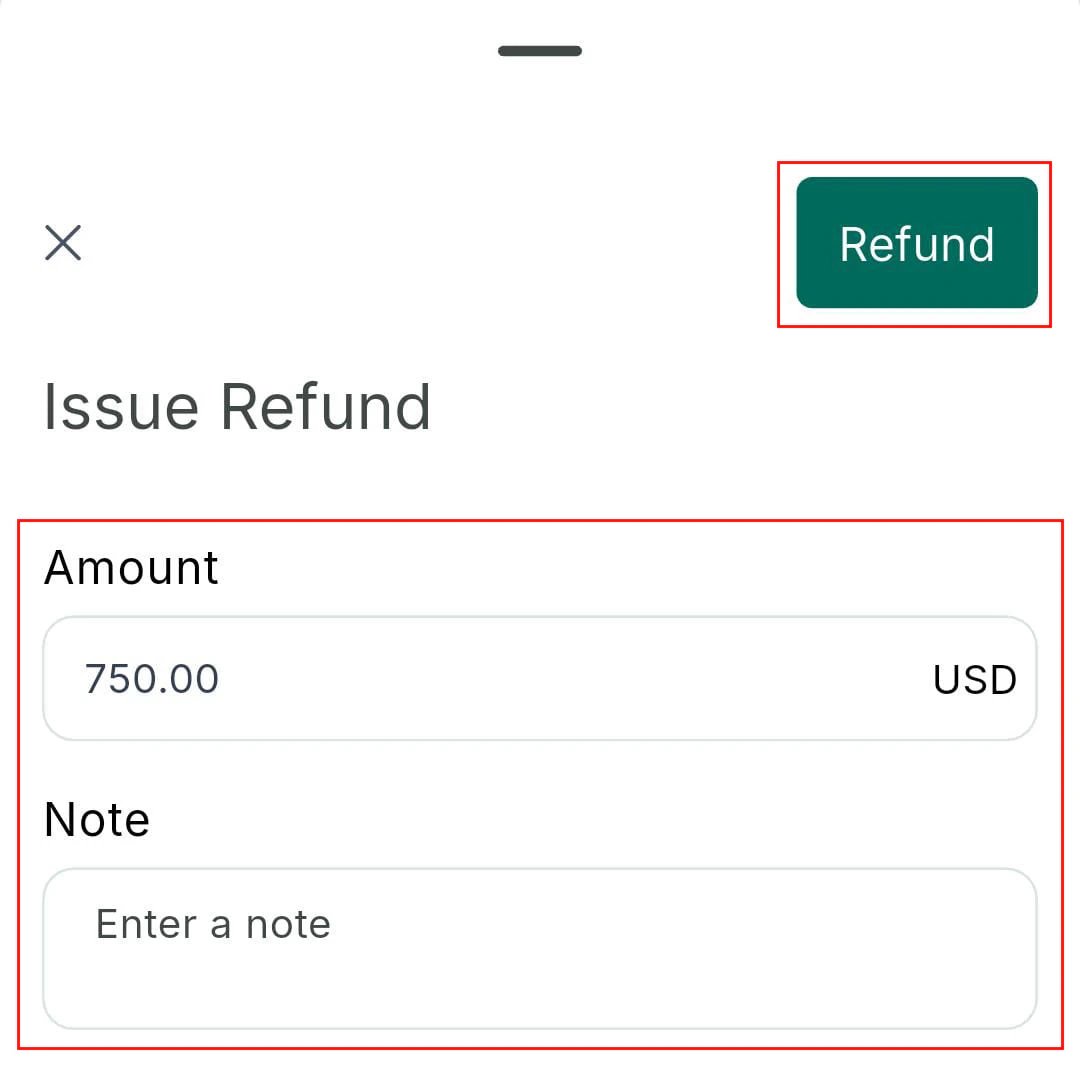
Issue a refund from transaction history
Estimates
Create and send price estimates before issuing a formal invoice. From the apps menu, tap Estimates to browse, search, and manage your estimates.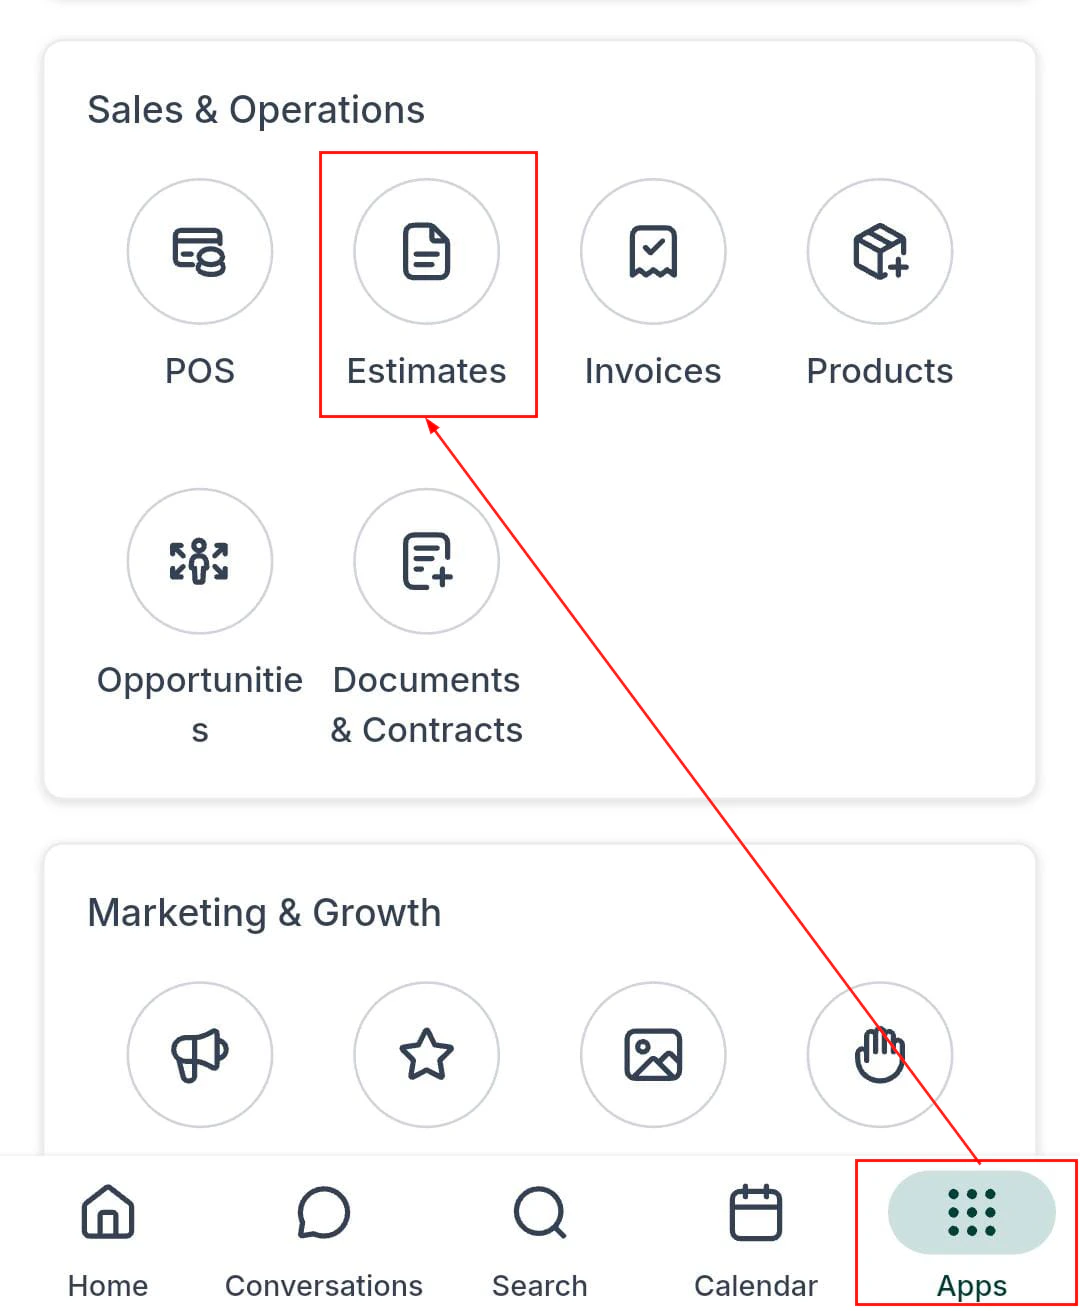
Estimates section — view, create, and manage estimates
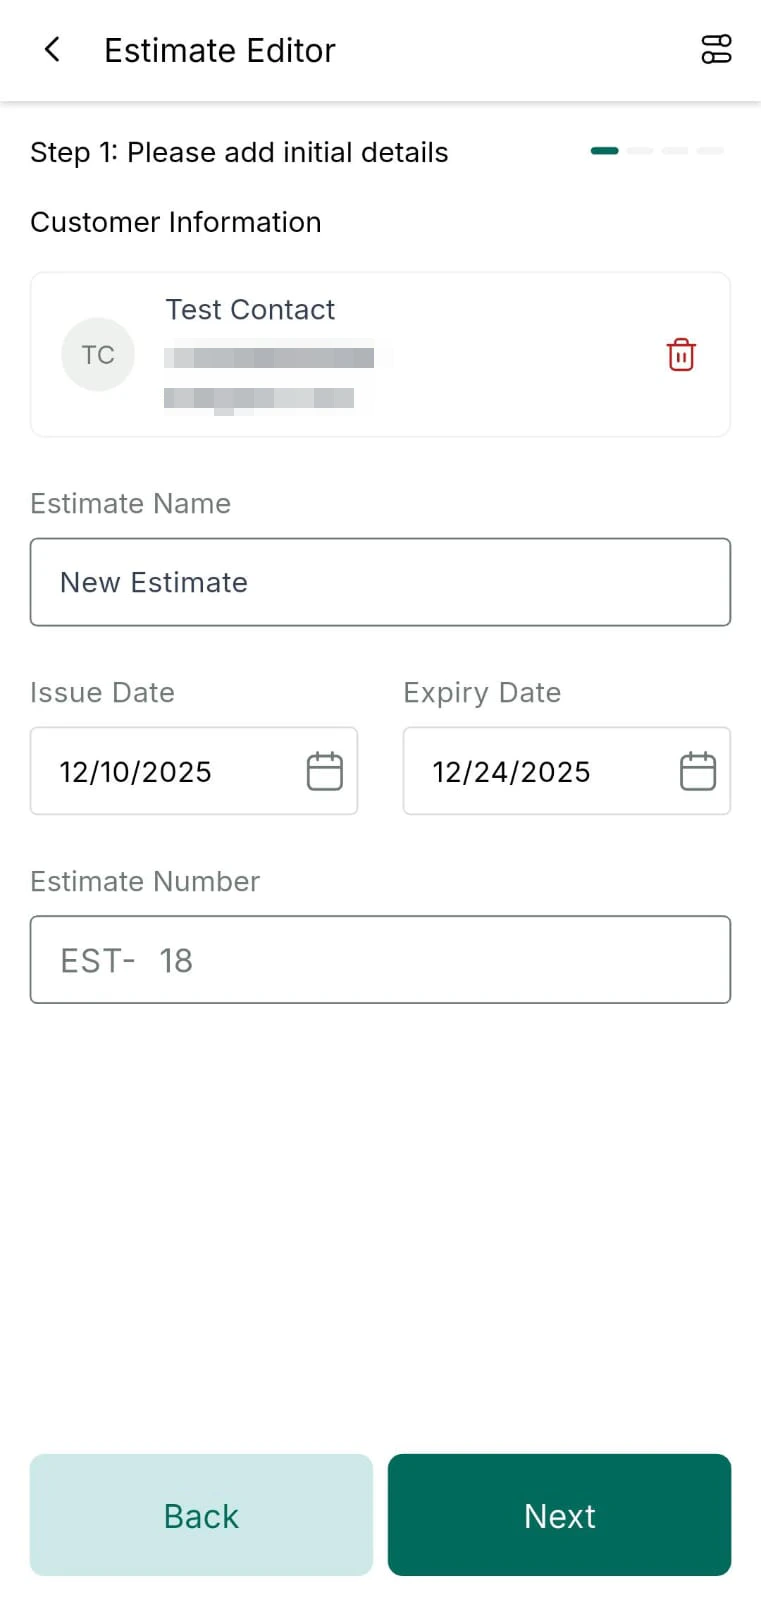
Creating and sending an estimate
New estimate — add line items, quantities, and prices
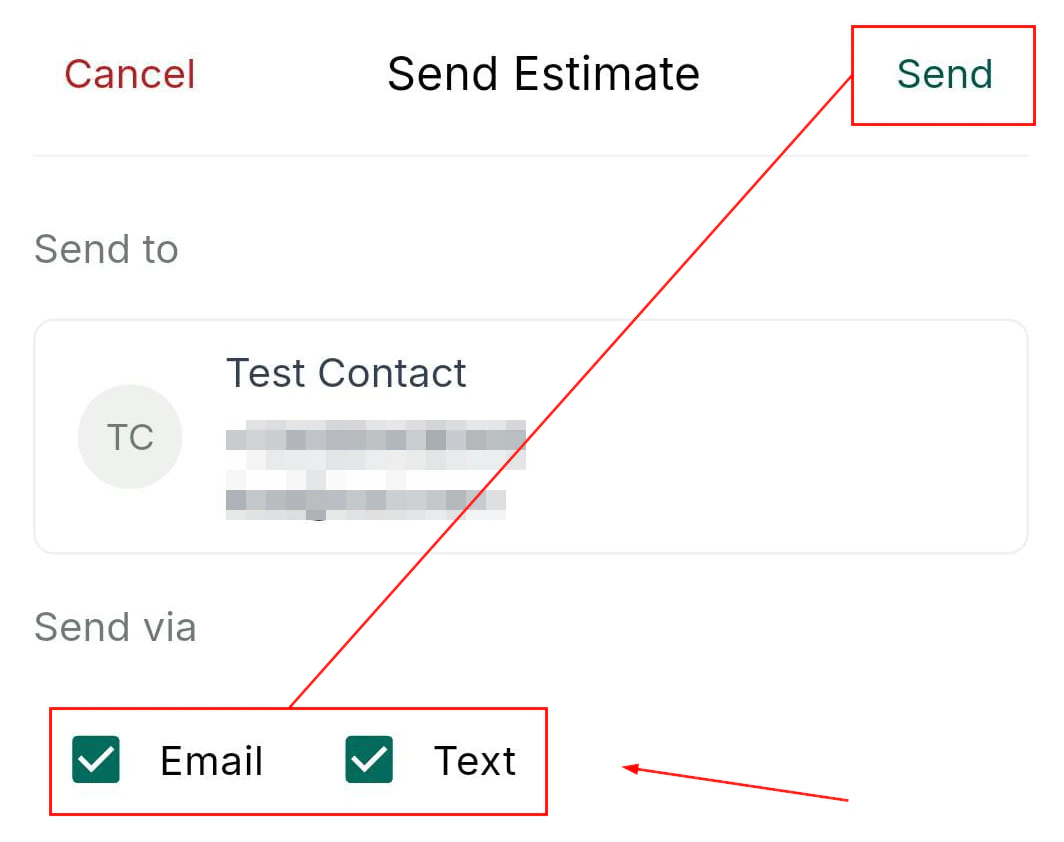
Send the estimate via email or SMS
Tap the + button in Estimates
Add line items
Link to a contact
Review and send
Estimate direct payments
Let customers pay the estimate amount directly without converting to a formal invoice first. When creating an estimate, add a Direct Payment option and send.Downloading estimates
Tap the three-dot menu on any estimate and select Download to save the estimate as a PDF to your device.Converting estimates to invoices
Tap the Convert button on any accepted estimate to generate a formal invoice from it automatically.Documents and contracts
Create and send documents or contracts from your mobile app using predefined templates, then collect in-person or remote signatures.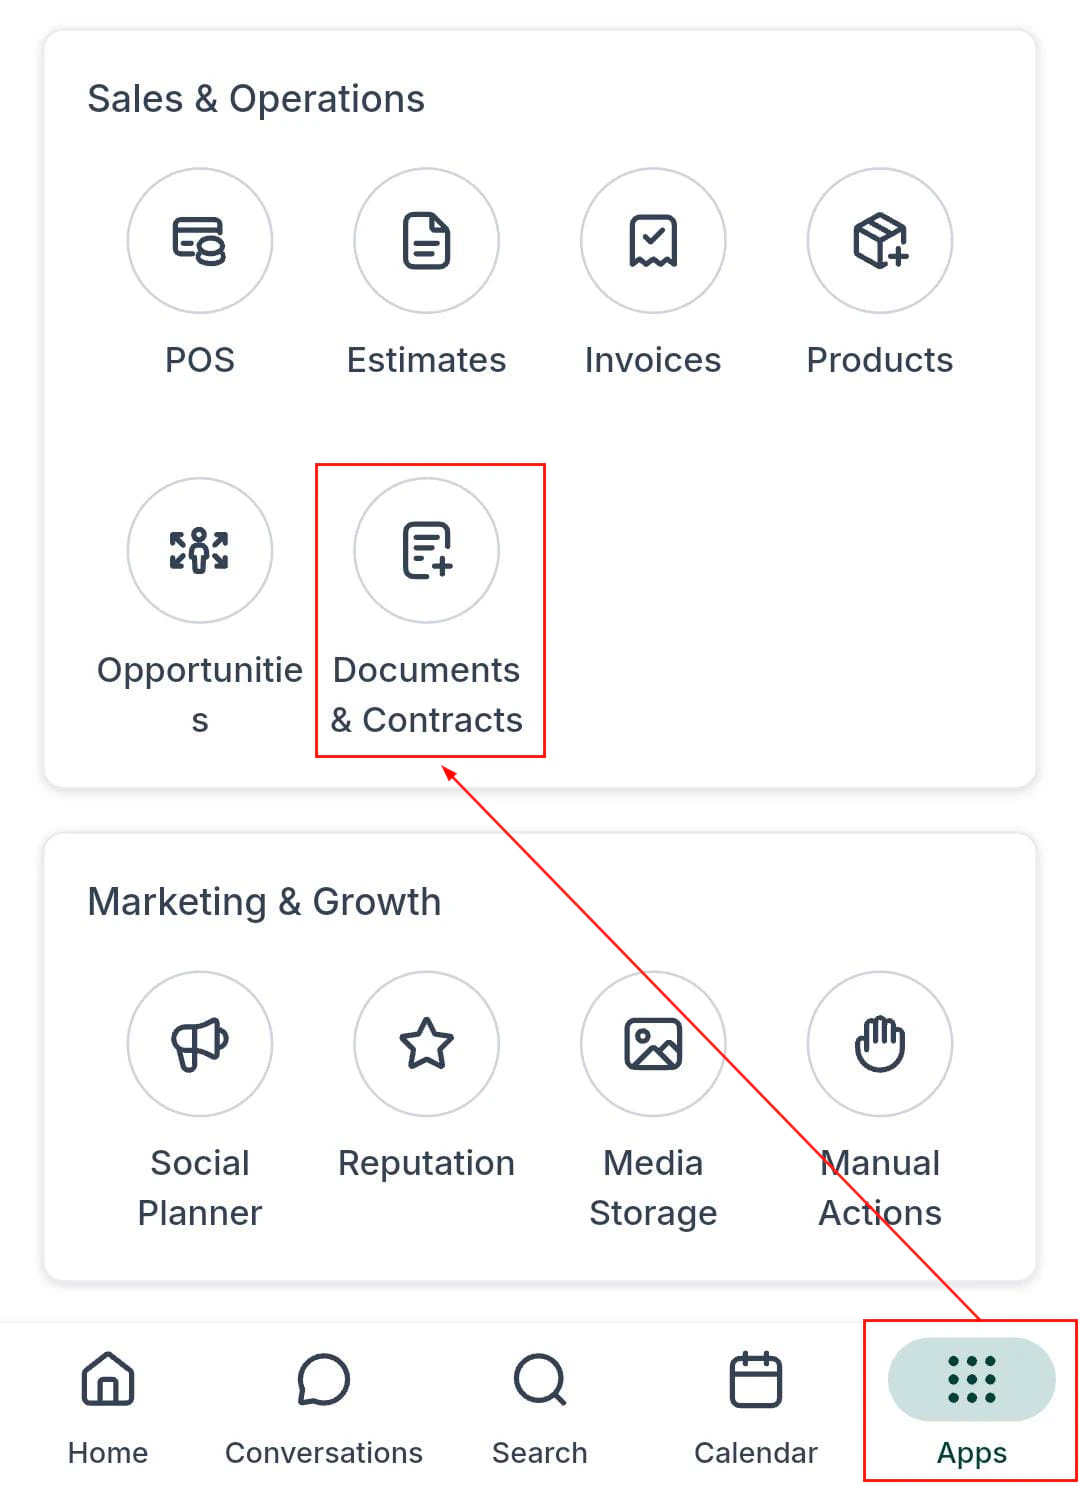
Documents section — all documents and contracts
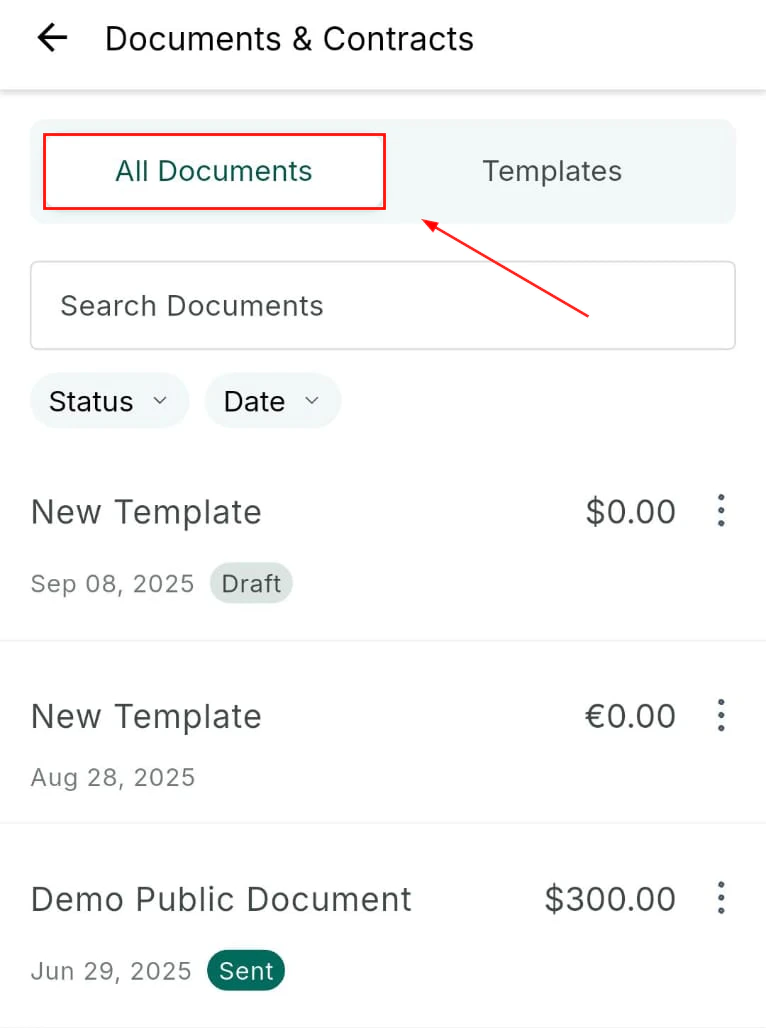
All documents — browse sent, signed, and draft documents
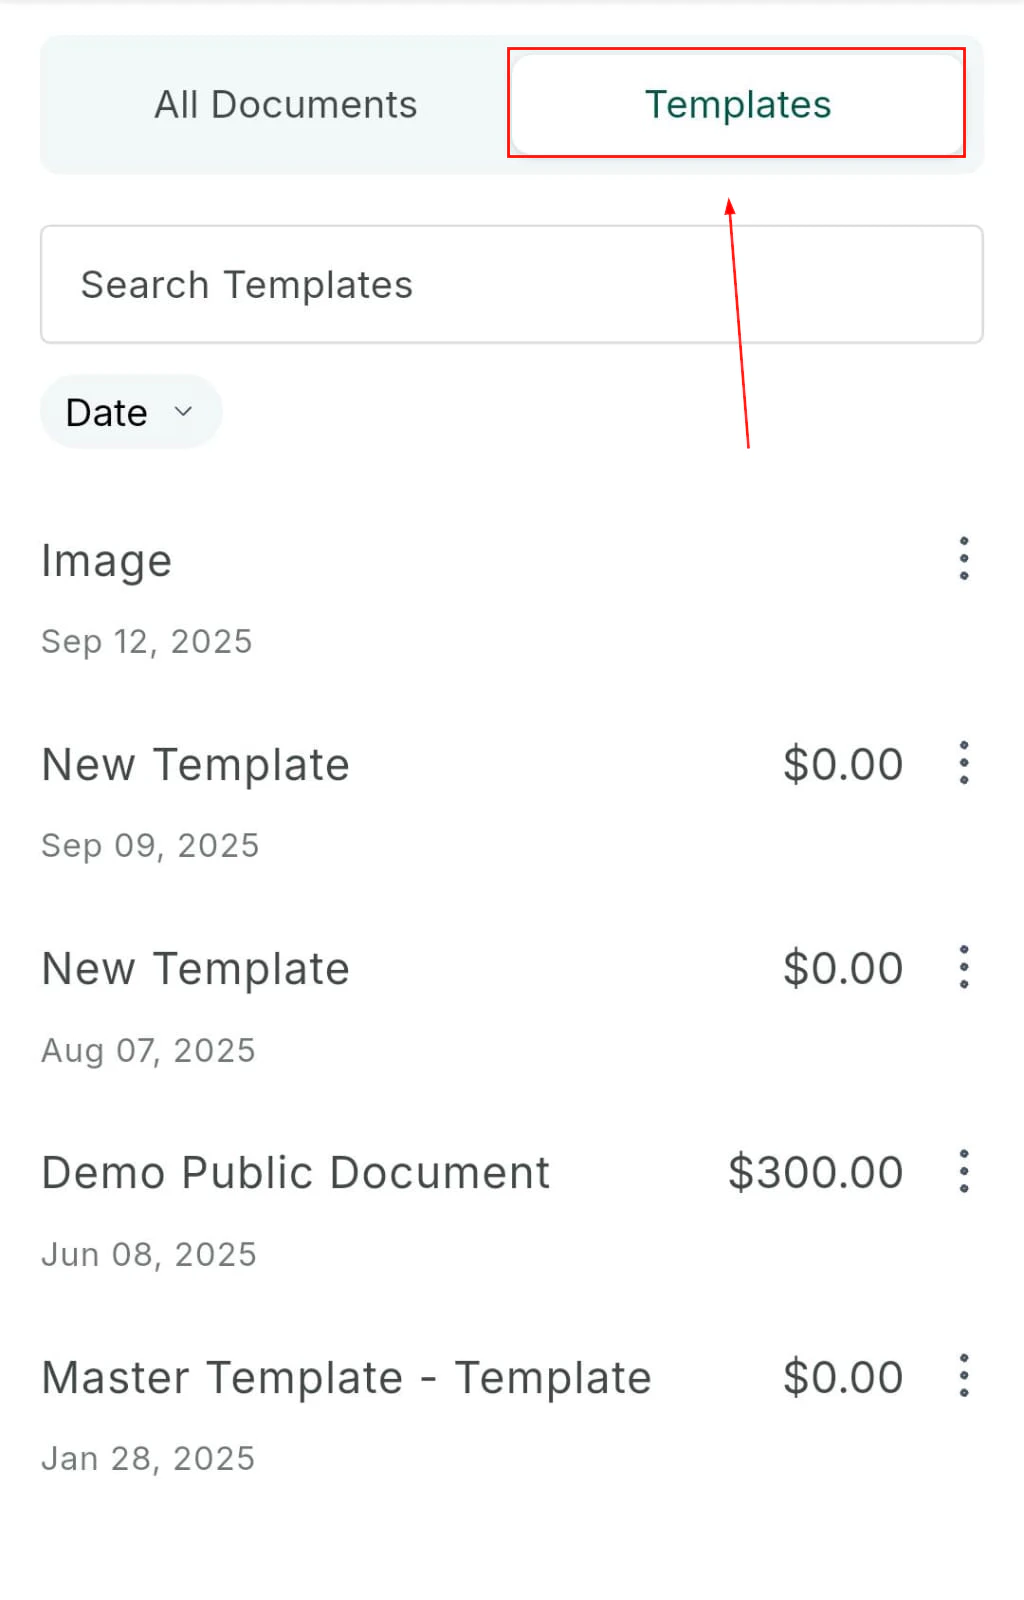
Access documents
Add a new document
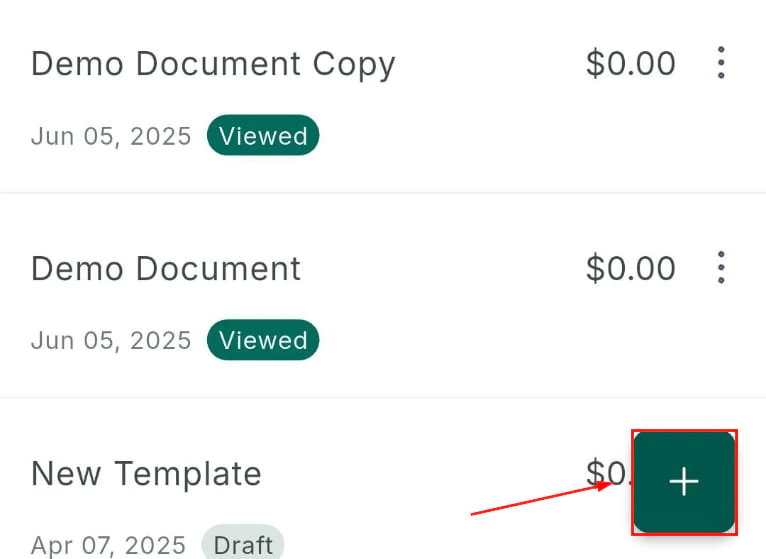
Add new document button
Select a template
Select a document template
Name the document
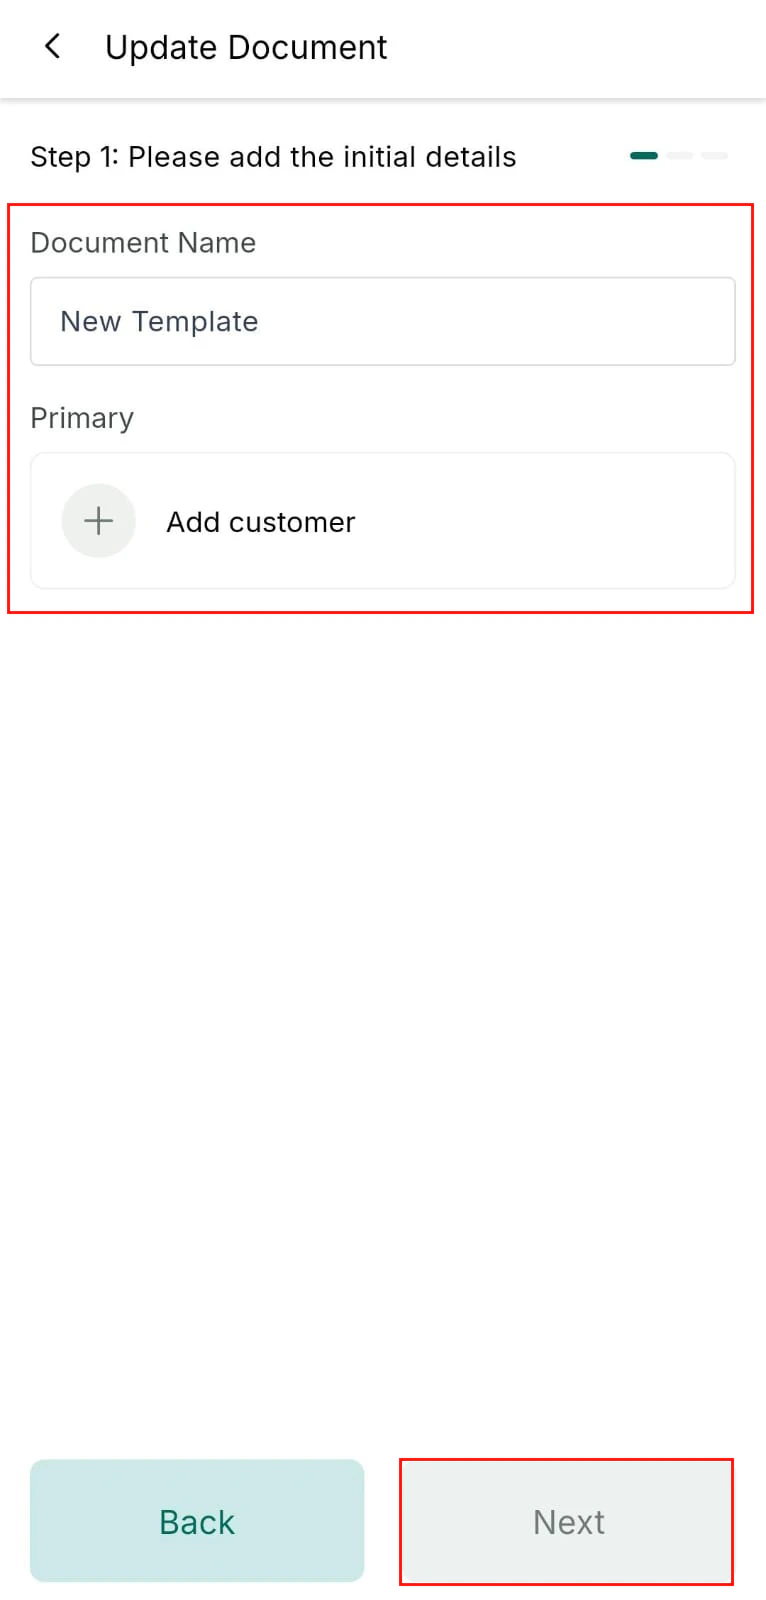
Name the document
Review and send
Review the document before sending
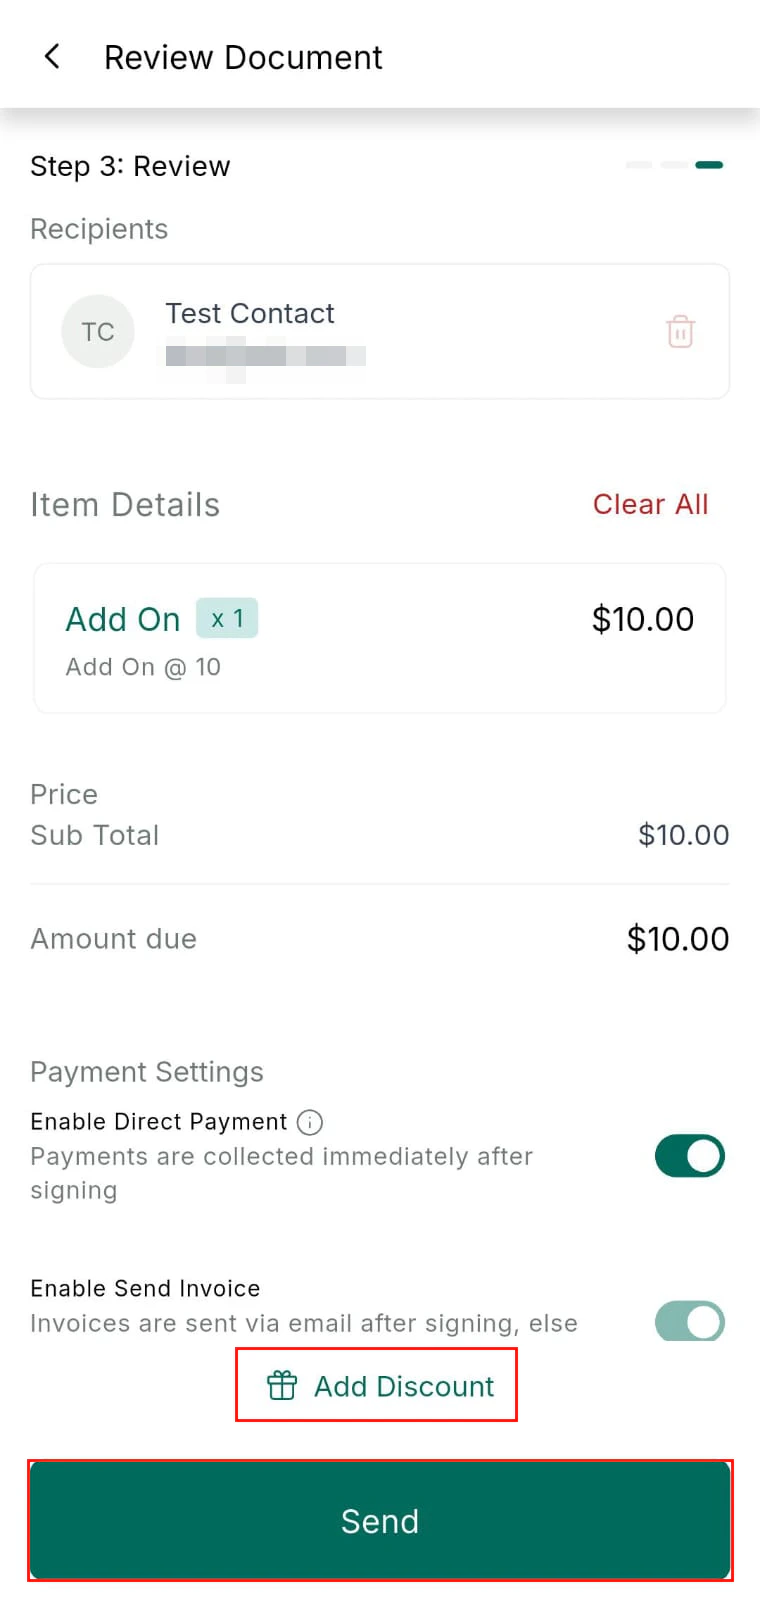
Send the document to the contact
Collecting in-person signatures
To collect a signature on your mobile device:
Collecting an in-person digital signature on mobile
- Open the document from a contact record
- Present your device to the customer
- The customer draws their signature directly on the screen
- The signed document is saved automatically to the contact record
Products
Create and manage products in the mobile app. Products sync instantly with the desktop platform and appear in the POS catalog.
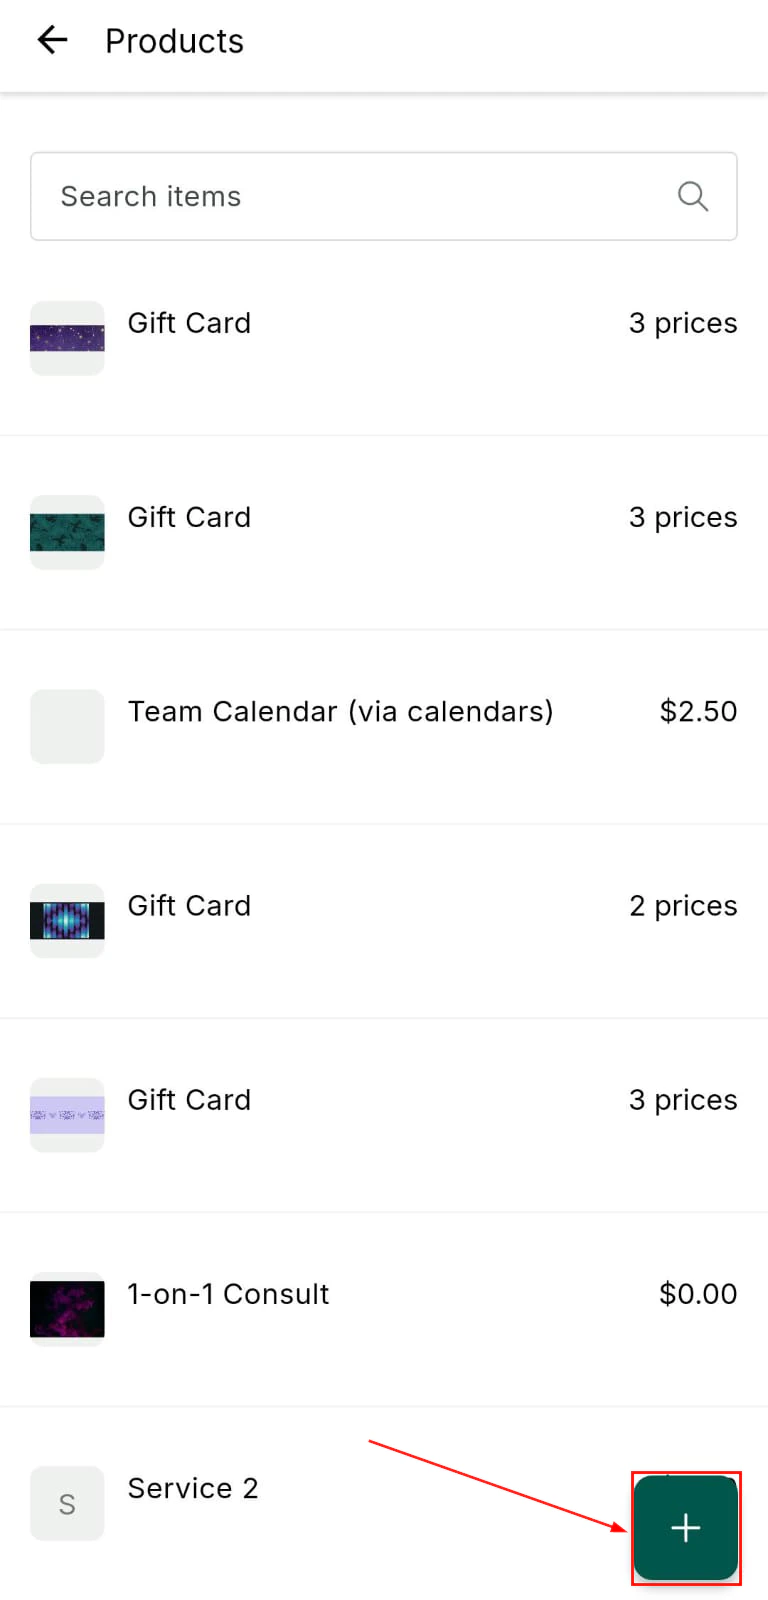
Products list — all products in your catalog
Add a new product
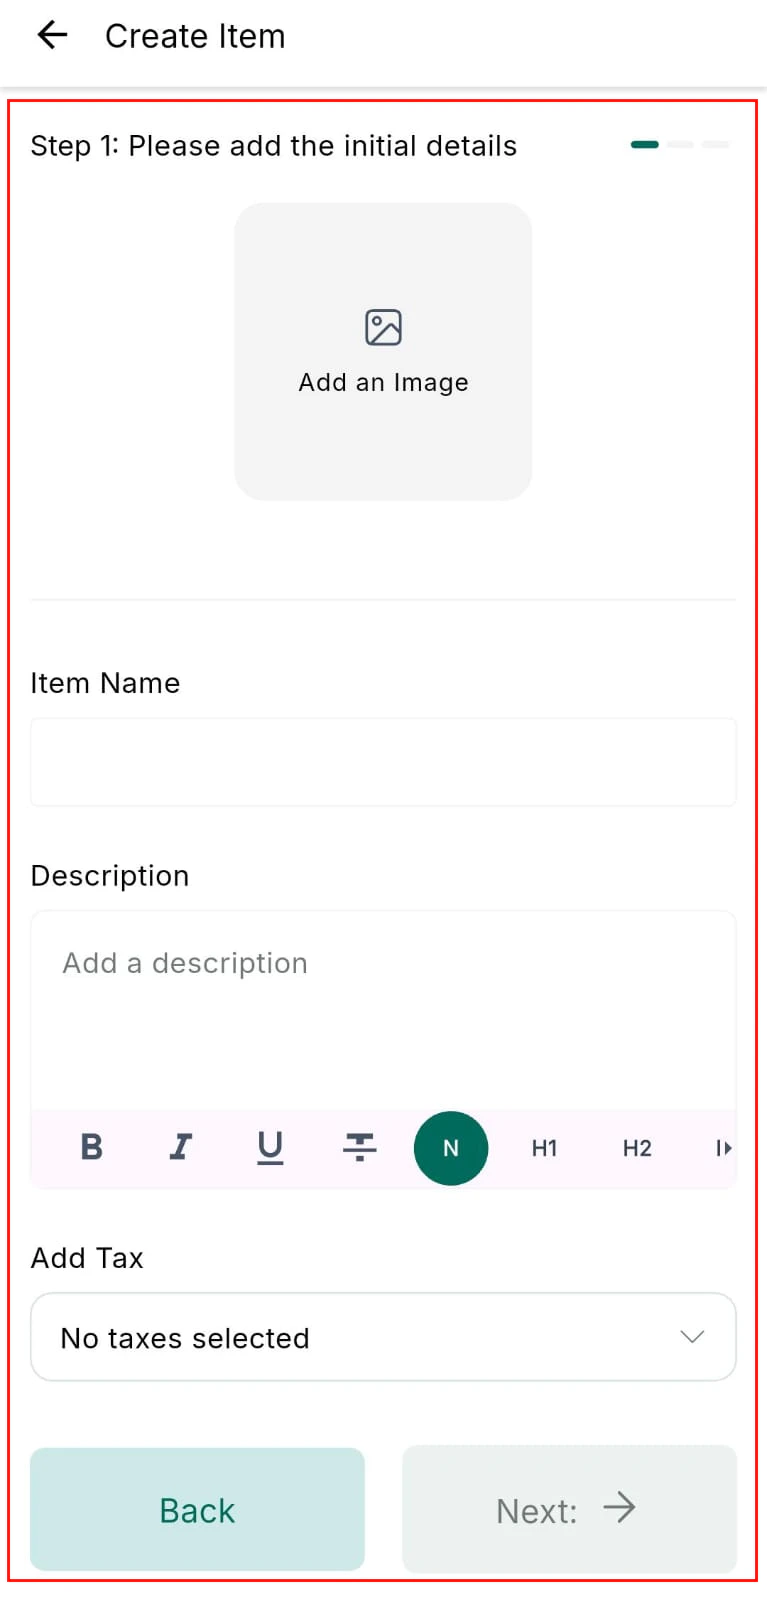
Product details — name, description, image
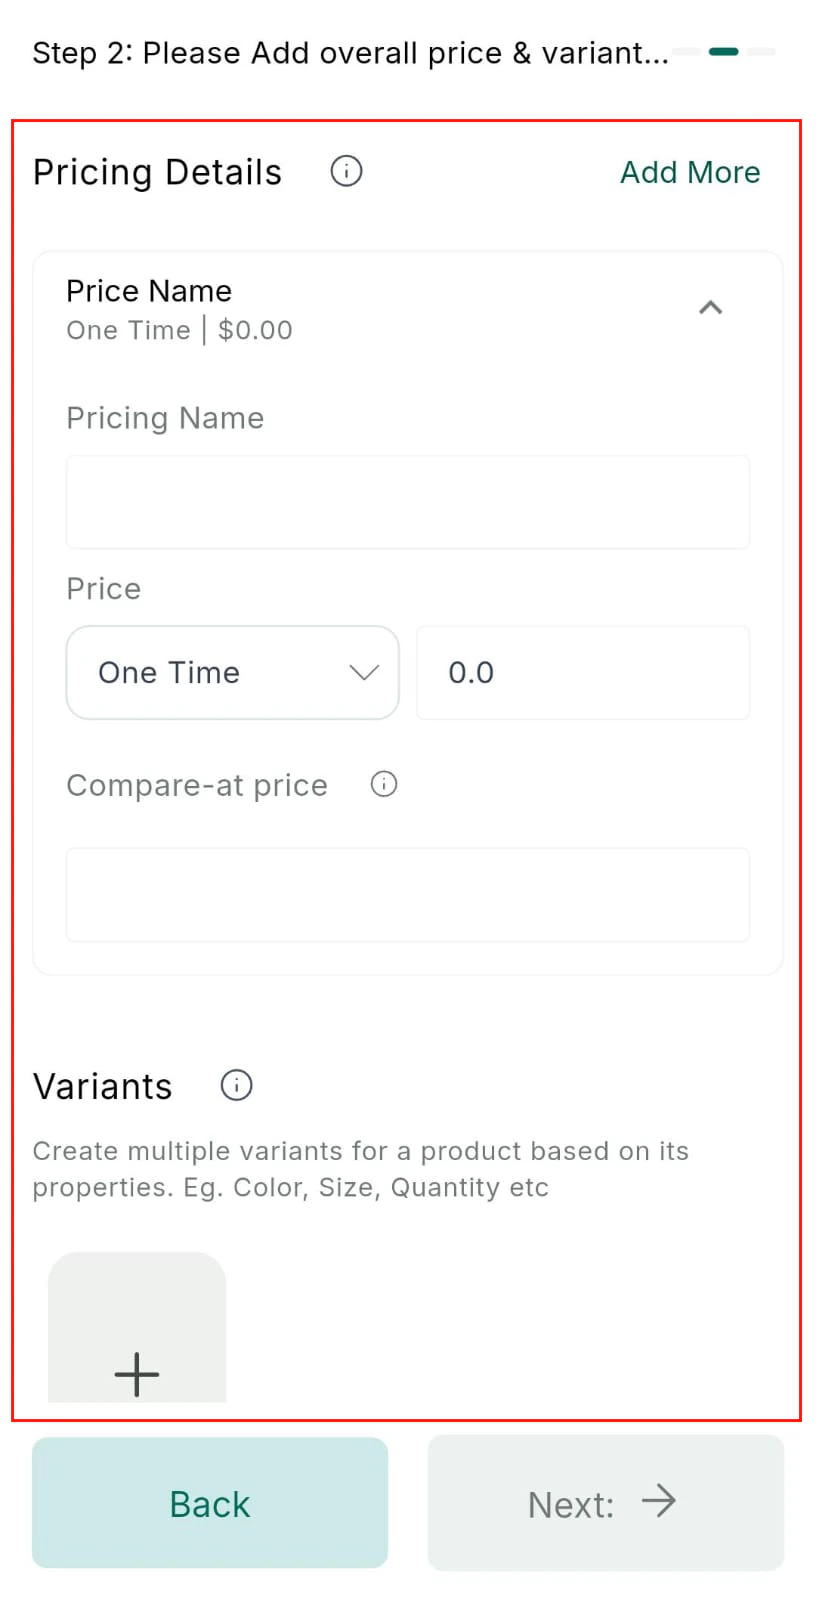
Product pricing — set pricing models and variants
- Upload a product image for display in the POS catalog
- Define pricing models (standard, discounted, clearance)
- Create variants based on properties like size or color