

The Payments section in the HoopAI Platform sidebar
Core billing
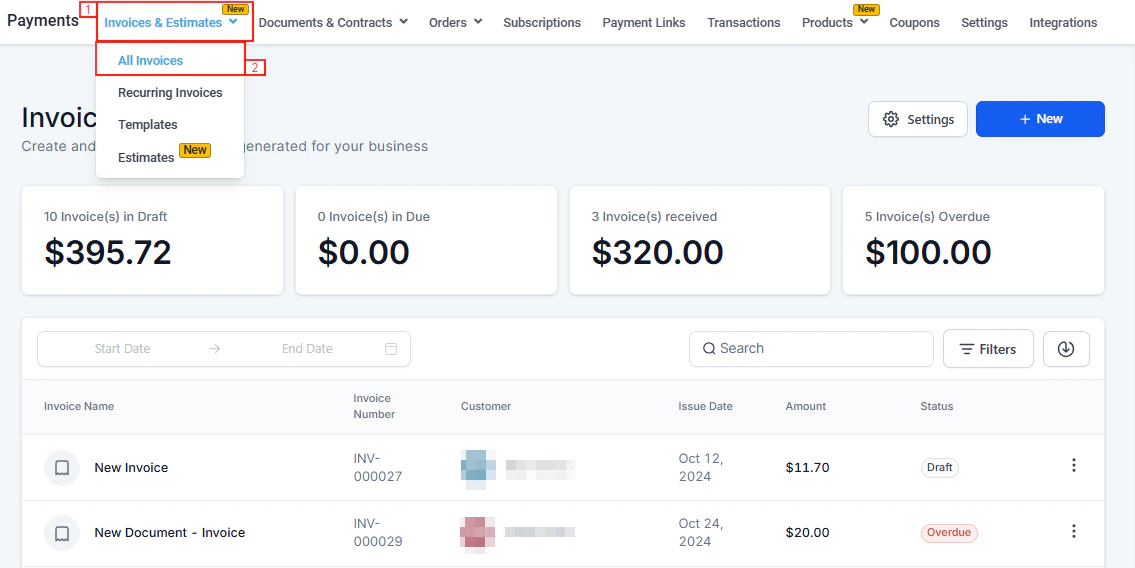
Invoices & estimates
Create one-time invoices, send estimates, set payment plans, and automate reminders.
Recurring invoices
Set up automated billing schedules — daily, weekly, monthly, or custom — with optional auto-payment.
Estimates
Send professional quotes to contacts, get approval, and convert to invoices in one click.
Payment plans
Split invoices into installments or collect a deposit, with optional auto-payment per installment.
Invoice reminders
Automate follow-up emails and SMS before, on, and after invoice due dates.
Documents & contracts
Build, send, and collect signatures on proposals, contracts, and agreements.
Collecting payments
Payment links
Generate shareable payment links for products and send them to contacts in bulk.
Text-to-Pay
Send payment request links via SMS so customers can pay from their phone instantly.
Point of sale
Accept in-person card payments using Tap to Pay on iPhone or Square from the mobile app.
Orders
View and fulfill e-commerce orders, manage abandoned checkouts, and handle partial payments.
Payment methods
Apple Pay & Google Pay
Enable one-tap digital wallet payments on invoices, payment links, and order forms.
ACH & bank transfers
Accept ACH Direct Debit and SEPA payments for invoices — lower fees, ideal for large transactions.
Buy now, pay later
Offer Klarna, AfterPay, and Affirm installment options to increase conversion and order value.
Manual payments
Record cash, check, or wire transfer payments and set up Cash on Delivery for store orders.
Products and catalog
Products
Create physical, digital, and free products with inventory tracking and collections.
Coupons
Create discount codes and promo codes for order forms and subscriptions.
Gift cards
Sell and send digital gift cards, track redemptions, and view the gift card dashboard.
Subscriptions
Create and manage recurring subscriptions — pause, cancel, or modify at any time.
Financial records
Transactions
Track all transactions, process refunds, and import transaction history.
Refunds
Issue full or partial refunds and understand refund timelines by payment gateway.
Taxes
Configure tax rates, apply international VAT/GST, and set up automatic tax calculation.
Import & export
Import historical transactions, orders, and products; export payment data for accounting.
Configuration
Payment integrations
Connect Stripe, PayPal, Square, NMI, Authorize.net, Adyen, and more.
Default gateways
Set which gateway processes each channel — invoices, order forms, calendars, and subscriptions.
Payment settings
Configure receipts, shipping, subscription retry logic, and abandoned cart emails.
Processing charges
Pass payment processing fees to customers transparently at checkout.
Checkout themes
Brand your payment pages with custom logos, colors, and redirect URLs.
Accounting integrations
Sync invoices and payments with Xero, QuickBooks, and other accounting tools.
Getting started
1
Connect a payment gateway
Go to Payments → Payment Integrations and connect at least one payment processor. Stripe is recommended for the full feature set — Apple Pay, Google Pay, ACH, BNPL, Text-to-Pay, and subscriptions all require Stripe Connect.
2
Add your products
Navigate to Payments → Products and create the products or services you sell. Set prices, variants, and inventory levels. Products are shared across invoices, payment links, order forms, and your online store.
3
Configure taxes and settings
Under Payments → Payment Settings → Taxes, add your tax rates. Then configure receipt emails, shipping rates, and subscription preferences. For a dedicated tax setup guide, see Taxes.
4
Create your first invoice or payment link
Send a one-time invoice from Payments → Invoices & Estimates, or create a quick payment link from Payments → Payment Links. For recurring billing, set up a recurring invoice template.
Some payment features — ACH debit, Apple Pay, Google Pay, Buy Now Pay Later, Text-to-Pay, and subscriptions — require Stripe Connect. Manual payment recording is available for accounts without Stripe.
Payments and your online store
Products, taxes, shipping rates, and orders are shared between Payments and your Online Store. Changes you make in Payments flow through automatically:- Products created in Payments → Products are available in your store immediately
- Tax rates configured in Payments → Payment Settings → Taxes apply to store checkouts
- Shipping rates set up in Payments → Payment Settings → Shipping & Delivery appear as options in your store checkout
- Orders from your store appear in Payments → Orders alongside all other order sources
- Abandoned carts from your store are tracked under Payments → Orders → Abandoned Checkouts
Frequently asked questions
Do I need Stripe to use the Payments section?
Do I need Stripe to use the Payments section?
No. You can create and send invoices, payment links, and documents without Stripe. However, to collect online card payments, process ACH debits, enable Apple Pay / Google Pay, use Buy Now Pay Later, send Text-to-Pay links, and run subscriptions, Stripe Connect is required. Other gateways (PayPal, Square, NMI, Authorize.net, Adyen) are also available for online payment collection.
What is the difference between payment links and invoices?
What is the difference between payment links and invoices?
Payment links are quick, shareable URLs tied to one or more products — ideal for one-off sales and bulk sending. Invoices are formal billing documents with line items, due dates, late fees, payment plans, and auto-reminders — best for client billing relationships.
What is the difference between subscriptions and recurring invoices?
What is the difference between subscriptions and recurring invoices?
Subscriptions (Stripe-managed) charge customers automatically each cycle without sending a new invoice document. Recurring invoices send a new invoice on a schedule — the customer must pay each one (or autopay handles it). Use subscriptions for SaaS-style silent billing and recurring invoices when you need a formal document each cycle.
Can I send payment requests via SMS?
Can I send payment requests via SMS?
Yes. Use Text-to-Pay to send a payment request link via SMS directly to a contact. You can also use the Conversations tab to send a payment request mid-conversation. See Text-to-Pay for details.
How do I collect a deposit then the balance later?
How do I collect a deposit then the balance later?
Use Payment Plans on an invoice. Set up a deposit installment (e.g., 30% now) and a balance installment (e.g., 70% on a later date). Each installment can be paid separately and can be set up with auto-payment. See Payment plans.
Can I accept payments in multiple currencies?
Can I accept payments in multiple currencies?
Yes. The platform supports multiple currencies. Set the currency per invoice, document, or product. The dashboard converts all amounts to your base currency in real time for summary totals.
Where do I go to issue a refund?
Where do I go to issue a refund?
Go to Payments → Transactions, find the transaction, click the three-dot menu, and select Refund. You can issue a full or partial refund. See Refunds for the full guide.
How do taxes work with my online store?
How do taxes work with my online store?
Tax rates created in Payments → Payment Settings → Taxes are available across all checkout channels including your online store. Enable taxes on individual products and configure whether pricing is tax-inclusive or tax-exclusive. See Taxes for the full configuration guide.
Can I accept in-person payments?
Can I accept in-person payments?
Yes. Use the HoopAI mobile app with Tap to Pay on iPhone (Stripe required) for contactless in-person payments. You can also connect a Square reader for in-person POS. See Point of sale.
Can I offer installment payment options like Klarna?
Can I offer installment payment options like Klarna?
Yes. With Stripe Connect and live mode enabled, you can offer Klarna, AfterPay, and Affirm (Buy Now Pay Later) on payment links, invoices, and order forms. See Buy now, pay later.