

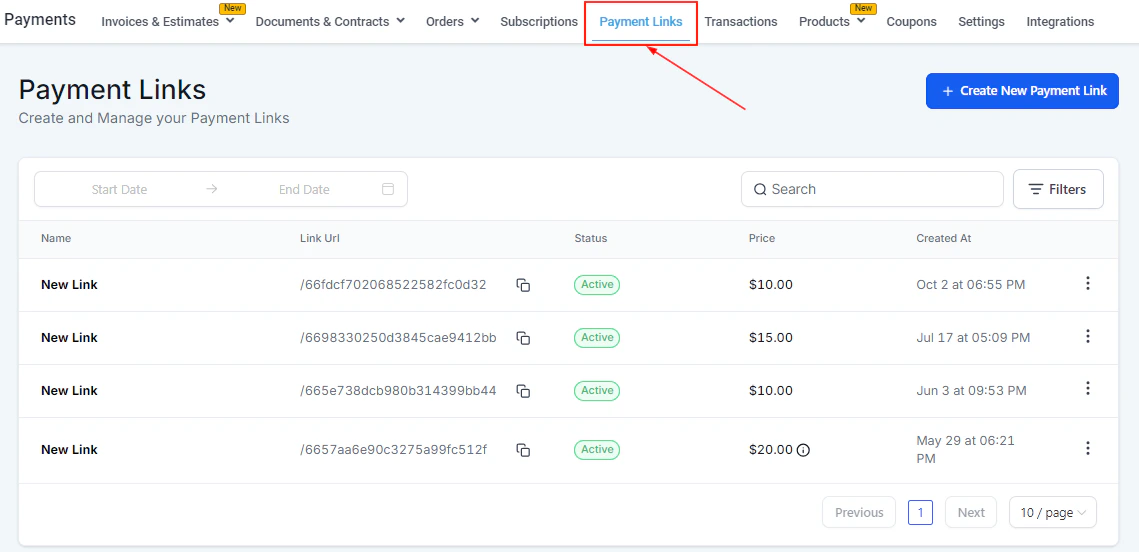
The Payment Links dashboard listing all active and inactive links
Payment links overview
A payment link is a unique URL tied to one or more products. When a customer opens the link, they see a checkout page branded with your colors and logo. They enter their payment details and complete the purchase — no login required. Payment links support:- One-time and recurring products
- Single and multiple products
- Brand color customization
- Coupon/promo code fields
- Custom redirect URLs after payment
- Sending to multiple contacts at once
Payment links dashboard
The dashboard table shows each link’s name, URL (with a copy button), status, price, and creation date. Use the date picker to filter by creation period, the search bar to find by name, and Filters to sort by status or source. The three-dot menu on each row lets you edit, deactivate, or delete a payment link.Creating a payment link
Start a new payment link
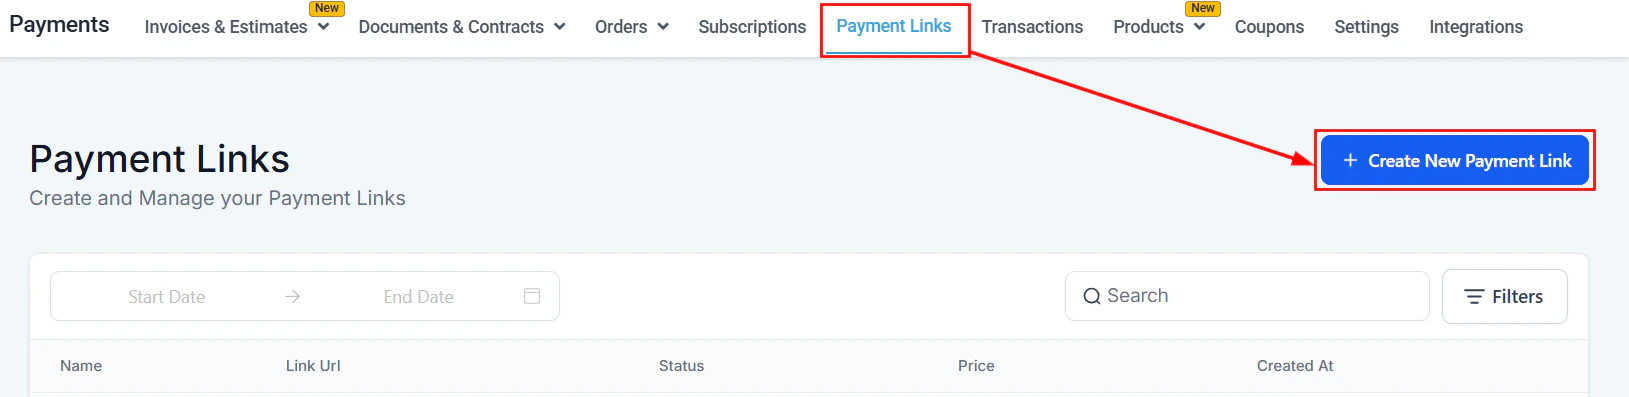
Starting a new payment link from the dashboard
Name the link
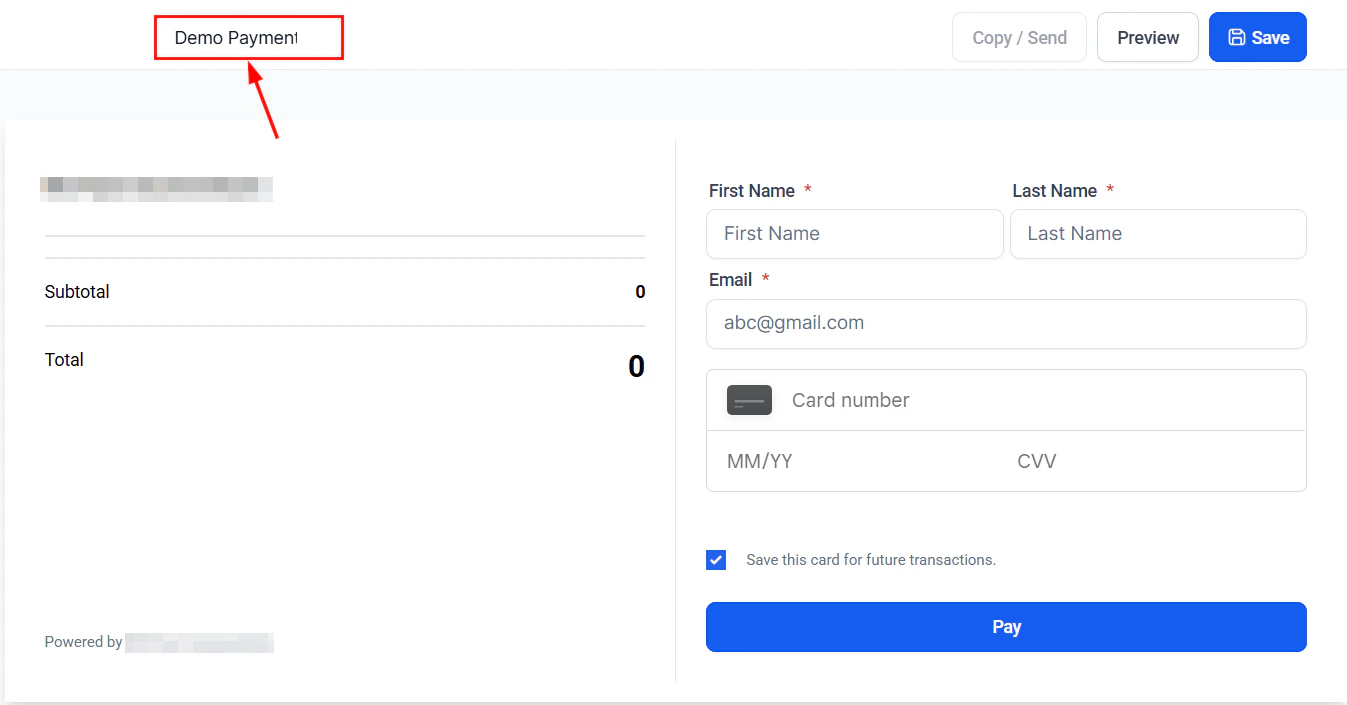
Naming the payment link for internal reference
Add products
- Set a fixed quantity per product, or enable Allow customers to choose quantity and configure the minimum and maximum order quantity they can select.
- When multiple recurring products are offered, customers can select only one recurring option at checkout.
Configure options
- Require phone number — checkout cannot proceed without a phone number
- Collect customer address — adds a delivery address field and saves it to the contact record
- Allow coupon codes — adds a coupon/promo code field to the checkout page
- Enable redirection to custom URL — after payment, customers are redirected to a URL you specify (choose same tab or new tab)
Customize branding
Generate and copy the link
Customizing payment links with brand colors
When creating or editing a payment link, open Advanced Options to access branding settings. Enter your primary brand color as a hex code or use the color picker — this is applied to buttons, borders, and accents on the checkout page. The preview updates in real time before you save.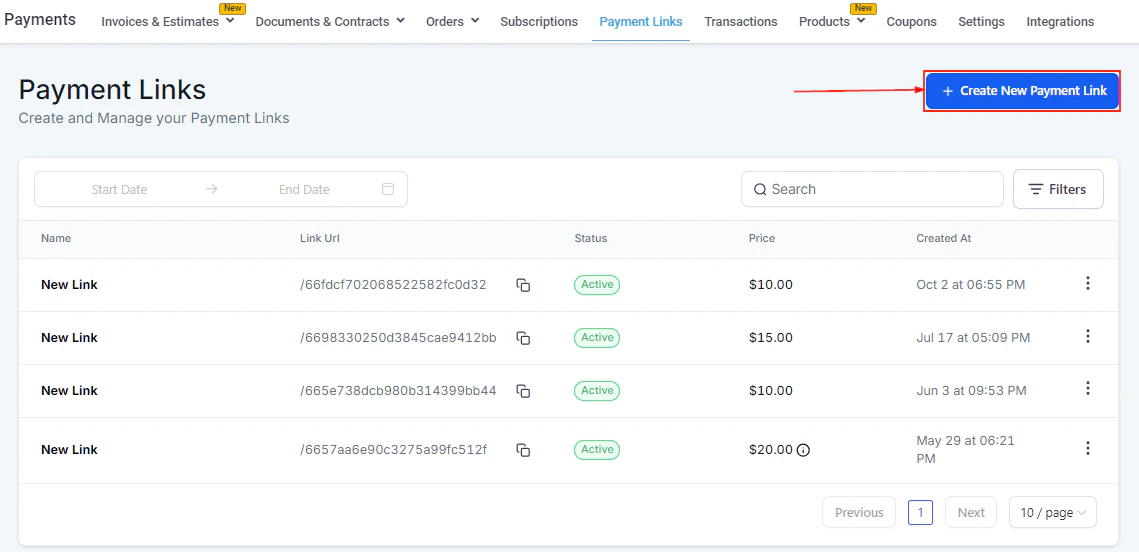
Payment link checkout page preview showing branding and product details
Sending payment links to multiple contacts
Instead of copying and pasting a link into individual messages, you can send a payment link directly to a list of contacts from within the platform.Open a payment link
Select recipients
Choose the channel
Send
Text-to-Pay — sending payment requests via SMS
Text-to-Pay lets you send a payment request directly to a contact as an SMS message — no invoice or payment link setup required. The customer receives a text with a secure checkout link and can pay immediately from their phone. There are two ways to send a Text-to-Pay request:From a contact record
Open the contact
Click Text to Pay
Add products
Customize the message
Send
From Conversations
Open the conversation
Insert a payment request
Select products and send
Tracking payment link activity
Each payment link in the dashboard shows its name, URL, status, price, and the date created. Click into a link to see a breakdown of individual transactions associated with it, including purchase amounts and contact details.Frequently asked questions
Can I include multiple products in one payment link?
Can I include multiple products in one payment link?
Do payment links expire?
Do payment links expire?
What payment methods do customers see on the checkout page?
What payment methods do customers see on the checkout page?
Can I use payment links in automations?
Can I use payment links in automations?
Can I require customers to enter a phone number?
Can I require customers to enter a phone number?
Can I redirect customers to a thank-you page after payment?
Can I redirect customers to a thank-you page after payment?
What is Text-to-Pay and how is it different from a payment link?
What is Text-to-Pay and how is it different from a payment link?
Can I track who opened a payment link but did not pay?
Can I track who opened a payment link but did not pay?