The HoopAI Platform supports a wide range of payment gateways. Connect one or more processors to accept card payments, ACH debits, digital wallets, and more — both online and in person. Navigate to Payments → Payment Integrations (via the Integrations option in the upper-right of the Payments tab) to get started.

How the integrations screen is organized

The Payment Integrations page is divided into three sections:
  1. Default provider — the standard gateway used for all payment collection
  2. Connected providers — additional integrated gateways with a Manage button
  3. Available providers — gateways not yet connected, with a Connect button
Stripe is strongly recommended as your primary payment gateway. It unlocks the full feature set including recurring invoices with autopayment, ACH debit, Apple Pay, Google Pay, and subscription management. Other gateways have limited feature availability.

Supported integrations

Stripe

Full-featured: invoices, subscriptions, ACH, Apple Pay, Google Pay, Stripe Connect.

PayPal

Accept PayPal wallet payments and card payments via PayPal’s checkout.

Square

In-person and online payments with Square hardware support.

NMI

Network Merchants Inc. — a full gateway with advanced fraud tools.

Authorize.net

Enterprise-grade gateway with strong fraud detection and reporting.

Razorpay

Payments for India-based businesses; supports UPI, cards, and net banking.

Adyen

Global payment platform for enterprise merchants.

QuickBooks

Sync invoices and payments to QuickBooks for accounting reconciliation.

Wave Accounting

Sync invoices to Wave Accounting for bookkeeping.

Manual methods

Accept cash, check, bank transfer, or any custom payment method.

Stripe integration

Stripe is the recommended primary gateway for the HoopAI Platform. It enables the broadest set of payment features.
1

Open integrations

Go to Payments → Payment Integrations and click Connect next to Stripe.
2

Sign in to Stripe

You’ll be redirected to Stripe. Sign in to your existing Stripe account or create a new one.
3

Authorize the connection

Review the permissions and click Connect. You’ll be redirected back to the HoopAI Platform.
4

Verify the connection

The Stripe integration tile will show a green “Connected” indicator. Your Stripe account ID is displayed for confirmation.

Stripe features unlocked

FeatureAvailable with Stripe
Card payments (Visa, Mastercard, Amex)Yes
ACH debitYes
Apple PayYes
Google PayYes
Recurring invoices with autopaymentYes
SubscriptionsYes
RefundsYes
Test modeYes

PayPal integration

1

Open integrations

Go to Payments → Payment Integrations and click Connect next to PayPal.
2

Log in to PayPal

You’ll be redirected to PayPal to log in with your business account credentials.
3

Grant permissions

Approve the requested permissions so the HoopAI Platform can process payments on your behalf.
4

Return to confirm

After approval, you’re redirected back and the PayPal integration shows as connected.

Square integration

1

Open integrations

Go to Payments → Payment Integrations and click Connect next to Square.
2

Log in to Square

Sign in to your Square account and authorize the connection.
3

Select your location

If you have multiple Square locations, select the one to connect.
4

Confirm

Return to the HoopAI Platform. Square is now connected and ready to process payments.

NMI (Network Merchants Inc.) integration

NMI is a full-service payment gateway with advanced fraud detection and recurring billing support.
1

Gather your NMI credentials

Log in to your NMI merchant dashboard and locate your API key and gateway ID.
2

Open integrations

Go to Payments → Payment Integrations and click Connect next to NMI.
3

Enter credentials

Paste your NMI API key and any additional required fields (security key, gateway ID).
4

Test the connection

Use the built-in test transaction to verify the connection is working before going live.
5

Save

Click Save. NMI is now active on your account.

Authorize.net integration

Authorize.net is an enterprise-grade gateway widely used by established businesses.
1

Gather your Authorize.net credentials

Log in to your Authorize.net merchant portal and note your API Login ID and Transaction Key.
2

Open integrations

Go to Payments → Payment Integrations and select Authorize.net.
3

Enter credentials

Enter your API Login ID and Transaction Key. Optionally enter your Signature Key for enhanced webhook verification.
4

Choose live or sandbox

Toggle between Live and Sandbox mode for testing.
5

Save

Click Save. The integration is now active.

Razorpay integration

Razorpay supports businesses operating in India, offering UPI, net banking, cards, and wallets.
1

Get your Razorpay API keys

Log in to your Razorpay dashboard and go to Settings → API Keys. Generate a key pair if you haven’t already.
2

Open integrations

Go to Payments → Payment Integrations and click Razorpay.
3

Enter Key ID and Secret

Paste your Razorpay Key ID and Key Secret.
4

Save

Click Save. Razorpay is now connected.

Adyen integration

Adyen is a global enterprise payment platform. Contact your Adyen account manager for merchant credentials before connecting.
1

Get Adyen credentials

From your Adyen Customer Area, note your Merchant account name, API key, and Client key.
2

Open integrations

Go to Payments → Payment Integrations and select Adyen.
3

Enter credentials

Fill in the required Adyen API fields.
4

Save

Click Save.

QuickBooks integration

Syncing with QuickBooks keeps your invoices and payment records in sync with your accounting software automatically.
1

Open integrations

Go to Payments → Payment Integrations and click Connect next to QuickBooks.
2

Sign in to QuickBooks

Authenticate with your QuickBooks Online account.
3

Authorize

Grant the HoopAI Platform permission to read and write QuickBooks data.
4

Configure sync

Choose which data to sync — invoices, payments, customers, and products.
5

Save

Click Save. Going forward, invoices created in the HoopAI Platform will sync to QuickBooks automatically.

Apple Pay and Google Pay

Apple Pay and Google Pay are digital wallets that let customers pay with a single tap using their device’s saved payment method. Requirements:
  • Stripe must be connected as your primary gateway
  • Your checkout page must be served over HTTPS
  • Apple Pay requires domain verification through Stripe
1

Enable in Stripe

Log in to your Stripe dashboard, go to Settings → Payment Methods, and enable Apple Pay and Google Pay.
2

Verify domain for Apple Pay

In Stripe, follow the Apple Pay domain verification steps. This involves downloading a verification file and hosting it on your domain.
3

Test

Use a compatible device (Safari for Apple Pay, Chrome for Google Pay) to test the digital wallet options on your checkout page.

Manual payment methods

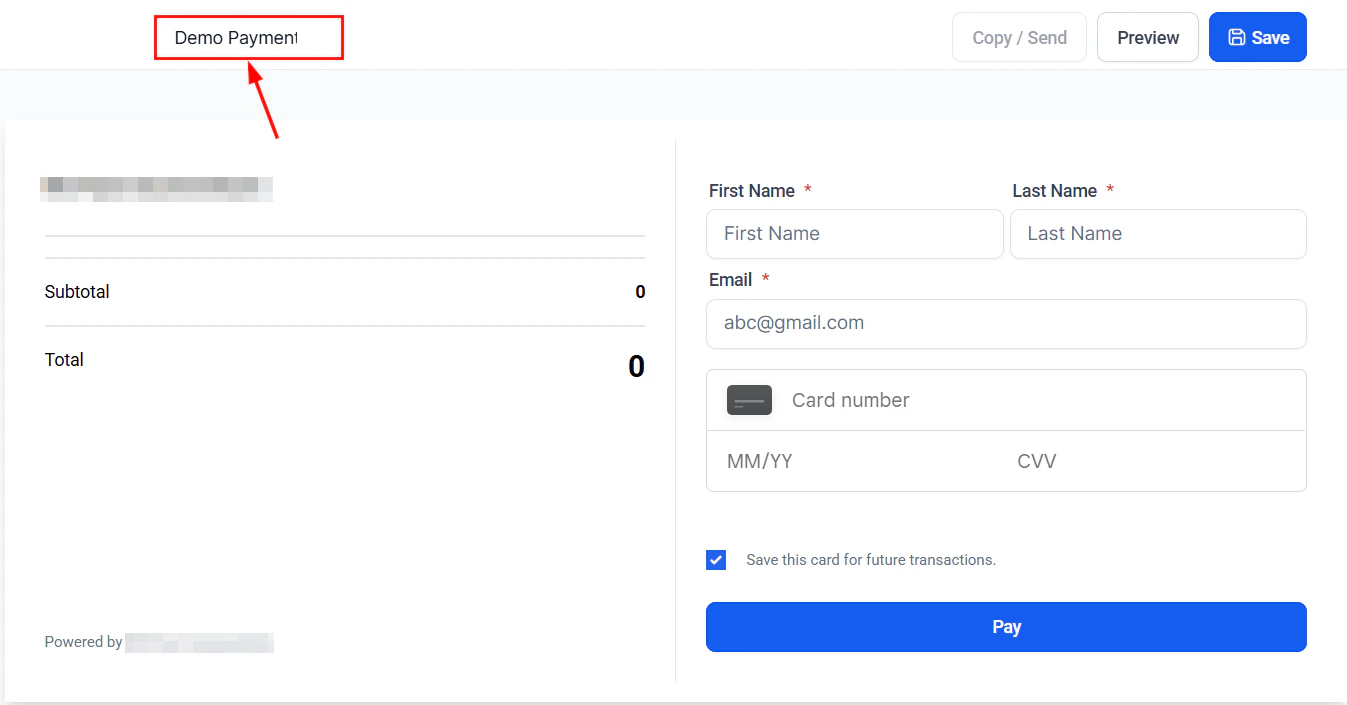
Manual payment methods let you accept payments outside of digital gateways — such as cash, check, bank transfer, or any custom method you define.
1

Open manual payment settings

Go to Payments → Payment Integrations → Manual Payment Methods.
2

Add a payment method

Click + Add method and enter:
  • Method name — e.g., “Bank Transfer”, “Check”, “Cash on Delivery”
  • Instructions — shown to customers at checkout explaining how to pay
3

Save

Click Save. The manual method appears as a checkout option alongside digital payment methods.
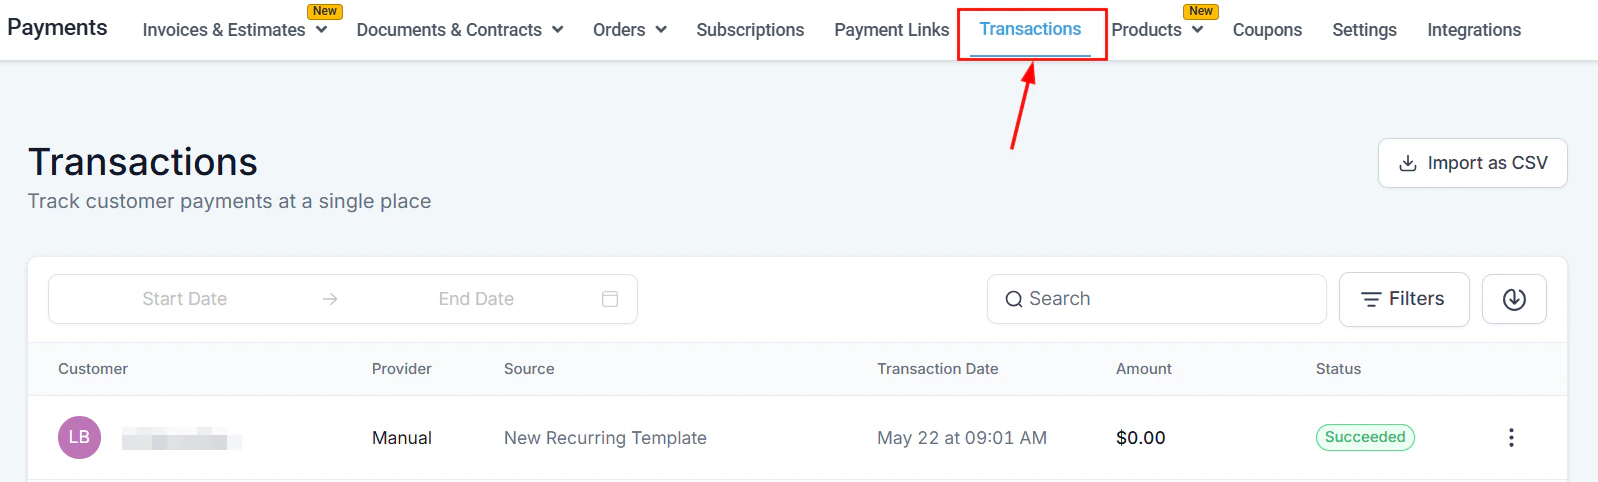
When a customer selects a manual payment method, their order is placed but marked as Payment pending until you manually record the payment in Payments → Transactions.

Configuring payment provider by channel

You can assign different payment gateways to different channels — for example, Stripe on your website checkout and Square for in-person transactions.
1

Open channel settings

Go to Payments → Payment Integrations → Configure by channel.
2

Select a channel

Choose the channel (e.g., order forms, invoices, in-person, payment links).
3

Assign a gateway

Select which connected payment gateway should process payments for that channel.
4

Save

Click Save. Each channel now routes transactions through the designated gateway.

Wave Accounting sync

Sync your HoopAI Platform invoices to Wave Accounting for free bookkeeping and accounting.
1

Connect Wave

Go to Payments → Payment Integrations and click Connect next to Wave Accounting.
2

Authorize

Sign in to Wave and grant access.
3

Configure sync

Choose which invoice statuses to sync (e.g., paid invoices only or all statuses).
4

Save

Invoices will sync to Wave automatically going forward.

Frequently asked questions

Yes. You can connect multiple gateways and assign each to specific channels using the Configure by channel option.
In Test mode, you can process payments using Stripe test card numbers without charging real cards. Switch to Live mode when you are ready to accept real payments.
Yes. You can update your gateway connections at any time. Existing subscriptions and recurring invoices may need to be migrated manually if you switch gateways mid-cycle.
The platform itself does not add additional transaction fees. You pay the standard processing fees of whichever payment gateway you use.
Last modified on March 4, 2026