

- Salons and hairdressers
- Spas and wellness centers
- Massage and therapy clinics
- Fitness studios and personal trainers
- Healthcare providers
- Pet groomers
- Event planners and many more
Creating a service calendar
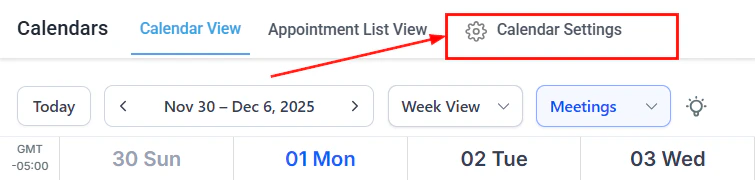
Open Calendar Settings
Open Calendar Settings and click + Create Calendar to start
Select Service Booking
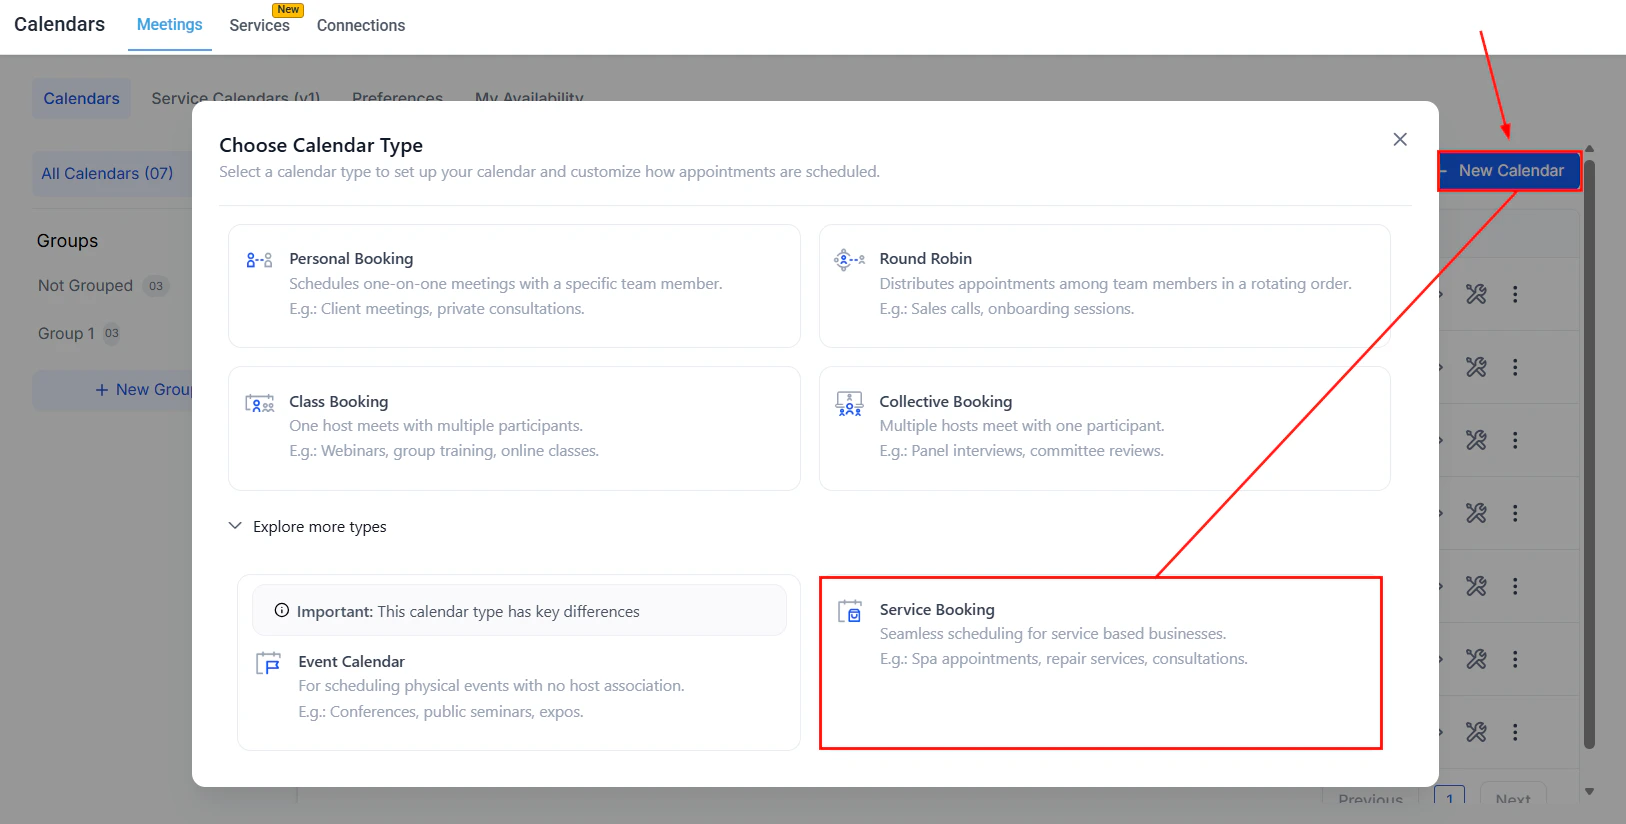
Select Service Booking from the calendar type options
Complete initial setup
- Service name — shown to clients on the booking page
- Select staff member — team members who take this appointment
- Custom URL — the calendar slug for the booking link
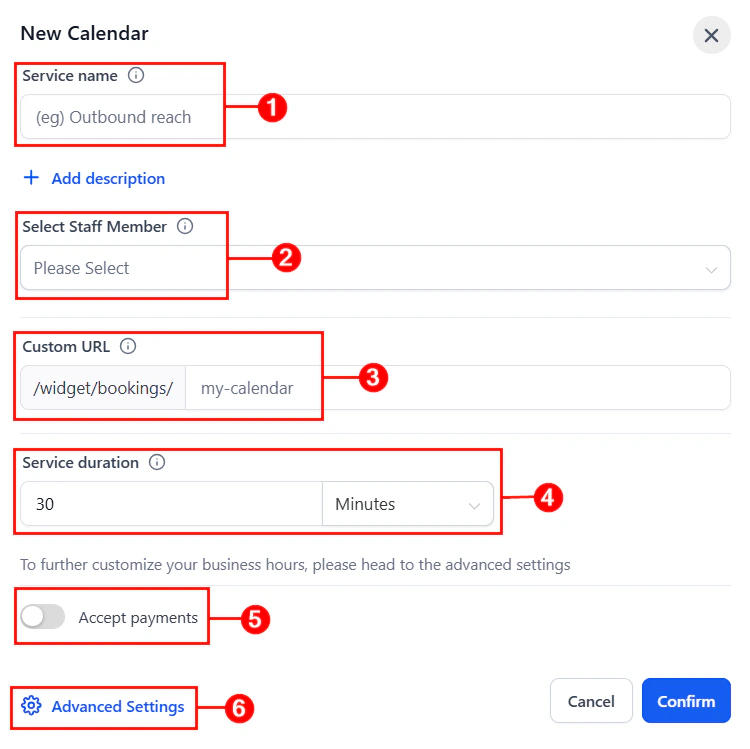
Enter the service name and calendar URL for your service calendar
- Service duration — how long each appointment lasts
- Accept payments — toggle to charge for the service at booking time
Add the staff member who will take this service booking
Save or open Advanced Settings
Advanced settings for service calendars
Service details
Configure the client-facing information for the service: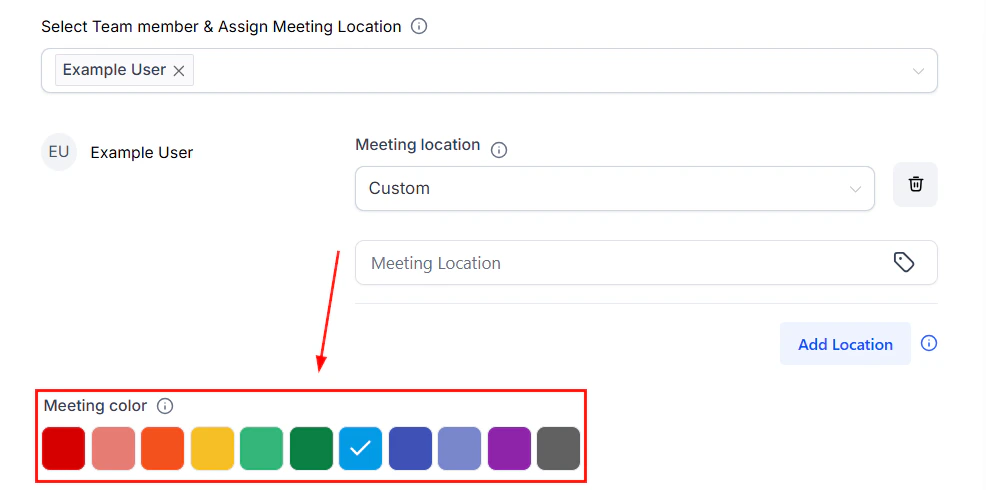
Configure the event color for the service calendar
- Calendar logo — your brand image displayed on the booking page
- Description — what the service is, requirements, and any extra information for clients
- Calendar group — group this service calendar with others for a combined booking view
- Meeting invite title — what appears on calendar entries and confirmation emails
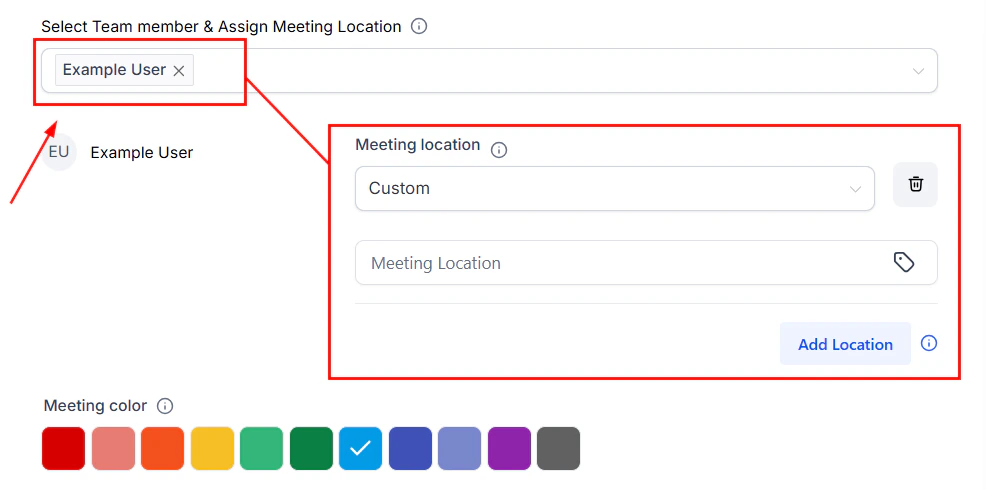
- Team members and meeting location — add all staff who take these appointments
- Meeting color — color synced to Google Calendar for this booking type
Availability
Configure available days, times, and slot settings for the service calendar.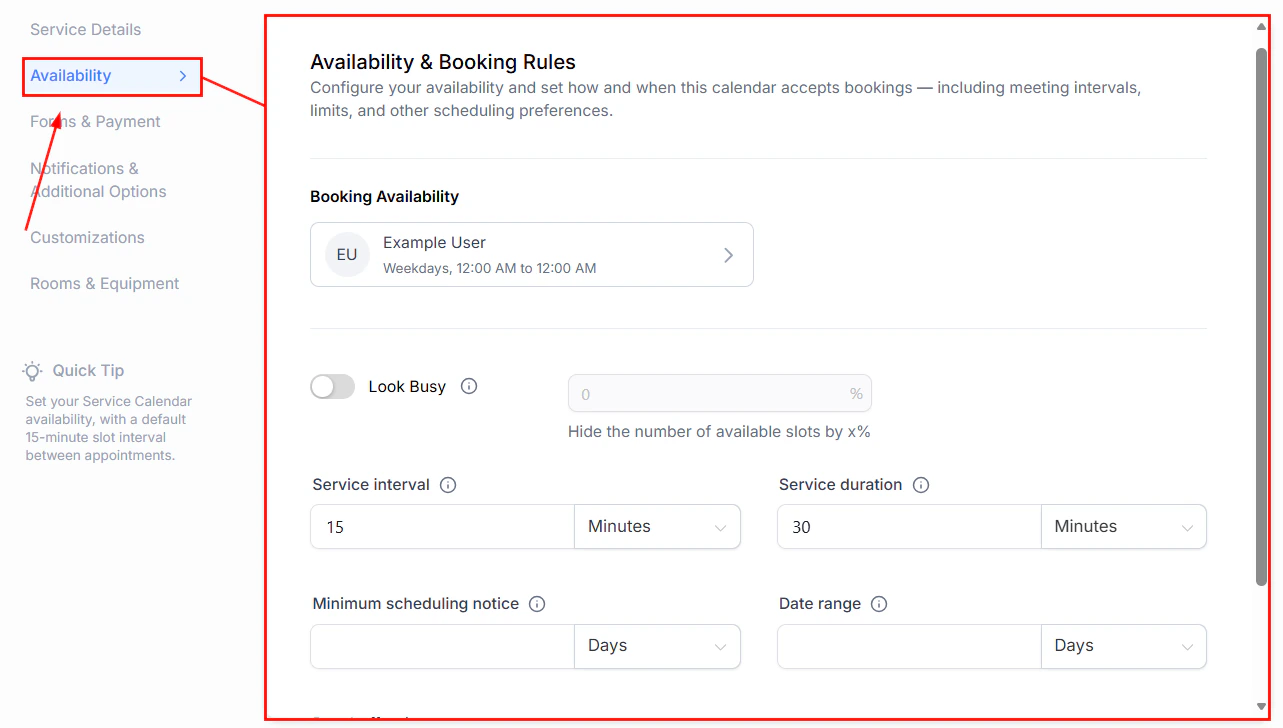
Set available days and hours for the service calendar
Forms and payment
Enable payment collection for this service: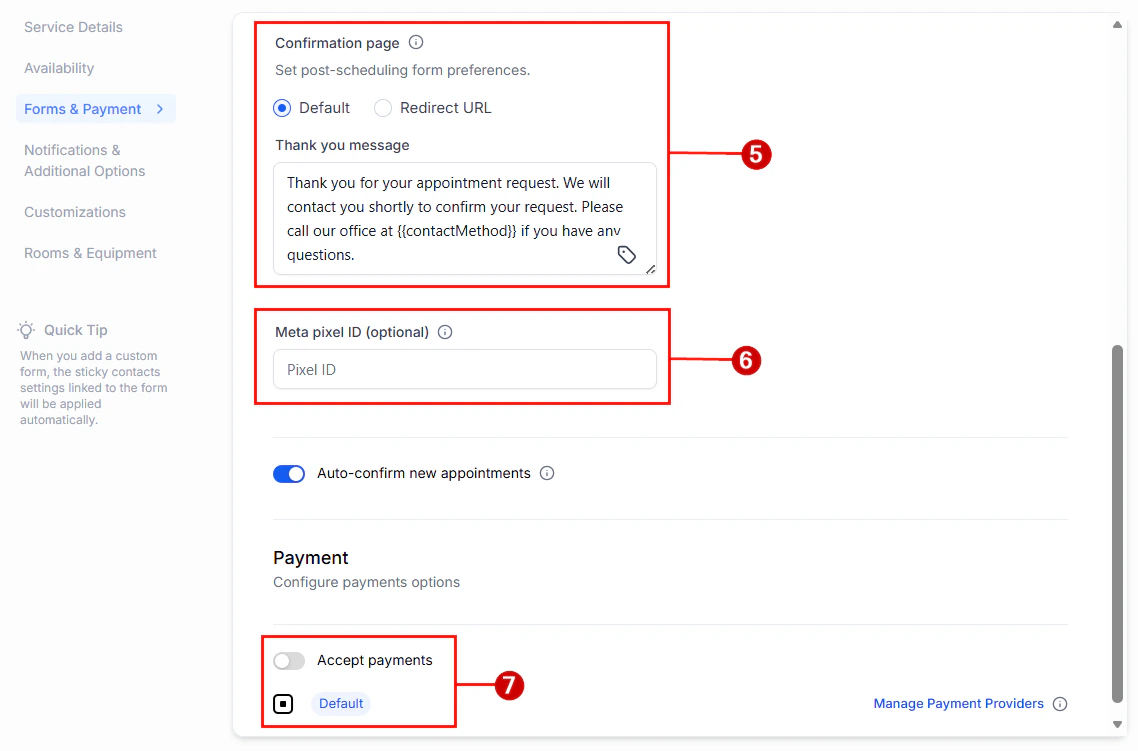
Configure payment settings for the service calendar
- Select form — the booking form contacts complete when scheduling
- Consent checkbox — SMS compliance opt-in at booking time
- Payment — enable to charge at booking time; supports full payment, deposits, and coupon codes
Notifications and additional options
- Notification templates — customize confirmation, reminder, cancellation, and rescheduling emails and SMS
- Reschedule policy — provide a rescheduling link with a configurable expiry window
- Cancellation policy — provide a cancellation link with a configurable expiry window
Rooms and equipment
In the Rooms & Equipment tab of the service calendar, select the rooms and equipment that this service requires. When a booking is made, those resources are automatically blocked for that time slot to prevent double-booking.Rooms and equipment
Rooms and equipment are physical resources linked to service calendars. Once linked, Hoop blocks them when booked so they cannot be double-booked across appointments.Creating a room
Rooms represent any physical space required for a service — a massage room, salon chair, treatment suite, or workout area.Go to Calendar Settings

The Rooms tab in Calendar Settings
Create a new room
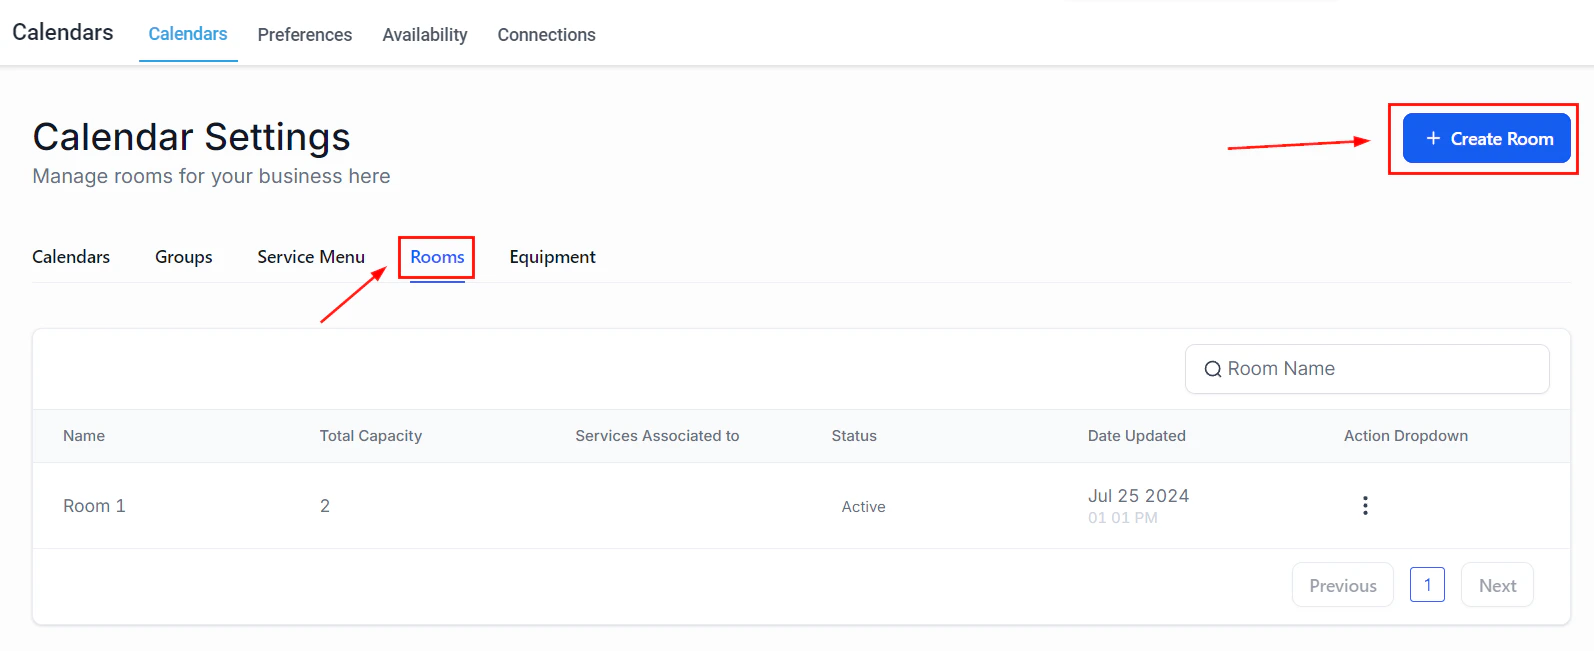
Create a new room to link to service calendars
Fill in the room details
- Name — an identifying name visible to your team and clients
- Description — optional notes about what the room is used for
- Total capacity — maximum number of appointments that can be booked simultaneously in this room
- Select calendar — link this room to its service calendar

Fill in the room name, description, capacity, and linked calendar
Create
Creating equipment
Equipment represents any tool, device, or machine used to deliver a service.Go to the Equipment tab
Create new equipment
Fill in equipment details
- Name — identifying name for the equipment
- Description — optional notes (e.g., “Laser hair removal device”)
- Total quantity — total number of units available, including out-of-service ones
- Out-of-service quantity — units currently unavailable (broken, in repair, etc.)
- Select calendar — link to the service calendar that uses this equipment
Create
Managing rooms and equipment
From the Rooms or Equipment tab, use the three-dot action menu next to each item to:- Edit — update name, description, capacity, or linked calendar
- Disable — remove from active calendars without deleting
- Delete — permanently remove the room or equipment
The service menu
The Service Menu is a centralized customer-facing booking page that displays all your service calendars in one place. Clients can browse categorized services, select a service and staff member, and book an appointment.Creating a service menu
Before creating a service menu, ensure you have already created calendar groups and service calendars.Open Service Menu
Create a new menu
Configure the menu
Save
Service menu management
The Service Menu list shows each menu with:- Edit — update menu settings, included services, and branding
- Copy embed code — get the iframe snippet to embed the menu on your website
- Copy permanent link — share a direct link to the menu on any external page
- Copy scheduling link — share via SMS, email, or any communication channel
- Deactivate service menu — hide the menu from clients without deleting it
- Delete — permanently remove the service menu
Booking flow for clients
When a client visits your Service Menu link, they:- Browse available services grouped by category
- Select a service
- Choose a staff member (if staff selection is enabled)
- Pick an available date and time
- Complete the booking form
- Pay (if payment is required)
- Receive a confirmation email with appointment details
Frequently asked questions
Can I list service bookings on Google Business Profile?
Can I list service bookings on Google Business Profile?
What happens if a piece of equipment is marked out of service?
What happens if a piece of equipment is marked out of service?