

Viewing appointments
Appointments can be viewed in two places:- Calendar view — the main calendar in the Calendars section displays all appointments in day, week, or month layout
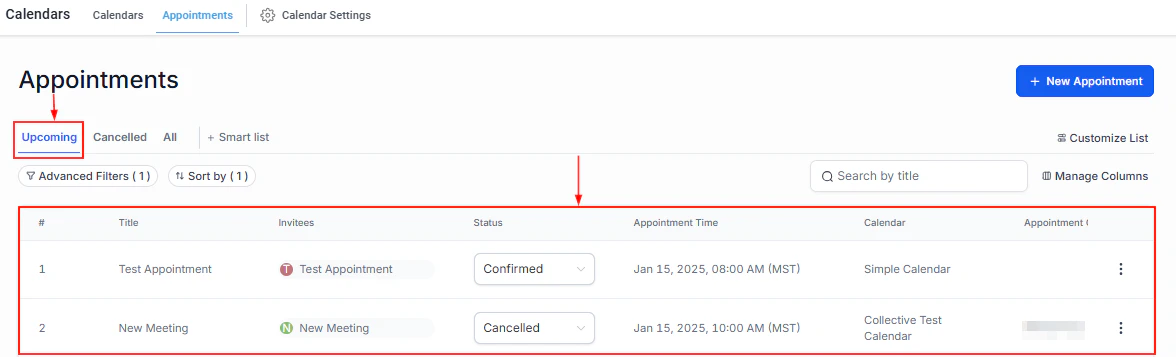
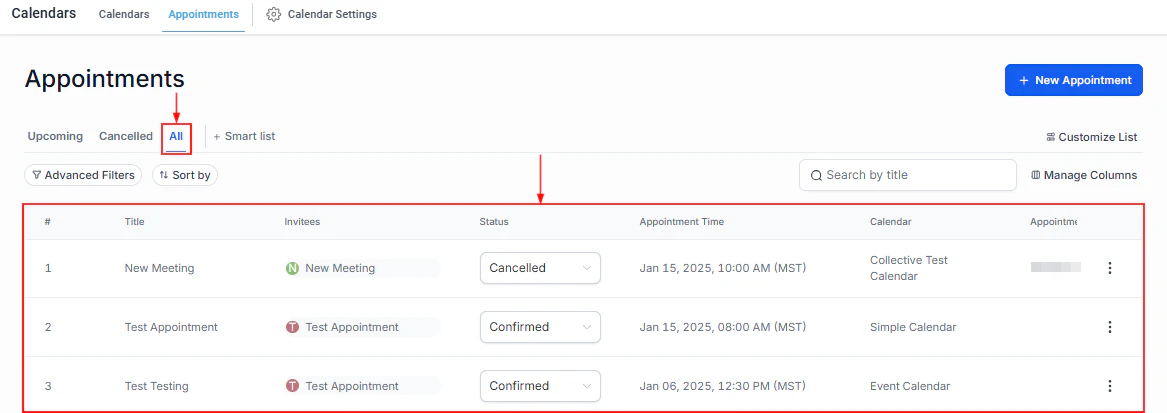
- Appointments list — a dedicated list view within the Calendars section with filtering, sorting, and column customization
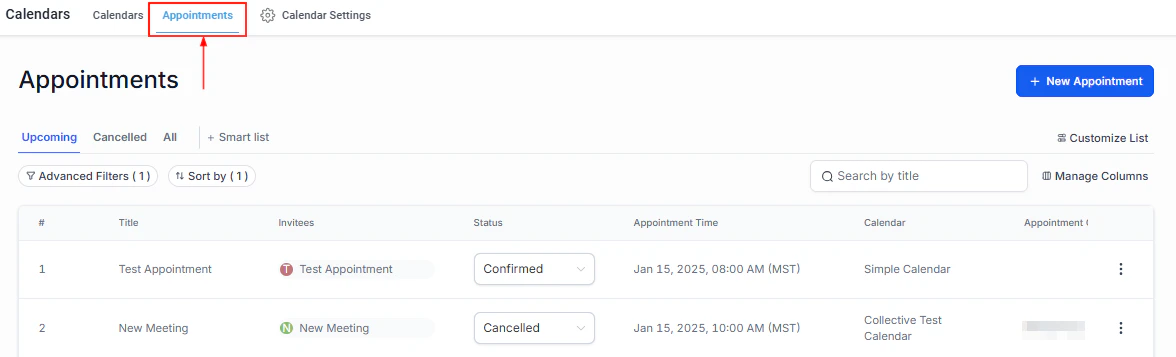
The Appointments section within the Calendars tab showing all scheduled appointments
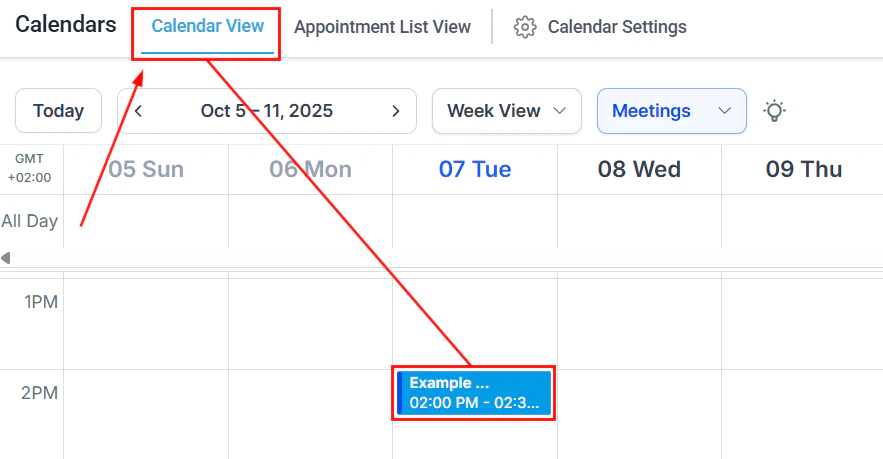
The calendar view displays appointments in day, week, or month format
Appointment list columns
The appointments list shows the following information by default:Filtering and sorting
Click the Filter icon to filter appointments by:- Date range — past, upcoming, or a custom range
- Status — Confirmed, Pending, Cancelled, No Show, etc.
- Calendar — filter to a specific calendar
- Assigned user — show only appointments for a specific team member
- Contact — find all appointments for a specific contact
Filter appointments by date range, status, calendar, and assigned user
Additional filter and sort controls for the appointments list
Smart lists in appointments
Save a filter configuration as a smart list to reuse it later:Apply your filters
Save as smart list
Access later
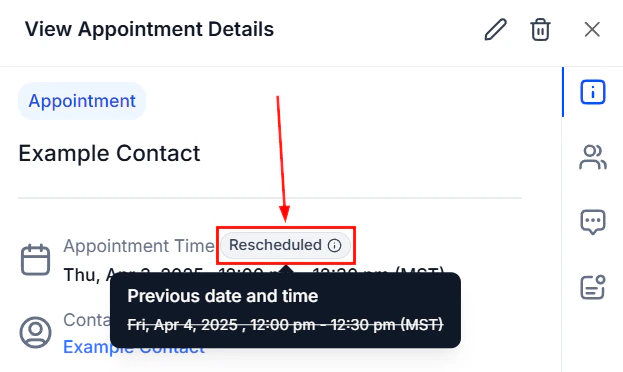
Viewing an appointment in calendar view
Click on any appointment in the calendar to open the appointment modal.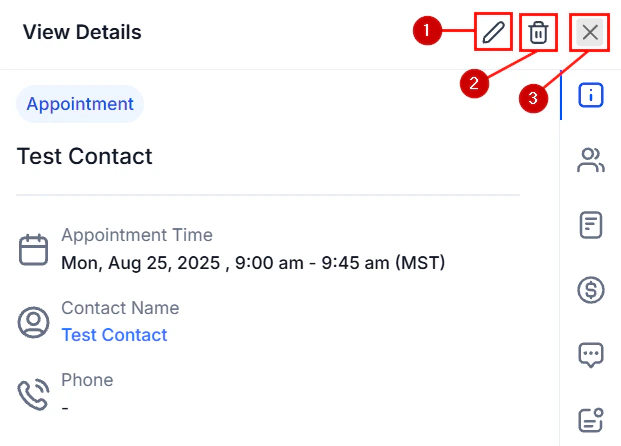
Click an appointment in the calendar to open its detail modal
- Contact name (linked to the contact record)
- Calendar name and assigned user
- Appointment status
- Date, time, and duration
- Meeting location or video link
- Notes
- Guest list
- Actions: edit, cancel, reschedule, or change status
Appointment modal with all details and action buttons
Booking a new appointment
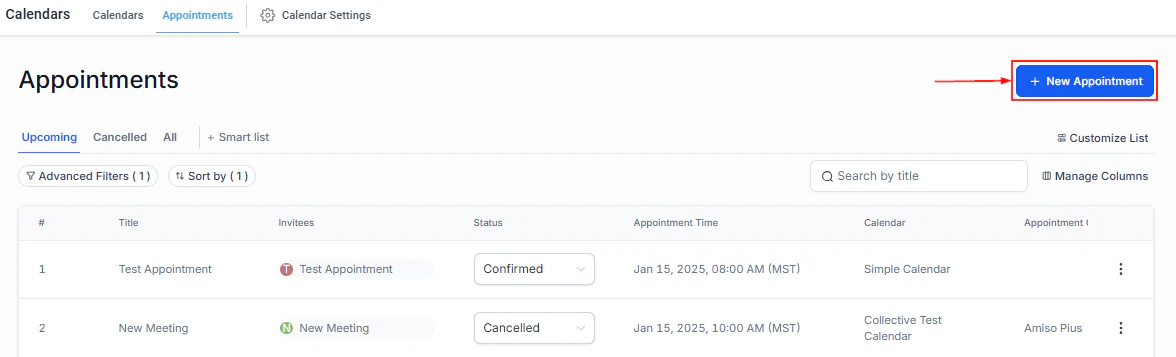
Click '+ New Appointment'
The + New Appointment button to start the booking process
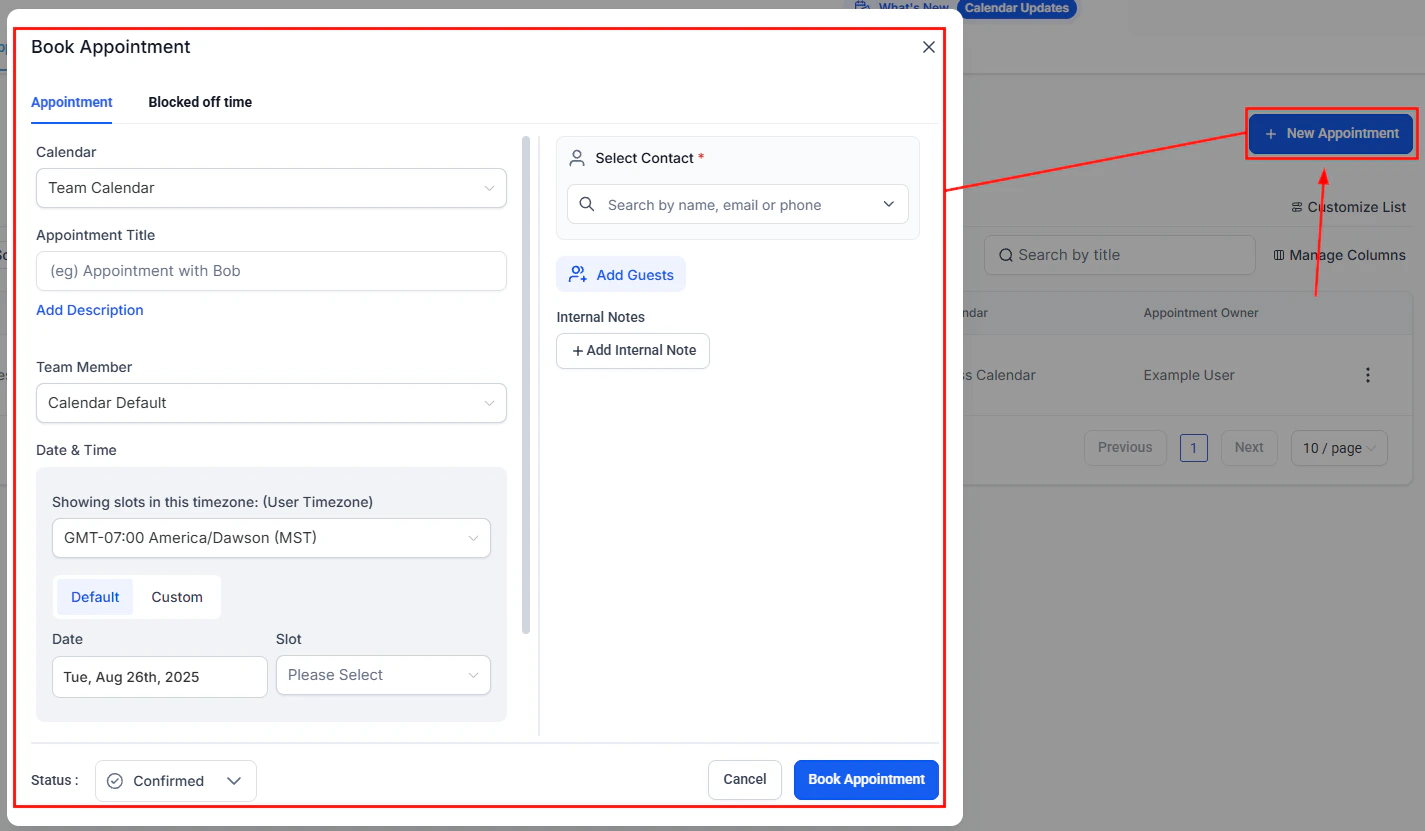
Select the contact
Select the calendar
Set the date and time
Date and time selection with available slots highlighted
Add optional details
- Assigned user — which team member is hosting
- Meeting location — address, virtual link, or platform
- Status — Confirmed, Pending, or other
- Notes — any pre-meeting context
- Guests — additional attendees
Save
Editing an appointment
Open the appointment
Click Edit
Update the details
The appointment edit form with all editable fields
Save
Adding guests to an appointment
Guests are additional attendees beyond the primary contact.
Adding guests to an appointment during booking or editing
Enable Add Guests in calendar settings
Add guests when booking
Creating a recurring appointment
Recurring appointments repeat on a defined schedule from a single booking.
Creating and editing a recurring appointment series
Enable Recurring Meeting in calendar settings
Configure the recurrence
- Frequency — how often the appointment repeats (daily, weekly, monthly)
- Times to repeat — total number of consecutive occurrences
- Unavailable slot handling — skip, book next available, or continue regardless
Book the appointment
Editing a recurring series
When you edit a recurring appointment, you can choose to:- Edit this appointment only — change only the selected occurrence
- Edit this and all following appointments — update the remaining series from this point
- Edit all appointments in the series — apply changes to every occurrence
Manual confirmation of appointments
When a calendar has Manual Confirmation enabled, new bookings arrive in Pending status rather than being immediately confirmed. A team member must approve or reject the appointment before the contact receives a confirmation. To approve a pending appointment:- Open the appointment from the Appointments list or calendar view.
- Change the status from Pending to Confirmed.
- The contact receives their confirmation notification at that point.
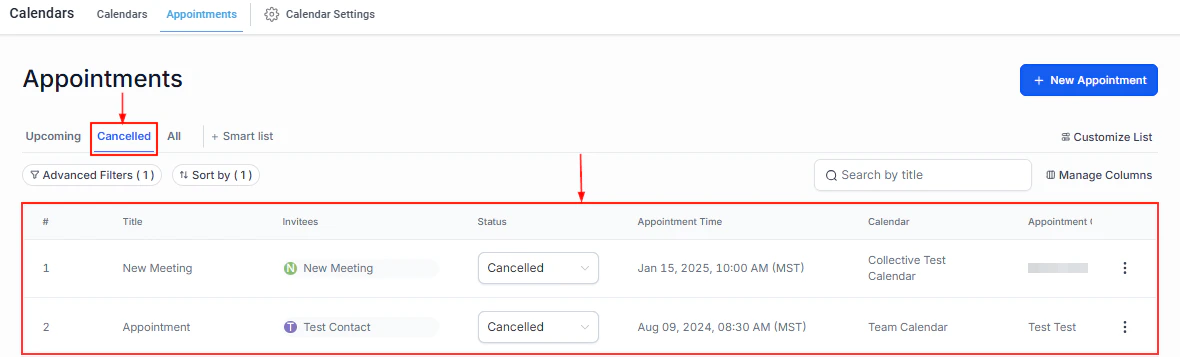
Cancelling an appointment
Open the appointment and click Cancel (or select Cancel from the three-dots menu). If the cancellation policy is configured in the calendar, the contact may also have a self-service cancellation link in their confirmation email.Appointment list view
The appointment list view provides a spreadsheet-style interface for managing appointments in bulk, as an alternative to the visual calendar view.Switching to list view
In the Calendars section, click the List tab (next to the Calendar tab) to switch to list view. The list displays all appointments in a sortable, filterable table.List view capabilities
- Sort by date, status, calendar, contact name, or assigned user
- Filter using the filter bar — combine date range, status, calendar, and user filters
- Bulk actions — select multiple appointments to update statuses, export, or cancel in bulk
- Column customization — click Manage Columns to show or hide fields like notes, payment status, and custom fields
- Quick edit — click on any appointment row to open the detail modal for editing
When to use list view vs. calendar view
Appointment statuses
Appointment statuses track the lifecycle of a booking: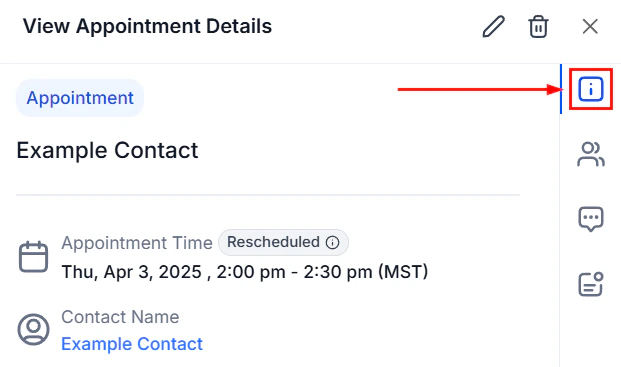
Appointment status options in the calendar view