

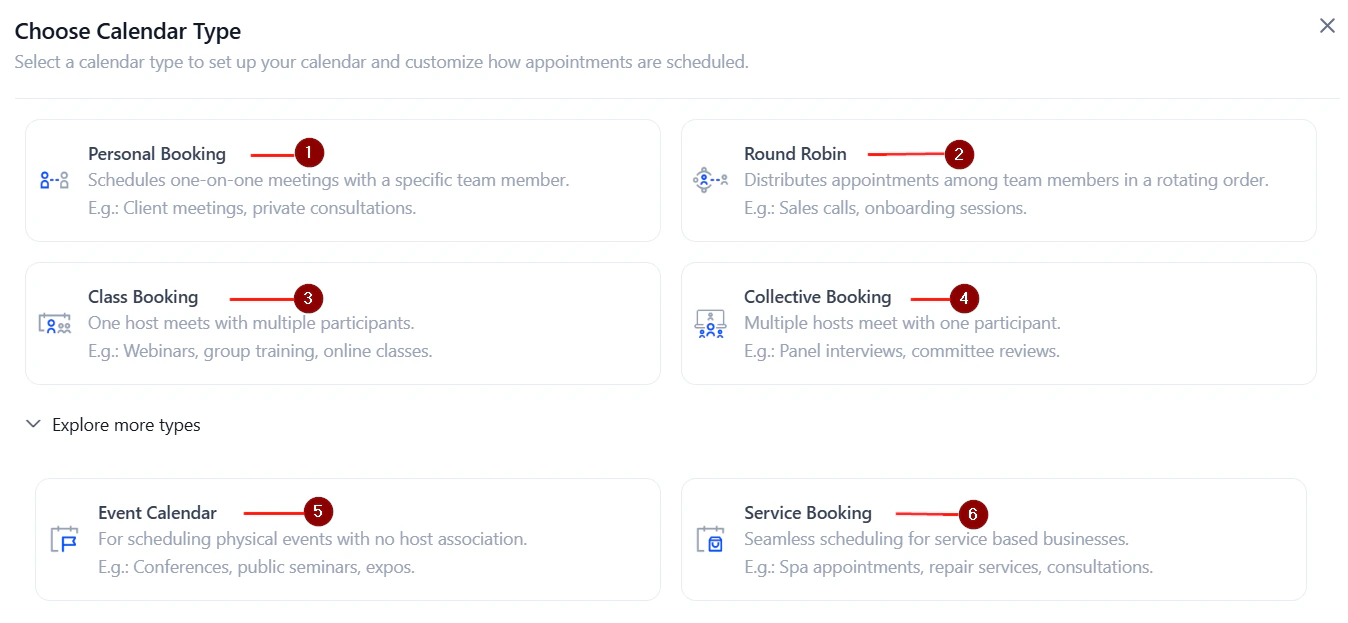
The calendar type selection screen when creating a new calendar
Overview of calendar types
Event calendar
A general-purpose calendar for individual booking links. Best for one-on-one appointments or public events where no specific team member is required.
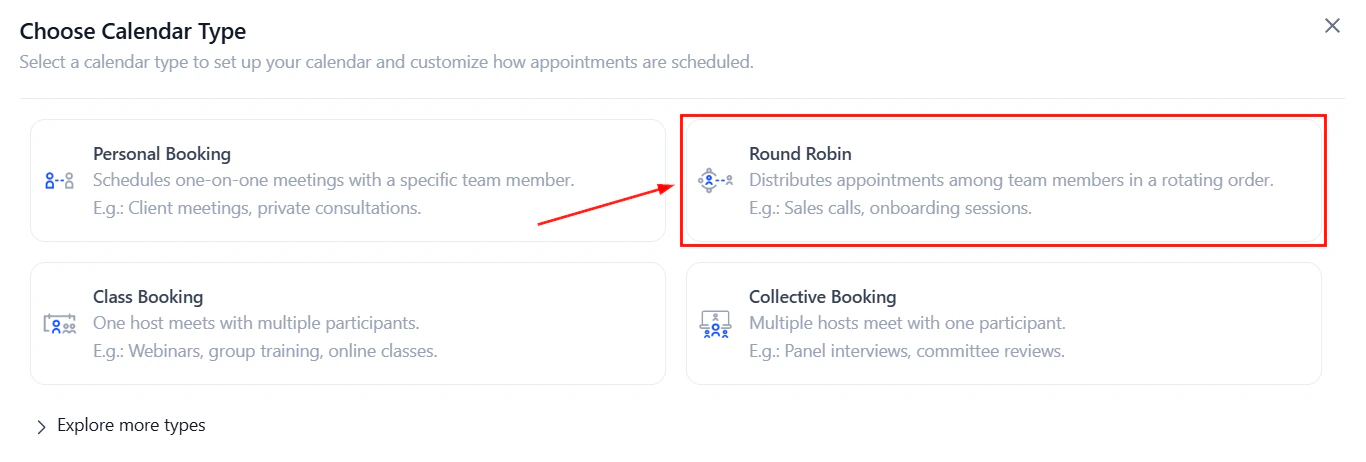
Round robin
Distributes bookings across a team by rotating assignments based on availability or equal distribution. Ideal for sales teams, support queues, and shared scheduling.
Class booking
Allows multiple contacts to book the same time slot up to a defined seat capacity. Perfect for workshops, webinars, fitness classes, and group training sessions. Maximum 9,999 seats per slot.
Collective booking
All assigned team members must be available for a slot to appear as bookable. Used for panel interviews, multi-specialist consultations, or any meeting requiring multiple attendees simultaneously.
Personal calendar
A 1:1 booking calendar assigned to a single user. Designed for intimate, one-on-one meetings — sales calls, coaching sessions, consultations.
Service booking
A calendar for service-based businesses that groups services into a single booking interface. Supports staff assignment, rooms, equipment, and Google My Business listing. See Service calendars.
Choosing the right calendar type
Event calendar
Event calendars are the most flexible type. They work for one-person appointment scheduling or public events with open registration.
An event calendar booking page as seen by contacts
- Single booking link per calendar
- Optional payment collection at booking
- Custom form attachment
- Confirmation page customization (message or redirect URL)
Round robin calendar
Round robin calendars distribute incoming bookings among a group of team members.
Round robin calendar configuration with team member assignment settings
- Optimize for availability — assign to whoever is free at the selected time
- Optimize for equal distribution — assign to each team member at random to balance workloads
Add team members to the round robin and configure distribution settings
- Look Busy — hide a percentage of available slots to create booking urgency
- Staff selection toggle — optionally let bookers choose which team member they want
- Contact routing preferences — control whether rescheduled appointments stay with the same team member
When only one team member is added to a round robin calendar, you can add multiple meeting locations.
Class booking calendar
Class calendars are one-to-many: a single appointment slot can accommodate multiple attendees up to a configured seat limit.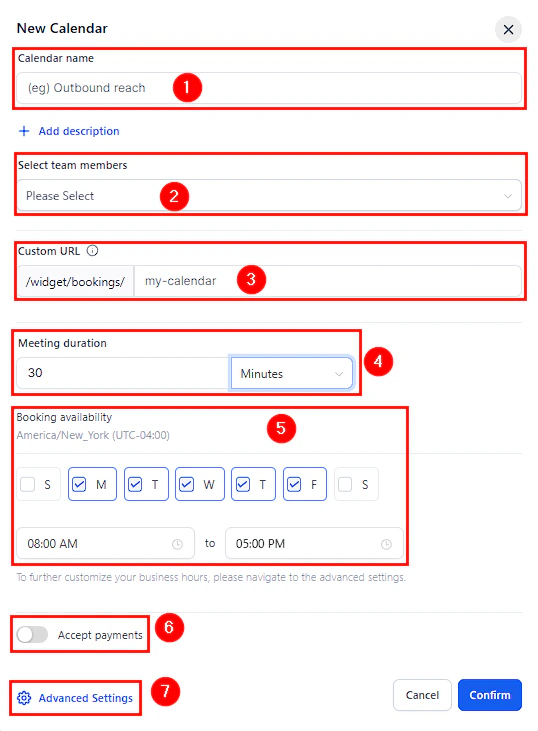
Class booking calendar with available slots and seat count displayed
- Seats per class — set the maximum number of attendees per slot (up to 9,999)
- Seats per slot widget — show remaining spots on the booking widget to create urgency
- Attendees can be charged individually, or a deposit can be collected
- Coupon codes supported for class checkout
If you use a video conferencing tool (Zoom, Google Meet), the tool’s attendee limit applies independently. For example, Zoom limits attendees based on your license tier.
Collective booking calendar
Collective calendars show only time slots when all assigned team members are simultaneously available. Key features:- Minimum 2 team members required
- Primary owner designation (can be changed by clicking “Make Owner”)
- Dynamic team assignment — automatically finds the next available group slot
- All standard availability, form, and notification settings apply
Personal calendar
Personal calendars are functionally similar to event calendars but scoped to a single user. They support all standard advanced settings including:- Recurring meeting setup
- Guest invitations
- Pre-populate fields (sticky contact)
- Consent checkbox for SMS compliance
- Payment collection
Service booking calendar
Service calendars are covered in full detail in the Service calendars guide. In brief, they allow service-based businesses to:- Define individual services with prices, durations, and staff assignments
- Manage rooms and equipment as bookable resources
- Display a customer-facing service menu
- Accept add-ons at booking time
- List services on Google My Business for organic appointment booking