

Getting started
Navigate to Calendars in the left sidebar, then click Calendar Settings. Click + New Calendar to begin.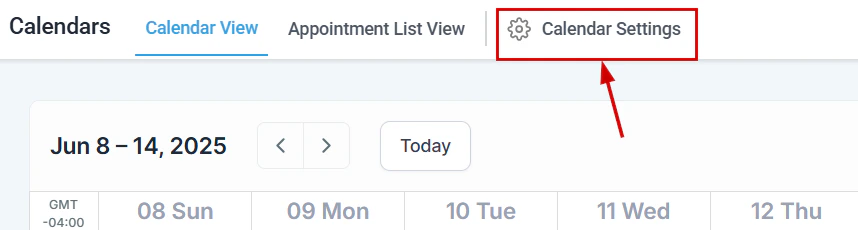
Click + New Calendar in Calendar Settings to start creating a calendar
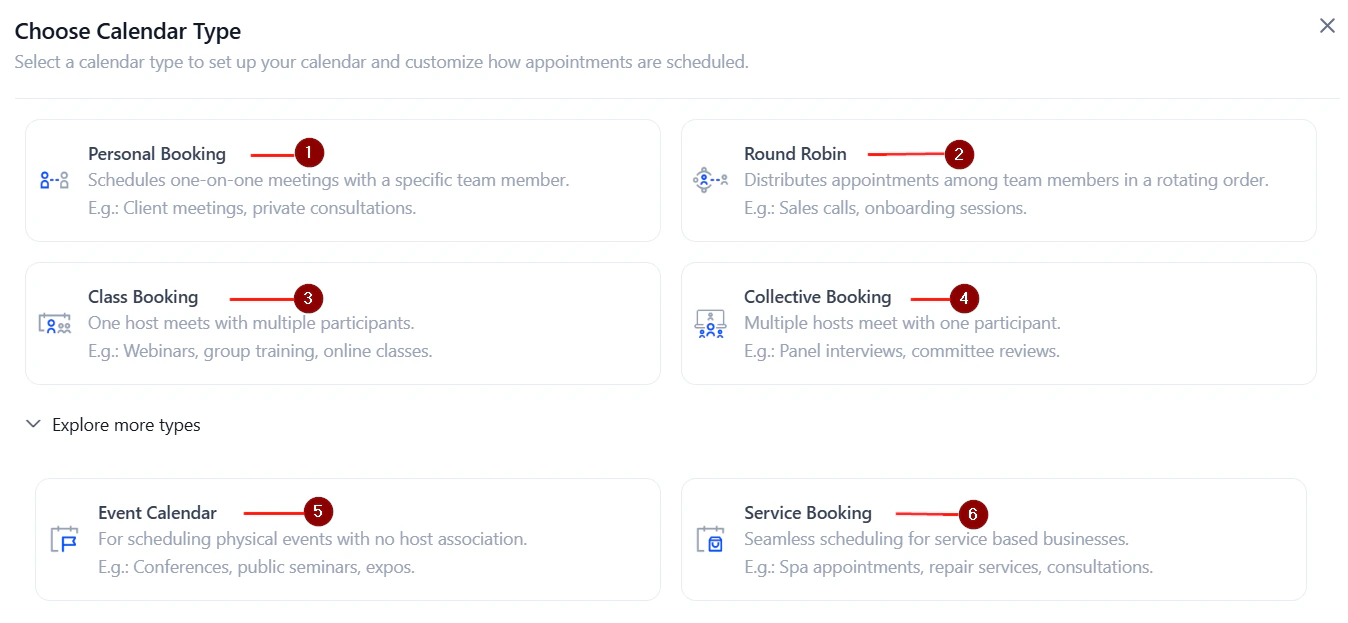
Select the calendar type that matches your scheduling use case
Quick-start setup
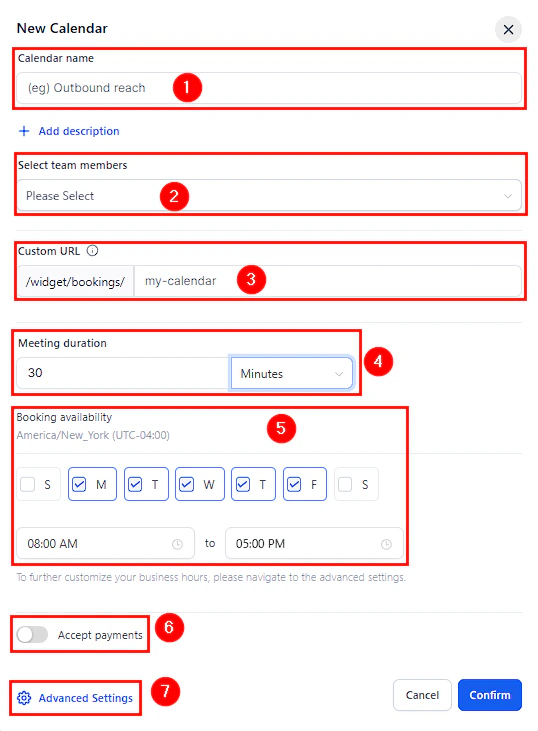
After selecting a type, you complete an Initial Setup with the core fields: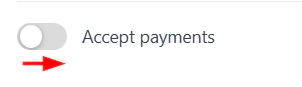
The initial quick-start setup form for a new calendar
Advanced settings tabs
All calendar types share the same five Advanced Settings sections.Meeting details
Configure what contacts see on the booking widget and in confirmation emails:- Calendar logo — upload a brand image displayed on the booking page
- Description — context for what the appointment is about, visible to bookers
- Calendar group — assign this calendar to a group
- Custom URL — modify the booking link slug
- Meeting invite title — what appears in the calendar entry and confirmation email
- Team member — select who conducts the meeting
- Meeting location — physical address, Zoom/Google Meet/Teams link, phone number, or custom
- Event color — color code for the in-app calendar display
Availability
Controls all timing and scheduling settings: Weekly available hours — set which days and time ranges accept bookings by checking the day boxes and configuring start/end times. Date-specific hours — override the regular schedule for specific dates. Use this to block holidays, add extended hours, or mark vacation days. Recurring meetings — toggle on to create appointments that repeat on a schedule. Configure:- Frequency — daily, weekly, or custom interval
- Times to repeat — total consecutive occurrences
- Unavailable slot behavior — skip the slot, book the next available slot, or continue regardless
Forms and payment
Select form — choose the booking form contacts complete when scheduling. Consent checkbox — adds a compliance opt-in checkbox that contacts must check before booking. Add guests — allow the booker to invite additional attendees. Confirmation page — configure what appears after a booking:- Default — display a custom thank-you message
- Redirect URL — send the contact to a specific website
- Partial payment — let the customer pay a deposit to secure the appointment
- Per-attendee billing — charge each attendee including guests (class calendars)
- Coupon codes — allow discount codes at checkout
Notifications and additional options
Notifications — pre-written email and SMS notifications are included for:- Booking confirmation
- Appointment reminders (configurable timing)
- Cancellations
- Rescheduling confirmations
Customizations
Calendar widget style — select between the classic widget and the Neo widget. Color scheme — customize button, date, time slot, and action colors. Button text — personalize the call-to-action button label.Creating a round robin calendar
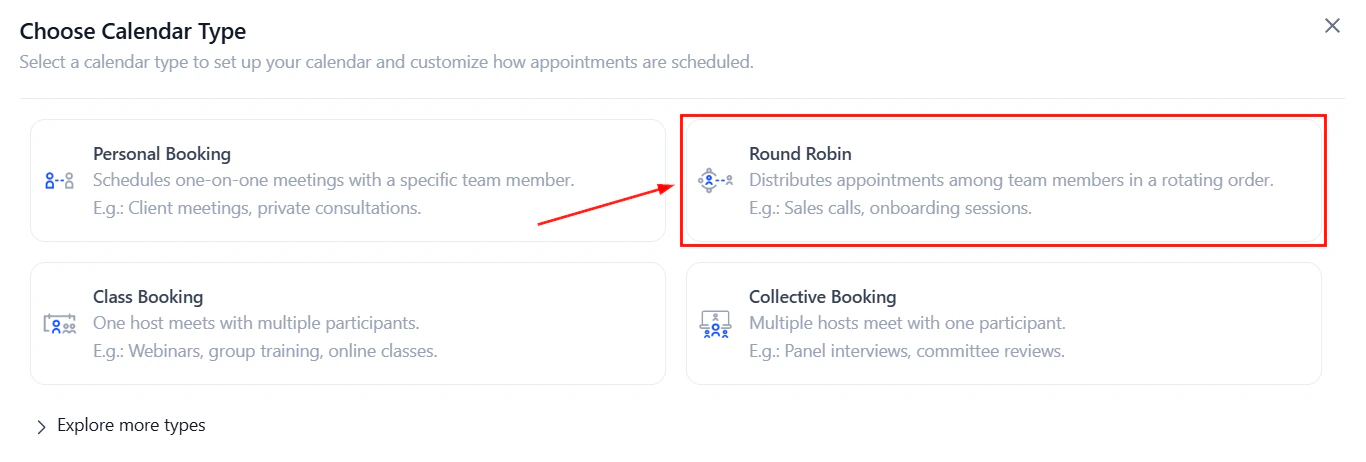
Select Round Robin

Round Robin calendar type option in the calendar type selection screen
Add team members
Add team members who will receive round robin bookings
Configure assignment in Meeting Details
- Optimize for availability — assign to the highest-priority available user
- Optimize for equal distribution — assign randomly to balance workloads
Configure how bookings are distributed among team members
Set contact routing preferences
- Reschedule preference — keep the same team member or reassign at random
- New appointment preference — auto-assign to the contact’s assigned user
Configure availability and save
Creating a class calendar
Select Class Booking
Set seats per class
Configure schedule and save
Creating a collective booking calendar
Select Collective Booking
Add team members (minimum 2)
Confirm and configure
Save
Creating a calendar schedule
Calendar schedules let you define a reusable availability template and apply it across multiple calendars.Go to My Availability
Select the user
Create a new schedule
Set available hours
Add date-specific overrides
Link to calendars
Save changes
Sharing your calendar
To share your booking link or embed code, click the share icon (arrow pointing out) in the top right of the calendar editor. This opens a module with:- Direct link — copy the booking URL
- Embed code — copy the iframe snippet to add to a website or funnel