

Accessing the template library
When creating a new workflow:- Go to Automation and click Create Workflow.
- On the creation screen, select Select from Template instead of starting from scratch.
- The Template Library opens, showing available templates organized by category.
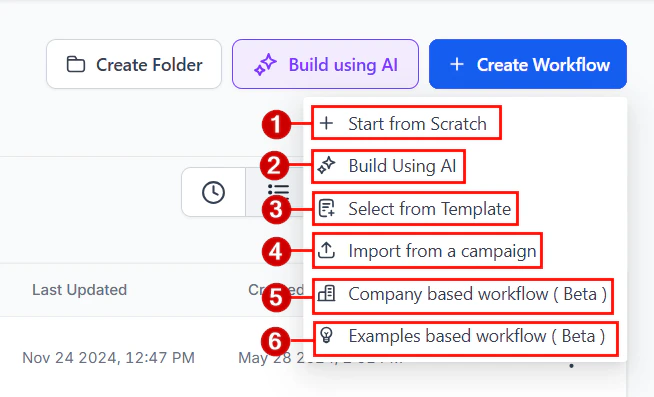
The Create Workflow screen with the option to start from scratch or select a template
Browsing and filtering templates
The template library includes filters to help you find relevant templates quickly:- Category filters — browse by use case such as Lead Nurture, Appointment Reminders, Sales Follow-up, Re-engagement, Onboarding, and more
- Keyword search — type a term to find templates matching specific topics (e.g., “SMS,” “missed call,” “appointment”)
- Sort options — sort by popularity to see the most widely used templates first
Previewing a template
Click on a template card to open the preview view. The preview shows:- A description of the workflow’s purpose and intended use case
- A list of prerequisites or integrations required (e.g., a connected calendar or a specific tag structure)
- The full trigger-and-action sequence, so you can see every step before committing
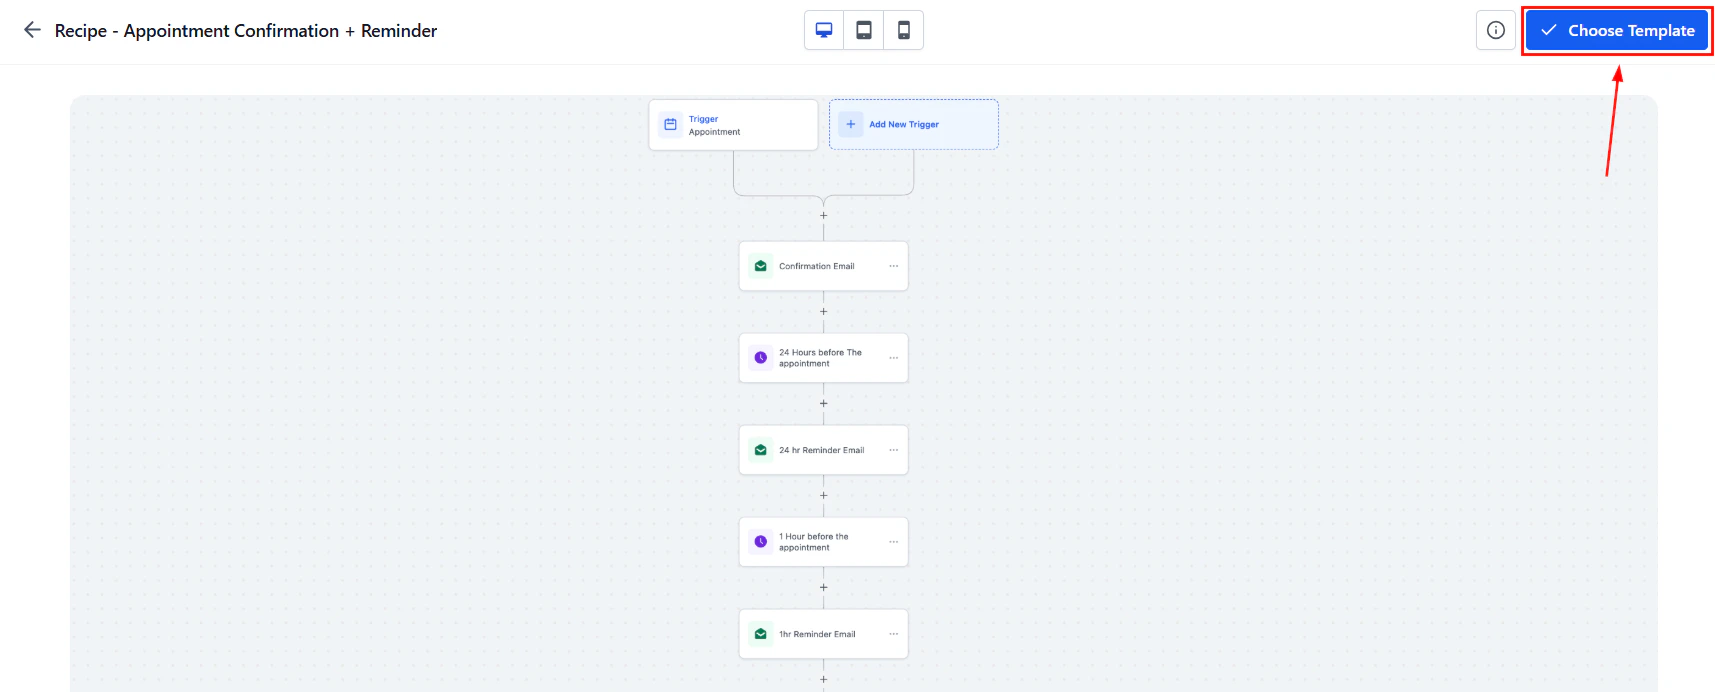
Preview of a workflow template showing the full trigger-and-action sequence with a Choose Template button
Loading a template into the editor
After previewing a template, click Continue to load it into the workflow builder. The template’s structure — triggers, actions, conditions, and wait steps — is fully editable once loaded. Nothing in the template is permanent. You can:- Change the trigger to match your enrollment method
- Edit email and SMS copy to use your brand voice
- Adjust wait durations to match your contact cadence
- Add or remove branches in If/Else conditions
- Insert additional steps before or after any existing action
What to customize after loading a template
Most templates require some configuration before they are ready to publish: Trigger setup: The template may use a generic trigger (such as “Tag Added”). Replace or configure it with the specific trigger and filters appropriate for your use case. Message content: Default email and SMS bodies in templates are placeholder text. Replace them with your actual copy, subject lines, and sender details. Wait durations: Template wait steps use illustrative durations. Adjust them to reflect your sales cycle length and the pace at which you want to contact leads. Connected integrations: Some templates include actions that require connected integrations (such as a calendar for appointment actions). Ensure those integrations are configured before publishing. Tags and fields: Templates may reference tags or custom fields that you need to create in your account if they do not already exist.Using templates as training tools
For teams with multiple users managing workflows, templates serve as a shared reference for best practices. When a new team member needs to build a follow-up sequence, pointing them to a well-structured template — even if they do not use it directly — helps them understand the expected structure, naming conventions, and action order used across the account.Sharing proven workflow structures
While the template library currently does not allow you to publish custom templates for others to browse, you can share individual workflows with team members or across accounts using the Snapshot feature. A snapshot packages one or more workflows (along with other account assets like forms and calendars) into a transferable link. To share a workflow via snapshot:- Navigate to Account Snapshots in your admin settings.
- Create a new snapshot and select the workflows to include.
- Generate a share link (permanent, one-time, or email) and send it to the recipient.
- The recipient imports the snapshot into their account, where the workflows appear as fully editable copies.
FAQs
Can I save my own workflow as a custom template?
Can I save my own workflow as a custom template?
Saving custom workflows as templates for the general template library is not currently available. To reuse a workflow structure, duplicate it within the same account or share it via a snapshot.
Are templates automatically updated when the library changes?
Are templates automatically updated when the library changes?
No. Once you load a template into the editor, it becomes an independent workflow. Any future updates to the template in the library do not affect your version. You own and maintain your copy.
Does loading a template automatically publish the workflow?
Does loading a template automatically publish the workflow?
No. Loaded templates open in draft mode. The workflow is not active until you review, configure, and publish it manually.
Can I use a template as a starting point and add it to a folder?
Can I use a template as a starting point and add it to a folder?
Yes. After loading the template and saving the workflow, move it to the appropriate folder using the workflow Actions menu on the Workflows list page.