

How drip sequences work in HoopAI
Drip sequences are built using the standard workflow builder. The core structure is simple: a trigger that enrolls contacts, followed by alternating Send Message and Wait actions that space out the messages. The Wait actions control the pacing — how long between each touchpoint. A basic five-email drip sequence looks like this:- Trigger (e.g., form submitted)
- Send email 1 — welcome / introduction
- Wait 1 day
- Send email 2 — value content
- Wait 2 days
- Send email 3 — case study or social proof
- Wait 2 days
- Send email 4 — objection handling
- Wait 3 days
- Send email 5 — call to action
Choosing your drip interval
The right pacing depends on your sales cycle length and the nature of your offer:
Start with slightly longer intervals rather than shorter ones. It is easier to increase frequency if engagement is high than to recover from contacts who unsubscribed because they felt spammed.
Using the Drip action for batch delivery
When you need to release contacts through a sequence gradually — for example, when adding a large list of contacts to a workflow at once — use the Drip action. This controls the rate at which contacts progress through the workflow, processing them in batches rather than all at once. Configuration options:- Batch size — how many contacts move to the next step at one time (1 to 10,000)
- Drip interval — how often the next batch is released (1–60 minutes, 1–24 hours, or 1–7 days)
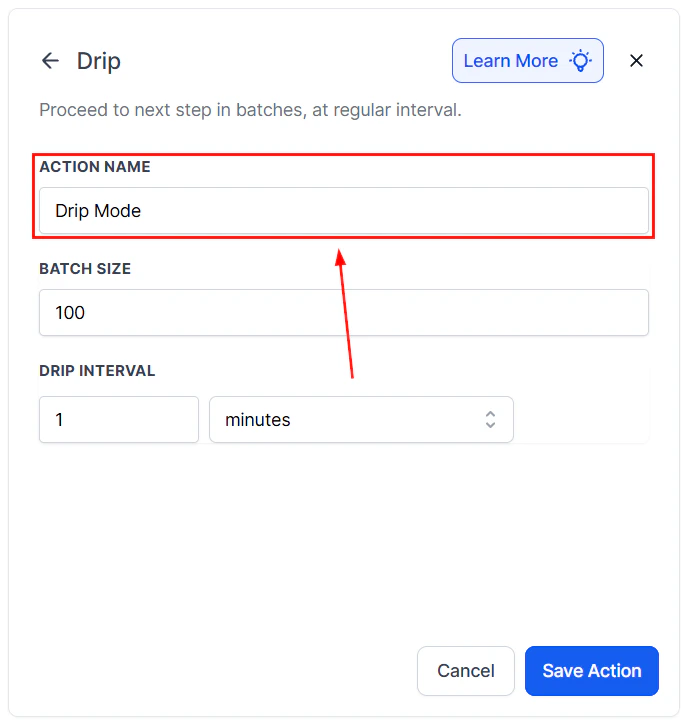
Drip action configuration showing batch size and interval settings
Adding personalization
A well-designed drip sequence does not send the same message to every contact. Use custom fields and dynamic variables to personalize each message:- Address the contact by first name:
{{contact.first_name}} - Reference their industry, location, or product interest stored in custom fields
- Include their assigned sales rep’s name and phone number using user merge fields
Incorporating conditional branches
Not every contact should receive every message in the sequence. Add If/Else conditions at key points to branch the drip based on behavior:- If the contact opened the last email → send a more detailed follow-up
- If the contact clicked a link → move them to a different workflow (e.g., a sales call booking sequence)
- If the contact has a specific tag → skip a step that is not relevant to them
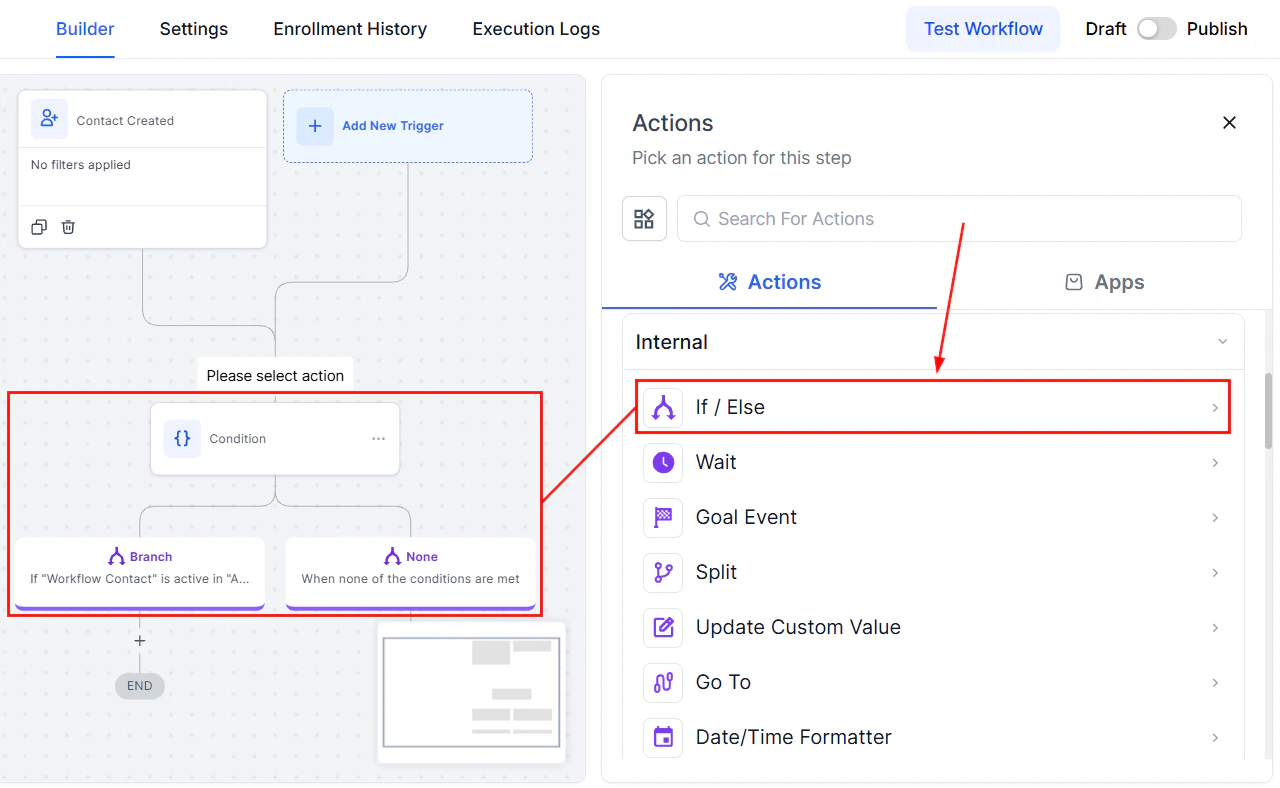
An If/Else condition in the workflow builder used to branch a drip sequence
Using goal events to exit the sequence early
One of the most important additions to any drip sequence is a Goal Event that exits contacts as soon as they convert. Without this, a contact who books a call on day two will continue to receive nurture emails on days three, four, and five — which feels out of place and may even undermine confidence. Set a Goal Event at the beginning of the sequence with the type “Appointment confirmed” or “Form submitted” or whichever action constitutes conversion. When that event fires, the contact is moved to the goal step and exits the nurture workflow, freeing them to enter a post-conversion sequence instead.Structuring a multi-channel drip
Combining email and SMS in a single sequence creates more touchpoints without dramatically increasing volume at any single channel. A simple multi-channel pattern:- Day 0 — Send welcome email
- Day 1 — Send introductory SMS (short, conversational)
- Day 3 — Send value-focused email
- Day 5 — Send SMS with a question or prompt to reply
- Day 7 — Send email with a case study or testimonial
- Day 10 — Send SMS with a direct call to action
- Day 14 — Send final email (“Last chance” or breakup message)
Monitoring drip sequence performance
Use the Workflow Statistics view to check email open and click rates at each step of the sequence. Look for significant drop-offs — a step with a notably lower open rate than the previous step may indicate a subject line problem, a send-time issue, or that the content is not relevant enough. Monitor unsubscribe rates per step as well. A high unsubscribe rate at a particular email may signal that the message is too aggressive, too frequent, or off-topic relative to what the contact expected.FAQs
Can I pause a drip sequence for a specific contact without removing them?
Can I pause a drip sequence for a specific contact without removing them?
Yes. In the Enrollment History tab, locate the contact and use the manual advance or hold options. For a workflow-level pause, you can temporarily disable the workflow (which pauses all active contacts) or use a Wait For Event step as a conditional gate.
Can contacts enter a drip sequence at different points, not always from the beginning?
Can contacts enter a drip sequence at different points, not always from the beginning?
Contacts always start from the beginning of a workflow when enrolled. To start contacts at a specific step, structure separate workflows for each entry point, or use If/Else conditions early in the sequence to skip irrelevant steps based on contact data.
How do I prevent a contact from receiving a drip sequence twice?
How do I prevent a contact from receiving a drip sequence twice?
Disable the Allow Re-entry setting on the workflow. With re-entry off, each contact can only enter the sequence once. For sequences where re-entry makes sense (such as annual renewal reminders), leave re-entry enabled and add a tag-based filter to the trigger to control timing.
What is the difference between a drip sequence workflow and an SMS campaign?
What is the difference between a drip sequence workflow and an SMS campaign?
An SMS campaign sends a single message to a list of contacts at a scheduled time. A drip sequence workflow is an ongoing automation that enrolls contacts individually (or in batches) and sends a series of messages over time, with each contact moving through the sequence at their own pace based on when they enrolled.