

When to use a custom webhook
Use the Custom Webhook action when you need to:- Push contact data to an external database or CRM at a specific point in a workflow
- Notify a third-party service of a conversion event (e.g., a form submission or payment)
- Trigger an action in another system (e.g., provision an account, create a record, send a Slack notification)
- Pass workflow or contact data to a custom application that your team manages
Adding a custom webhook action
- Open your workflow in the builder and click the + icon at the point where you want the webhook to fire.
- Search for or select Custom Webhook from the action list.
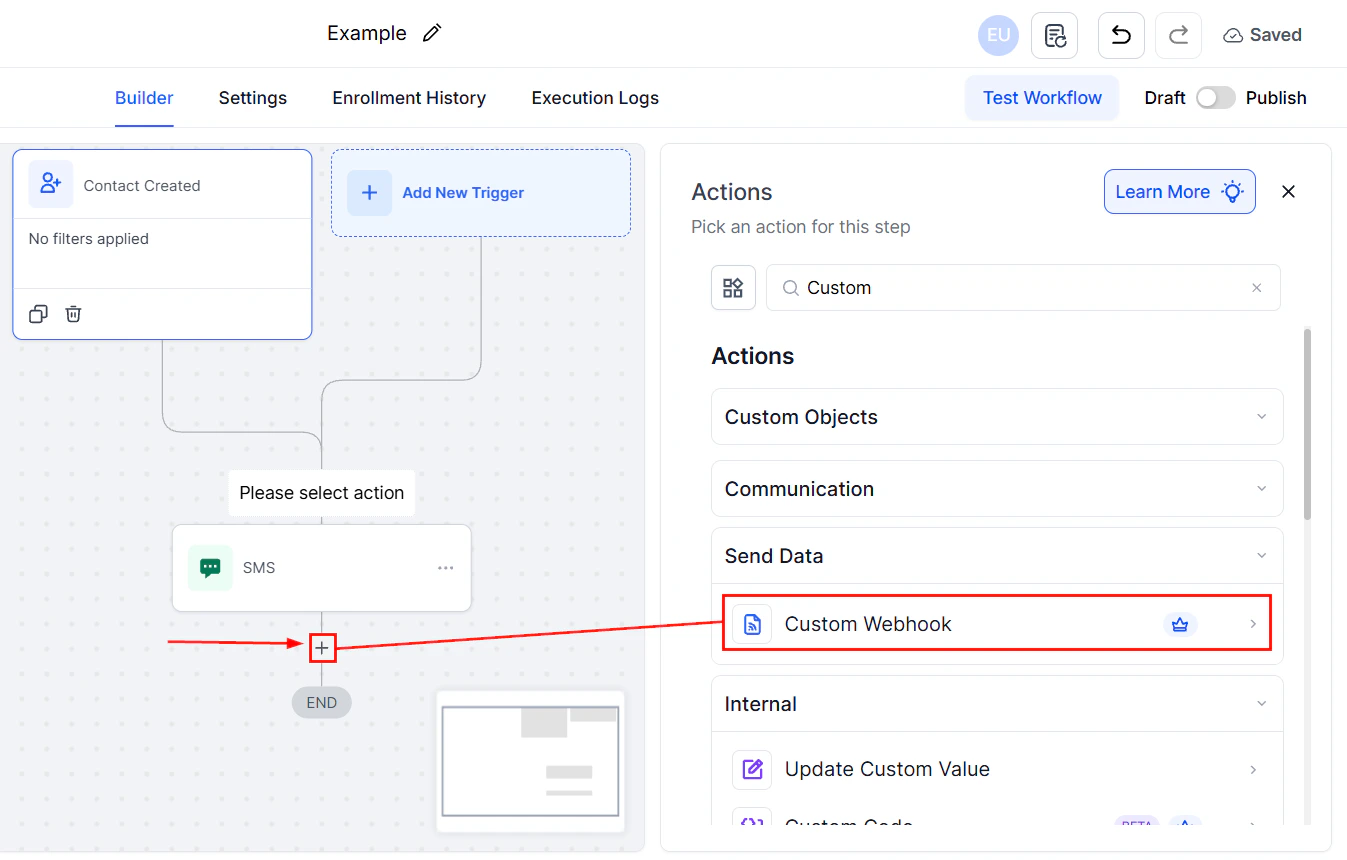
Selecting the Custom Webhook action from the workflow builder action list
- Configure the request using the settings described below.
- Save the action and test it before publishing.
HTTP method
Choose the HTTP method that matches the operation your external API expects:
POST is the most common method for sending contact data to external services.
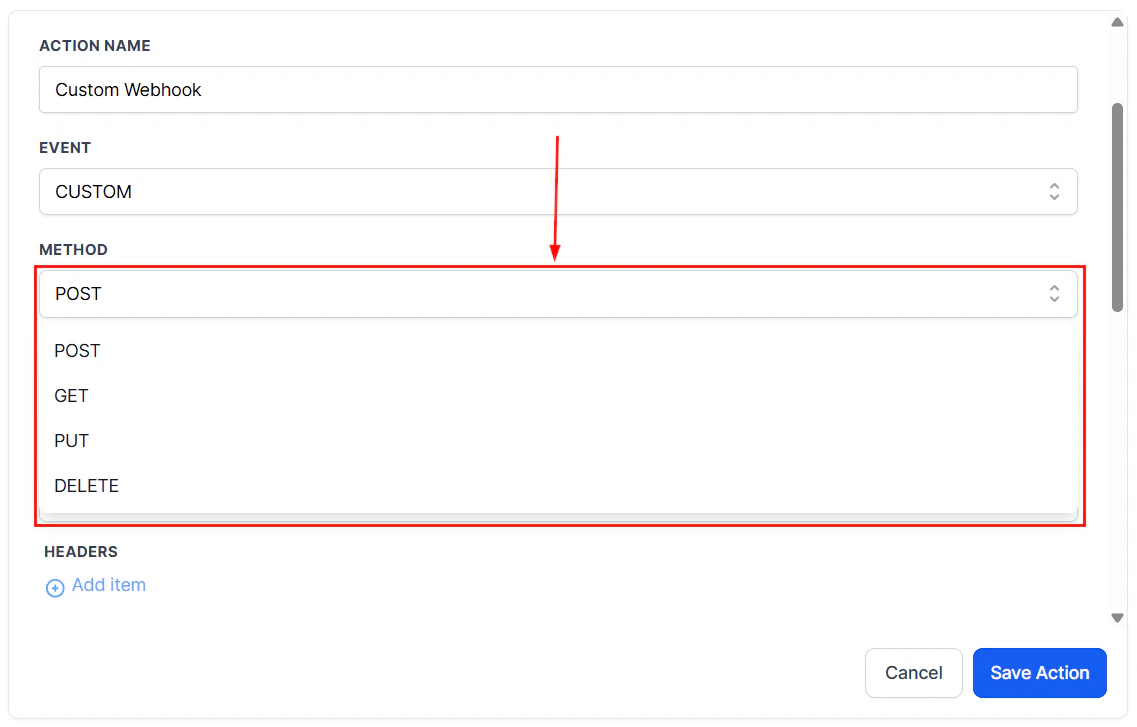
HTTP method dropdown showing POST, GET, PUT, and DELETE options
Webhook URL
Enter the full URL of the external endpoint that will receive the request. This URL is provided by the third-party service you are integrating with. Make sure the URL is correct and the endpoint is accessible from the internet.Authentication
Choose the authentication method required by your external API:- No auth — the endpoint is public or uses custom header-based authentication
- Bearer token — adds an
Authorization: Bearer <token>header automatically - API key — adds a custom header with your API key (you specify the header name and value)
- Basic auth — sends a Base64-encoded username and password pair in the Authorization header
- OAuth 2.0 — uses a pre-configured OAuth token stored in your workflow global settings
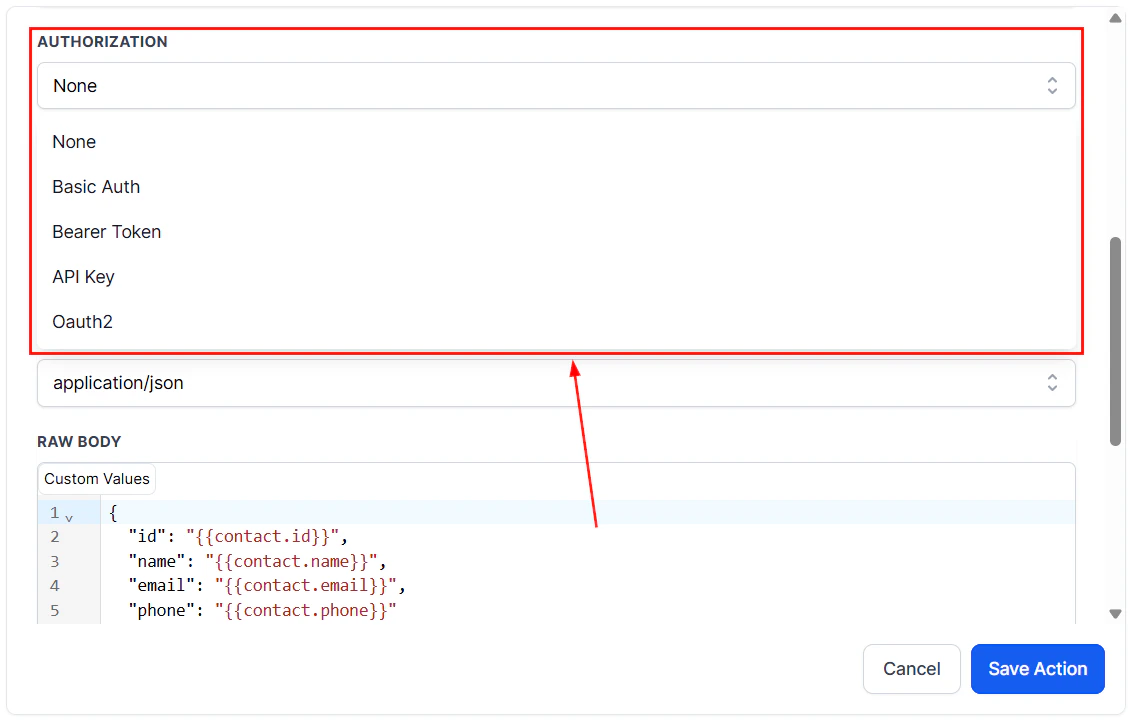
Authentication options and raw body configuration for a custom webhook
Headers
Headers provide metadata about the request. Common headers include:Content-Type: application/json— required by most APIs that accept JSON payloadsX-API-Key: your_key_here— a common pattern for key-based authentication- Cache control and rate-limit headers as required by the destination API
Query parameters
For GET requests, query parameters are the primary way to pass data. For POST and PUT requests, you may still include query parameters for filtering or routing purposes alongside a request body. Click Add Parameter to add key-value pairs. Parameter values support dynamic variables.Request body
For POST and PUT requests, the request body contains the data payload. The Custom Webhook action supports building a JSON body using:- Static values — fixed text you type directly
- Dynamic contact fields — values pulled from the contact’s record at the moment the action runs
Using dynamic values
Dynamic values let you populate the request with live contact data rather than static placeholders. Available variables include:- Contact fields:
{{contact.email}},{{contact.first_name}},{{contact.phone}}, custom fields, etc. - Opportunity data: pipeline name, stage, value
- Workflow variables passed from earlier steps
Testing the webhook
Before publishing your workflow, verify the webhook is firing correctly:- Use the Test Workflow button in draft mode with a real contact record.
- Direct your webhook URL to a tool like Webhook.site or Postman to capture the raw request and inspect the headers, parameters, and body.
- Confirm the data structure matches what the destination API expects.
- Review the Execution Logs after the test to check the response status code and any error messages.
FAQs
How many custom webhook actions can I have in a single workflow?
How many custom webhook actions can I have in a single workflow?
There is no enforced limit on the number of Custom Webhook actions in a workflow. You can fire webhooks to multiple endpoints at different stages of the automation.
What happens if the webhook request fails?
What happens if the webhook request fails?
The execution logs record the failure with the HTTP status code and any error message returned by the server. The workflow continues to the next step regardless of the webhook response. If your use case requires retry logic, add error handling steps using If/Else conditions to check for failure and re-attempt or notify your team.
Can I send a webhook to an internal URL or localhost?
Can I send a webhook to an internal URL or localhost?
No. The HoopAI platform sends requests from its servers to the specified URL. Localhost addresses and private network URLs are not reachable. The endpoint must be publicly accessible.
Is the Custom Webhook action the same as the Webhook (Outbound) action?
Is the Custom Webhook action the same as the Webhook (Outbound) action?
They serve a similar purpose but differ in configurability. Custom Webhook supports multiple HTTP methods, full authentication options, custom headers, and a flexible body builder. The basic Webhook (Outbound) action is simpler and follows a more fixed request format. Use Custom Webhook for integrations that require specific request structures.