

Adding the Trigger Link Clicked Trigger
To get started with setting up your workflow, click on “Add New Trigger” and select Trigger Link Clicked.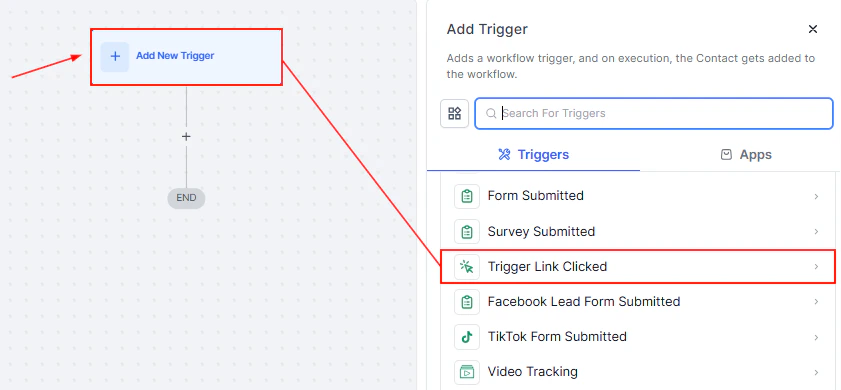
Screenshot
Add Filter
Click the “Add Filters” button to choose from the standard filter or custom filters.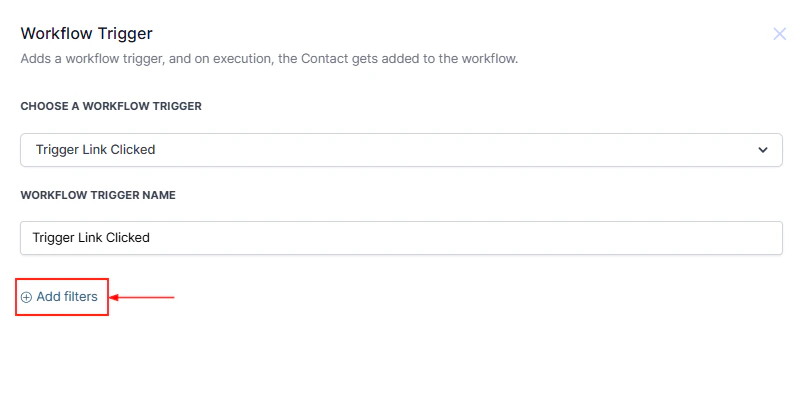
Screenshot
Trigger Link
You can filter your trigger by clicking Add Filters and selecting Trigger Link. In the second dropdown, select the trigger link you would like to use for the workflow.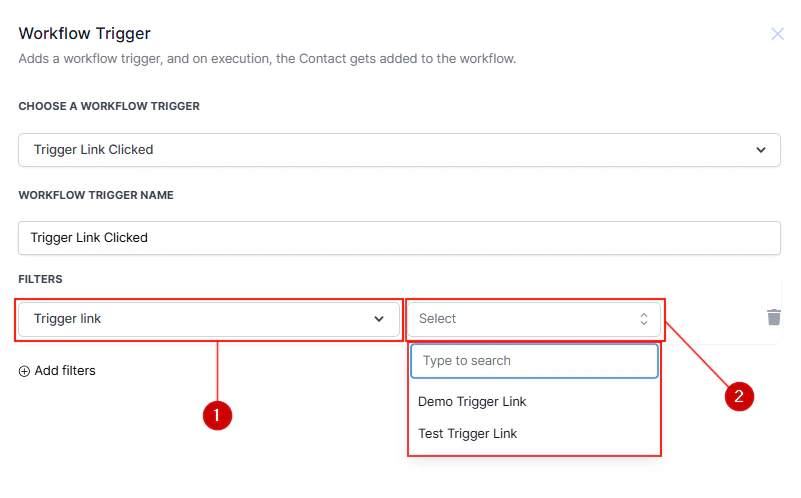
Screenshot
Screenshot
Screenshot
FAQs
What is a trigger link?
What is a trigger link?
A trigger link is a trackable URL that fires a workflow automation the moment a contact clicks it. Unlike a standard URL, it records the click event and immediately enrolls the contact in the linked workflow so you can send personalised follow-ups.
Where can I use trigger links?
Where can I use trigger links?
Trigger links can be embedded in SMS messages, emails, web pages, and any other channel where you can include a hyperlink. When the contact clicks the link they are redirected to the destination URL and the workflow is simultaneously triggered.
Can one trigger link activate multiple workflows?
Can one trigger link activate multiple workflows?
A single trigger link can only be associated with one filter per trigger. To activate additional workflows from the same link, add the same trigger link as a filter to multiple workflow triggers, or create separate trigger links for each workflow.
How do I create a trigger link?
How do I create a trigger link?
Navigate to Marketing > Trigger Links, click Add Trigger Link, give it a name, enter the destination URL, and save. The generated link is then available to insert into your messages and to select as a filter in the Trigger Link Clicked workflow trigger.
Can I track how many contacts clicked a trigger link?
Can I track how many contacts clicked a trigger link?
Yes. Open the trigger link record in Marketing > Trigger Links to see click counts. You can also filter Enrollment History in the linked workflow by trigger to see exactly which contacts entered via the link.