> ## Documentation Index
> Fetch the complete documentation index at: https://help.hoopai.com/llms.txt
> Use this file to discover all available pages before exploring further.
# Client portal
> Give clients a branded self-service portal to access courses, communities, and account details in the Hoop platform.
The Client Portal is a branded, client-facing interface where your members can log in to access their courses, community groups, affiliate earnings, contracts, and subscriptions. It lives on a customizable subdomain and can be extended with a Branded Mobile App.
 ## Setting up the client portal
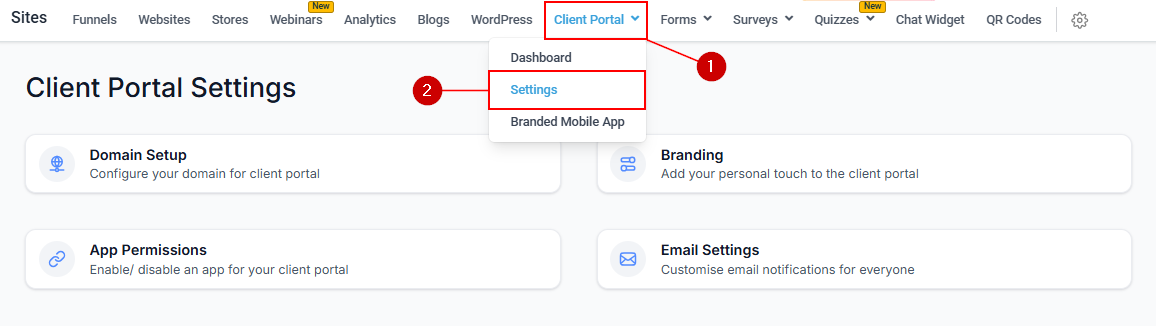
Click **Sites** in the left sidebar and select **Client Portal**, or access it from **Memberships and Communities**.
Go to **Settings > Domain Setup**. Choose a **Subdomain** (your account ID is used as the prefix by default) or enter a **Custom Domain**. Click **Update Domain** to save.
For a custom domain, add these DNS records at your domain registrar:
* **A record**: `162.159.140.166`
* **CNAME record**: `clientportal.ludicrous.cloud`
Allow 24–48 hours for DNS propagation.
Go to **Settings > Branding** to set:
* **Portal Name** — displayed on the portal
* **Portal Description** — a brief summary visible to clients
* **Brand Color One** — used for buttons, headings, and highlights
* **Brand Color Two** — secondary color
* **Favicon** — 16×16 px, SVG/PNG/JPG
* **Portal Image** — square image up to 720×720 px
* **Logo** — 1:1 ratio, up to 200×200 px
* **Support Email** — contact address for portal support
* **Copyright** — your company copyright line
* **Advanced** — custom code for further customization
Click **Save Settings** to apply changes.
Go to **Settings > App Permissions**. Toggle each app or feature on or off. Disabled apps are hidden from clients even if they access the portal URL directly.
In **Settings**, choose the default landing page from the dropdown. This is the first page clients see when they log in. Click **Save Settings**.
## Client portal dashboard
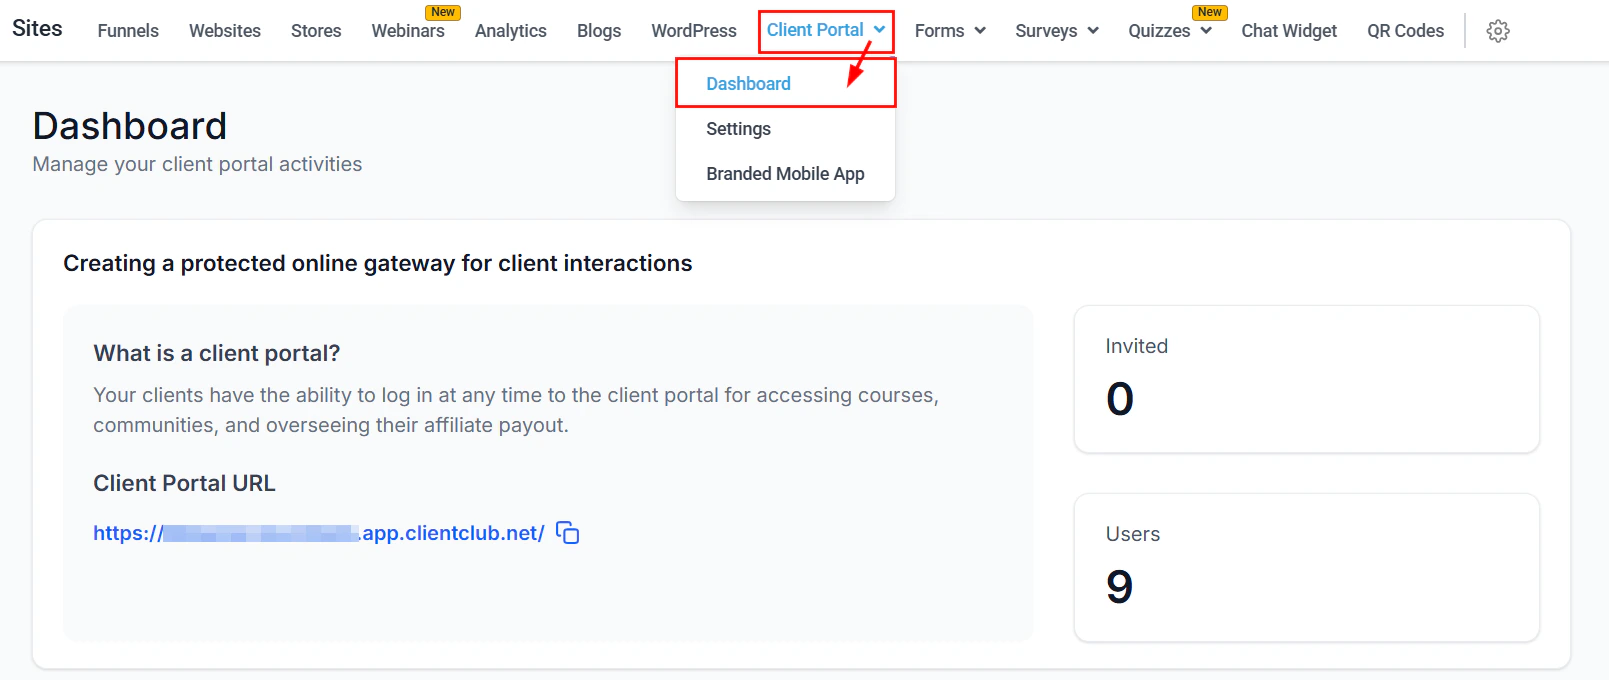
The Dashboard shows:
* **Invited Users** — number of contacts invited to the portal
* **Joined Users** — number of contacts who have successfully logged in
* **Client Portal URL** — the live URL to share with clients
* **Generate Magic Link** — create a direct-access link for a specific contact, bypassing the login screen
* **Invite to Client Portal** — send invitation emails to existing contacts or new email addresses
* **Send Login Email** — send a login button email to a contact for one-click portal access
## Setting up the client portal
Click **Sites** in the left sidebar and select **Client Portal**, or access it from **Memberships and Communities**.
Go to **Settings > Domain Setup**. Choose a **Subdomain** (your account ID is used as the prefix by default) or enter a **Custom Domain**. Click **Update Domain** to save.
For a custom domain, add these DNS records at your domain registrar:
* **A record**: `162.159.140.166`
* **CNAME record**: `clientportal.ludicrous.cloud`
Allow 24–48 hours for DNS propagation.
Go to **Settings > Branding** to set:
* **Portal Name** — displayed on the portal
* **Portal Description** — a brief summary visible to clients
* **Brand Color One** — used for buttons, headings, and highlights
* **Brand Color Two** — secondary color
* **Favicon** — 16×16 px, SVG/PNG/JPG
* **Portal Image** — square image up to 720×720 px
* **Logo** — 1:1 ratio, up to 200×200 px
* **Support Email** — contact address for portal support
* **Copyright** — your company copyright line
* **Advanced** — custom code for further customization
Click **Save Settings** to apply changes.
Go to **Settings > App Permissions**. Toggle each app or feature on or off. Disabled apps are hidden from clients even if they access the portal URL directly.
In **Settings**, choose the default landing page from the dropdown. This is the first page clients see when they log in. Click **Save Settings**.
## Client portal dashboard
The Dashboard shows:
* **Invited Users** — number of contacts invited to the portal
* **Joined Users** — number of contacts who have successfully logged in
* **Client Portal URL** — the live URL to share with clients
* **Generate Magic Link** — create a direct-access link for a specific contact, bypassing the login screen
* **Invite to Client Portal** — send invitation emails to existing contacts or new email addresses
* **Send Login Email** — send a login button email to a contact for one-click portal access
 ## Client portal vs memberships
| Feature | Memberships | Client Portal |
| -------------- | ------------------------------- | ------------------------------------------ |
| Focus | Content creation and management | Client-side access and interaction |
| Courses | Created and managed here | Accessed by clients through this interface |
| Communities | Created and managed here | Accessed by clients through this interface |
| Branding | Course-level customization | Full portal-level branding |
| Access control | Membership offers and pricing | App permissions and magic links |
Both features work together: courses and communities built in Memberships are accessed by clients through the Client Portal.
## Branded Mobile App
The Branded Mobile App lets you publish a branded iOS and Android app for your portal. To get started:
## Client portal vs memberships
| Feature | Memberships | Client Portal |
| -------------- | ------------------------------- | ------------------------------------------ |
| Focus | Content creation and management | Client-side access and interaction |
| Courses | Created and managed here | Accessed by clients through this interface |
| Communities | Created and managed here | Accessed by clients through this interface |
| Branding | Course-level customization | Full portal-level branding |
| Access control | Membership offers and pricing | App permissions and magic links |
Both features work together: courses and communities built in Memberships are accessed by clients through the Client Portal.
## Branded Mobile App
The Branded Mobile App lets you publish a branded iOS and Android app for your portal. To get started:
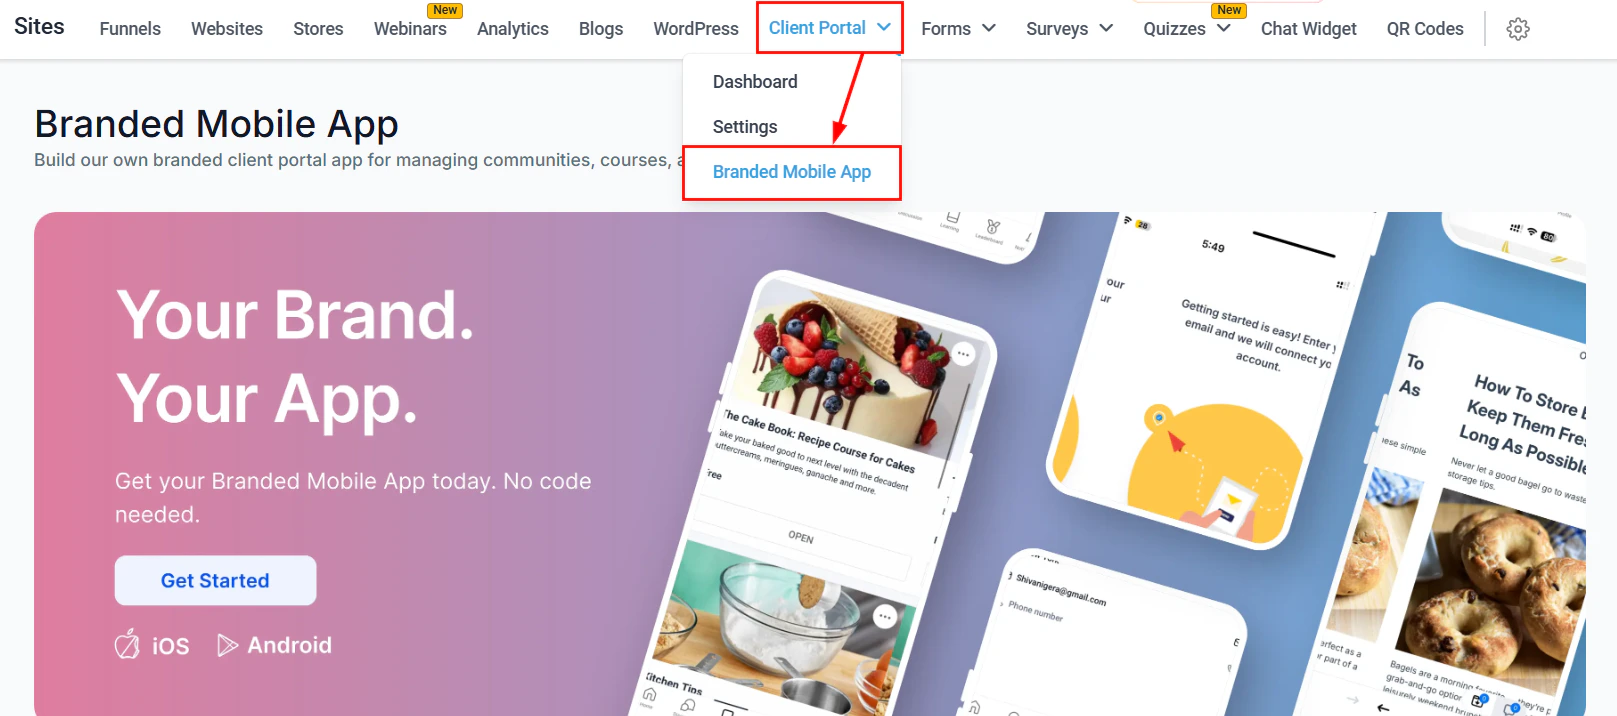 Click **Get Started** and complete the purchase. Allow 3–4 weeks for processing after all required data is submitted.
Upload your mobile app icon and carousel images. Add a Play Store banner. Navigate to the **Profile** tab to enter personal information, app details (name, description, terms/privacy URLs), and developer credentials (Google and Apple).
Click **Submit**. Details are reviewed within 5 business days. You will be notified if any further action is needed.
Schedule a slot to receive a 2FA authentication code required to proceed with app processing.
After store approval (up to 2 weeks), the app goes live and you can share the download links with your portal users.
Once submitted, the branding and profile details for the Branded Mobile App cannot be modified. Review everything carefully before clicking Submit.
Use **Magic Links** when sending onboarding emails. A magic link logs the client in with a single click, removing the friction of password setup and increasing the likelihood that new members actually access their content.
Click **Get Started** and complete the purchase. Allow 3–4 weeks for processing after all required data is submitted.
Upload your mobile app icon and carousel images. Add a Play Store banner. Navigate to the **Profile** tab to enter personal information, app details (name, description, terms/privacy URLs), and developer credentials (Google and Apple).
Click **Submit**. Details are reviewed within 5 business days. You will be notified if any further action is needed.
Schedule a slot to receive a 2FA authentication code required to proceed with app processing.
After store approval (up to 2 weeks), the app goes live and you can share the download links with your portal users.
Once submitted, the branding and profile details for the Branded Mobile App cannot be modified. Review everything carefully before clicking Submit.
Use **Magic Links** when sending onboarding emails. A magic link logs the client in with a single click, removing the friction of password setup and increasing the likelihood that new members actually access their content.