> ## Documentation Index
> Fetch the complete documentation index at: https://help.hoopai.com/llms.txt
> Use this file to discover all available pages before exploring further.
# Chat widget
> Add a real-time chat widget to your website or funnel pages to capture leads and support visitors.
The Chat Widget lets you instantly capture visitor details from any webpage and route conversations to your team or automations. Every interaction creates or updates a contact record in your account, keeping lead data centralized.
 ## Widget types
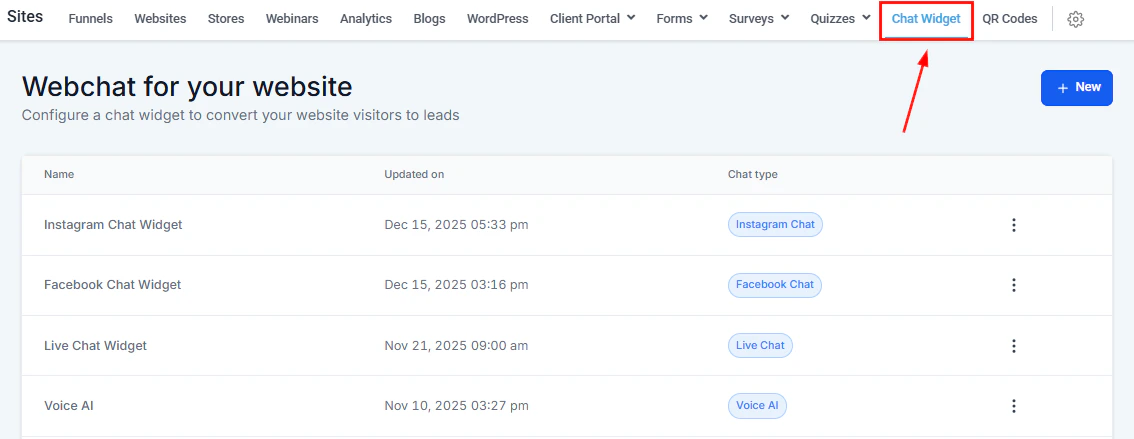
Combines multiple conversation channels in a single widget. Best for smaller teams that want to manage all chat types from one place.
Collects visitor contact info and creates them as a contact for you to reply to later. Best for teams that cannot respond immediately.
Enables real-time two-way conversation directly in the chat bubble. Best for larger teams with someone available to respond instantly.
Routes conversations through Facebook Messenger from your website. Messages are delivered to your connected Facebook Page.
Routes conversations through Instagram Direct from your website. Messages are delivered to your connected Instagram Business account.
Routes conversations to WhatsApp. Requires a WhatsApp number connected in Settings.
Connects visitors to a Voice AI Agent for audio-based inquiries — a great option for smaller teams that receive frequent call requests.
## Creating a chat widget
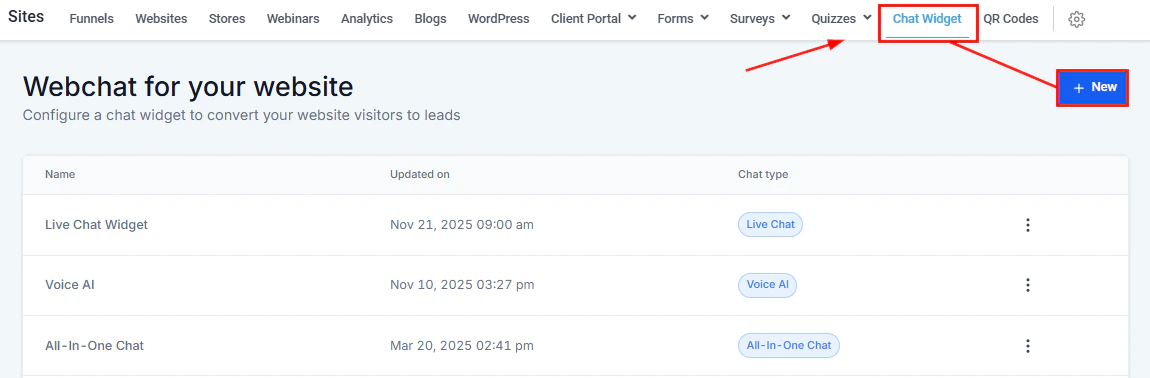
Click **Sites** in the left sidebar, then select **Chat Widget**. Click **+ New**.
Choose from SMS/Email, Live Chat, All-in-One, Facebook, Instagram, WhatsApp, or Voice AI.
Configure the chat prompt, chat icon, color theme, welcome message, return visitor message, avatar image, widget position on the page, and widget dimensions.
Set the title, intro message, contact form fields, call-to-action redirects, prefilled message text, notification sounds, and HIPAA consent checkbox. For Live Chat, configure assigned/closed messages and business hours.
Set the widget language and configure acknowledgment messages, feedback messages, and the chat-ended message. Customize the acknowledgment icon and placeholder color.
Click **Save**. Changes are applied immediately to any live instances of the widget already installed on websites.
## Widget types
Combines multiple conversation channels in a single widget. Best for smaller teams that want to manage all chat types from one place.
Collects visitor contact info and creates them as a contact for you to reply to later. Best for teams that cannot respond immediately.
Enables real-time two-way conversation directly in the chat bubble. Best for larger teams with someone available to respond instantly.
Routes conversations through Facebook Messenger from your website. Messages are delivered to your connected Facebook Page.
Routes conversations through Instagram Direct from your website. Messages are delivered to your connected Instagram Business account.
Routes conversations to WhatsApp. Requires a WhatsApp number connected in Settings.
Connects visitors to a Voice AI Agent for audio-based inquiries — a great option for smaller teams that receive frequent call requests.
## Creating a chat widget
Click **Sites** in the left sidebar, then select **Chat Widget**. Click **+ New**.
Choose from SMS/Email, Live Chat, All-in-One, Facebook, Instagram, WhatsApp, or Voice AI.
Configure the chat prompt, chat icon, color theme, welcome message, return visitor message, avatar image, widget position on the page, and widget dimensions.
Set the title, intro message, contact form fields, call-to-action redirects, prefilled message text, notification sounds, and HIPAA consent checkbox. For Live Chat, configure assigned/closed messages and business hours.
Set the widget language and configure acknowledgment messages, feedback messages, and the chat-ended message. Customize the acknowledgment icon and placeholder color.
Click **Save**. Changes are applied immediately to any live instances of the widget already installed on websites.
 ## Installing the chat widget
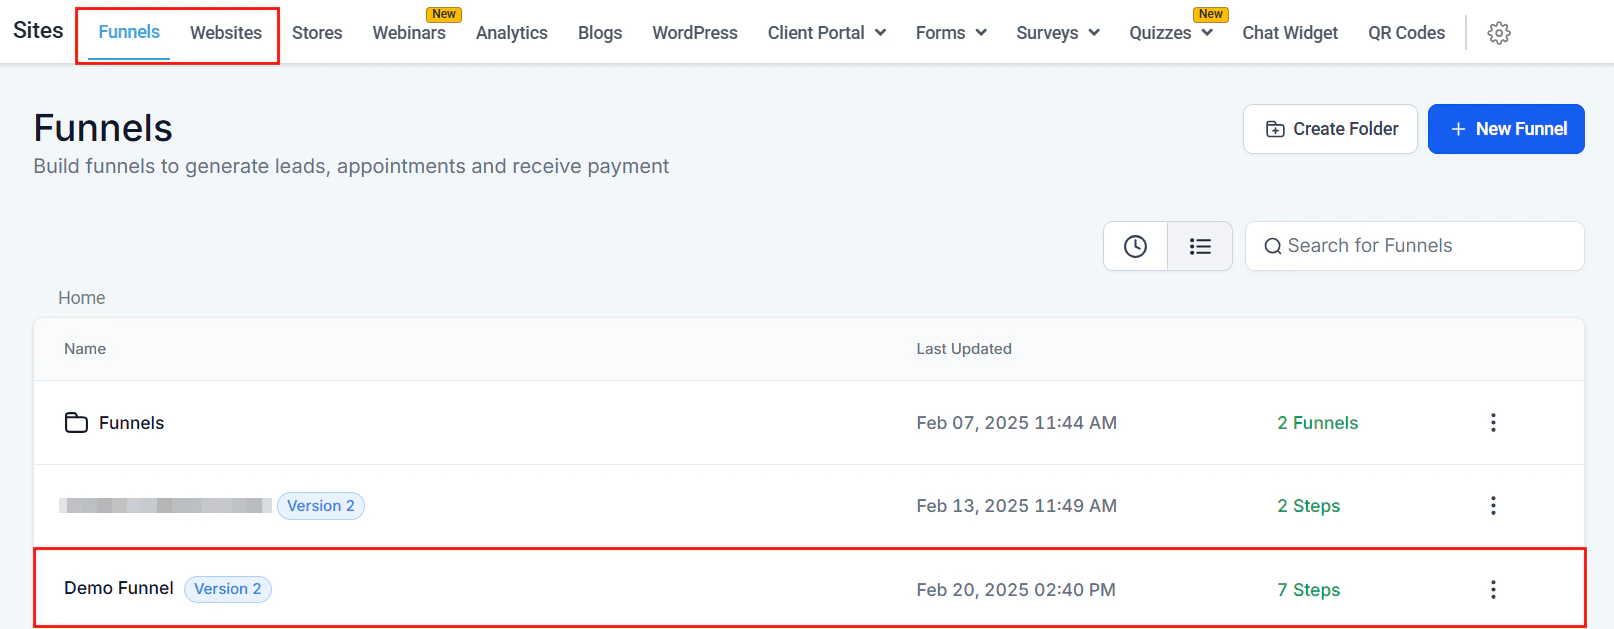 Open the funnel or website in Sites, go to the **Settings** tab, select your chat widget from the **Chat Widget** dropdown, and click **Save**. This adds the widget to every page.
Click the three-dot icon on your widget and select **Edit**. Click **Get Code** in the top-right corner. Copy the code and paste it into the **Footer Tracking** section of the specific funnel step or website page's Tracking Code settings.
Copy the widget code (as above) and paste it into your external site's header or footer. For Squarespace, GoDaddy, and similar platforms, use the Custom Code / HTML embed section.
In WordPress, go to **Plugins > Add New** and search for **HoopAI**. Install and activate the plugin. Click **HoopAI** in the left menu and sign in to your account. Your chat widgets will be available automatically.
The chat widget only loads after a visitor has accepted the cookie consent prompt on your funnel or website. Make sure cookie consent is configured if you use the widget for lead capture.
## Widget management
Use the three-dot icon on any widget in the Chat Widget list to:
* **Edit** — modify the widget's settings, style, and messages
* **Clone** — create an identical copy of the widget including all images and settings
* **Delete** — permanently remove the widget (this cannot be undone)
Use an **All-in-One Chat** widget if your audience reaches you through multiple channels. It gives visitors a single button to choose how they want to connect, reducing friction and increasing conversion.
Open the funnel or website in Sites, go to the **Settings** tab, select your chat widget from the **Chat Widget** dropdown, and click **Save**. This adds the widget to every page.
Click the three-dot icon on your widget and select **Edit**. Click **Get Code** in the top-right corner. Copy the code and paste it into the **Footer Tracking** section of the specific funnel step or website page's Tracking Code settings.
Copy the widget code (as above) and paste it into your external site's header or footer. For Squarespace, GoDaddy, and similar platforms, use the Custom Code / HTML embed section.
In WordPress, go to **Plugins > Add New** and search for **HoopAI**. Install and activate the plugin. Click **HoopAI** in the left menu and sign in to your account. Your chat widgets will be available automatically.
The chat widget only loads after a visitor has accepted the cookie consent prompt on your funnel or website. Make sure cookie consent is configured if you use the widget for lead capture.
## Widget management
Use the three-dot icon on any widget in the Chat Widget list to:
* **Edit** — modify the widget's settings, style, and messages
* **Clone** — create an identical copy of the widget including all images and settings
* **Delete** — permanently remove the widget (this cannot be undone)
Use an **All-in-One Chat** widget if your audience reaches you through multiple channels. It gives visitors a single button to choose how they want to connect, reducing friction and increasing conversion.