> ## Documentation Index
> Fetch the complete documentation index at: https://help.hoopai.com/llms.txt
> Use this file to discover all available pages before exploring further.
# My Staff
> Add team members, configure user roles and permissions, set up Google Meet, and manage your staff accounts in the HoopAI Platform.
The My Staff section is your central hub for team management. Add or remove users, assign roles and permissions, configure calendar integrations, and control what data each team member can see.
Navigate to **Settings > My Staff** to get started.
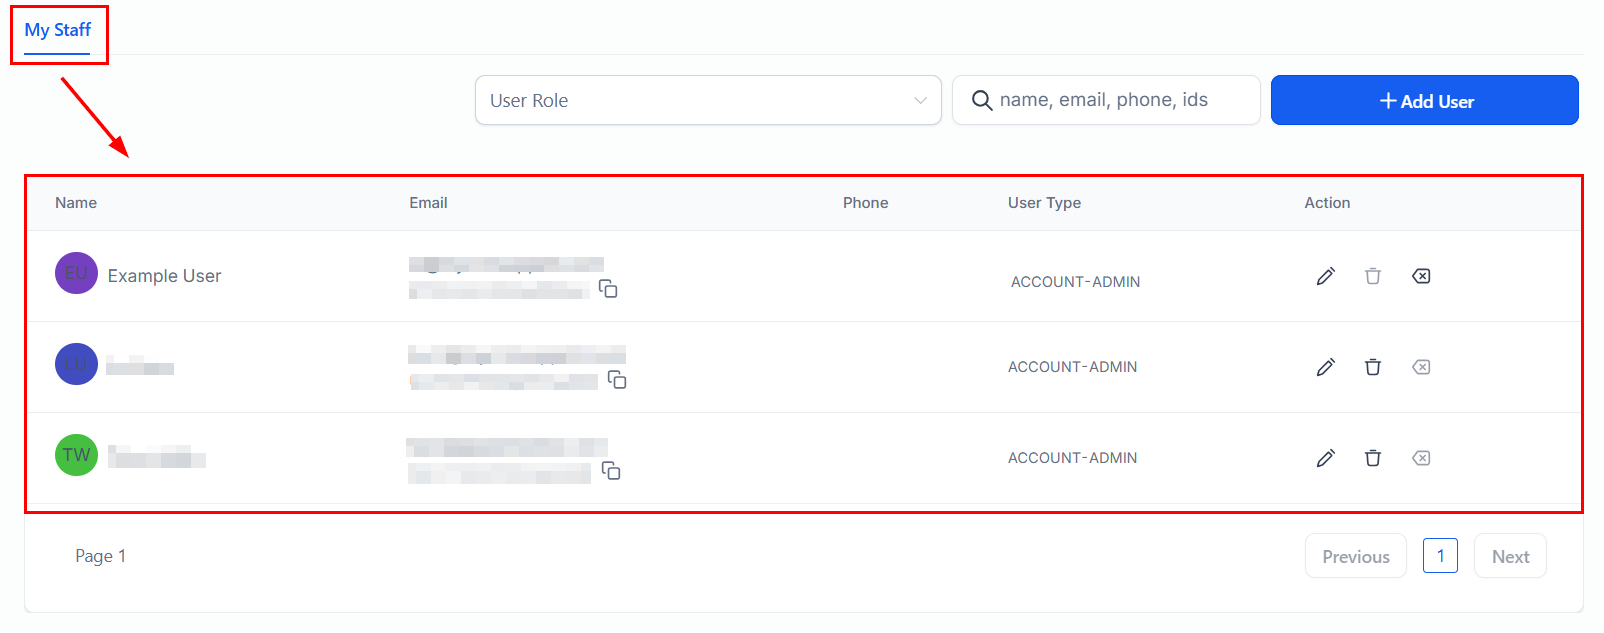 ## Team members list
The Team Members list shows all users currently added to your account. From here you can:
* Search for a specific user
* Filter by role
* View each user's name, email, role, and status
* Edit or remove users
***
## User roles
Roles define what permissions a user has across the account. Assign roles to control access to specific features and data.
Standard roles include:
| Role | Access level |
| ---------- | ------------------------------------------------------ |
| **Admin** | Full access to all settings, data, and features |
| **User** | Access to assigned contacts, conversations, and tasks |
| **Custom** | Granular permission set configured by an administrator |
## Team members list
The Team Members list shows all users currently added to your account. From here you can:
* Search for a specific user
* Filter by role
* View each user's name, email, role, and status
* Edit or remove users
***
## User roles
Roles define what permissions a user has across the account. Assign roles to control access to specific features and data.
Standard roles include:
| Role | Access level |
| ---------- | ------------------------------------------------------ |
| **Admin** | Full access to all settings, data, and features |
| **User** | Access to assigned contacts, conversations, and tasks |
| **Custom** | Granular permission set configured by an administrator |
 User permission settings control visibility at the data level — for example, whether a user can see all contacts or only those assigned to them.
***
## Adding a team member
In **Settings > My Staff**, click the **Add User** button in the top-right corner.
User permission settings control visibility at the data level — for example, whether a user can see all contacts or only those assigned to them.
***
## Adding a team member
In **Settings > My Staff**, click the **Add User** button in the top-right corner.
 Fill in the user's name, email address, and phone number.
Select a role for the user. This determines their default permission set.
Customize the user's access to specific features, pipelines, calendars, and data visibility settings.
Click **Save**. The user receives an email invitation to set up their account and password.
***
## Showing only assigned data in dashboards
By default, all users see all data in the dashboard. You can restrict users to see only the data assigned to them — useful for keeping sensitive information private and reducing clutter for individual team members.
**Steps to enable assigned-data-only view:**
1. Go to **Settings > My Staff**.
2. Open the user's profile by clicking their name or the edit icon.
3. Scroll to **Dashboard Permissions**.
4. Enable **Show Only Assigned Data**.
5. Save the changes.
This setting affects dashboards, contacts, opportunities, and conversations — the user will only see records assigned to them.
***
## Password reset
As an administrator, you can reset a staff member's password:
1. In **My Staff**, find the user.
2. Click the edit icon next to their name.
3. Click **Reset Password** to send them a password reset email.
Users can also reset their own password through the **My Profile** section or from the login screen.
***
## Integrating Google Meet for virtual appointments
Connect Google Meet so that virtual appointment links are automatically generated and included in appointment confirmations.
**Steps:**
1. In **My Staff**, open the relevant user's profile.
2. Scroll to the **Calendar Integration** section.
3. Click **Connect Google Meet** and sign in with the user's Google account.
4. Authorize the integration and save.
Once connected, all new appointments for that user will automatically include a Google Meet link in the confirmation email.
Make sure each user has their own Google account connected for Google Meet — links are generated per-user, not per-account.
***
## Related articles
* [My profile](/settings/my-profile)
* [Calendars](/calendars/overview)
* [Business profile](/settings/business-profile)
Fill in the user's name, email address, and phone number.
Select a role for the user. This determines their default permission set.
Customize the user's access to specific features, pipelines, calendars, and data visibility settings.
Click **Save**. The user receives an email invitation to set up their account and password.
***
## Showing only assigned data in dashboards
By default, all users see all data in the dashboard. You can restrict users to see only the data assigned to them — useful for keeping sensitive information private and reducing clutter for individual team members.
**Steps to enable assigned-data-only view:**
1. Go to **Settings > My Staff**.
2. Open the user's profile by clicking their name or the edit icon.
3. Scroll to **Dashboard Permissions**.
4. Enable **Show Only Assigned Data**.
5. Save the changes.
This setting affects dashboards, contacts, opportunities, and conversations — the user will only see records assigned to them.
***
## Password reset
As an administrator, you can reset a staff member's password:
1. In **My Staff**, find the user.
2. Click the edit icon next to their name.
3. Click **Reset Password** to send them a password reset email.
Users can also reset their own password through the **My Profile** section or from the login screen.
***
## Integrating Google Meet for virtual appointments
Connect Google Meet so that virtual appointment links are automatically generated and included in appointment confirmations.
**Steps:**
1. In **My Staff**, open the relevant user's profile.
2. Scroll to the **Calendar Integration** section.
3. Click **Connect Google Meet** and sign in with the user's Google account.
4. Authorize the integration and save.
Once connected, all new appointments for that user will automatically include a Google Meet link in the confirmation email.
Make sure each user has their own Google account connected for Google Meet — links are generated per-user, not per-account.
***
## Related articles
* [My profile](/settings/my-profile)
* [Calendars](/calendars/overview)
* [Business profile](/settings/business-profile)