> ## Documentation Index
> Fetch the complete documentation index at: https://help.hoopai.com/llms.txt
> Use this file to discover all available pages before exploring further.
# Orders
> View, manage, and fulfill e-commerce orders in the HoopAI Platform — including Shopify sync and abandoned checkout recovery.
The Orders section in the HoopAI Platform centralizes all e-commerce orders generated through your online stores, funnels, and order forms. You can fulfill orders, print shipping labels, sync Shopify orders, and recover abandoned checkouts — all from one place.
Navigate to **Payments → Orders** to get started.
 ## Orders overview
The orders dashboard shows all transactions placed through your HoopAI Platform stores and order forms. Key information displayed for each order:
| Column | Description |
| -------------- | ------------------------------------------------------------ |
| **Customer** | Contact name — click to open the contact card |
| **Source** | The funnel or store page where the purchase was completed |
| **Items** | Total items in the order |
| **Order date** | Date and time placed (in your timezone) |
| **Amount** | Total order value |
| **Status** | Current order status (processing, completed, refunded, etc.) |
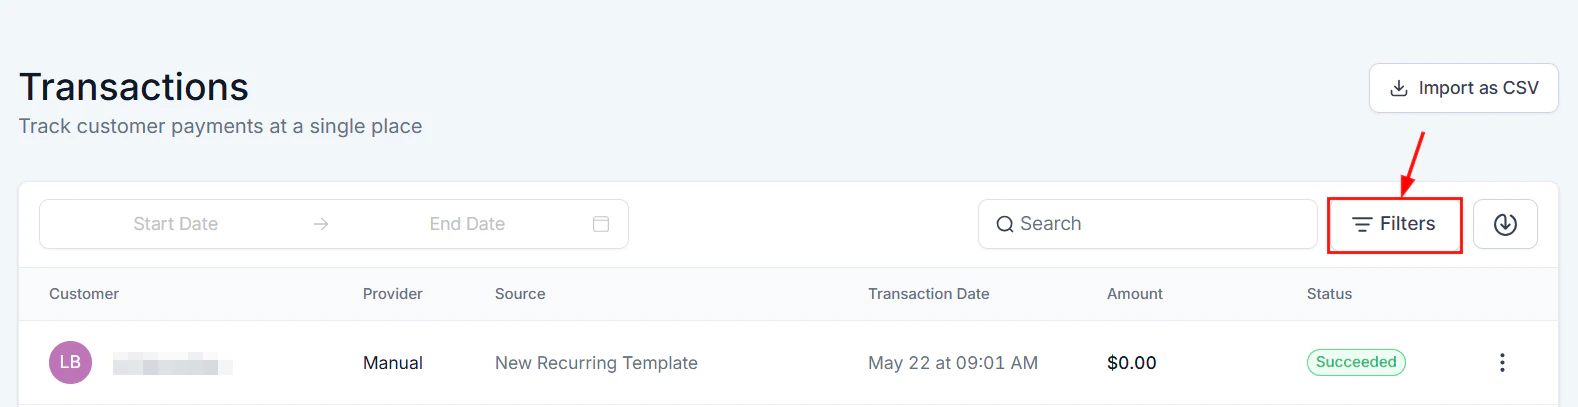
Use the **Search bar** to find an order by order ID, source, or customer name. Use the **Filter** button to filter by status, source, or payment details. Click the **Export** icon (downward arrow) to download orders as a CSV file.
### Order fulfillment states
Orders move through the following statuses as they are processed and shipped:
| Status | Description |
| ----------------------- | ------------------------------------------------------------------ |
| **Pending** | Order placed but payment has not yet cleared |
| **Processing** | Payment confirmed; order is being prepared |
| **Partially fulfilled** | Some items in a multi-item order have been shipped |
| **Fulfilled** | All items shipped and tracking information recorded |
| **Completed** | Order delivered or marked complete (also used for imported orders) |
| **Cancelled** | Order cancelled before fulfillment |
| **Refunded** | Payment fully reversed |
| **Partially refunded** | A portion of the order value has been refunded |
Digital product orders skip the fulfillment step — they are marked **Completed** automatically as soon as payment is confirmed and the download link is delivered to the customer.
***
## Orders overview
The orders dashboard shows all transactions placed through your HoopAI Platform stores and order forms. Key information displayed for each order:
| Column | Description |
| -------------- | ------------------------------------------------------------ |
| **Customer** | Contact name — click to open the contact card |
| **Source** | The funnel or store page where the purchase was completed |
| **Items** | Total items in the order |
| **Order date** | Date and time placed (in your timezone) |
| **Amount** | Total order value |
| **Status** | Current order status (processing, completed, refunded, etc.) |
Use the **Search bar** to find an order by order ID, source, or customer name. Use the **Filter** button to filter by status, source, or payment details. Click the **Export** icon (downward arrow) to download orders as a CSV file.
### Order fulfillment states
Orders move through the following statuses as they are processed and shipped:
| Status | Description |
| ----------------------- | ------------------------------------------------------------------ |
| **Pending** | Order placed but payment has not yet cleared |
| **Processing** | Payment confirmed; order is being prepared |
| **Partially fulfilled** | Some items in a multi-item order have been shipped |
| **Fulfilled** | All items shipped and tracking information recorded |
| **Completed** | Order delivered or marked complete (also used for imported orders) |
| **Cancelled** | Order cancelled before fulfillment |
| **Refunded** | Payment fully reversed |
| **Partially refunded** | A portion of the order value has been refunded |
Digital product orders skip the fulfillment step — they are marked **Completed** automatically as soon as payment is confirmed and the download link is delivered to the customer.
***
 ***
## Fulfilling an order
Go to **Payments → Orders** and click the three-dot icon next to the order, then select **View Order**.
Confirm the items, quantities, shipping address, and customer information before proceeding.
Click **Fulfill Items**. A dialog opens where you enter:
* **Tracking number** — from your shipping carrier
* **Carrier** — the shipping service used
* **Tracking link** — URL customers can use to track their shipment
Toggle on **Notify Customer** to automatically send the customer an email with their order and tracking information.
Click **Save**. The order is marked as **Fulfilled** in the system.
### Partial fulfillment
When you do not have all items in stock, you can fulfill part of an order and send the rest later.
In the **Fulfill Items** dialog, adjust the quantity of each item to reflect what you are shipping in this batch. Leave unreceived items at zero.
Complete the tracking and carrier fields and click **Save**. The order is marked **Partially Fulfilled**.
When the remaining stock arrives, open the order details and click **Fulfill Items** again. Items already sent are subtracted from the list automatically. Complete the process for the remaining items.
***
***
## Printing shipping labels and packing slips
Packing slips are generated as PDFs directly from the order and include:
* Order ID and order date
* Store name
* Shipping and billing address
* Itemized product list with variant name, product images, and quantities
* Sender's address (your store address)
### Full order packing slip
Go to **Payments → Orders**, click the three-dot icon next to the order, and select **View Order**.
Click **Print Packing Slips** to download a PDF containing all items in the order. If the order has been partially fulfilled in the past, each fulfillment batch appears on a separate page.
### Packing slip for a partial fulfillment
In the **Fulfill Items** dialog, select the items and quantities you are fulfilling in this batch.
Click **Print Packing Slips** within the fulfillment dialog to generate a PDF for only the items in this batch. This is ideal for picking and packaging accuracy.
Print packing slips per fulfillment batch to avoid packaging errors when splitting orders across multiple shipments.
***
***
## Fulfilling an order
Go to **Payments → Orders** and click the three-dot icon next to the order, then select **View Order**.
Confirm the items, quantities, shipping address, and customer information before proceeding.
Click **Fulfill Items**. A dialog opens where you enter:
* **Tracking number** — from your shipping carrier
* **Carrier** — the shipping service used
* **Tracking link** — URL customers can use to track their shipment
Toggle on **Notify Customer** to automatically send the customer an email with their order and tracking information.
Click **Save**. The order is marked as **Fulfilled** in the system.
### Partial fulfillment
When you do not have all items in stock, you can fulfill part of an order and send the rest later.
In the **Fulfill Items** dialog, adjust the quantity of each item to reflect what you are shipping in this batch. Leave unreceived items at zero.
Complete the tracking and carrier fields and click **Save**. The order is marked **Partially Fulfilled**.
When the remaining stock arrives, open the order details and click **Fulfill Items** again. Items already sent are subtracted from the list automatically. Complete the process for the remaining items.
***
***
## Printing shipping labels and packing slips
Packing slips are generated as PDFs directly from the order and include:
* Order ID and order date
* Store name
* Shipping and billing address
* Itemized product list with variant name, product images, and quantities
* Sender's address (your store address)
### Full order packing slip
Go to **Payments → Orders**, click the three-dot icon next to the order, and select **View Order**.
Click **Print Packing Slips** to download a PDF containing all items in the order. If the order has been partially fulfilled in the past, each fulfillment batch appears on a separate page.
### Packing slip for a partial fulfillment
In the **Fulfill Items** dialog, select the items and quantities you are fulfilling in this batch.
Click **Print Packing Slips** within the fulfillment dialog to generate a PDF for only the items in this batch. This is ideal for picking and packaging accuracy.
Print packing slips per fulfillment batch to avoid packaging errors when splitting orders across multiple shipments.
***
 ***
## Abandoned checkout recovery
When a customer adds items to their cart but does not complete the purchase, the HoopAI Platform captures the incomplete checkout. You can follow up automatically to recover the sale.
Go to **Payments → Orders** and click **Abandoned Cart** from the dropdown to see all incomplete cart sessions.
The abandoned checkout dashboard shows:
* **Placed by** — customer name or email if the name is unavailable
* **Date** — when the cart was abandoned
* **Items** — quantity of items in the cart
* **Amount** — total value of the abandoned cart
* **Email status** — whether an automated recovery email was sent
* **Recovery status** — whether the customer completed the purchase after abandonment (marked "Recovered")
Configure automated abandoned cart emails under **Payments → Payment Settings → Notifications**, or set up a workflow in **Automation → Workflows**.
For abandoned checkout emails to work, the customer must have entered their email address before abandoning the cart. The checkout link sent in the recovery email remains functional across different browsers, devices, and sessions.
If a customer completes their purchase before the abandoned cart email sends, the system automatically cancels the email to avoid unnecessary reminders.
***
***
## Syncing Shopify orders
If you run a Shopify store alongside your HoopAI Platform, you can sync Shopify orders into the Orders tab for unified order management.
### Step 1 — Get your Shopify API credentials
Go to your Shopify admin at **admin.shopify.com → Settings → Apps and sales channels → Develop apps** and click **Allow custom app development**.
Once custom app development is enabled on a Shopify store, it cannot be undone.
Click **Create an app**, then go to the **Configuration** tab and add the following API access scopes:
* `read_orders`
* `read_customers`
* `read_products`
* `read_inventory`
Go to the **API Credentials** tab, click **Install app**, then click **Reveal token once** and copy your Admin API Access Token.
### Step 2 — Connect Shopify in the HoopAI Platform
Go to **Settings → Integrations → Shopify** and click **Connect**.
Paste your **Admin API Access Token** and enter your **Shopify store name**.
Toggle on the import elements and sync settings that match your business needs (e.g., sync customers, sync products, sync orders).
Once connected, the integration tile confirms the link. Shopify orders begin syncing into **Payments → Orders** automatically.
The Shopify integration syncs new orders going forward. Past orders from before the connection was established cannot be retroactively synced.
### Viewing Shopify order and transaction details
* **Orders**: Go to **Payments → Orders**, click the three-dot icon on a Shopify order, and select **View Order** to see full order details and the associated transaction value.
* **Transactions**: Go to **Payments → Transactions**, find the Shopify transaction, click the three-dot icon, and select **View Transaction** for the full transaction record.
***
***
## Importing orders
If you have historical order data from another system, you can import it via CSV.
Download the **Sample CSV** template from the import dialog to use as a formatting guide. Fill in your order data following the column structure provided.
Go to **Payments → Orders** and click the **Import as CSV** option. Upload your CSV file and click **Upload & Preview** to review the data before importing.
Once satisfied with the preview, click **Import Orders** to complete the process.
All imported orders are automatically marked as **Completed** and a linked transaction record is created. Imported orders can be edited after the import if needed.
***
***
## Frequently asked questions
Yes. When fulfilling, you can select specific items from a multi-item order to fulfill, leaving the rest as unfulfilled until they are ready to ship.
Refunds are processed from **Payments → Transactions**. Locate the transaction tied to the order and use the refund option there.
Yes. When a customer purchases a digital product (such as a downloadable file or course access), the HoopAI Platform marks the order as fulfilled and delivers the product automatically.
Yes. Use the filter options in the Orders tab to filter by source, date range, status, or product.
No. The Shopify integration syncs new orders going forward from the date of connection. Historical orders cannot be retroactively imported through the Shopify integration. Use the **Import as CSV** option if you need historical order data in the platform.
Packing slips include the order ID, order date, store name, shipping and billing addresses, an itemized product list with variant names and quantities, product images, and your store's sender address.
**Fulfilled** means all items have been shipped and tracking information has been entered. **Completed** is a broader final state that also covers digital product deliveries and imported historical orders that are marked complete automatically.
To cancel an order, open it from **Payments → Orders**, click the three-dot menu, and select **Cancel Order**. If a payment was already collected, process a refund from **Payments → Transactions** separately.
Yes. When fulfilling an order, toggle on **Notify Customer** in the Fulfill Items dialog. The customer receives an automated email with their order summary and the tracking link you entered.
***
## Abandoned checkout recovery
When a customer adds items to their cart but does not complete the purchase, the HoopAI Platform captures the incomplete checkout. You can follow up automatically to recover the sale.
Go to **Payments → Orders** and click **Abandoned Cart** from the dropdown to see all incomplete cart sessions.
The abandoned checkout dashboard shows:
* **Placed by** — customer name or email if the name is unavailable
* **Date** — when the cart was abandoned
* **Items** — quantity of items in the cart
* **Amount** — total value of the abandoned cart
* **Email status** — whether an automated recovery email was sent
* **Recovery status** — whether the customer completed the purchase after abandonment (marked "Recovered")
Configure automated abandoned cart emails under **Payments → Payment Settings → Notifications**, or set up a workflow in **Automation → Workflows**.
For abandoned checkout emails to work, the customer must have entered their email address before abandoning the cart. The checkout link sent in the recovery email remains functional across different browsers, devices, and sessions.
If a customer completes their purchase before the abandoned cart email sends, the system automatically cancels the email to avoid unnecessary reminders.
***
***
## Syncing Shopify orders
If you run a Shopify store alongside your HoopAI Platform, you can sync Shopify orders into the Orders tab for unified order management.
### Step 1 — Get your Shopify API credentials
Go to your Shopify admin at **admin.shopify.com → Settings → Apps and sales channels → Develop apps** and click **Allow custom app development**.
Once custom app development is enabled on a Shopify store, it cannot be undone.
Click **Create an app**, then go to the **Configuration** tab and add the following API access scopes:
* `read_orders`
* `read_customers`
* `read_products`
* `read_inventory`
Go to the **API Credentials** tab, click **Install app**, then click **Reveal token once** and copy your Admin API Access Token.
### Step 2 — Connect Shopify in the HoopAI Platform
Go to **Settings → Integrations → Shopify** and click **Connect**.
Paste your **Admin API Access Token** and enter your **Shopify store name**.
Toggle on the import elements and sync settings that match your business needs (e.g., sync customers, sync products, sync orders).
Once connected, the integration tile confirms the link. Shopify orders begin syncing into **Payments → Orders** automatically.
The Shopify integration syncs new orders going forward. Past orders from before the connection was established cannot be retroactively synced.
### Viewing Shopify order and transaction details
* **Orders**: Go to **Payments → Orders**, click the three-dot icon on a Shopify order, and select **View Order** to see full order details and the associated transaction value.
* **Transactions**: Go to **Payments → Transactions**, find the Shopify transaction, click the three-dot icon, and select **View Transaction** for the full transaction record.
***
***
## Importing orders
If you have historical order data from another system, you can import it via CSV.
Download the **Sample CSV** template from the import dialog to use as a formatting guide. Fill in your order data following the column structure provided.
Go to **Payments → Orders** and click the **Import as CSV** option. Upload your CSV file and click **Upload & Preview** to review the data before importing.
Once satisfied with the preview, click **Import Orders** to complete the process.
All imported orders are automatically marked as **Completed** and a linked transaction record is created. Imported orders can be edited after the import if needed.
***
***
## Frequently asked questions
Yes. When fulfilling, you can select specific items from a multi-item order to fulfill, leaving the rest as unfulfilled until they are ready to ship.
Refunds are processed from **Payments → Transactions**. Locate the transaction tied to the order and use the refund option there.
Yes. When a customer purchases a digital product (such as a downloadable file or course access), the HoopAI Platform marks the order as fulfilled and delivers the product automatically.
Yes. Use the filter options in the Orders tab to filter by source, date range, status, or product.
No. The Shopify integration syncs new orders going forward from the date of connection. Historical orders cannot be retroactively imported through the Shopify integration. Use the **Import as CSV** option if you need historical order data in the platform.
Packing slips include the order ID, order date, store name, shipping and billing addresses, an itemized product list with variant names and quantities, product images, and your store's sender address.
**Fulfilled** means all items have been shipped and tracking information has been entered. **Completed** is a broader final state that also covers digital product deliveries and imported historical orders that are marked complete automatically.
To cancel an order, open it from **Payments → Orders**, click the three-dot menu, and select **Cancel Order**. If a payment was already collected, process a refund from **Payments → Transactions** separately.
Yes. When fulfilling an order, toggle on **Notify Customer** in the Fulfill Items dialog. The customer receives an automated email with their order summary and the tracking link you entered.