> ## Documentation Index
> Fetch the complete documentation index at: https://help.hoopai.com/llms.txt
> Use this file to discover all available pages before exploring further.
# Documents and contracts — e-signatures in HoopAI
> Build, send, and collect e-signatures on proposals, contracts, and agreements — with payment collection and auto-invoicing in HoopAI.
The Documents & Contracts section is a central hub for managing proposals, estimates, and contracts. It features a versatile builder supporting text, images, videos, tables, digital signatures, and document state management — providing a comprehensive solution for professional business communication.
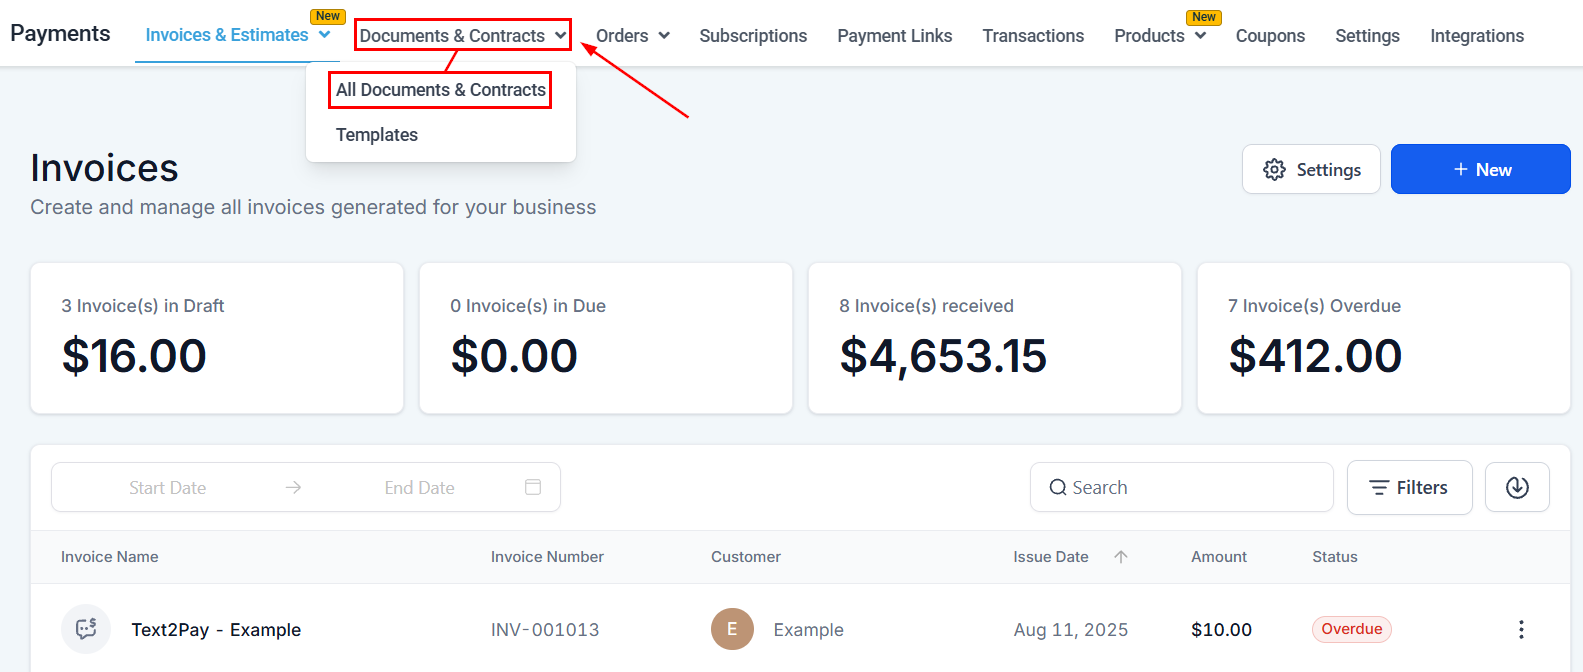
Navigate to **Payments → Documents & Contracts** to access:
* **All Documents & Contracts** — your full document history with status tracking
* **Templates** — reusable document layouts you build once and send repeatedly
* **Settings** — default configurations for notifications, product invoicing, and signing behavior
Documents can be sent to a single recipient or to multiple signers in sequence. Once signed, documents can automatically trigger invoice creation, payment collection, or workflow actions.
 ### Document statuses
| Status | Description |
| -------- | ----------------------------------- |
| Draft | Created but not yet sent |
| Sent | Delivered to at least one recipient |
| Viewed | Recipient has opened the document |
| Signed | All required signatures collected |
| Declined | Recipient declined to sign |
| Expired | Past the expiry date |
| Voided | Manually cancelled |
***
## The document builder
The builder uses a drag-and-drop canvas where you compose the document content and insert fillable elements.
### Document statuses
| Status | Description |
| -------- | ----------------------------------- |
| Draft | Created but not yet sent |
| Sent | Delivered to at least one recipient |
| Viewed | Recipient has opened the document |
| Signed | All required signatures collected |
| Declined | Recipient declined to sign |
| Expired | Past the expiry date |
| Voided | Manually cancelled |
***
## The document builder
The builder uses a drag-and-drop canvas where you compose the document content and insert fillable elements.
 ### Content elements
Add text blocks, images, headings, and product lists to the body of your document using the left panel.
### Fillable elements
Insert fields that recipients must complete before signing:
| Element | Description |
| ----------------- | ---------------------------------------------------------- |
| **Signature** | Collects the recipient's drawn or typed signature |
| **Initials** | A shorter sign-off, useful for page-by-page acknowledgment |
| **Date** | Auto-fills with the signing date |
| **Text field** | Free-form input for names, addresses, or other information |
| **Checkbox** | For confirmations and consent |
| **Custom fields** | Map to contact fields in your CRM for automatic population |
### Product list
Add a product table to display itemized pricing, quantities, and totals. You can include recurring products (for subscription-based agreements) and add discount and tax lines.
Document variables (merge fields) automatically pull in contact data — name, email, company, address — so you never type recipient details manually.
***
***
## Creating a document or contract
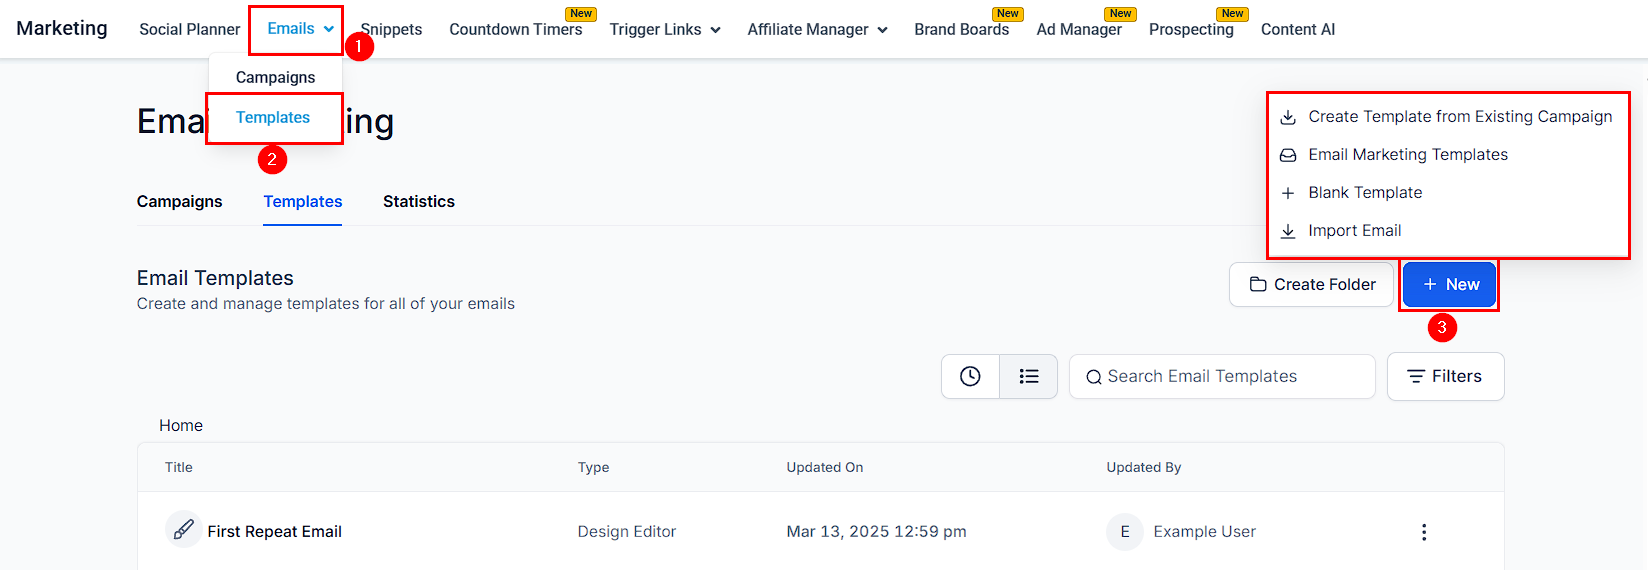
Go to **Payments → Documents & Contracts** and click **+ New Document**, or open an existing template to modify it.
Use the builder to add text, headings, images, and product tables. Use document variables (e.g., `{{contact.name}}`) to personalize the content automatically.
Drag signature, initials, date, text field, and checkbox elements onto the canvas and assign each to the correct signer role.
In document settings, set:
* **Subject line** — customize the email subject sent to recipients
* **Currency** — choose the correct currency for any product amounts
* **Expiry date** — set a deadline after which the document can no longer be signed
* **Notification preferences** — who receives alerts on signing events
Save the document as a **Template** for future reuse, or click **Send** to deliver it immediately.
***
***
## Sending documents
### Content elements
Add text blocks, images, headings, and product lists to the body of your document using the left panel.
### Fillable elements
Insert fields that recipients must complete before signing:
| Element | Description |
| ----------------- | ---------------------------------------------------------- |
| **Signature** | Collects the recipient's drawn or typed signature |
| **Initials** | A shorter sign-off, useful for page-by-page acknowledgment |
| **Date** | Auto-fills with the signing date |
| **Text field** | Free-form input for names, addresses, or other information |
| **Checkbox** | For confirmations and consent |
| **Custom fields** | Map to contact fields in your CRM for automatic population |
### Product list
Add a product table to display itemized pricing, quantities, and totals. You can include recurring products (for subscription-based agreements) and add discount and tax lines.
Document variables (merge fields) automatically pull in contact data — name, email, company, address — so you never type recipient details manually.
***
***
## Creating a document or contract
Go to **Payments → Documents & Contracts** and click **+ New Document**, or open an existing template to modify it.
Use the builder to add text, headings, images, and product tables. Use document variables (e.g., `{{contact.name}}`) to personalize the content automatically.
Drag signature, initials, date, text field, and checkbox elements onto the canvas and assign each to the correct signer role.
In document settings, set:
* **Subject line** — customize the email subject sent to recipients
* **Currency** — choose the correct currency for any product amounts
* **Expiry date** — set a deadline after which the document can no longer be signed
* **Notification preferences** — who receives alerts on signing events
Save the document as a **Template** for future reuse, or click **Send** to deliver it immediately.
***
***
## Sending documents
 Select one or more contacts. For multi-recipient signing, add each signer and assign them a role and signing order.
Edit the email subject to match your brand voice and the purpose of the document.
Click **Send**. Each recipient receives an email with a unique link to view and sign their copy.
### Public documents
You can create a **Public document** — a shareable link that any recipient can open and sign without being addressed to a specific contact. This is useful for standard agreements, terms of service, and intake forms.
***
***
## E-signature workflow
The e-signature process covers the full journey from document creation to signed copy delivery — for both single-recipient and multi-signer scenarios.
### What the signer experiences
1. **Email invitation** — the recipient receives an email with a unique link to their copy of the document.
2. **Document review** — they open the link (no account or login required) and read the document.
3. **Fill required fields** — they complete any text fields, checkboxes, or initials assigned to them.
4. **Sign** — they draw or type their signature in the designated signature field.
5. **Submit** — clicking **Submit** finalizes their portion. The signed document is timestamped and locked.
6. **Confirmation** — a copy of the fully signed document is emailed to the signer and to your account.
### Single recipient signing
The recipient opens the document link, fills in any required fields, draws or types their signature, and clicks **Submit**. The signed document is emailed to all parties and stored in your HoopAI Platform account.
### Multi-recipient signing
In the document builder, add each signer and assign a signing order (Signer 1, Signer 2, etc.).
Drag each fillable element and assign it to the appropriate signer role so each person only sees and fills in their designated fields.
The platform sends the document to Signer 1. Only after they complete their portion does Signer 2 receive their invitation — and so on through the chain.
### Initials
Use the **Initials** fillable element to collect a shorter acknowledgment on individual pages or clauses. Initials are separate from the main signature and are useful for multi-page contracts where page-by-page acknowledgment is needed.
***
***
## Collecting payment at signing
You can require payment as part of the signing process so that signature and payment happen in a single step.
Insert a product table into the document and add the relevant products or services.
In the document settings, toggle on **Collect payment after signing**. The recipient will be prompted to pay immediately after they submit their signature.
If the total is large, add a payment plan to the document. The recipient sees the installment schedule and agrees to it as part of signing.
***
***
## Auto-creating an invoice after signing
In document settings, toggle on **Create invoice automatically after signing**.
The products in your document's product list are used to generate the invoice automatically.
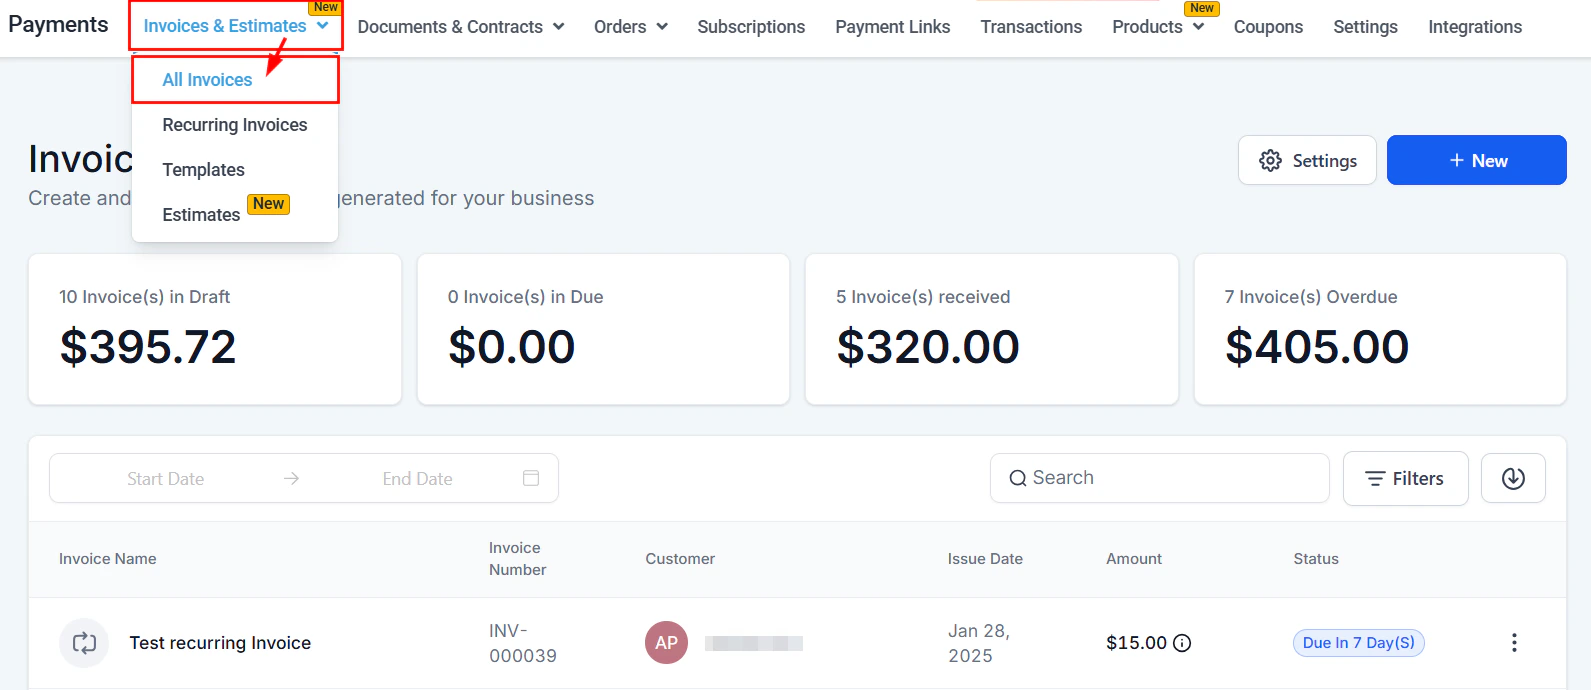
Once the document is signed, a draft invoice is created in **Payments → Invoices & Estimates** for you to review and send.
***
***
## Templates
Templates save your document structure so you can send the same agreement to many contacts without rebuilding it each time.
After building a document, click **Save as template** and give it a name.
When creating a new document, select **From template** and choose the template from your library.
In **Automation → Workflows**, add the **Send document** action and select a template. The workflow will personalize and send the document based on the trigger (e.g., after a form submission or opportunity stage change).
***
***
## Settings
Go to **Documents & Contracts → Settings** to configure:
* **Default email and SMS notifications** — who is alerted when a document is sent, signed, or declined
* **Branding** — upload your logo and set brand colors for the signing experience
* **Custom fields for signing** — map CRM custom fields to document variables so they auto-populate
* **Currency** — set the default currency for document product amounts
* **Uploading PDFs** — upload an existing PDF and overlay fillable fields on top of it
***
***
## Recurring products in documents
If your agreement includes a recurring product (e.g., a monthly retainer), add it to the product list in the document. When the document is signed and payment is collected, the recurring billing begins automatically.
Recurring products in documents require Stripe Connect to be active on your account.
***
***
## Uploading PDFs as documents
Instead of building from scratch, you can upload an existing PDF and overlay fillable fields on top of it.
Go to **Payments → Documents & Contracts** and click **+ New → Upload PDF**. Select your PDF file to upload.
The uploaded PDF pages appear in the builder. Drag signature, initials, date, text fields, and checkboxes onto the relevant areas of each page.
For each fillable element, assign it to the appropriate signer role.
Send the document through the standard sending flow — the recipient fills in their fields and signs directly on the PDF.
***
***
## Sharing documents via customized links
After creating a document, click the **Share** option and select **Customized link**. Copy the generated URL.
Add the link to emails, landing pages, SMS messages, or your website as a button or hyperlink. Recipients can open and sign the document without needing to log in.
***
***
## Document variables
Document variables are merge fields that automatically pull data from the contact's CRM record into the document at the time of sending. This eliminates manual data entry and ensures accuracy.
Common document variables include:
* `{{contact.first_name}}` / `{{contact.last_name}}`
* `{{contact.email}}`
* `{{contact.phone}}`
* `{{contact.company}}`
* `{{contact.address}}`
* Custom contact fields you have created
* Opportunity custom fields
Insert variables using the `{}` variable picker in the document builder's text editor.
***
***
## Adding custom fields for signing
You can map CRM custom fields to fillable elements in the document. When the document is opened, the field auto-populates with the contact's stored data.
In the builder, drag a **Custom field** element onto the canvas.
In the element settings, select the CRM custom field to map (e.g., "Business License Number", "Project Name").
Assign the field to the appropriate signer so they can review or complete it.
***
***
## Setting the subject line
Customize the email subject line that recipients receive when the document is sent to them.
In the document settings (gear icon in the builder), find the **Email Subject** field and type your custom subject. You can include document variables in the subject line for personalization.
***
***
## Currency settings for documents
Each document can have its own currency for product pricing. This is important when selling internationally.
In the document builder, click the settings icon and select the **Currency** for this document. All product prices and totals in the product list will display in the selected currency.
***
***
## Expiry dates
Set a deadline after which the signing link becomes inactive.
In the document settings, enable **Set Expiry Date** and choose the date. After this date, any attempt to open the signing link will display an expiry message.
Expired documents can be re-sent by cloning them and creating a new copy with a fresh expiry date.
***
***
## Product list in documents
Add an itemized product table to your documents and contracts to display pricing and terms clearly.
In the builder, drag the **Product List** block onto the canvas.
Click **+ Add Product** and select from your product catalog. Set quantities and apply discounts or taxes as needed.
If the agreement includes a subscription, add the recurring product to the list. Once the document is signed, the recurring billing will be initiated automatically.
***
## Creating documents from templates
Templates let you send the same document structure to many contacts without rebuilding each time.
Navigate to **Payments → Documents & Contracts → Templates**.
Click on an existing template, or create a new one by building a document and clicking **Save as Template**.
Click **Use Template** (or when creating a new document, select **From Template**). The template content is copied into a new document that you can customize before sending.
Document variables like `{{contact.first_name}}` auto-fill when the document is sent to a specific contact. Adjust any details and click **Send**.
Templates are ideal for repeatable agreements like service contracts, proposals, NDAs, and onboarding documents. Build once, send hundreds of times.
***
## Sending documents via SMS and workflows
### Sending via SMS
You can share a document's signing link via SMS:
1. Open the document and copy the **Signing Link**
2. Paste it into an SMS message to the contact (manually or via a workflow)
3. The recipient taps the link on their mobile device and signs in their browser
### Sending via workflows
Automate document delivery using workflows:
Go to **Automation → Workflows** and create a new workflow with the appropriate trigger (e.g., Form Submitted, Opportunity Stage Changed).
Add the **Send Document** action and select the document template to send.
The document is sent to the contact who triggered the workflow. Their data auto-fills any document variables.
Chain additional actions: wait for signing, send reminders, or update contact fields after the document is signed.
***
## Tracking document activity
Monitor the full lifecycle of every document from the dashboard:
| Activity | Where to see it |
| --------------------- | --------------------------------------------------- |
| **Sent** | Documents list → Status column |
| **Viewed** | Document detail → Activity timeline |
| **Signed** | Documents list → Status column + email notification |
| **Declined** | Documents list → Status column + notification |
| **Expired** | Documents list → Status column |
| **Payment collected** | Documents list + Payments → Transactions |
Click on any document to see the **Activity Timeline** — a chronological log of every event: when it was sent, opened, viewed, signed, and by whom (including IP address and timestamp).
***
## Public document links
Public documents are shareable links that anyone can open and sign — no specific contact assignment needed.
### When to use public documents
* Standard terms of service or agreements
* Event waivers
* Intake forms for new clients
* Any document where you want a single URL for multiple signers
### Creating a public document
1. Build your document as usual
2. When sending, select **Public Document** instead of assigning a specific contact
3. Copy the public URL and share it on your website, in emails, or via SMS
4. Each person who opens the link fills in their own details and signs independently
Public documents create a new contact record (or update an existing one) for each signer based on the information they provide.
***
## Decline documents feature
Recipients can decline to sign a document if they do not agree with the terms:
* When viewing a document, the recipient clicks **Decline** (if the option is enabled)
* They can optionally provide a reason for declining
* The document status changes to **Declined** in your dashboard
* You receive a notification
* A workflow can be triggered on the "Document Declined" event to alert your team or start a follow-up sequence
A declined document cannot be signed later. To re-attempt, clone the document and send a fresh copy.
***
## Frequently asked questions
Yes. Go to **Payments → Documents & Contracts** and click **+ New → Upload PDF**. You can then drag signature, initials, and other fillable elements onto the PDF pages in the builder.
Yes. After creating a document, use the **Share via customized link** option to generate a branded URL you can embed in emails, proposals, or websites.
Documents & Contracts support all currencies available in your HoopAI Platform account. Set the currency per document in the document settings.
Yes. In the builder, insert a **Custom field** element and map it to any standard or custom contact field. The field will auto-populate with the recipient's data when they open the document.
Yes. In document settings, enable **Set Expiry Date**. After this date, the signing link becomes inactive and the recipient can no longer sign.
Yes. Use the **Public Document** option. A public document has a shareable URL that anyone can open and sign — ideal for standard agreements, intake forms, and terms of service.
Yes. Add **Initials** fillable elements to individual pages or clauses for page-by-page acknowledgment. Initials are separate from the main signature field.
Yes. In **Automation → Workflows**, add the **Send Document** action and select your template. Configure the workflow trigger and the document is sent automatically with contact data pre-filled.
Yes. Add recurring products to the product list in your document. Once signed, recurring billing is initiated automatically. This requires Stripe Connect.
No. The signer receives a unique link by email and can open, fill in, and sign the document directly in their browser — no account, login, or app download required.
Once all required signers have completed their portions, a final copy of the signed document is emailed to all parties (including your account). The document status updates to **Signed** in your dashboard. If auto-invoice creation or payment collection is enabled, those are triggered automatically at this point.
Yes. Open the document and select **Void** from the actions menu. This marks the document as void and the signing link becomes inactive. A voided document cannot be reinstated — clone it to create a fresh copy.
The HoopAI Platform's e-signatures follow established electronic signature standards (similar to DocuSign and other e-sign platforms) and are legally binding in most jurisdictions. Each signature is timestamped and the signed document is archived with an audit trail. Consult legal counsel for jurisdiction-specific requirements.
Select one or more contacts. For multi-recipient signing, add each signer and assign them a role and signing order.
Edit the email subject to match your brand voice and the purpose of the document.
Click **Send**. Each recipient receives an email with a unique link to view and sign their copy.
### Public documents
You can create a **Public document** — a shareable link that any recipient can open and sign without being addressed to a specific contact. This is useful for standard agreements, terms of service, and intake forms.
***
***
## E-signature workflow
The e-signature process covers the full journey from document creation to signed copy delivery — for both single-recipient and multi-signer scenarios.
### What the signer experiences
1. **Email invitation** — the recipient receives an email with a unique link to their copy of the document.
2. **Document review** — they open the link (no account or login required) and read the document.
3. **Fill required fields** — they complete any text fields, checkboxes, or initials assigned to them.
4. **Sign** — they draw or type their signature in the designated signature field.
5. **Submit** — clicking **Submit** finalizes their portion. The signed document is timestamped and locked.
6. **Confirmation** — a copy of the fully signed document is emailed to the signer and to your account.
### Single recipient signing
The recipient opens the document link, fills in any required fields, draws or types their signature, and clicks **Submit**. The signed document is emailed to all parties and stored in your HoopAI Platform account.
### Multi-recipient signing
In the document builder, add each signer and assign a signing order (Signer 1, Signer 2, etc.).
Drag each fillable element and assign it to the appropriate signer role so each person only sees and fills in their designated fields.
The platform sends the document to Signer 1. Only after they complete their portion does Signer 2 receive their invitation — and so on through the chain.
### Initials
Use the **Initials** fillable element to collect a shorter acknowledgment on individual pages or clauses. Initials are separate from the main signature and are useful for multi-page contracts where page-by-page acknowledgment is needed.
***
***
## Collecting payment at signing
You can require payment as part of the signing process so that signature and payment happen in a single step.
Insert a product table into the document and add the relevant products or services.
In the document settings, toggle on **Collect payment after signing**. The recipient will be prompted to pay immediately after they submit their signature.
If the total is large, add a payment plan to the document. The recipient sees the installment schedule and agrees to it as part of signing.
***
***
## Auto-creating an invoice after signing
In document settings, toggle on **Create invoice automatically after signing**.
The products in your document's product list are used to generate the invoice automatically.
Once the document is signed, a draft invoice is created in **Payments → Invoices & Estimates** for you to review and send.
***
***
## Templates
Templates save your document structure so you can send the same agreement to many contacts without rebuilding it each time.
After building a document, click **Save as template** and give it a name.
When creating a new document, select **From template** and choose the template from your library.
In **Automation → Workflows**, add the **Send document** action and select a template. The workflow will personalize and send the document based on the trigger (e.g., after a form submission or opportunity stage change).
***
***
## Settings
Go to **Documents & Contracts → Settings** to configure:
* **Default email and SMS notifications** — who is alerted when a document is sent, signed, or declined
* **Branding** — upload your logo and set brand colors for the signing experience
* **Custom fields for signing** — map CRM custom fields to document variables so they auto-populate
* **Currency** — set the default currency for document product amounts
* **Uploading PDFs** — upload an existing PDF and overlay fillable fields on top of it
***
***
## Recurring products in documents
If your agreement includes a recurring product (e.g., a monthly retainer), add it to the product list in the document. When the document is signed and payment is collected, the recurring billing begins automatically.
Recurring products in documents require Stripe Connect to be active on your account.
***
***
## Uploading PDFs as documents
Instead of building from scratch, you can upload an existing PDF and overlay fillable fields on top of it.
Go to **Payments → Documents & Contracts** and click **+ New → Upload PDF**. Select your PDF file to upload.
The uploaded PDF pages appear in the builder. Drag signature, initials, date, text fields, and checkboxes onto the relevant areas of each page.
For each fillable element, assign it to the appropriate signer role.
Send the document through the standard sending flow — the recipient fills in their fields and signs directly on the PDF.
***
***
## Sharing documents via customized links
After creating a document, click the **Share** option and select **Customized link**. Copy the generated URL.
Add the link to emails, landing pages, SMS messages, or your website as a button or hyperlink. Recipients can open and sign the document without needing to log in.
***
***
## Document variables
Document variables are merge fields that automatically pull data from the contact's CRM record into the document at the time of sending. This eliminates manual data entry and ensures accuracy.
Common document variables include:
* `{{contact.first_name}}` / `{{contact.last_name}}`
* `{{contact.email}}`
* `{{contact.phone}}`
* `{{contact.company}}`
* `{{contact.address}}`
* Custom contact fields you have created
* Opportunity custom fields
Insert variables using the `{}` variable picker in the document builder's text editor.
***
***
## Adding custom fields for signing
You can map CRM custom fields to fillable elements in the document. When the document is opened, the field auto-populates with the contact's stored data.
In the builder, drag a **Custom field** element onto the canvas.
In the element settings, select the CRM custom field to map (e.g., "Business License Number", "Project Name").
Assign the field to the appropriate signer so they can review or complete it.
***
***
## Setting the subject line
Customize the email subject line that recipients receive when the document is sent to them.
In the document settings (gear icon in the builder), find the **Email Subject** field and type your custom subject. You can include document variables in the subject line for personalization.
***
***
## Currency settings for documents
Each document can have its own currency for product pricing. This is important when selling internationally.
In the document builder, click the settings icon and select the **Currency** for this document. All product prices and totals in the product list will display in the selected currency.
***
***
## Expiry dates
Set a deadline after which the signing link becomes inactive.
In the document settings, enable **Set Expiry Date** and choose the date. After this date, any attempt to open the signing link will display an expiry message.
Expired documents can be re-sent by cloning them and creating a new copy with a fresh expiry date.
***
***
## Product list in documents
Add an itemized product table to your documents and contracts to display pricing and terms clearly.
In the builder, drag the **Product List** block onto the canvas.
Click **+ Add Product** and select from your product catalog. Set quantities and apply discounts or taxes as needed.
If the agreement includes a subscription, add the recurring product to the list. Once the document is signed, the recurring billing will be initiated automatically.
***
## Creating documents from templates
Templates let you send the same document structure to many contacts without rebuilding each time.
Navigate to **Payments → Documents & Contracts → Templates**.
Click on an existing template, or create a new one by building a document and clicking **Save as Template**.
Click **Use Template** (or when creating a new document, select **From Template**). The template content is copied into a new document that you can customize before sending.
Document variables like `{{contact.first_name}}` auto-fill when the document is sent to a specific contact. Adjust any details and click **Send**.
Templates are ideal for repeatable agreements like service contracts, proposals, NDAs, and onboarding documents. Build once, send hundreds of times.
***
## Sending documents via SMS and workflows
### Sending via SMS
You can share a document's signing link via SMS:
1. Open the document and copy the **Signing Link**
2. Paste it into an SMS message to the contact (manually or via a workflow)
3. The recipient taps the link on their mobile device and signs in their browser
### Sending via workflows
Automate document delivery using workflows:
Go to **Automation → Workflows** and create a new workflow with the appropriate trigger (e.g., Form Submitted, Opportunity Stage Changed).
Add the **Send Document** action and select the document template to send.
The document is sent to the contact who triggered the workflow. Their data auto-fills any document variables.
Chain additional actions: wait for signing, send reminders, or update contact fields after the document is signed.
***
## Tracking document activity
Monitor the full lifecycle of every document from the dashboard:
| Activity | Where to see it |
| --------------------- | --------------------------------------------------- |
| **Sent** | Documents list → Status column |
| **Viewed** | Document detail → Activity timeline |
| **Signed** | Documents list → Status column + email notification |
| **Declined** | Documents list → Status column + notification |
| **Expired** | Documents list → Status column |
| **Payment collected** | Documents list + Payments → Transactions |
Click on any document to see the **Activity Timeline** — a chronological log of every event: when it was sent, opened, viewed, signed, and by whom (including IP address and timestamp).
***
## Public document links
Public documents are shareable links that anyone can open and sign — no specific contact assignment needed.
### When to use public documents
* Standard terms of service or agreements
* Event waivers
* Intake forms for new clients
* Any document where you want a single URL for multiple signers
### Creating a public document
1. Build your document as usual
2. When sending, select **Public Document** instead of assigning a specific contact
3. Copy the public URL and share it on your website, in emails, or via SMS
4. Each person who opens the link fills in their own details and signs independently
Public documents create a new contact record (or update an existing one) for each signer based on the information they provide.
***
## Decline documents feature
Recipients can decline to sign a document if they do not agree with the terms:
* When viewing a document, the recipient clicks **Decline** (if the option is enabled)
* They can optionally provide a reason for declining
* The document status changes to **Declined** in your dashboard
* You receive a notification
* A workflow can be triggered on the "Document Declined" event to alert your team or start a follow-up sequence
A declined document cannot be signed later. To re-attempt, clone the document and send a fresh copy.
***
## Frequently asked questions
Yes. Go to **Payments → Documents & Contracts** and click **+ New → Upload PDF**. You can then drag signature, initials, and other fillable elements onto the PDF pages in the builder.
Yes. After creating a document, use the **Share via customized link** option to generate a branded URL you can embed in emails, proposals, or websites.
Documents & Contracts support all currencies available in your HoopAI Platform account. Set the currency per document in the document settings.
Yes. In the builder, insert a **Custom field** element and map it to any standard or custom contact field. The field will auto-populate with the recipient's data when they open the document.
Yes. In document settings, enable **Set Expiry Date**. After this date, the signing link becomes inactive and the recipient can no longer sign.
Yes. Use the **Public Document** option. A public document has a shareable URL that anyone can open and sign — ideal for standard agreements, intake forms, and terms of service.
Yes. Add **Initials** fillable elements to individual pages or clauses for page-by-page acknowledgment. Initials are separate from the main signature field.
Yes. In **Automation → Workflows**, add the **Send Document** action and select your template. Configure the workflow trigger and the document is sent automatically with contact data pre-filled.
Yes. Add recurring products to the product list in your document. Once signed, recurring billing is initiated automatically. This requires Stripe Connect.
No. The signer receives a unique link by email and can open, fill in, and sign the document directly in their browser — no account, login, or app download required.
Once all required signers have completed their portions, a final copy of the signed document is emailed to all parties (including your account). The document status updates to **Signed** in your dashboard. If auto-invoice creation or payment collection is enabled, those are triggered automatically at this point.
Yes. Open the document and select **Void** from the actions menu. This marks the document as void and the signing link becomes inactive. A voided document cannot be reinstated — clone it to create a fresh copy.
The HoopAI Platform's e-signatures follow established electronic signature standards (similar to DocuSign and other e-sign platforms) and are legally binding in most jurisdictions. Each signature is timestamped and the signed document is archived with an audit trail. Consult legal counsel for jurisdiction-specific requirements.