> ## Documentation Index
> Fetch the complete documentation index at: https://help.hoopai.com/llms.txt
> Use this file to discover all available pages before exploring further.
# Getting started with the HoopAI mobile app
> Download the HoopAI mobile app on iOS or Android, enable 2FA, and start adding contacts with the business card scanner.
This guide covers everything you need to get the HoopAI mobile app running — from downloading and logging in to securing your account and adding your first contacts via business card scanner.
## Downloading the app
Search for **Lead Connector** in the App Store (iOS) or Google Play Store (Android) — that's the name the HoopAI app is listed under. Install the latest version and log in with your HoopAI account credentials.
The app is listed as **Lead Connector** on both app stores. Once you log in with your HoopAI credentials, you have full access to your HoopAI account.
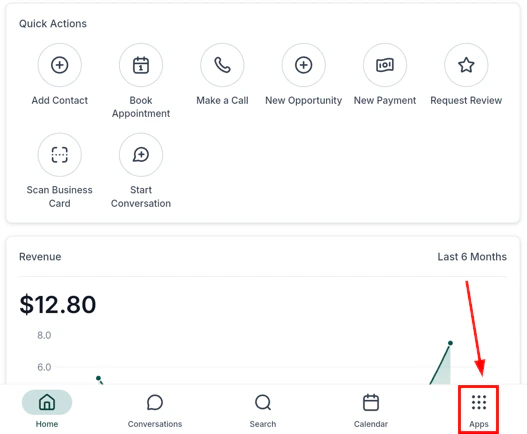 If you manage multiple accounts, you can switch between them using the account selector in the app's navigation menu.
***
## Two-factor authentication (2FA)
Enabling 2FA adds an extra layer of security to your account. After entering your password, you will be asked for a one-time verification code before being granted access.
2FA is available on iOS and Android devices running HoopAI mobile app version 3.88.1 or above.
### How to enable 2FA
Enter your email and password on the login screen, then tap **Sign In**.
If you manage multiple accounts, you can switch between them using the account selector in the app's navigation menu.
***
## Two-factor authentication (2FA)
Enabling 2FA adds an extra layer of security to your account. After entering your password, you will be asked for a one-time verification code before being granted access.
2FA is available on iOS and Android devices running HoopAI mobile app version 3.88.1 or above.
### How to enable 2FA
Enter your email and password on the login screen, then tap **Sign In**.
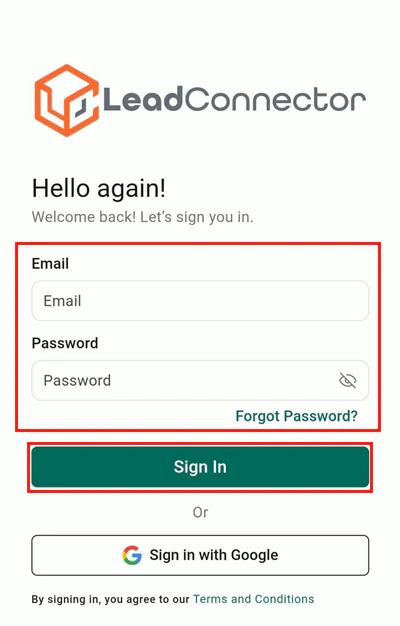 Select whether you want to receive the one-time password (OTP) via your registered email or phone number.
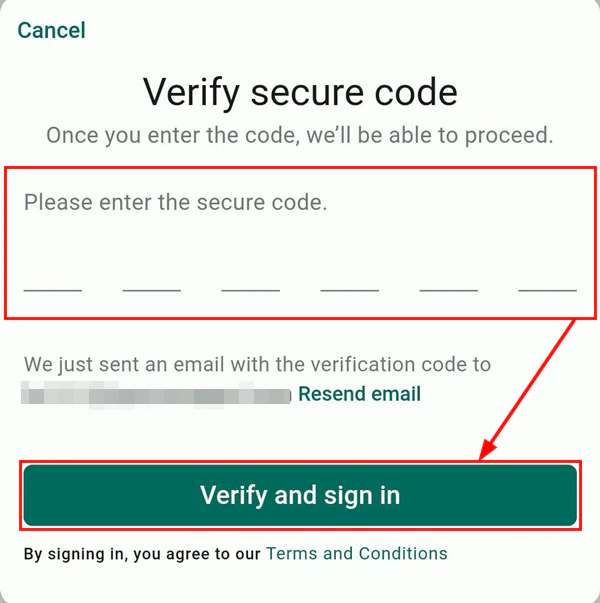
Tap **Continue**, enter the code sent to your chosen channel, then tap **Verify and Sign In**.
Select whether you want to receive the one-time password (OTP) via your registered email or phone number.
Tap **Continue**, enter the code sent to your chosen channel, then tap **Verify and Sign In**.
 ***
## Changing your password
You can update your password directly from the mobile app without needing to access the desktop version.
In the mobile app, tap the menu icon and navigate to **Settings**.
***
## Changing your password
You can update your password directly from the mobile app without needing to access the desktop version.
In the mobile app, tap the menu icon and navigate to **Settings**.
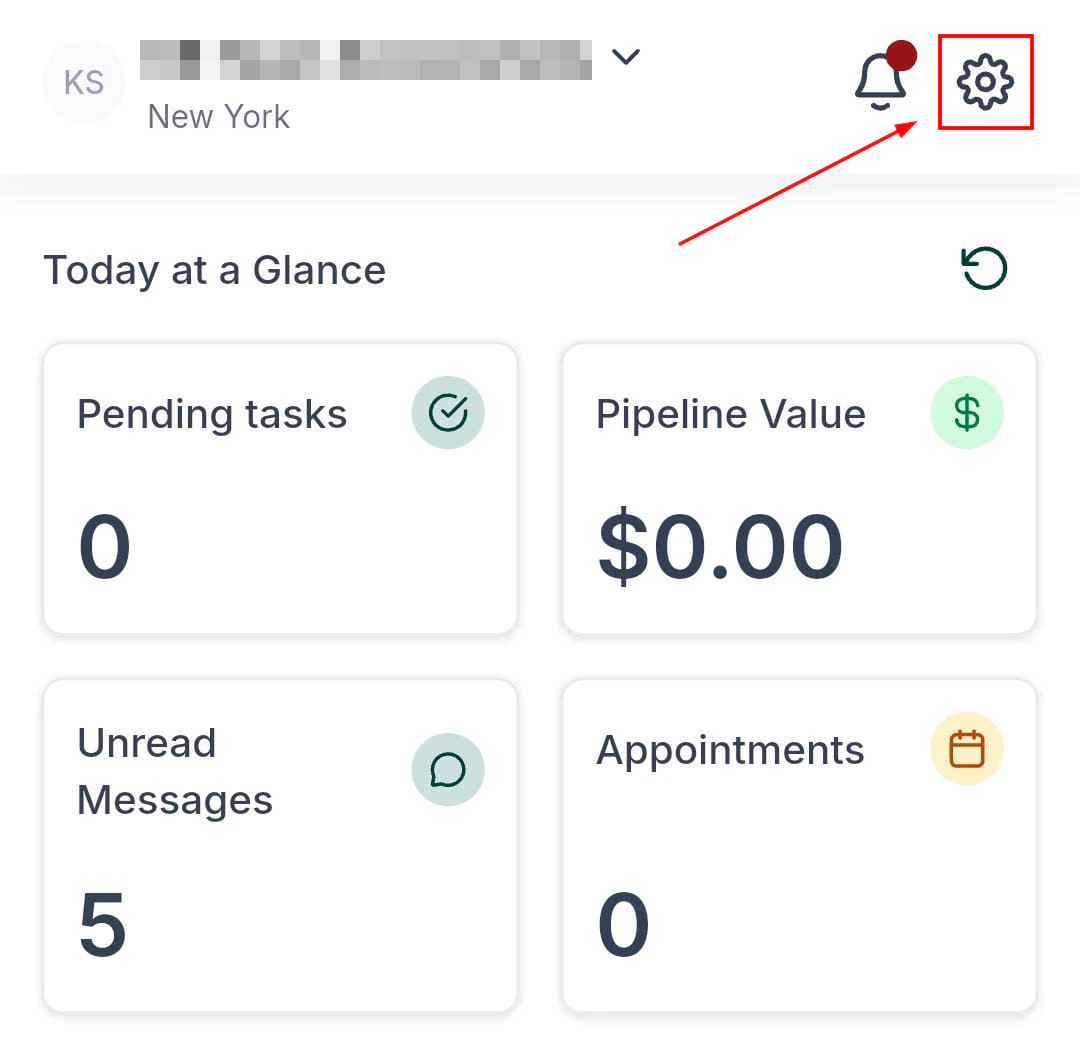 Under General Settings, tap **Change Password**.
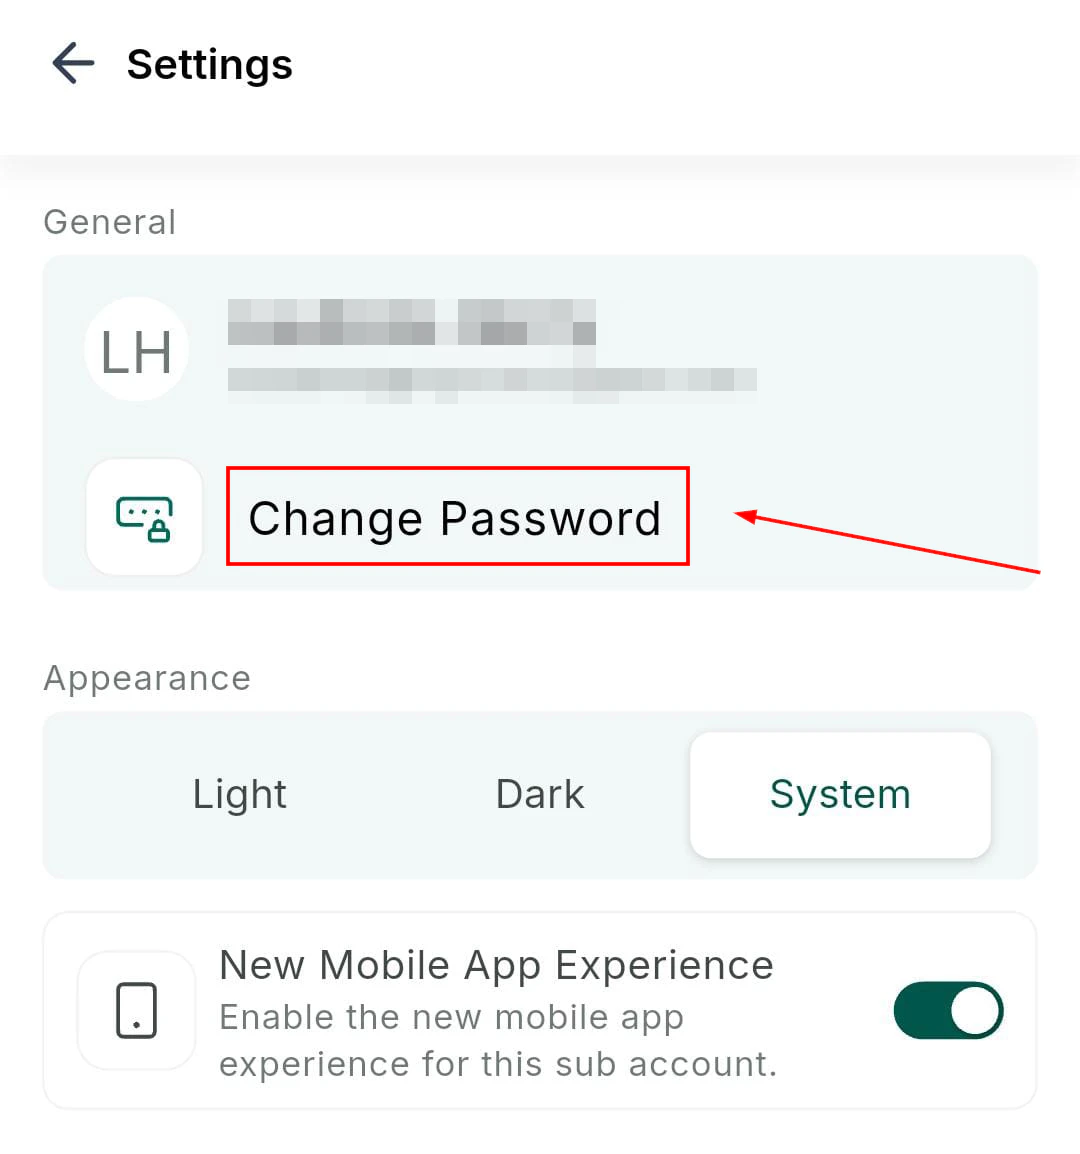 Enter your current password, then enter and confirm your new password.
Tap **Update** to save. All active sessions across other devices will be logged out automatically for security.
***
## Business card scanner
The business card scanner uses your device camera to automatically extract contact information from a business card and create a new contact record — no manual typing required.
Enter your current password, then enter and confirm your new password.
Tap **Update** to save. All active sessions across other devices will be logged out automatically for security.
***
## Business card scanner
The business card scanner uses your device camera to automatically extract contact information from a business card and create a new contact record — no manual typing required.
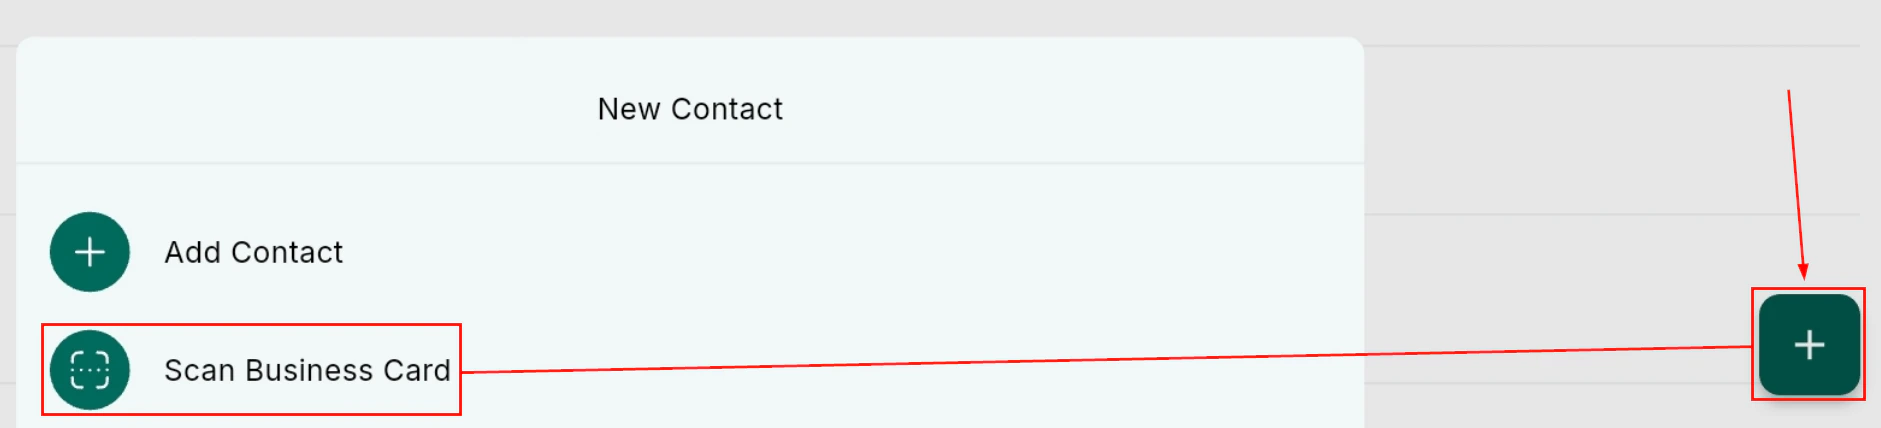 From the navigation, tap the **Contacts** icon (book icon).
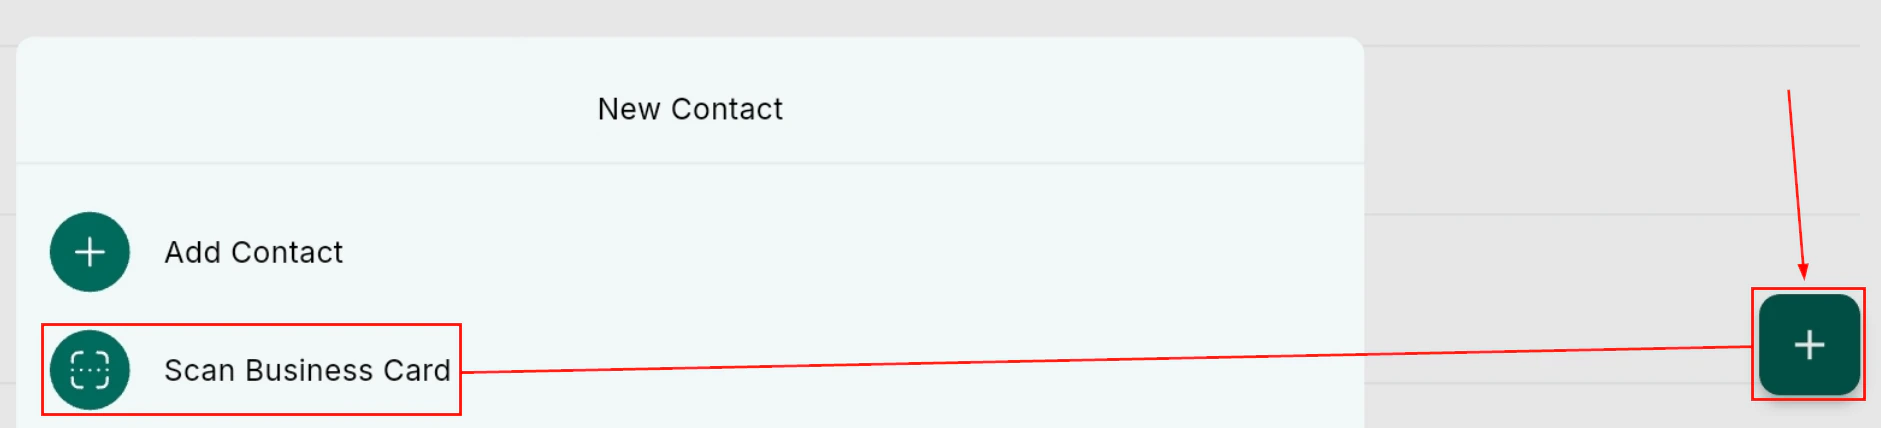
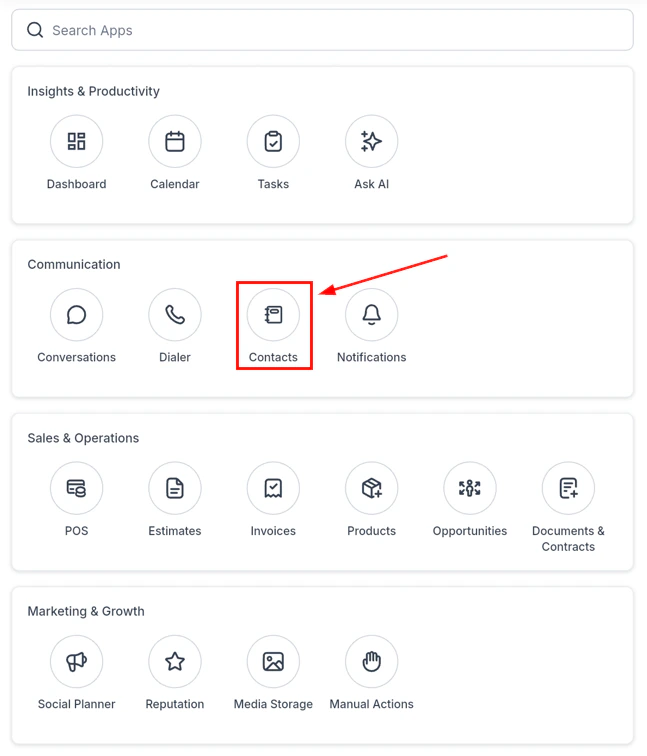 Tap the **+** icon and select **Scan Business Card**.
 Hold the business card within the rectangular scanning frame. The app automatically extracts the contact details.
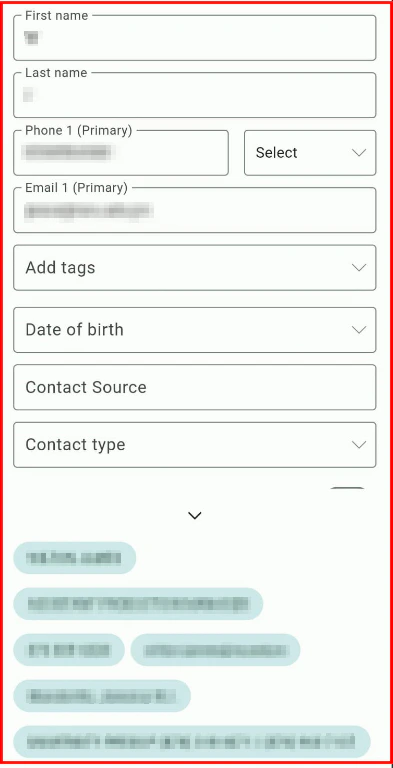
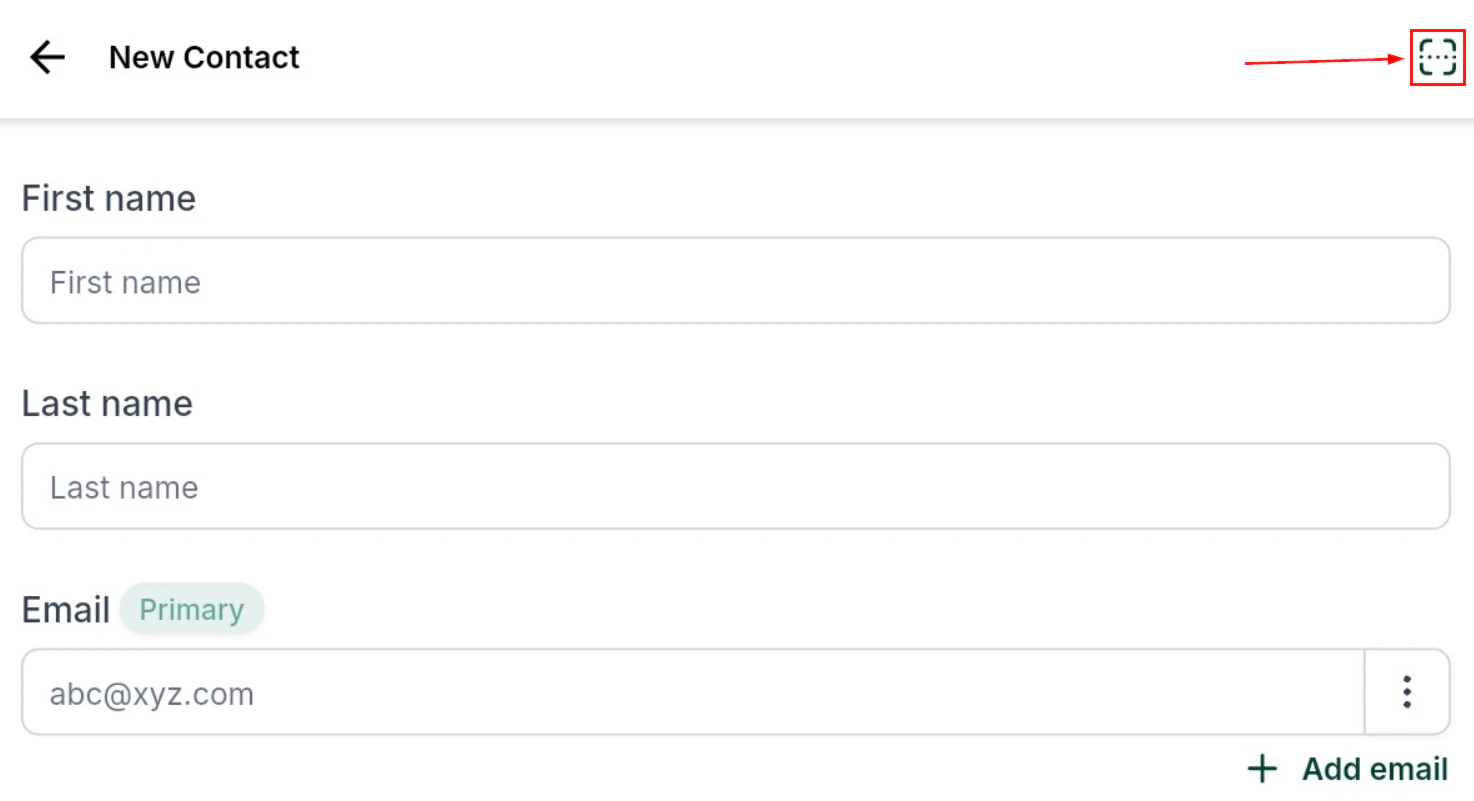 Review the extracted fields — name, phone, email, company — and make any corrections.
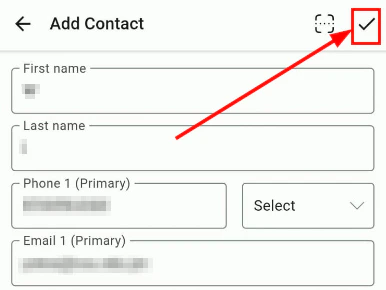
 Tap **Save** to create the contact record instantly.
 The business card scanner requires HoopAI mobile app version 3.74 or later on iOS or Android.
***
## Push notifications
Push notifications alert you to new messages, inbound calls, missed calls, voicemails, task reminders, and appointment reminders — even when the app is running in the background.
On first launch the app requests permission to send notifications. If you dismissed that prompt, go to your device's system settings, find **Lead Connector** (the name the HoopAI app is listed under), and enable notifications manually. See [App settings](/mobile-app/app-settings) for step-by-step instructions for iOS and Android.
***
## Biometric login
After your first successful password login, the app prompts you to enable Face ID (iOS) or fingerprint authentication (Android) for faster, more secure re-entry. If you skipped that prompt, you can enable biometrics from **Settings** inside the app. See [App settings](/mobile-app/app-settings) for details.
***
## Switching between accounts
If you manage multiple accounts (locations), tap your account name at the top of the sidebar to open the account switcher. Select the account you want to work in — the entire app will reload with that account's data.
***
## Key features accessible from the app
Full inbox with SMS, email, and WhatsApp support
Browse, create, and manage contact records
Make calls, use scripts, and manage voicemail
Invoices, estimates, and Tap to Pay
***
## Related articles
* [My profile settings](/settings/my-profile)
* [Contacts on mobile](/mobile-app/contacts)
* [Phone and dialer on mobile](/mobile-app/phone-and-dialer)
The business card scanner requires HoopAI mobile app version 3.74 or later on iOS or Android.
***
## Push notifications
Push notifications alert you to new messages, inbound calls, missed calls, voicemails, task reminders, and appointment reminders — even when the app is running in the background.
On first launch the app requests permission to send notifications. If you dismissed that prompt, go to your device's system settings, find **Lead Connector** (the name the HoopAI app is listed under), and enable notifications manually. See [App settings](/mobile-app/app-settings) for step-by-step instructions for iOS and Android.
***
## Biometric login
After your first successful password login, the app prompts you to enable Face ID (iOS) or fingerprint authentication (Android) for faster, more secure re-entry. If you skipped that prompt, you can enable biometrics from **Settings** inside the app. See [App settings](/mobile-app/app-settings) for details.
***
## Switching between accounts
If you manage multiple accounts (locations), tap your account name at the top of the sidebar to open the account switcher. Select the account you want to work in — the entire app will reload with that account's data.
***
## Key features accessible from the app
Full inbox with SMS, email, and WhatsApp support
Browse, create, and manage contact records
Make calls, use scripts, and manage voicemail
Invoices, estimates, and Tap to Pay
***
## Related articles
* [My profile settings](/settings/my-profile)
* [Contacts on mobile](/mobile-app/contacts)
* [Phone and dialer on mobile](/mobile-app/phone-and-dialer)