> ## Documentation Index
> Fetch the complete documentation index at: https://help.hoopai.com/llms.txt
> Use this file to discover all available pages before exploring further.
# Memberships
> Create and manage membership products, offers, settings, and member access in the Hoop platform.
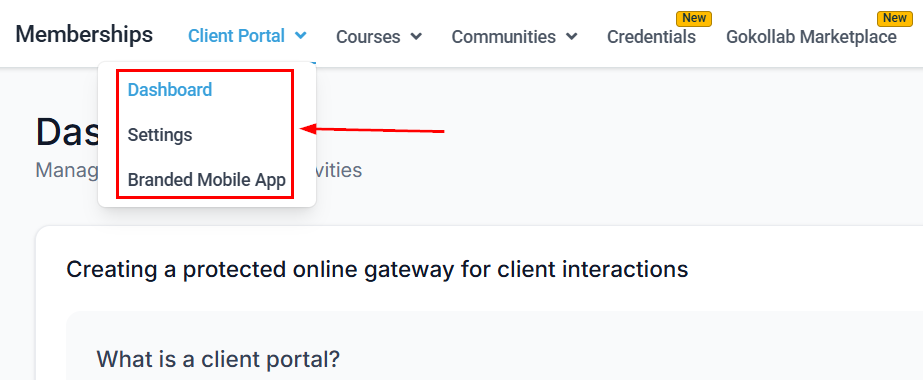
The Memberships section is the place to handle all learning and community-related things. This section houses Courses, Communities, and Certificates, providing a comprehensive system for managing your membership portal.
 ## Membership products
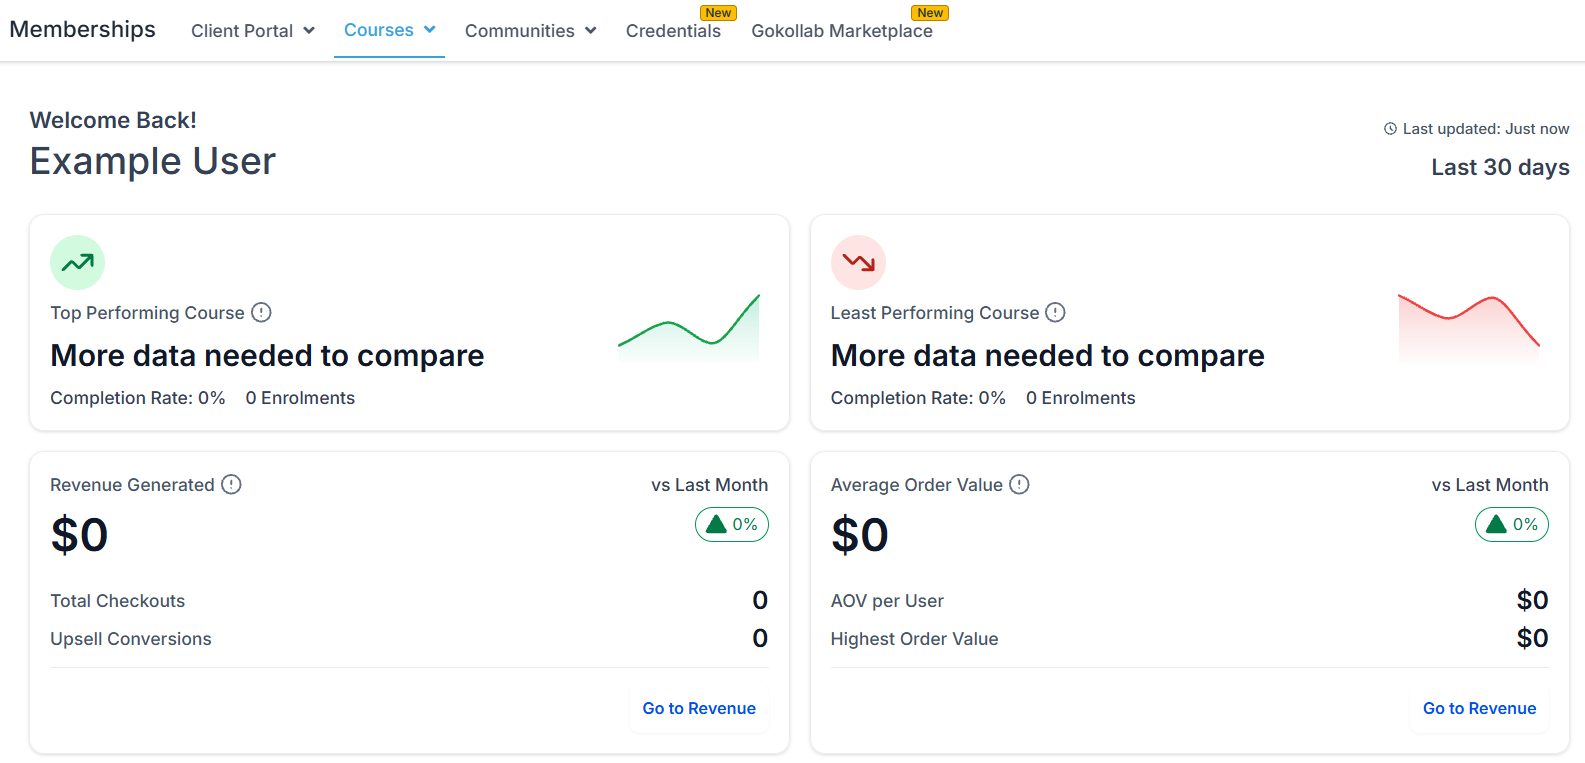
**Membership Products** is the place to create and manage any educational content you offer your audience. In the Membership Product section, you can edit details and structure to ensure you have the products your audience deserves.
## Membership products
**Membership Products** is the place to create and manage any educational content you offer your audience. In the Membership Product section, you can edit details and structure to ensure you have the products your audience deserves.
 ### Creating a product
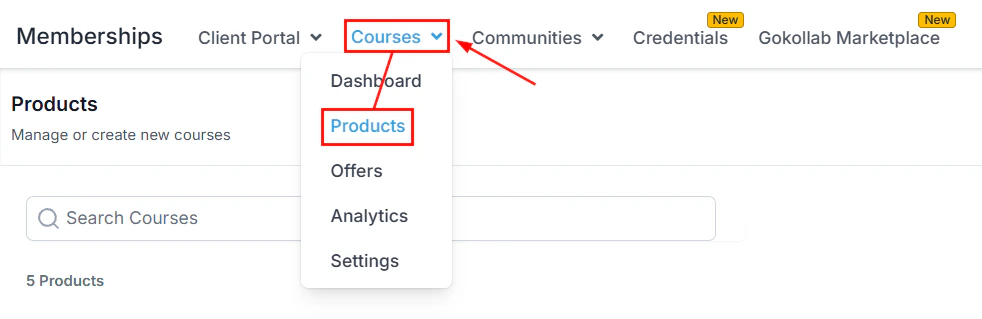
To build a product, click the **Create Product** button. You will be presented with options to build the course within the system or import courses from Kajabi.
### Creating a product
To build a product, click the **Create Product** button. You will be presented with options to build the course within the system or import courses from Kajabi.
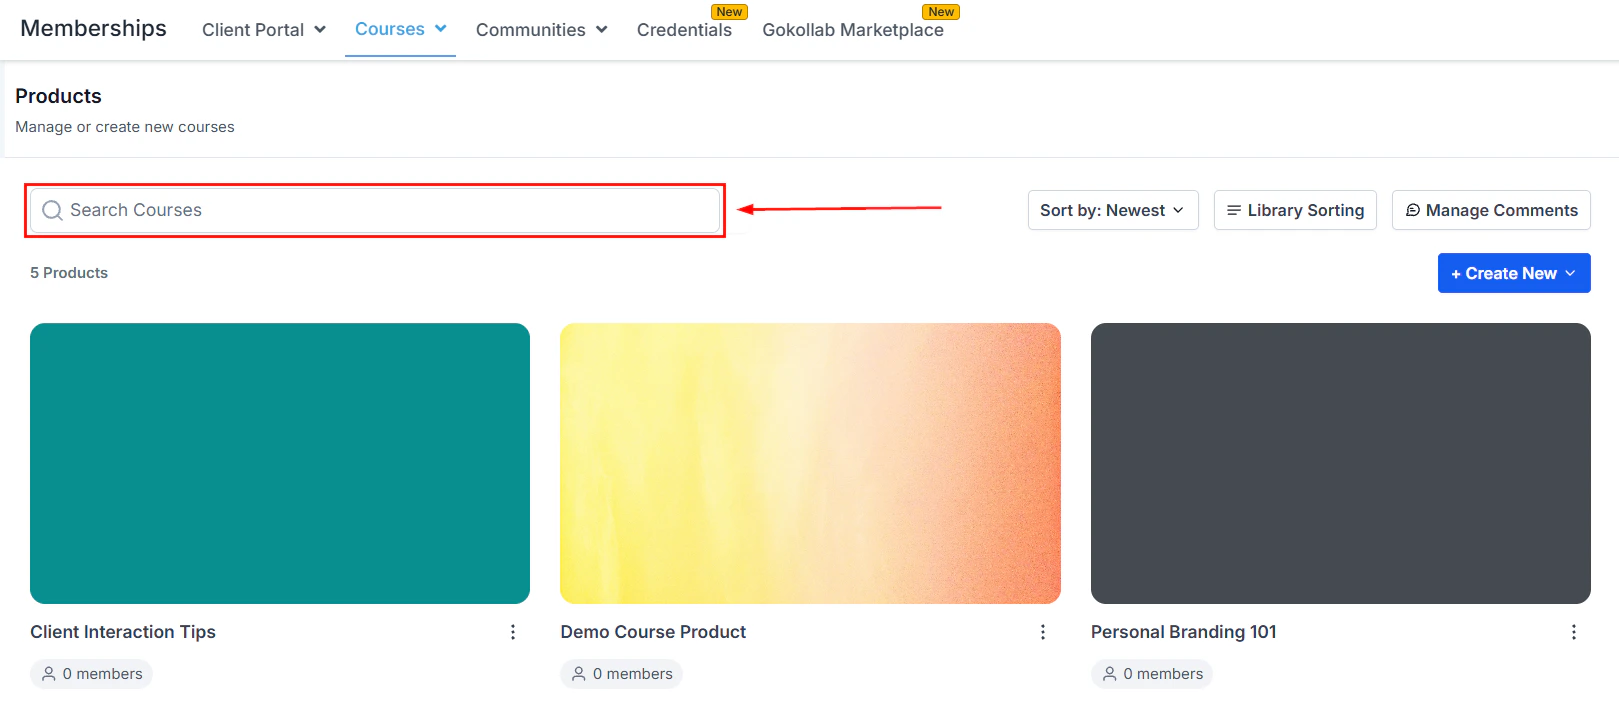
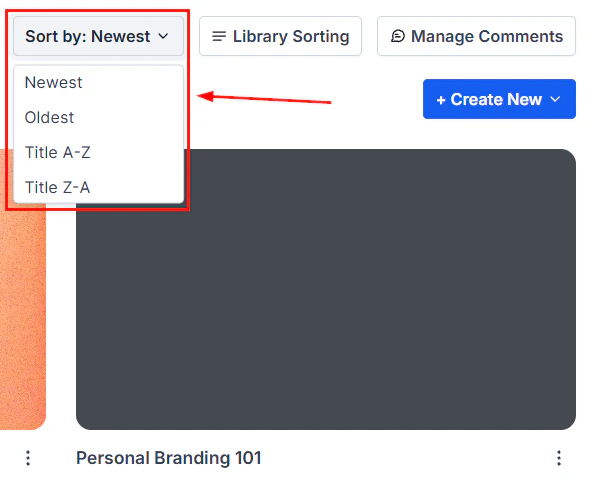
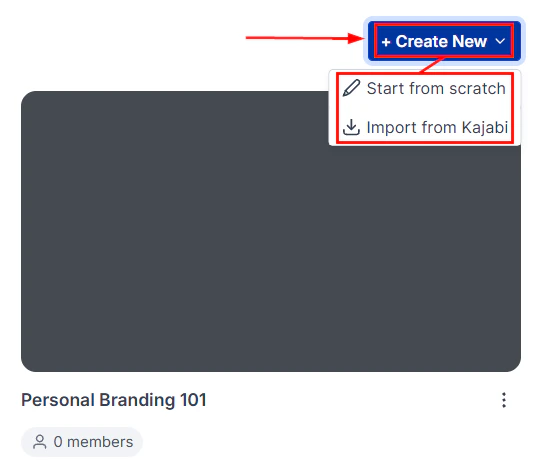 Use the **Search** bar to find products by name, and click the **Sort** dropdown to organize your products list.
***
## Membership offers
Offers allow you to assign a price to your products — either individually or in bundles of multiple products.
### Creating an offer
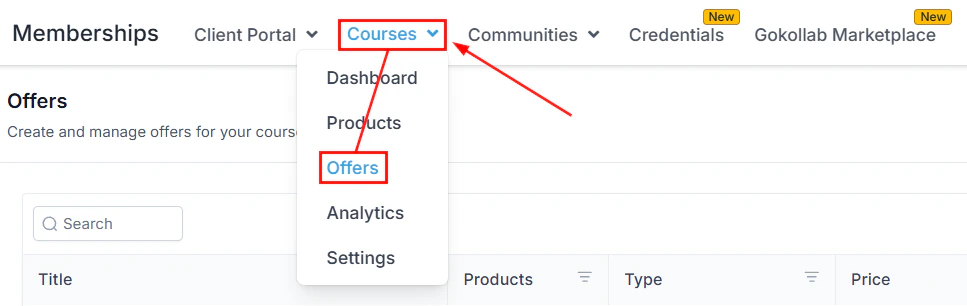
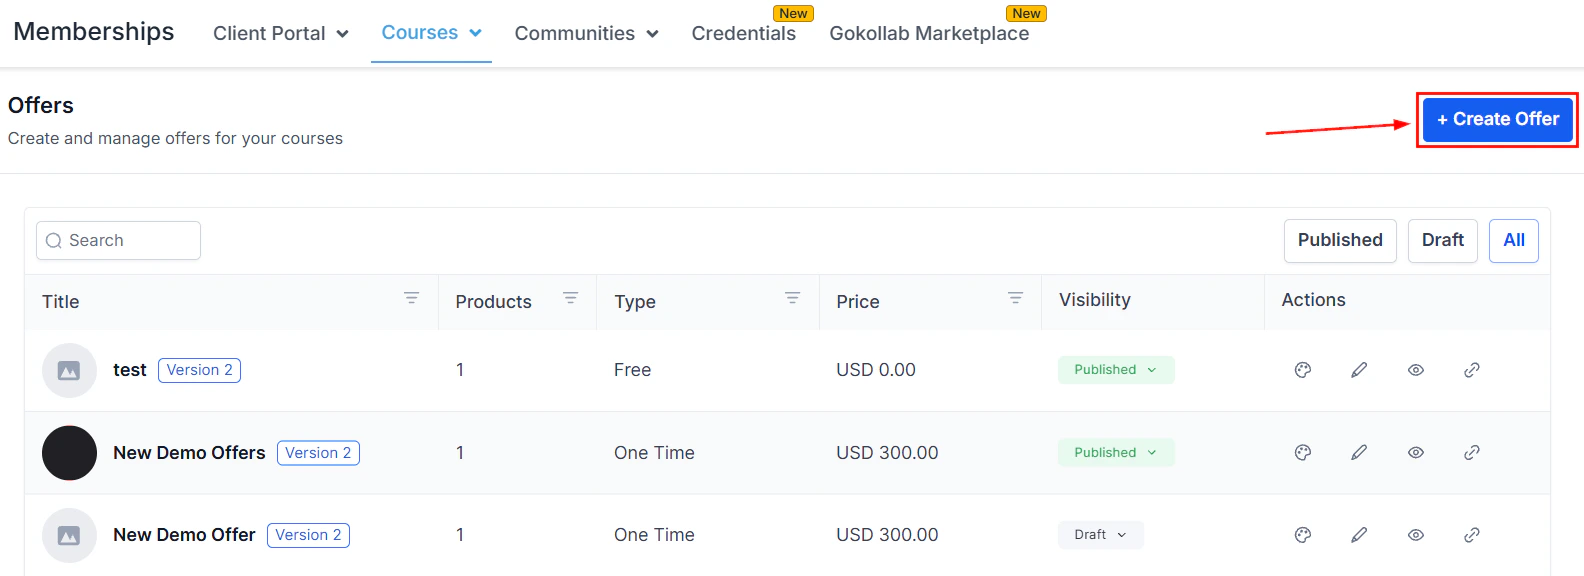
Navigate to the **Offers** tab inside your Memberships section under Courses. Click **+ Create Offer**.
Use the **Search** bar to find products by name, and click the **Sort** dropdown to organize your products list.
***
## Membership offers
Offers allow you to assign a price to your products — either individually or in bundles of multiple products.
### Creating an offer
Navigate to the **Offers** tab inside your Memberships section under Courses. Click **+ Create Offer**.
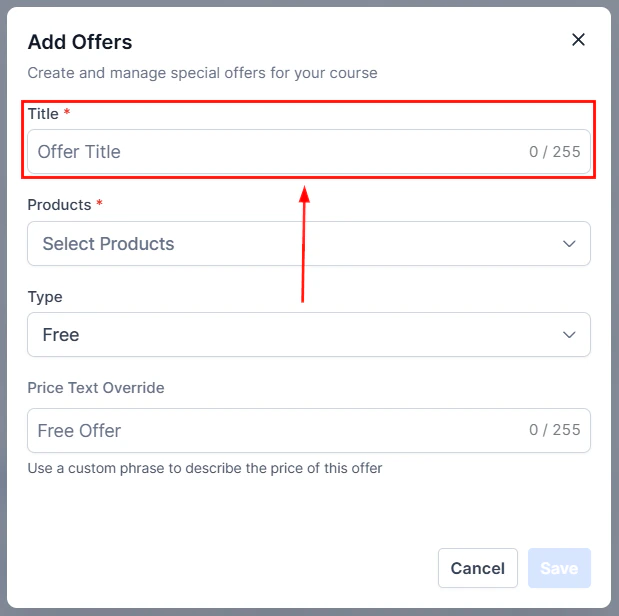
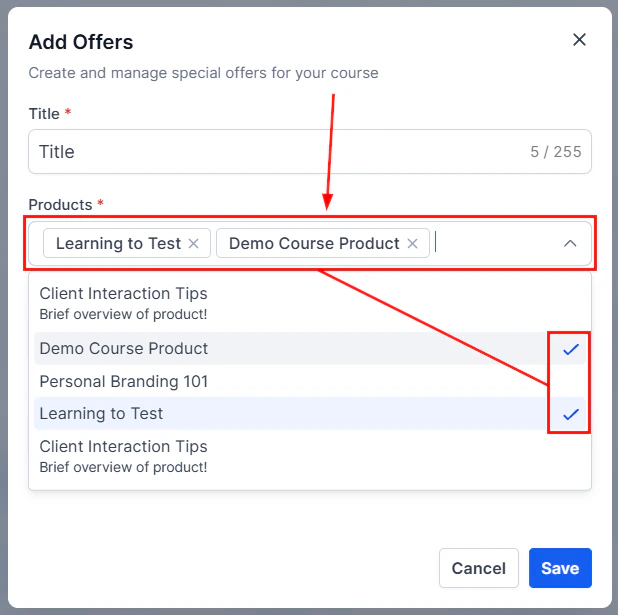
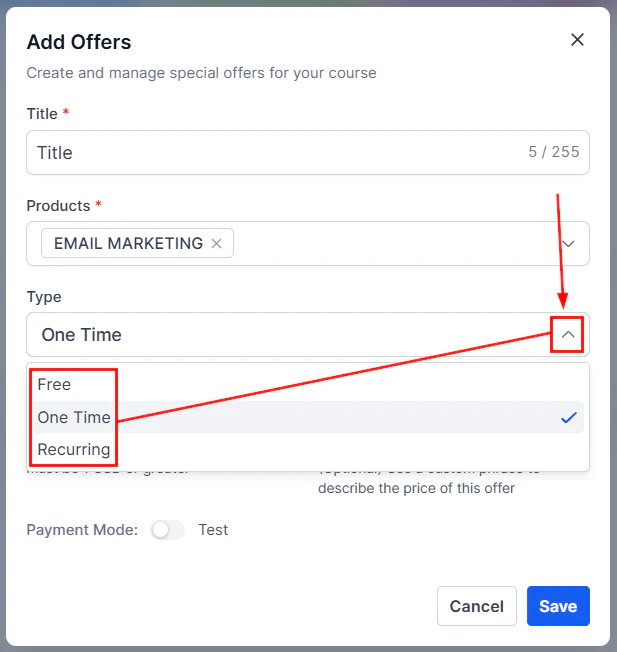
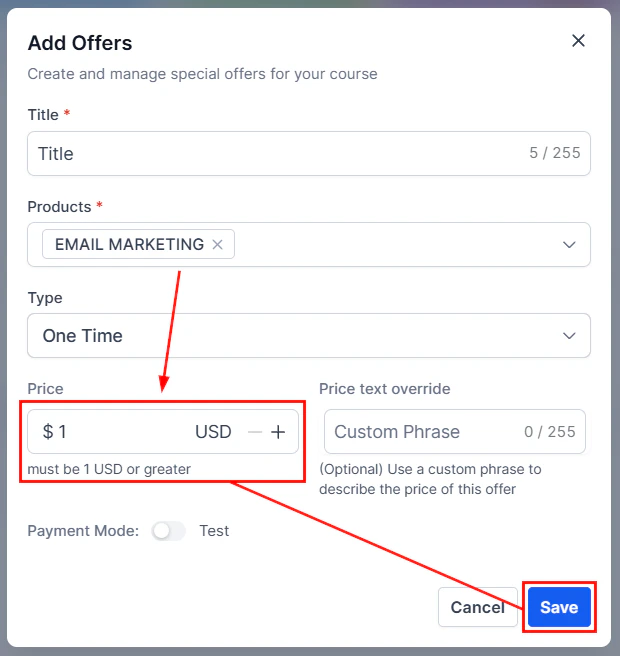
 Enter the offer title, select the course(s) to include (you can select more than one), and select the payment type. If charging for access, add the price.
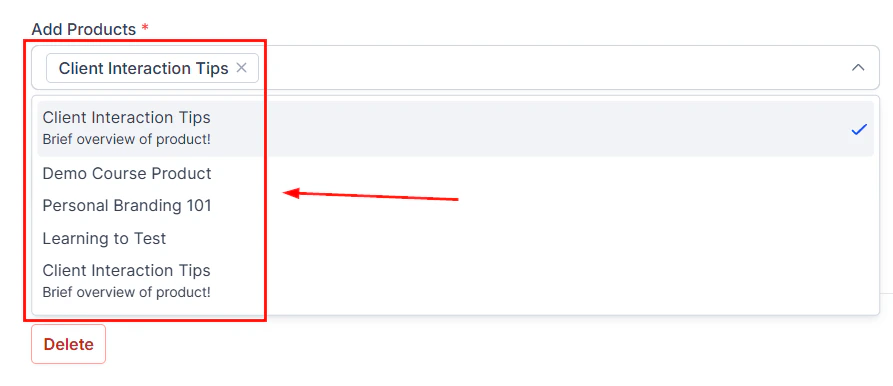
 Select the courses or communities to include in this offer. You can bundle multiple products together.
 Set pricing, payment frequency, and any trial period options.
 After creating the offer, you can configure:
* **Offer Status** — toggle between Published and Draft
* **Offer Pricing** — click Edit to change the pricing plan type and amount
* **Offer Access** — manage start and end of customer access
* **Image** — select an image to display on the offer page
After creating the offer, you can configure:
* **Offer Status** — toggle between Published and Draft
* **Offer Pricing** — click Edit to change the pricing plan type and amount
* **Offer Access** — manage start and end of customer access
* **Image** — select an image to display on the offer page
 Click **Add an Upsell** to add an optional offer members can purchase during checkout. The upsell checkout page appears after the initial offer is purchased. Select the upsell type, then choose the offer to upsell with.
Click **Edit Checkout** to customize the offer presentation — add videos, edit checkout copy, configure extra contact information fields, and set up a service agreement with Terms and Conditions.
Click **Add an Upsell** to add an optional offer members can purchase during checkout. The upsell checkout page appears after the initial offer is purchased. Select the upsell type, then choose the offer to upsell with.
Click **Edit Checkout** to customize the offer presentation — add videos, edit checkout copy, configure extra contact information fields, and set up a service agreement with Terms and Conditions.
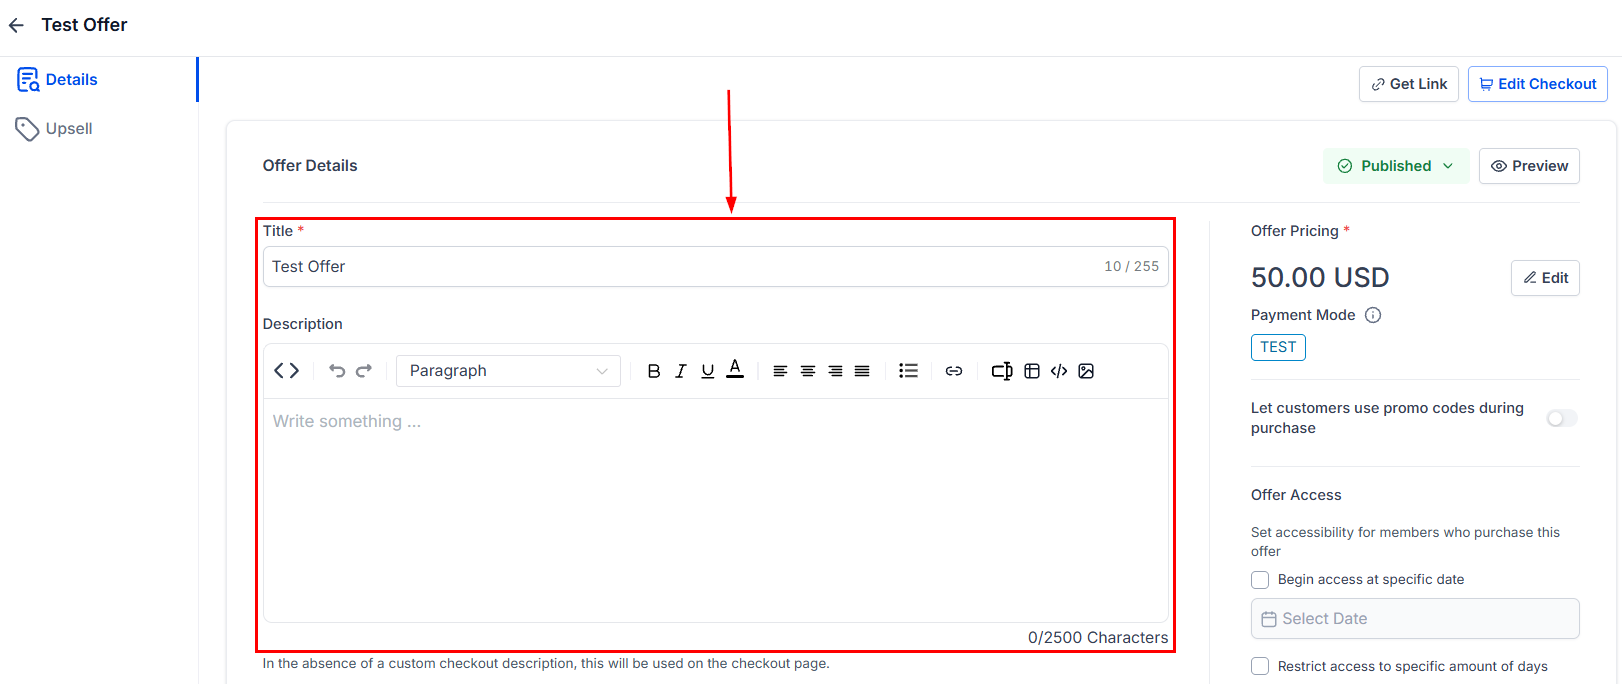 Use **Get Link** to copy the URL for sharing your course product. Use **Preview** to see what the course looks like before publishing.
***
## Membership settings
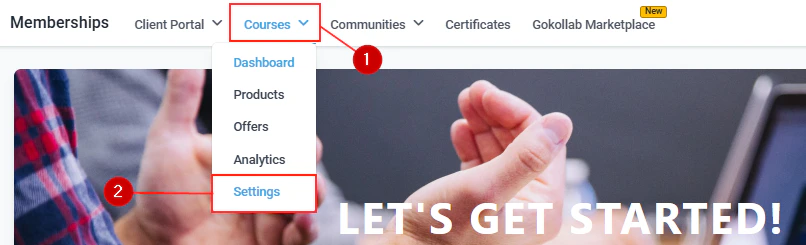
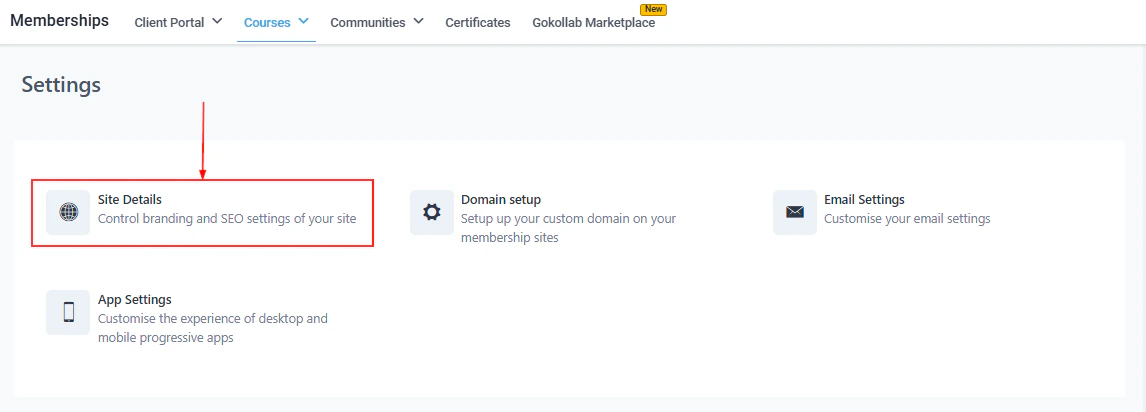
This section allows you to customize your entire membership portal. Before going live, configure these three sections:
### Site details
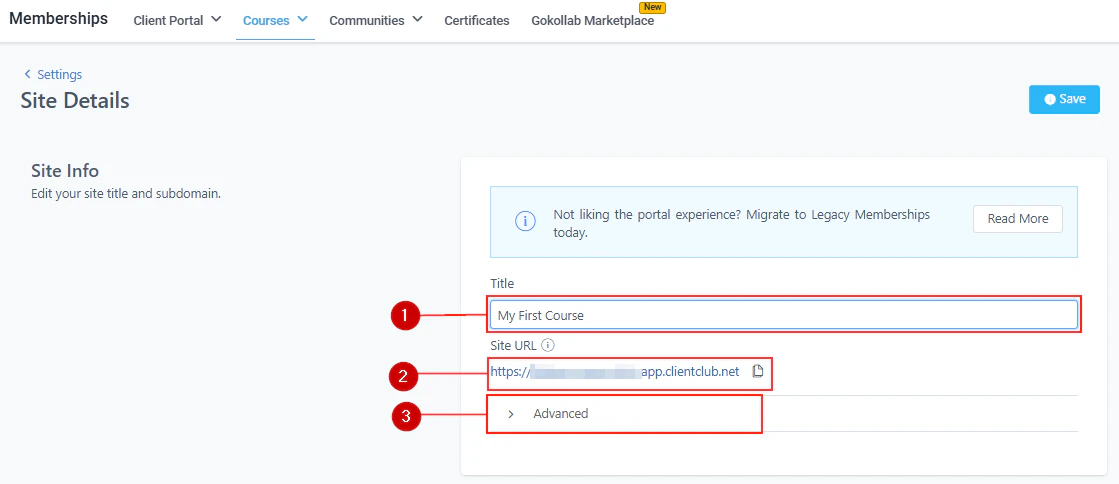
* **Site Info** — set the title of your membership portal (use your company name as it applies to the entire portal) and find the URL members will use to access the site
* **Advanced** — manage Custom JS, CSS, and Tracking Code
* **Branding** — add your logo (recommended 640×640) and Favicon (recommended 32×32)
* **Builder Settings** — enable the Download option to allow users to download original videos
Use **Get Link** to copy the URL for sharing your course product. Use **Preview** to see what the course looks like before publishing.
***
## Membership settings
This section allows you to customize your entire membership portal. Before going live, configure these three sections:
### Site details
* **Site Info** — set the title of your membership portal (use your company name as it applies to the entire portal) and find the URL members will use to access the site
* **Advanced** — manage Custom JS, CSS, and Tracking Code
* **Branding** — add your logo (recommended 640×640) and Favicon (recommended 32×32)
* **Builder Settings** — enable the Download option to allow users to download original videos
 ### Domain setup
Customize your portal's **Sub-Domain** or add a **Custom Domain** for a personalized web address. Click **Update Domain** to save changes.
### Domain setup
Customize your portal's **Sub-Domain** or add a **Custom Domain** for a personalized web address. Click **Update Domain** to save changes.
 ### Email settings
Configure automated membership emails including:
* Send Welcome Message
* Send Drip Message
* Send Offer Access Email
* New Comments In Courses
* New Course Materials Unlocked
### Email settings
Configure automated membership emails including:
* Send Welcome Message
* Send Drip Message
* Send Offer Access Email
* New Comments In Courses
* New Course Materials Unlocked
 Create default email templates for faster, more consistent communications.
### App settings
Customize the desktop and mobile experience:
* **Enable PWA** — toggle on the Progressive Web Application to make your portal available as a mobile app
* **App Details** — set app name, short name, and description
* **App Icon** — upload icons (recommended 512×512 for the app drawer and splash screen)
***
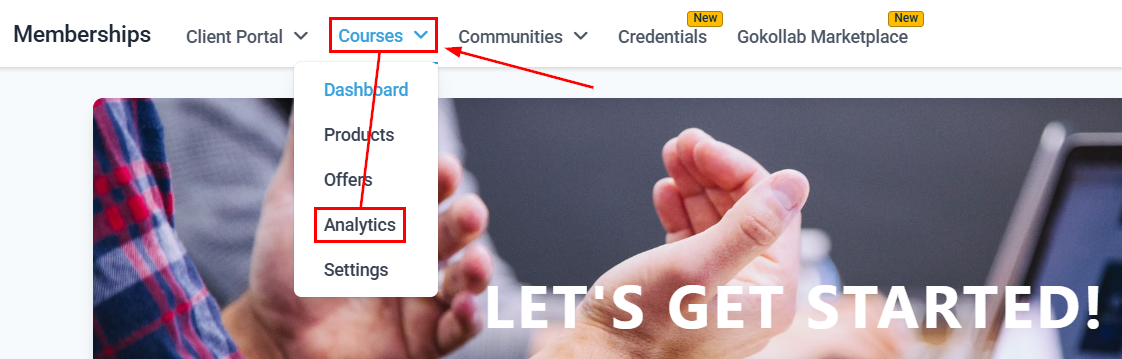
## Membership analytics
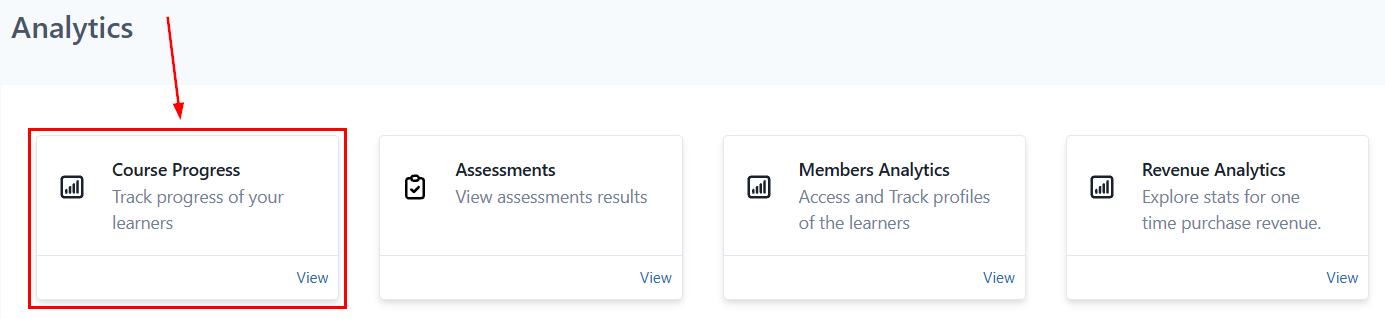
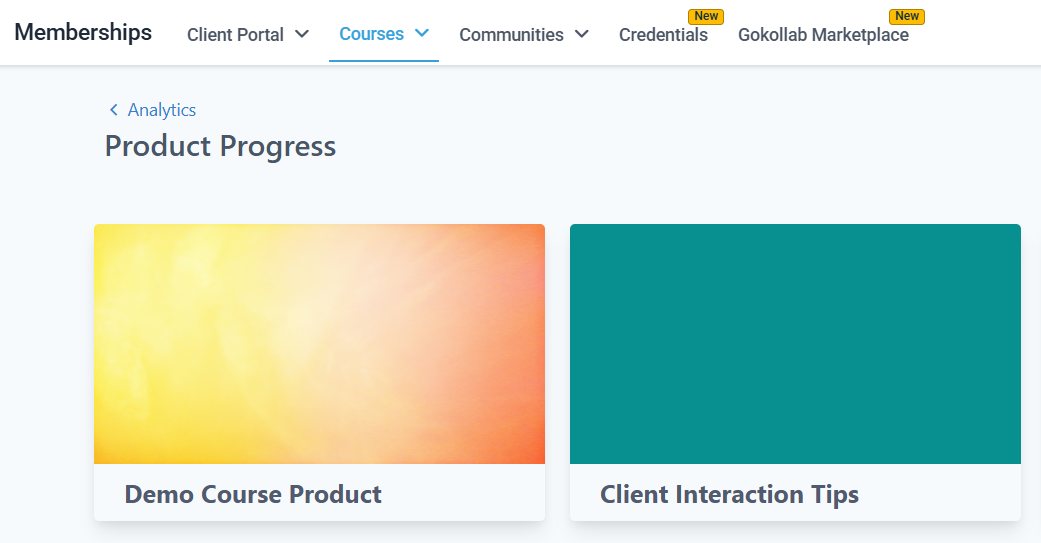
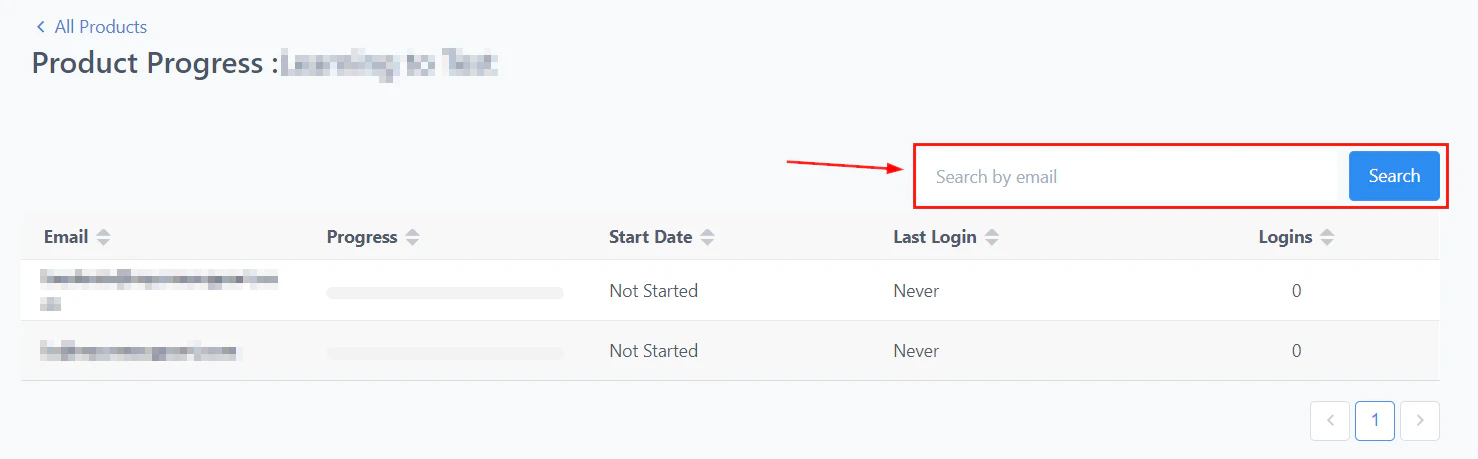
The Analytics section lets you review member progress across your courses and membership products.
Create default email templates for faster, more consistent communications.
### App settings
Customize the desktop and mobile experience:
* **Enable PWA** — toggle on the Progressive Web Application to make your portal available as a mobile app
* **App Details** — set app name, short name, and description
* **App Icon** — upload icons (recommended 512×512 for the app drawer and splash screen)
***
## Membership analytics
The Analytics section lets you review member progress across your courses and membership products.
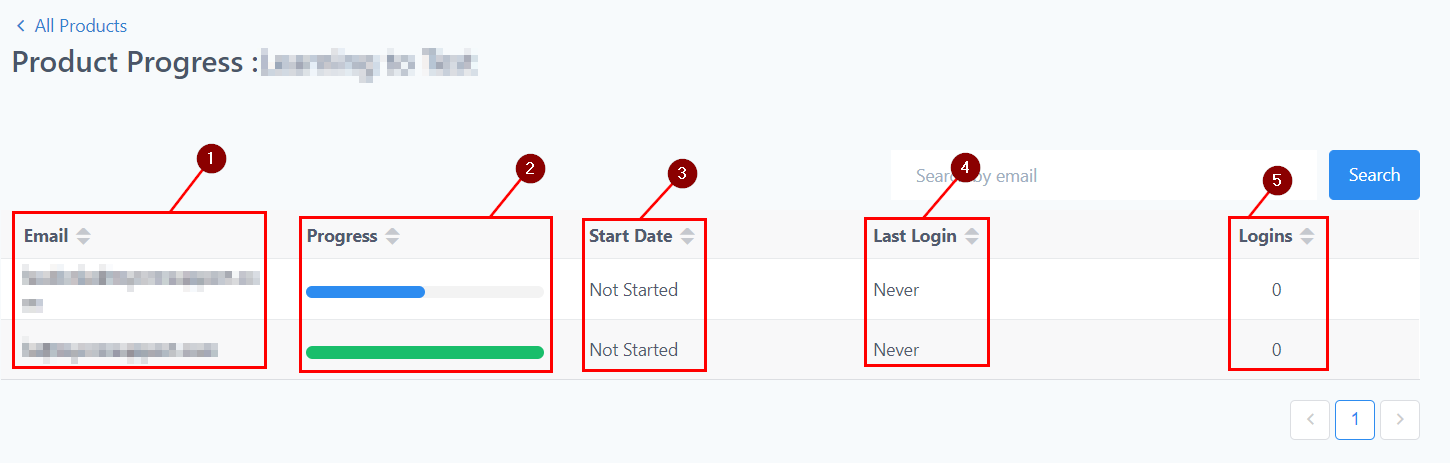 Track:
* Course completion rates
* Assessment scores and results
* Revenue generated
* Member activity data
***
## Managing member access
### Changing member passwords
To reset a member's password, navigate to **Contacts**, select the contact, and switch to the **Actions** tab. Under the **Client Portal** tab, you can:
* **Change Password** — enter and confirm a new password of your choice
* **Send Password Reset Link** — emails the contact a secure link to reset their own password
### Sending custom welcome emails
To use a branded welcome email instead of the default:
Create a welcome email that includes your logo and the login link using the custom value **Login Url (Magic Link)** under membership contacts.
Navigate to the **Settings** tab of your Courses inside the Memberships section and open **Email Settings**.
Next to the Sign-up option, click **Default Template** and select your new template from the dropdown. Click **Edit** to make any last-minute changes, then click **Save**.
Use the **Course Completion** trigger in Automations to send a congratulations email and issue a certificate automatically when a member finishes all lessons.
Membership content is entirely separate from your internal Hoop account. Members never see your CRM, contacts, or business data — only the content you have chosen to share in the portal.
***
## Frequently asked questions
Membership offers support three payment types: **one-time** (a single charge that grants permanent access), **subscription** (recurring monthly or annual billing), and **payment plan** (split payments over a fixed number of installments). You can also add an optional free or paid trial period to any offer.
Yes. When creating an offer, you can select multiple courses and communities to include. A member who purchases that offer gains access to all bundled products with a single checkout.
Inside your offer settings, click **Add an Upsell**. Choose the upsell type, then select the offer you want to present as an upgrade. The upsell checkout page appears automatically after the initial purchase is completed.
When a subscription is cancelled, access is revoked at the end of the current billing period (or immediately, depending on your configuration under Offer Access settings). You can configure access end dates and grace periods inside the offer's **Offer Access** settings.
Yes. Navigate to **Membership Settings > Domain Setup** and enter your custom domain. You will need to add a CNAME DNS record at your domain registrar pointing to the Hoop platform, then click **Update Domain** to activate it.
When you click **Create Product**, you are presented with the option to build a new course from scratch or import from Kajabi. Select the Kajabi import option and follow the prompts to connect your Kajabi account and migrate your content.
Navigate to **Contacts**, open the member's contact record, and go to the **Actions** tab. Under **Client Portal**, click **Send Password Reset Link** to email them a secure link to set a new password.
Track:
* Course completion rates
* Assessment scores and results
* Revenue generated
* Member activity data
***
## Managing member access
### Changing member passwords
To reset a member's password, navigate to **Contacts**, select the contact, and switch to the **Actions** tab. Under the **Client Portal** tab, you can:
* **Change Password** — enter and confirm a new password of your choice
* **Send Password Reset Link** — emails the contact a secure link to reset their own password
### Sending custom welcome emails
To use a branded welcome email instead of the default:
Create a welcome email that includes your logo and the login link using the custom value **Login Url (Magic Link)** under membership contacts.
Navigate to the **Settings** tab of your Courses inside the Memberships section and open **Email Settings**.
Next to the Sign-up option, click **Default Template** and select your new template from the dropdown. Click **Edit** to make any last-minute changes, then click **Save**.
Use the **Course Completion** trigger in Automations to send a congratulations email and issue a certificate automatically when a member finishes all lessons.
Membership content is entirely separate from your internal Hoop account. Members never see your CRM, contacts, or business data — only the content you have chosen to share in the portal.
***
## Frequently asked questions
Membership offers support three payment types: **one-time** (a single charge that grants permanent access), **subscription** (recurring monthly or annual billing), and **payment plan** (split payments over a fixed number of installments). You can also add an optional free or paid trial period to any offer.
Yes. When creating an offer, you can select multiple courses and communities to include. A member who purchases that offer gains access to all bundled products with a single checkout.
Inside your offer settings, click **Add an Upsell**. Choose the upsell type, then select the offer you want to present as an upgrade. The upsell checkout page appears automatically after the initial purchase is completed.
When a subscription is cancelled, access is revoked at the end of the current billing period (or immediately, depending on your configuration under Offer Access settings). You can configure access end dates and grace periods inside the offer's **Offer Access** settings.
Yes. Navigate to **Membership Settings > Domain Setup** and enter your custom domain. You will need to add a CNAME DNS record at your domain registrar pointing to the Hoop platform, then click **Update Domain** to activate it.
When you click **Create Product**, you are presented with the option to build a new course from scratch or import from Kajabi. Select the Kajabi import option and follow the prompts to connect your Kajabi account and migrate your content.
Navigate to **Contacts**, open the member's contact record, and go to the **Actions** tab. Under **Client Portal**, click **Send Password Reset Link** to email them a secure link to set a new password.