> ## Documentation Index
> Fetch the complete documentation index at: https://help.hoopai.com/llms.txt
> Use this file to discover all available pages before exploring further.
# Membership Access Control
> Control who can access your courses and communities — free, paid, or tier-based — using offers and automations in the HoopAI platform.
Membership access control determines exactly who can see what content inside your member portal. The HoopAI platform uses a combination of **offers**, **automation actions**, and **contact tags** to grant, restrict, and revoke access dynamically — whether you run a single free community or a multi-tier paid membership with several access levels.
## How access works
Access to membership content is controlled at the **offer** level. An offer is a bundle of one or more courses and communities paired with a pricing model. A member can only view content that belongs to an offer they have been granted access to. Content in other offers remains hidden from their portal — they will not even see it exists unless you explicitly show them a teaser.
The access workflow follows this pattern:
You create an offer and select which courses and communities belong to it. You set the price (free, one-time, subscription, or payment plan) and publish the offer.
Access is granted either automatically (via a purchase trigger in an automation) or manually (from the contact record or the Members tab).
As soon as access is granted, the member's portal refreshes and the included content appears. They can log in and begin immediately.
For subscriptions, access can be revoked automatically when a payment fails or the subscription cancels. For one-time purchases, access is permanent unless you manually remove it.
***
 ## Free access
Free offers grant access without requiring payment. Use a free offer to:
* Give all logged-in members access to a welcome course or orientation module
* Open a community group to everyone who creates a portal account
* Provide a free sample lesson to prospects who have not yet purchased
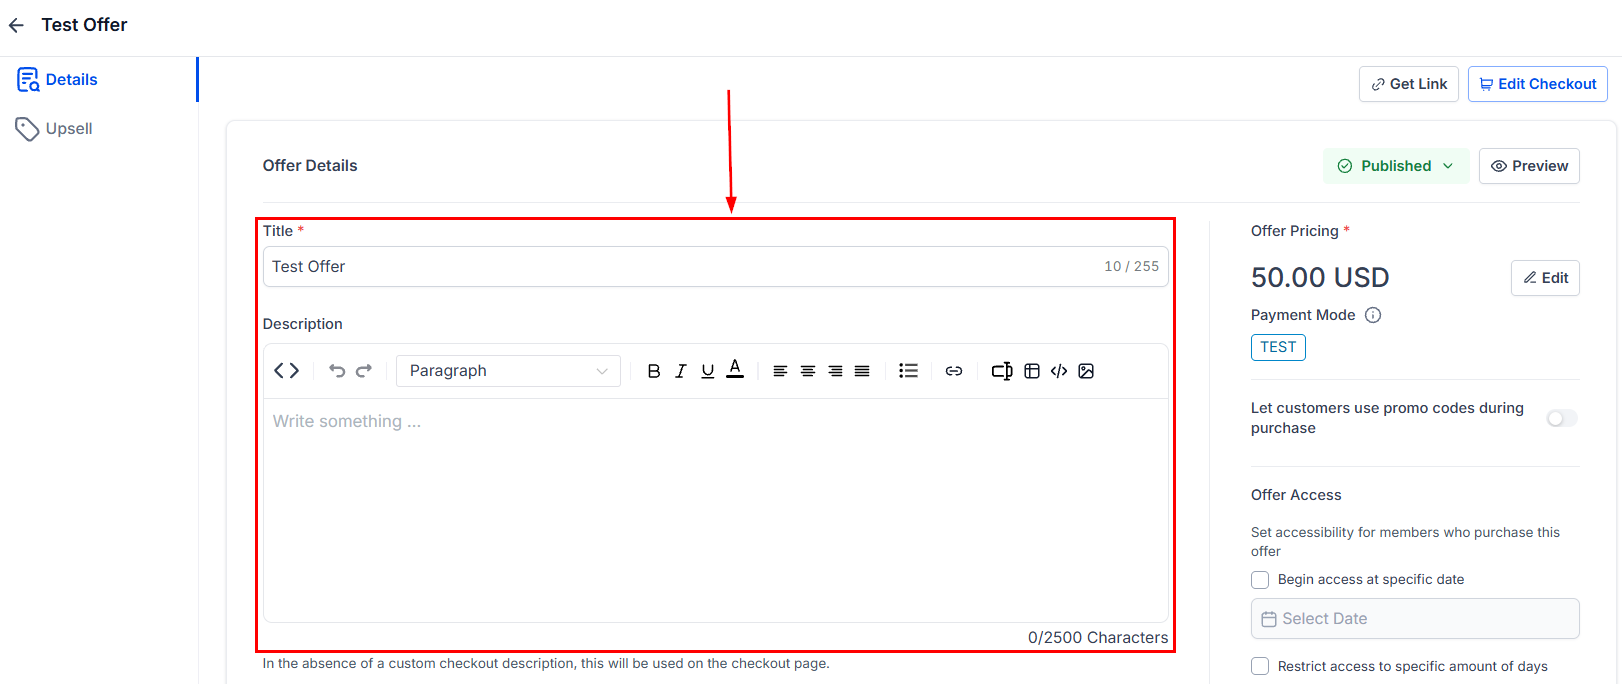
To create a free offer, set the **Payment Type** to **Free** when building the offer. No price or payment gateway is required. You can still use an automation to grant access automatically when a contact registers.
***
## Paid access
Paid offers require a payment before access is granted. Supported payment models include:
| Payment type | How it works |
| ------------ | --------------------------------------------------------------------------------------------------- |
| One-time | A single payment grants permanent access to all content in the offer |
| Subscription | Recurring billing (monthly or annual) — access continues while the subscription is active |
| Payment plan | A fixed number of instalments — access is granted immediately and continues after the final payment |
When a contact completes checkout, the HoopAI platform can automatically trigger a **Grant Membership Access** action in an automation. Set the trigger to **Payment Received** or **Order Form Submitted** and select the relevant offer in the action step.
Always test your access automation by placing a test order. Confirm the offer appears in the portal before opening the product to real customers.
***
## Free access
Free offers grant access without requiring payment. Use a free offer to:
* Give all logged-in members access to a welcome course or orientation module
* Open a community group to everyone who creates a portal account
* Provide a free sample lesson to prospects who have not yet purchased
To create a free offer, set the **Payment Type** to **Free** when building the offer. No price or payment gateway is required. You can still use an automation to grant access automatically when a contact registers.
***
## Paid access
Paid offers require a payment before access is granted. Supported payment models include:
| Payment type | How it works |
| ------------ | --------------------------------------------------------------------------------------------------- |
| One-time | A single payment grants permanent access to all content in the offer |
| Subscription | Recurring billing (monthly or annual) — access continues while the subscription is active |
| Payment plan | A fixed number of instalments — access is granted immediately and continues after the final payment |
When a contact completes checkout, the HoopAI platform can automatically trigger a **Grant Membership Access** action in an automation. Set the trigger to **Payment Received** or **Order Form Submitted** and select the relevant offer in the action step.
Always test your access automation by placing a test order. Confirm the offer appears in the portal before opening the product to real customers.
***
 ## Tier-based access
Tier-based memberships give different members access to different levels of content. For example:
| Tier | Offers included | Price |
| ------- | ------------------------------------------------------- | ----------- |
| Starter | Core course library | \$29/month |
| Pro | Core course library + advanced modules + community | \$79/month |
| VIP | All content + live Q\&A channel + 1-on-1 resource vault | \$149/month |
To build a tiered structure:
1. Create a separate **offer** for each tier, adding the appropriate courses and communities to each.
2. Create a separate **checkout page** or **funnel** for each offer, each at the appropriate price point.
3. Build an automation for each tier. Use **Payment Received** as the trigger, filter by the specific offer or product, and add a **Grant Membership Access** action selecting that tier's offer.
4. Optionally, use **contact tags** (e.g. `tier-starter`, `tier-pro`, `tier-vip`) to segment members in your CRM for targeted email campaigns and reporting.
Members who upgrade to a higher tier can be granted the new offer while retaining (or revoking) their lower-tier offer depending on your business rules.
***
## Granting access manually
To grant a single member access to an offer without a purchase:
1. Navigate to **Contacts** and open the contact's record.
2. Click the **Actions** tab and select **Client Portal**.
3. Click **Grant Offer Access**, choose the offer, and confirm.
Access is granted immediately and the content appears in the member's portal.
***
## Revoking access
To remove a member's access to an offer:
* **Manual revocation** — go to the contact record, open the **Client Portal** tab, and click **Revoke Access** next to the relevant offer.
* **Subscription cancellation** — configure the offer's **Offer Access** settings to define what happens on cancellation: revoke immediately or revoke at the end of the billing period.
* **Automation** — use a **Revoke Membership Access** action in a workflow triggered by subscription cancellation, payment failure, or a tag being removed.
Revoking access removes the offer from the member's portal instantly. Any progress the member has made in the course (completed lessons, quiz scores) is retained in your analytics and can be restored if access is re-granted.
***
## Access and the client portal
Members see only the courses and communities included in their active offers when they log in. If they have multiple active offers (for example, a free starter offer plus a paid advanced offer), all included content appears on their portal dashboard side by side.
The portal URL is the same for all members — access is enforced server-side based on each member's grant records, so there is no need to create separate portal URLs per tier.
***
## Frequently asked questions
Access is granted at the offer level, which includes full courses and communities. You cannot restrict a member to a single lesson within a course they have been granted. To achieve granular gating, structure your content as separate courses (each in its own offer) or use drip scheduling to control when individual lessons unlock after enrollment.
Progress data (completed lessons, quiz scores) is stored separately from the access grant. Revoking access hides the content but does not delete progress. If you re-grant access, the member's previous progress is restored and they can pick up where they left off.
Yes. Inside the offer's **Offer Access** settings, you can set an access end date — either a fixed calendar date or a number of days after the member gains access. After that date, the content is automatically hidden from the member's portal.
Use an automation with the **Form Submitted** trigger. Add the form submission condition, then add a **Grant Membership Access** action and select the relevant offer. This works well for free opt-in offers or gated lead magnets.
Yes. A member can hold active access to multiple offers simultaneously. Each offer's content appears in their portal. This is useful if you want to grandfather members into an old tier while also giving them access to new content, or if you run a temporary promotion for existing subscribers.
***
## Magic links for passwordless access
Magic links provide a frictionless login experience — members click a unique link in their email and are logged into the portal instantly, without entering a password or OTP.
### How magic links work
1. A unique, time-limited URL is generated for each member.
2. The link is included in an email (welcome email, course access notification, or manual send).
3. The member clicks the link and is authenticated directly into their portal session.
4. The link expires after a set period or after first use, preventing unauthorized access.
### Sending magic links
Magic links can be included in emails through automation:
1. Create an automation with the appropriate trigger (e.g., **Payment Received**, **Offer Granted**, or **Manual Trigger**).
2. Add a **Send Email** action.
3. In the email body, insert the **magic link** custom value or merge field — the platform generates a unique link for each contact.
4. The member receives the email and clicks the link to access their content.
### Use cases
* **Welcome emails** — new members click one link and immediately access their courses without a separate login step
* **Re-engagement campaigns** — send a magic link to inactive members to bring them back with zero friction
* **VIP access** — grant temporary access to a specific course or community by sending a magic link that authenticates and redirects to the content
Magic links are especially effective for reducing drop-off during onboarding. Members who receive a one-click access link in their welcome email are significantly more likely to log in and engage with content than those who need to create credentials and log in manually.
Magic links should be treated as sensitive — anyone with the link can access the member's account. Always set expiration times (24-72 hours is typical) and limit links to single use when possible.
## Tier-based access
Tier-based memberships give different members access to different levels of content. For example:
| Tier | Offers included | Price |
| ------- | ------------------------------------------------------- | ----------- |
| Starter | Core course library | \$29/month |
| Pro | Core course library + advanced modules + community | \$79/month |
| VIP | All content + live Q\&A channel + 1-on-1 resource vault | \$149/month |
To build a tiered structure:
1. Create a separate **offer** for each tier, adding the appropriate courses and communities to each.
2. Create a separate **checkout page** or **funnel** for each offer, each at the appropriate price point.
3. Build an automation for each tier. Use **Payment Received** as the trigger, filter by the specific offer or product, and add a **Grant Membership Access** action selecting that tier's offer.
4. Optionally, use **contact tags** (e.g. `tier-starter`, `tier-pro`, `tier-vip`) to segment members in your CRM for targeted email campaigns and reporting.
Members who upgrade to a higher tier can be granted the new offer while retaining (or revoking) their lower-tier offer depending on your business rules.
***
## Granting access manually
To grant a single member access to an offer without a purchase:
1. Navigate to **Contacts** and open the contact's record.
2. Click the **Actions** tab and select **Client Portal**.
3. Click **Grant Offer Access**, choose the offer, and confirm.
Access is granted immediately and the content appears in the member's portal.
***
## Revoking access
To remove a member's access to an offer:
* **Manual revocation** — go to the contact record, open the **Client Portal** tab, and click **Revoke Access** next to the relevant offer.
* **Subscription cancellation** — configure the offer's **Offer Access** settings to define what happens on cancellation: revoke immediately or revoke at the end of the billing period.
* **Automation** — use a **Revoke Membership Access** action in a workflow triggered by subscription cancellation, payment failure, or a tag being removed.
Revoking access removes the offer from the member's portal instantly. Any progress the member has made in the course (completed lessons, quiz scores) is retained in your analytics and can be restored if access is re-granted.
***
## Access and the client portal
Members see only the courses and communities included in their active offers when they log in. If they have multiple active offers (for example, a free starter offer plus a paid advanced offer), all included content appears on their portal dashboard side by side.
The portal URL is the same for all members — access is enforced server-side based on each member's grant records, so there is no need to create separate portal URLs per tier.
***
## Frequently asked questions
Access is granted at the offer level, which includes full courses and communities. You cannot restrict a member to a single lesson within a course they have been granted. To achieve granular gating, structure your content as separate courses (each in its own offer) or use drip scheduling to control when individual lessons unlock after enrollment.
Progress data (completed lessons, quiz scores) is stored separately from the access grant. Revoking access hides the content but does not delete progress. If you re-grant access, the member's previous progress is restored and they can pick up where they left off.
Yes. Inside the offer's **Offer Access** settings, you can set an access end date — either a fixed calendar date or a number of days after the member gains access. After that date, the content is automatically hidden from the member's portal.
Use an automation with the **Form Submitted** trigger. Add the form submission condition, then add a **Grant Membership Access** action and select the relevant offer. This works well for free opt-in offers or gated lead magnets.
Yes. A member can hold active access to multiple offers simultaneously. Each offer's content appears in their portal. This is useful if you want to grandfather members into an old tier while also giving them access to new content, or if you run a temporary promotion for existing subscribers.
***
## Magic links for passwordless access
Magic links provide a frictionless login experience — members click a unique link in their email and are logged into the portal instantly, without entering a password or OTP.
### How magic links work
1. A unique, time-limited URL is generated for each member.
2. The link is included in an email (welcome email, course access notification, or manual send).
3. The member clicks the link and is authenticated directly into their portal session.
4. The link expires after a set period or after first use, preventing unauthorized access.
### Sending magic links
Magic links can be included in emails through automation:
1. Create an automation with the appropriate trigger (e.g., **Payment Received**, **Offer Granted**, or **Manual Trigger**).
2. Add a **Send Email** action.
3. In the email body, insert the **magic link** custom value or merge field — the platform generates a unique link for each contact.
4. The member receives the email and clicks the link to access their content.
### Use cases
* **Welcome emails** — new members click one link and immediately access their courses without a separate login step
* **Re-engagement campaigns** — send a magic link to inactive members to bring them back with zero friction
* **VIP access** — grant temporary access to a specific course or community by sending a magic link that authenticates and redirects to the content
Magic links are especially effective for reducing drop-off during onboarding. Members who receive a one-click access link in their welcome email are significantly more likely to log in and engage with content than those who need to create credentials and log in manually.
Magic links should be treated as sensitive — anyone with the link can access the member's account. Always set expiration times (24-72 hours is typical) and limit links to single use when possible.