> ## Documentation Index
> Fetch the complete documentation index at: https://help.hoopai.com/llms.txt
> Use this file to discover all available pages before exploring further.
# Community Groups
> Create and configure groups within your community to organize members by topic, interest, or cohort in the HoopAI platform.
Groups are the primary organizational unit within a community. Rather than a single undifferentiated feed, a well-structured community uses multiple groups to separate discussions by topic, audience level, or purpose — making it easier for members to find relevant conversations and for you to moderate effectively.
## What is a group?
A group is a dedicated space within your community where members with shared interests or goals can interact. Each group has its own set of **channels** (Feed, Chat, Events, or Learning) and its own access and privacy settings. Members can belong to multiple groups simultaneously.
Common group examples:
* **Welcome & Introductions** — where new members introduce themselves
* **Questions & Answers** — a moderated space for member questions
* **Wins & Celebrations** — positive accountability and social proof sharing
* **Advanced Members** — restricted to members at a higher tier
* **Weekly Challenges** — structured engagement with regular prompts
* **Course Discussion** — linked to a specific course for lesson-by-lesson conversation
***
 ## Creating a group
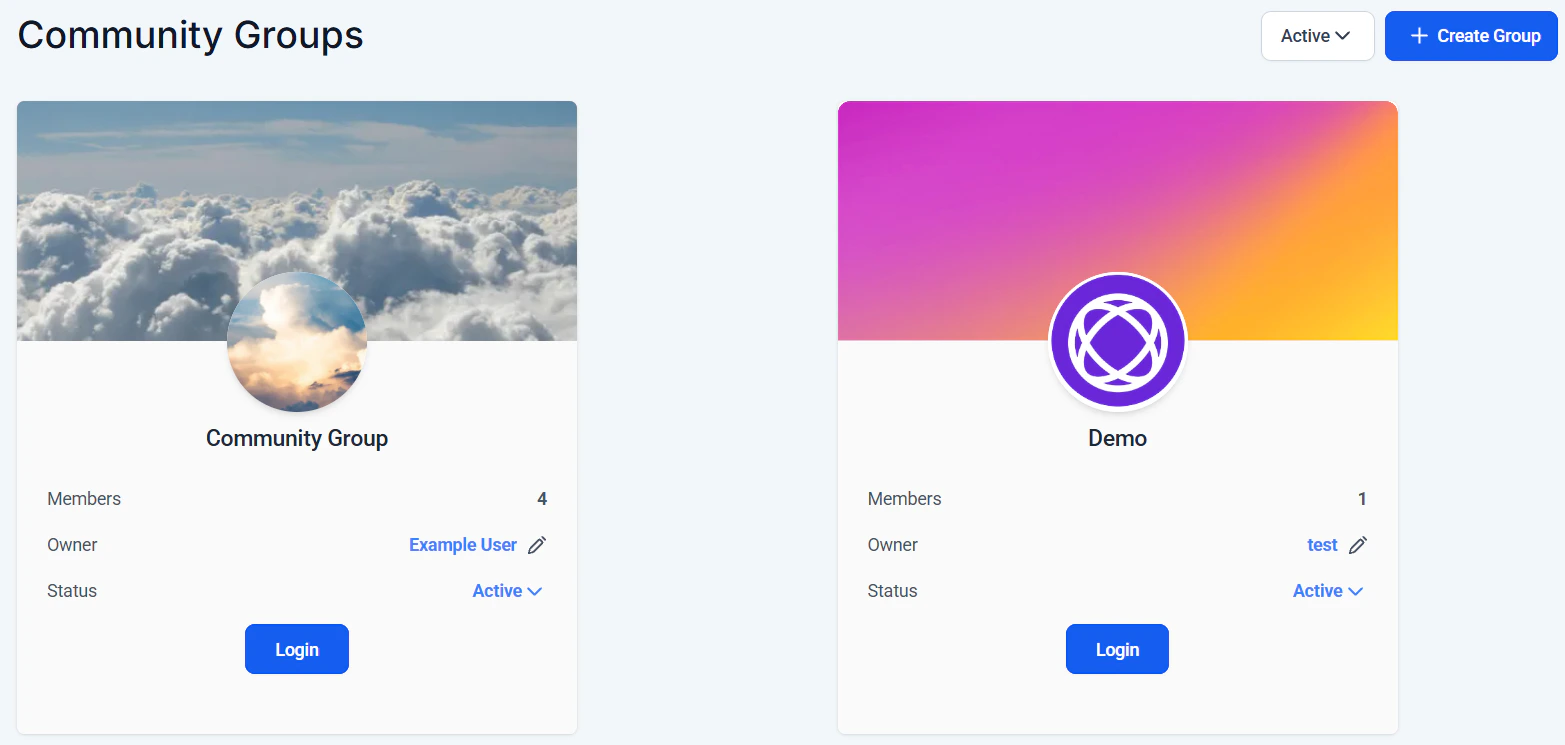
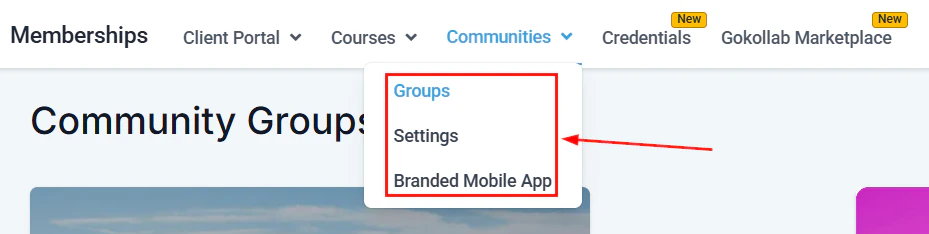
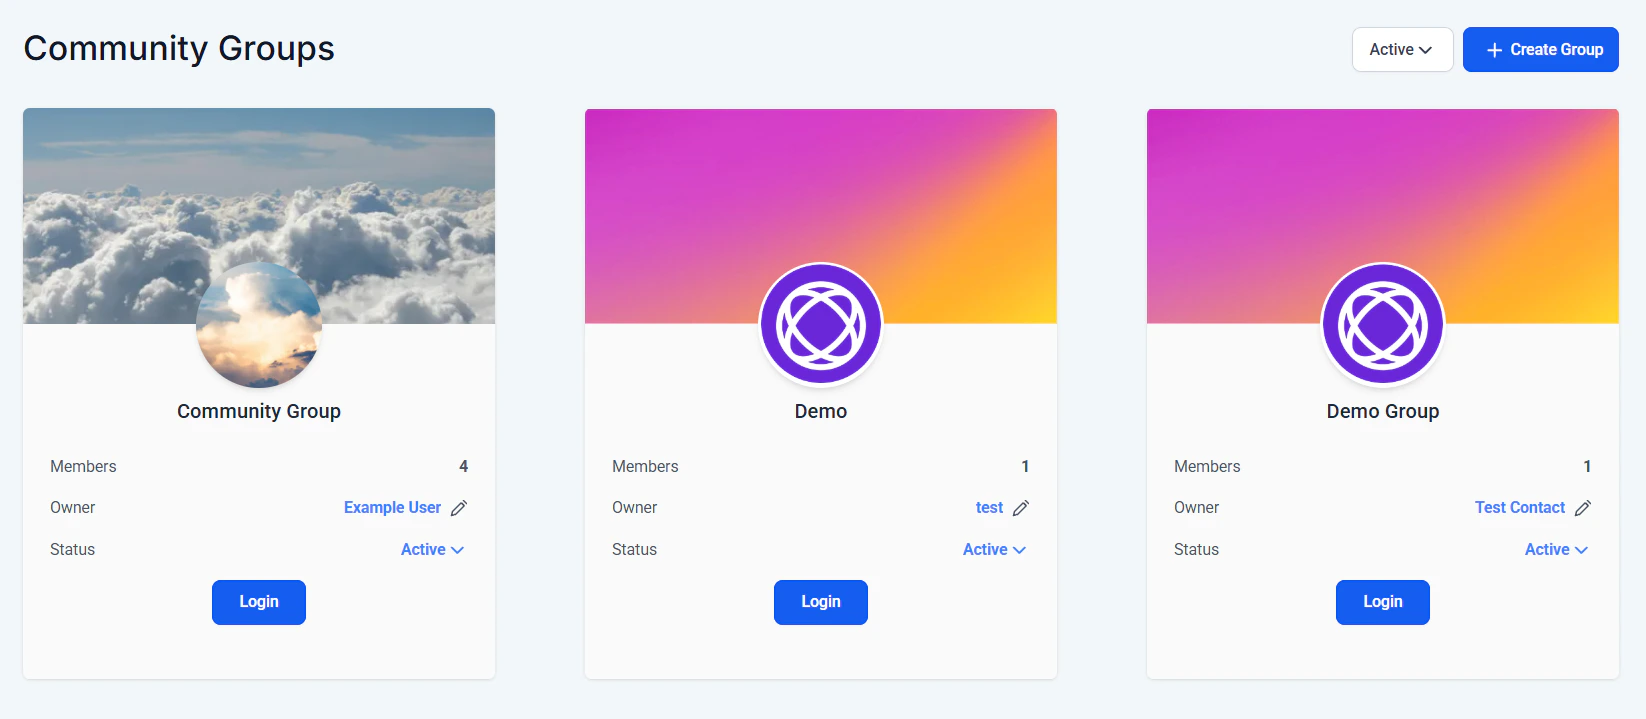
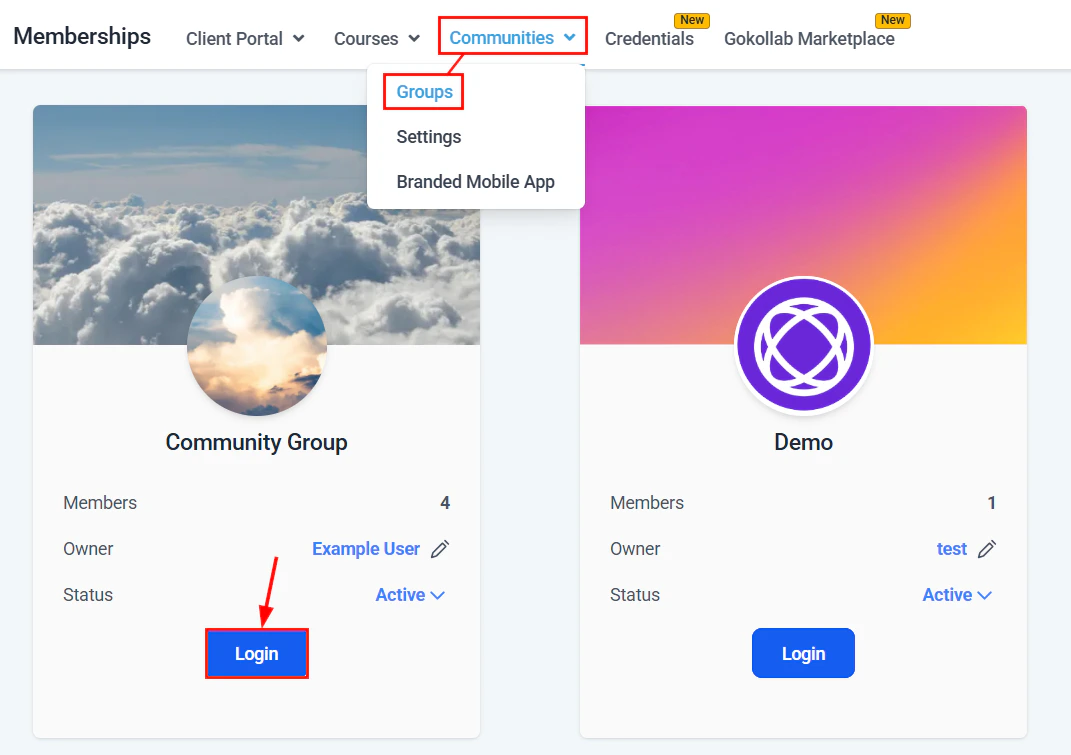
Go to **Memberships and Communities > Communities** in the left sidebar.
Click the community you want to add a group to. If you have not yet created a community, click **+ New Community** first and complete the setup.
Inside the community settings, click **+ Add Group**. Enter a group name and, optionally, a short description that appears in the group header.
Select the primary channel type for this group:
* **Feed** — social-style post wall for discussion, announcements, and sharing
* **Chat** — real-time threaded messaging, similar to a group chat
* **Events** — scheduled events with RSVP and calendar view
* **Learning** — course content embedded directly in the group
You can add multiple channel types to a single group after creation.
Choose who can access the group:
* **Open** — all community members can view and join
* **Private** — members must request to join; admin approves requests
* **Secret** — the group is not visible unless the admin directly invites a member
Optionally restrict the group to members who hold a specific offer, tag, or have met a custom field condition. This allows you to create tier-exclusive groups without manually approving each member.
Add a cover image and group icon. These appear in the group header and on the community homepage when members browse available groups.
Save the group settings. It is now visible (or hidden, depending on privacy settings) to community members.
***
## Creating a group
Go to **Memberships and Communities > Communities** in the left sidebar.
Click the community you want to add a group to. If you have not yet created a community, click **+ New Community** first and complete the setup.
Inside the community settings, click **+ Add Group**. Enter a group name and, optionally, a short description that appears in the group header.
Select the primary channel type for this group:
* **Feed** — social-style post wall for discussion, announcements, and sharing
* **Chat** — real-time threaded messaging, similar to a group chat
* **Events** — scheduled events with RSVP and calendar view
* **Learning** — course content embedded directly in the group
You can add multiple channel types to a single group after creation.
Choose who can access the group:
* **Open** — all community members can view and join
* **Private** — members must request to join; admin approves requests
* **Secret** — the group is not visible unless the admin directly invites a member
Optionally restrict the group to members who hold a specific offer, tag, or have met a custom field condition. This allows you to create tier-exclusive groups without manually approving each member.
Add a cover image and group icon. These appear in the group header and on the community homepage when members browse available groups.
Save the group settings. It is now visible (or hidden, depending on privacy settings) to community members.
***
 ## Group privacy settings
| Privacy level | Who can see the group | Who can join | Best used for |
| ------------- | ----------------------------- | --------------------------------------- | ---------------------------------- |
| Open | All community members | Anyone can join freely | General discussion, introductions |
| Private | All members can see it exists | Members request to join; admin approves | Advanced content, paid tier groups |
| Secret | Only invited members | By invitation only | VIP programs, mastermind groups |
***
## Group privacy settings
| Privacy level | Who can see the group | Who can join | Best used for |
| ------------- | ----------------------------- | --------------------------------------- | ---------------------------------- |
| Open | All community members | Anyone can join freely | General discussion, introductions |
| Private | All members can see it exists | Members request to join; admin approves | Advanced content, paid tier groups |
| Secret | Only invited members | By invitation only | VIP programs, mastermind groups |
***
 ## Adding channels to a group
Each group can contain multiple channels of different types, allowing you to blend interaction styles within a single group:
1. Inside the group settings, click **+ Add Channel**.
2. Name the channel (e.g. "Weekly Wins", "Live Call Chat", "Module 2 Discussion").
3. Select the channel type: Feed, Chat, Events, or Learning.
4. Optionally mark the channel as **Private** to restrict it to certain roles within the group.
Members see all channels listed in the group sidebar and can switch between them.
***
## Reordering groups and channels
Drag and drop groups in the community sidebar to change the order in which they appear. Similarly, drag and drop channels within a group to set the default display order. The first channel in the list is opened by default when a member enters the group.
***
## Member approval for private groups
When a group is set to **Private**, members who click **Join Group** are placed in a pending queue. Admins and moderators review requests from the **Members** tab:
1. Navigate to the group and click **Members**.
2. Click the **Requests** tab to see pending join requests.
3. Click **Approve** or **Decline** for each request.
You can also configure **Approval Questions** — custom questions shown to members when they request to join. Their answers appear alongside the join request, helping you decide whether to approve.
***
## Linking a group to a course
A Learning channel inside a group can display a specific course, turning the group into a cohort learning space:
1. Add a Learning channel to the group.
2. Select the course to embed.
3. Members see both the course content and the social channels side by side, allowing them to discuss lessons in context.
***
## Group notifications
Members receive notifications for new activity in their joined groups. Notification frequency options include:
* **Immediately** — a notification for every new post or comment
* **Daily digest** — a summary of the day's activity
* **Weekly digest** — a weekly summary email
Members manage their notification preferences from the community notification settings in their portal. Admins cannot override individual member notification preferences but can configure the default notification behavior for the group.
***
## Managing groups
From the community admin panel you can:
* **Edit** — change the group name, description, cover image, and privacy settings
* **Archive** — hide the group from the community homepage without deleting it or its content
* **Delete** — permanently remove the group and all of its posts, comments, and content
* **Transfer ownership** — reassign the group to another admin account
Deleting a group permanently removes all posts, comments, and channels within it. Archive a group instead of deleting it if you may want to restore it later.
***
## Frequently asked questions
There is no published limit on the number of groups within a community. In practice, three to seven well-defined groups are easier for members to navigate than twenty loosely defined ones. Add more groups as your community and its needs grow.
Yes. In the group access settings, set the group to **Private** and configure the access rule to require a specific contact tag (e.g. `vip-member`). Members who have that tag can join freely; others see the group but are prompted to request access and go through the approval queue.
By default, only admins can create groups. You can assign a member the **Moderator** role to allow them to assist with group management, but the ability to create new groups is reserved for admins.
Yes. In the group settings, enable **Paid** access and configure the subscription type, billing frequency, and price. Members who want to join the group are prompted to pay before gaining access. This is separate from course offer pricing and is handled directly within the community group settings.
Their posts and comments remain in the group's history. The content is not deleted when a member is removed. If you need to remove a specific member's posts, do so manually using the content moderation tools before or after removing the member from the group.
***
## Private channels and channel emojis
Within a group, individual channels can be set to **Private** — visible only to members with a specific role or access level. This lets you create exclusive sub-spaces inside a group (e.g., a private "Coaches Only" chat channel within a public group).
You can also assign custom emojis to channels:
1. Open the channel settings.
2. Click the emoji icon next to the channel name.
3. Select an emoji that represents the channel's purpose (e.g., a fire emoji for "Hot Takes" or a book emoji for "Resources").
Emojis appear in the group sidebar next to the channel name, making it easier for members to scan and navigate.
***
## Custom CSS/JS in groups
Admins can inject custom CSS and JavaScript into community groups to customize the visual experience beyond the default theme:
1. Open the community group settings.
2. Navigate to the **Customization** or **Advanced** section.
3. Add custom CSS to change colors, fonts, spacing, and layout within the group.
4. Add custom JavaScript for interactive elements or third-party integrations.
```css theme={null}
/* Example: custom group header color */
.community-group-header {
background: linear-gradient(135deg, #667eea, #764ba2);
color: white;
}
```
Custom CSS/JS in groups affects only the group where it is applied. Test changes thoroughly — malformed code can break the group layout for all members.
***
## Group theme customization
Customize the visual theme of individual groups to give each one a distinct identity:
* **Cover image** — set a unique banner image for the group header
* **Group icon** — upload a custom icon that appears in the community sidebar
* **Color accent** — choose a primary color for buttons and highlights within the group
* **Layout** — select between card-style and feed-style post layouts
These options are available in the group settings under **Appearance** or **Theme**.
***
## Navigation tab customization
Customize which tabs appear in the group's navigation bar and their order:
1. Open the group settings and navigate to **Tabs** or **Navigation**.
2. Toggle tabs on or off: Feed, Chat, Events, Learning, Members, About.
3. Drag tabs to reorder them — the first tab is the default view when a member enters the group.
4. Rename tabs if needed (e.g., rename "Feed" to "Discussion" or "Learning" to "Course").
This lets you tailor the group experience to its purpose. A course-focused group might lead with the Learning tab, while a social group leads with the Feed tab.
## Adding channels to a group
Each group can contain multiple channels of different types, allowing you to blend interaction styles within a single group:
1. Inside the group settings, click **+ Add Channel**.
2. Name the channel (e.g. "Weekly Wins", "Live Call Chat", "Module 2 Discussion").
3. Select the channel type: Feed, Chat, Events, or Learning.
4. Optionally mark the channel as **Private** to restrict it to certain roles within the group.
Members see all channels listed in the group sidebar and can switch between them.
***
## Reordering groups and channels
Drag and drop groups in the community sidebar to change the order in which they appear. Similarly, drag and drop channels within a group to set the default display order. The first channel in the list is opened by default when a member enters the group.
***
## Member approval for private groups
When a group is set to **Private**, members who click **Join Group** are placed in a pending queue. Admins and moderators review requests from the **Members** tab:
1. Navigate to the group and click **Members**.
2. Click the **Requests** tab to see pending join requests.
3. Click **Approve** or **Decline** for each request.
You can also configure **Approval Questions** — custom questions shown to members when they request to join. Their answers appear alongside the join request, helping you decide whether to approve.
***
## Linking a group to a course
A Learning channel inside a group can display a specific course, turning the group into a cohort learning space:
1. Add a Learning channel to the group.
2. Select the course to embed.
3. Members see both the course content and the social channels side by side, allowing them to discuss lessons in context.
***
## Group notifications
Members receive notifications for new activity in their joined groups. Notification frequency options include:
* **Immediately** — a notification for every new post or comment
* **Daily digest** — a summary of the day's activity
* **Weekly digest** — a weekly summary email
Members manage their notification preferences from the community notification settings in their portal. Admins cannot override individual member notification preferences but can configure the default notification behavior for the group.
***
## Managing groups
From the community admin panel you can:
* **Edit** — change the group name, description, cover image, and privacy settings
* **Archive** — hide the group from the community homepage without deleting it or its content
* **Delete** — permanently remove the group and all of its posts, comments, and content
* **Transfer ownership** — reassign the group to another admin account
Deleting a group permanently removes all posts, comments, and channels within it. Archive a group instead of deleting it if you may want to restore it later.
***
## Frequently asked questions
There is no published limit on the number of groups within a community. In practice, three to seven well-defined groups are easier for members to navigate than twenty loosely defined ones. Add more groups as your community and its needs grow.
Yes. In the group access settings, set the group to **Private** and configure the access rule to require a specific contact tag (e.g. `vip-member`). Members who have that tag can join freely; others see the group but are prompted to request access and go through the approval queue.
By default, only admins can create groups. You can assign a member the **Moderator** role to allow them to assist with group management, but the ability to create new groups is reserved for admins.
Yes. In the group settings, enable **Paid** access and configure the subscription type, billing frequency, and price. Members who want to join the group are prompted to pay before gaining access. This is separate from course offer pricing and is handled directly within the community group settings.
Their posts and comments remain in the group's history. The content is not deleted when a member is removed. If you need to remove a specific member's posts, do so manually using the content moderation tools before or after removing the member from the group.
***
## Private channels and channel emojis
Within a group, individual channels can be set to **Private** — visible only to members with a specific role or access level. This lets you create exclusive sub-spaces inside a group (e.g., a private "Coaches Only" chat channel within a public group).
You can also assign custom emojis to channels:
1. Open the channel settings.
2. Click the emoji icon next to the channel name.
3. Select an emoji that represents the channel's purpose (e.g., a fire emoji for "Hot Takes" or a book emoji for "Resources").
Emojis appear in the group sidebar next to the channel name, making it easier for members to scan and navigate.
***
## Custom CSS/JS in groups
Admins can inject custom CSS and JavaScript into community groups to customize the visual experience beyond the default theme:
1. Open the community group settings.
2. Navigate to the **Customization** or **Advanced** section.
3. Add custom CSS to change colors, fonts, spacing, and layout within the group.
4. Add custom JavaScript for interactive elements or third-party integrations.
```css theme={null}
/* Example: custom group header color */
.community-group-header {
background: linear-gradient(135deg, #667eea, #764ba2);
color: white;
}
```
Custom CSS/JS in groups affects only the group where it is applied. Test changes thoroughly — malformed code can break the group layout for all members.
***
## Group theme customization
Customize the visual theme of individual groups to give each one a distinct identity:
* **Cover image** — set a unique banner image for the group header
* **Group icon** — upload a custom icon that appears in the community sidebar
* **Color accent** — choose a primary color for buttons and highlights within the group
* **Layout** — select between card-style and feed-style post layouts
These options are available in the group settings under **Appearance** or **Theme**.
***
## Navigation tab customization
Customize which tabs appear in the group's navigation bar and their order:
1. Open the group settings and navigate to **Tabs** or **Navigation**.
2. Toggle tabs on or off: Feed, Chat, Events, Learning, Members, About.
3. Drag tabs to reorder them — the first tab is the default view when a member enters the group.
4. Rename tabs if needed (e.g., rename "Feed" to "Discussion" or "Learning" to "Course").
This lets you tailor the group experience to its purpose. A course-focused group might lead with the Learning tab, while a social group leads with the Feed tab.