> ## Documentation Index
> Fetch the complete documentation index at: https://help.hoopai.com/llms.txt
> Use this file to discover all available pages before exploring further.
# Built-in image editor
> Crop, resize, flip, retouch, and annotate images directly inside the HoopAI media library without external tools.
The HoopAI platform includes a built-in image editor directly inside Media Storage. You can crop, rotate, flip, adjust colors, add text, draw, and apply filters to any image without downloading it, opening a separate application, and re-uploading. Edited images are saved as new files in your media library, preserving the original.
The built-in image editor currently supports **PNG and JPEG** files only. Other image formats (WebP, SVG, GIF) must be converted before they can be edited with this tool. The editor is available on desktop and is not yet accessible in the HoopAI mobile app.
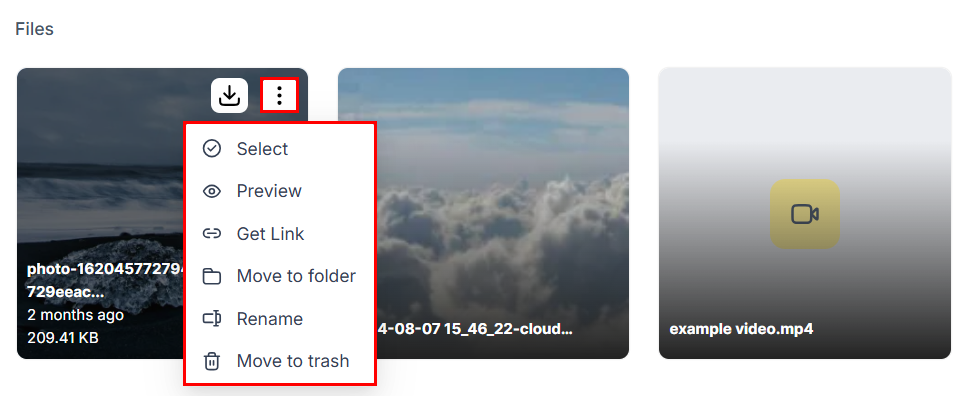 ## Opening the image editor
1. Open **Media Storage** from the left sidebar
2. Hover over the image you want to edit
3. Click the **three-dot icon** that appears on the image
4. Select **Edit**
The editor opens in a modal window overlaying the media library. Your original file is not modified until you explicitly save a new version.
You can also open the editor from within a supported module (Social Planner, Funnel builder, Email builder) by hovering over an image in the media picker and selecting **Edit**.
## Editing tools
### Crop
Click **Crop** to trim the image to a specific area. You can:
* Drag the crop handles freely to define a custom region
* Choose a **preset aspect ratio** (1:1 for square, 4:3, 16:9, 9:16 for portrait) from the toolbar to constrain the crop to a standard proportion
* Zoom in on the crop preview to check fine details before applying
### Rotate and flip
* **Rotate left / Rotate right** — rotate the image 90 degrees at a time
* **Flip horizontal** — mirror the image left-to-right
* **Flip vertical** — mirror the image top-to-bottom
These tools are useful for correcting photos taken in the wrong orientation or creating mirrored versions of logos and icons.
### Filters
Apply a one-click filter to change the overall look and feel of the image. Available filters include presets similar to photo editing software: matte, vivid, faded, grayscale, and others. Filters are non-destructive within the editor session — you can switch between them or remove them before saving.
### Adjustments
Fine-tune the image using manual sliders:
| Adjustment | What it does |
| ---------- | ------------------------------------------------------------------ |
| Brightness | Makes the image lighter or darker |
| Contrast | Increases or decreases the difference between light and dark areas |
| Saturation | Boosts or mutes color intensity |
| Blur | Applies a Gaussian blur across the entire image |
Drag each slider left or right to decrease or increase the effect. The preview updates in real time.
### Text
Click **Text** to add a text layer on top of the image. Options include:
* **Font family** — choose from available system fonts
* **Font size** — set the size in points
* **Alignment** — left, center, or right
* **Font color** — pick from the color palette or enter a hex code
* **Background color** — add a solid color fill behind the text block
* **Line spacing** — adjust the vertical space between lines
Click and drag the text block to position it anywhere on the canvas. Text added this way is permanently baked into the image when you save — it cannot be re-edited as a text layer after saving.
### Stickers
Click **Sticker** to overlay an emoji or geometric shape on the image. For each sticker you can adjust:
* **Opacity** — make the sticker transparent or fully opaque
* **Color** — for shapes, change the fill color
* **Size and position** — drag and resize the sticker on the canvas
Stickers are useful for adding visual callouts, badges, or decorative elements to promotional images.
### Brush
Click **Brush** to draw freehand directly on the image. Adjust:
* **Hardness** — a soft brush feathers the edges; a hard brush produces crisp lines
* **Size** — brush diameter in pixels
* **Color** — pick any color from the palette
Use the brush to annotate screenshots, highlight specific areas, or add simple graphical marks.
### Undo and redo
Use **Undo** (or Ctrl+Z / Cmd+Z) to reverse the last action, and **Redo** to reapply it. The undo history is maintained for the duration of your editing session.
## Opening the image editor
1. Open **Media Storage** from the left sidebar
2. Hover over the image you want to edit
3. Click the **three-dot icon** that appears on the image
4. Select **Edit**
The editor opens in a modal window overlaying the media library. Your original file is not modified until you explicitly save a new version.
You can also open the editor from within a supported module (Social Planner, Funnel builder, Email builder) by hovering over an image in the media picker and selecting **Edit**.
## Editing tools
### Crop
Click **Crop** to trim the image to a specific area. You can:
* Drag the crop handles freely to define a custom region
* Choose a **preset aspect ratio** (1:1 for square, 4:3, 16:9, 9:16 for portrait) from the toolbar to constrain the crop to a standard proportion
* Zoom in on the crop preview to check fine details before applying
### Rotate and flip
* **Rotate left / Rotate right** — rotate the image 90 degrees at a time
* **Flip horizontal** — mirror the image left-to-right
* **Flip vertical** — mirror the image top-to-bottom
These tools are useful for correcting photos taken in the wrong orientation or creating mirrored versions of logos and icons.
### Filters
Apply a one-click filter to change the overall look and feel of the image. Available filters include presets similar to photo editing software: matte, vivid, faded, grayscale, and others. Filters are non-destructive within the editor session — you can switch between them or remove them before saving.
### Adjustments
Fine-tune the image using manual sliders:
| Adjustment | What it does |
| ---------- | ------------------------------------------------------------------ |
| Brightness | Makes the image lighter or darker |
| Contrast | Increases or decreases the difference between light and dark areas |
| Saturation | Boosts or mutes color intensity |
| Blur | Applies a Gaussian blur across the entire image |
Drag each slider left or right to decrease or increase the effect. The preview updates in real time.
### Text
Click **Text** to add a text layer on top of the image. Options include:
* **Font family** — choose from available system fonts
* **Font size** — set the size in points
* **Alignment** — left, center, or right
* **Font color** — pick from the color palette or enter a hex code
* **Background color** — add a solid color fill behind the text block
* **Line spacing** — adjust the vertical space between lines
Click and drag the text block to position it anywhere on the canvas. Text added this way is permanently baked into the image when you save — it cannot be re-edited as a text layer after saving.
### Stickers
Click **Sticker** to overlay an emoji or geometric shape on the image. For each sticker you can adjust:
* **Opacity** — make the sticker transparent or fully opaque
* **Color** — for shapes, change the fill color
* **Size and position** — drag and resize the sticker on the canvas
Stickers are useful for adding visual callouts, badges, or decorative elements to promotional images.
### Brush
Click **Brush** to draw freehand directly on the image. Adjust:
* **Hardness** — a soft brush feathers the edges; a hard brush produces crisp lines
* **Size** — brush diameter in pixels
* **Color** — pick any color from the palette
Use the brush to annotate screenshots, highlight specific areas, or add simple graphical marks.
### Undo and redo
Use **Undo** (or Ctrl+Z / Cmd+Z) to reverse the last action, and **Redo** to reapply it. The undo history is maintained for the duration of your editing session.
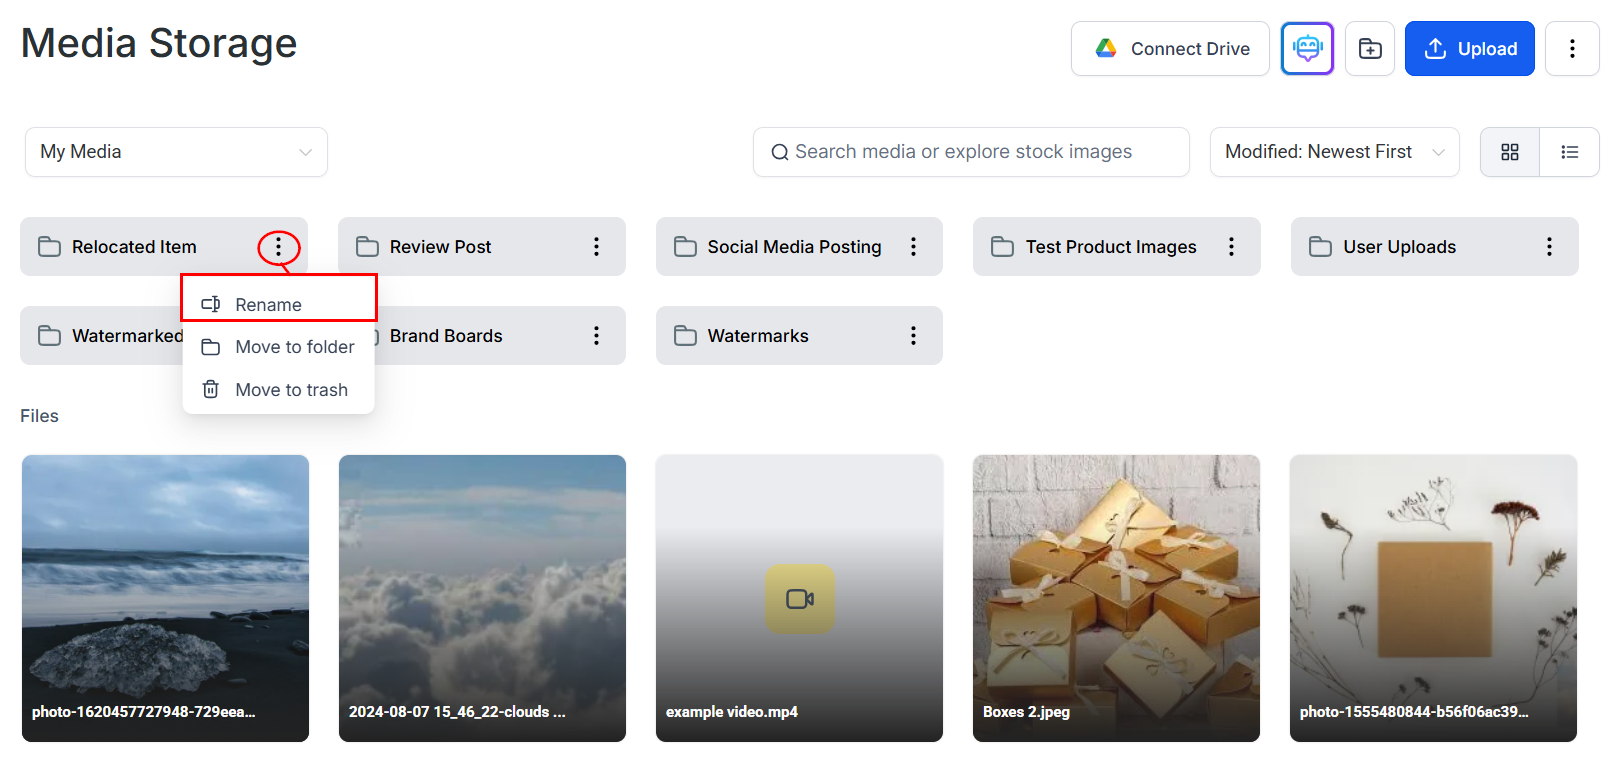 ## Saving an edited image
When you are satisfied with your edits:
1. Click **Save** in the editor toolbar
2. A dialog appears prompting you to name the new image file
3. Optionally choose a destination folder from the **Save to Folder** dropdown
4. Click **Save** to confirm
The edited image is saved as a new file in your media library. The original file is untouched and remains in its original location. If you want to replace the original, delete it manually after saving the edited version.
Use a consistent naming convention when saving edited files — for example, appending `-edited`, `-cropped`, or `-web` to the original filename. This makes it easy to identify which version of an image is in use across your funnels and emails.
## Editing images from within a builder
The image editor is also accessible while you are working inside the funnel builder, email builder, or social planner. When you open the media picker from one of these tools:
1. Hover over the image you want to edit
2. Click the **Edit** option
3. Make your changes in the editor modal
4. Save — the edited image is added to your media library and automatically selected for the element you were configuring
This workflow lets you adjust an image to the right crop or size without leaving the builder.
## Limitations
* **Supported formats:** PNG and JPEG only. WebP, GIF, SVG, and TIFF images cannot be edited with the built-in editor.
* **Bulk editing:** Images must be edited one at a time. There is no batch-edit mode.
* **Mobile:** The image editor is not available in the HoopAI mobile app.
* **Non-destructive layers:** Text, stickers, and brush strokes are permanently merged into the image on save. They cannot be repositioned or removed in a future editing session.
***
## FAQs
No. The editor always saves the result as a new file. Your original image remains in the library unchanged. If you want to use only the edited version, delete the original manually.
The crop tool works visually using drag handles and preset aspect ratios. There is no numeric input for setting exact pixel dimensions in the crop dialog. To get a specific pixel size, crop to the correct aspect ratio and then resize the saved image using an external tool before re-uploading, or size your crop relative to the image dimensions shown in the preview.
Not directly. Convert the file to PNG or JPEG first using a conversion tool such as Squoosh, then upload the converted file and edit it with the built-in editor.
Background removal is not a built-in feature of the image editor. Use an external tool such as remove.bg to remove backgrounds, then upload the resulting transparent PNG to Media Storage.
## Saving an edited image
When you are satisfied with your edits:
1. Click **Save** in the editor toolbar
2. A dialog appears prompting you to name the new image file
3. Optionally choose a destination folder from the **Save to Folder** dropdown
4. Click **Save** to confirm
The edited image is saved as a new file in your media library. The original file is untouched and remains in its original location. If you want to replace the original, delete it manually after saving the edited version.
Use a consistent naming convention when saving edited files — for example, appending `-edited`, `-cropped`, or `-web` to the original filename. This makes it easy to identify which version of an image is in use across your funnels and emails.
## Editing images from within a builder
The image editor is also accessible while you are working inside the funnel builder, email builder, or social planner. When you open the media picker from one of these tools:
1. Hover over the image you want to edit
2. Click the **Edit** option
3. Make your changes in the editor modal
4. Save — the edited image is added to your media library and automatically selected for the element you were configuring
This workflow lets you adjust an image to the right crop or size without leaving the builder.
## Limitations
* **Supported formats:** PNG and JPEG only. WebP, GIF, SVG, and TIFF images cannot be edited with the built-in editor.
* **Bulk editing:** Images must be edited one at a time. There is no batch-edit mode.
* **Mobile:** The image editor is not available in the HoopAI mobile app.
* **Non-destructive layers:** Text, stickers, and brush strokes are permanently merged into the image on save. They cannot be repositioned or removed in a future editing session.
***
## FAQs
No. The editor always saves the result as a new file. Your original image remains in the library unchanged. If you want to use only the edited version, delete the original manually.
The crop tool works visually using drag handles and preset aspect ratios. There is no numeric input for setting exact pixel dimensions in the crop dialog. To get a specific pixel size, crop to the correct aspect ratio and then resize the saved image using an external tool before re-uploading, or size your crop relative to the image dimensions shown in the preview.
Not directly. Convert the file to PNG or JPEG first using a conversion tool such as Squoosh, then upload the converted file and edit it with the built-in editor.
Background removal is not a built-in feature of the image editor. Use an external tool such as remove.bg to remove backgrounds, then upload the resulting transparent PNG to Media Storage.