> ## Documentation Index
> Fetch the complete documentation index at: https://help.hoopai.com/llms.txt
> Use this file to discover all available pages before exploring further.
# Email templates
> Build reusable email templates with the drag-and-drop builder — add elements, customize layouts, apply branding, and access the template library.
Email Templates are reusable layouts that serve as the foundation for your campaigns. Create custom templates aligned with your brand, incorporating images, videos, logos, and recurring content for use across multiple campaigns.
Navigate to **Marketing > Emails > Templates** to access the Templates section.
 ## Creating a template
Click **+ New** to start. Choose from:
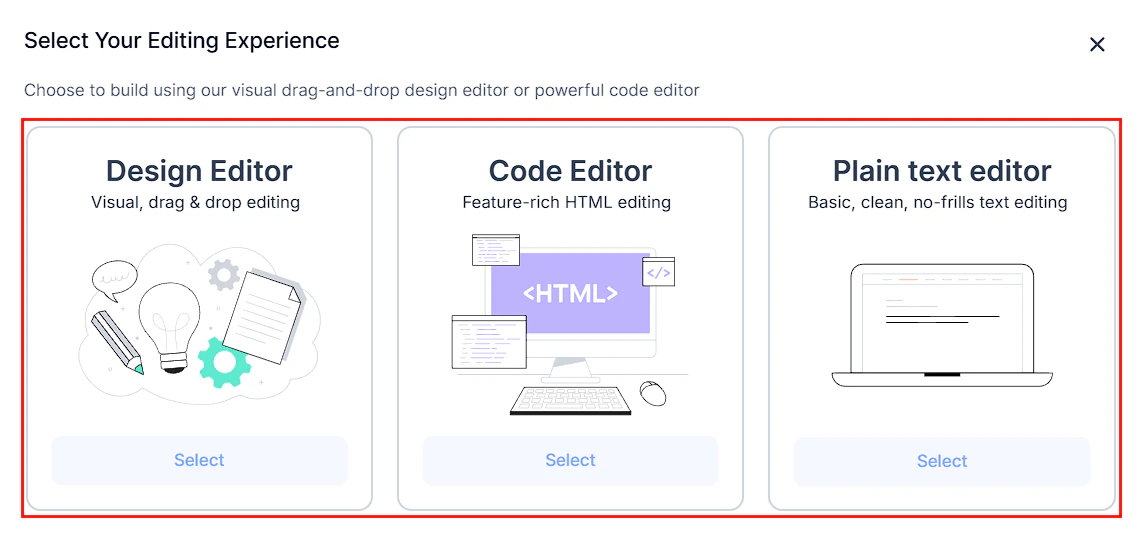
Start from zero with the Design Editor or Code Editor
Select from pre-designed, professionally styled system templates
Duplicate a template from a previously sent or scheduled campaign
Import an HTML email template from another platform
***
## Managing templates
* **Search** by name to locate specific templates quickly
* **Filter** by Active or Archived status
* **Create folders** to organize templates by campaign type or purpose
* **Switch views** between Recent (recently accessed) and List (all templates)
***
## Email builder elements
The drag-and-drop email builder provides a comprehensive set of content elements.
## Creating a template
Click **+ New** to start. Choose from:
Start from zero with the Design Editor or Code Editor
Select from pre-designed, professionally styled system templates
Duplicate a template from a previously sent or scheduled campaign
Import an HTML email template from another platform
***
## Managing templates
* **Search** by name to locate specific templates quickly
* **Filter** by Active or Archived status
* **Create folders** to organize templates by campaign type or purpose
* **Switch views** between Recent (recently accessed) and List (all templates)
***
## Email builder elements
The drag-and-drop email builder provides a comprehensive set of content elements.
 Add headings and body text to your email. After dragging the element into the builder, format text using the toolbar: fonts, size, alignment, bold, italic, color, and heading types. Add text snippets by clicking the dog-eared paper icon. Adjust padding and background color from the left sidebar settings.
Drag and drop the image element to add visuals. Click the pencil icon to upload from your media library or create an AI-generated image. Set alt text, a redirect link, width and height, background color, alignment, and padding. Use the **Visible In** setting to show the image on Desktop, Mobile, or Both.
Add a call-to-action button to drive clicks and conversions. Customize button text, font, size, alignment, full-width toggle, background color, border, border radius, and padding. Set the button action to URL, email, file, phone, or other.
Embed a video thumbnail with a play button that links to your hosted video. Supports YouTube (including Shorts), Vimeo, and other hosts. Customize the thumbnail, size, opacity, padding, and visibility by device. Use custom values for dynamic video URLs.
Add headings and body text to your email. After dragging the element into the builder, format text using the toolbar: fonts, size, alignment, bold, italic, color, and heading types. Add text snippets by clicking the dog-eared paper icon. Adjust padding and background color from the left sidebar settings.
Drag and drop the image element to add visuals. Click the pencil icon to upload from your media library or create an AI-generated image. Set alt text, a redirect link, width and height, background color, alignment, and padding. Use the **Visible In** setting to show the image on Desktop, Mobile, or Both.
Add a call-to-action button to drive clicks and conversions. Customize button text, font, size, alignment, full-width toggle, background color, border, border radius, and padding. Set the button action to URL, email, file, phone, or other.
Embed a video thumbnail with a play button that links to your hosted video. Supports YouTube (including Shorts), Vimeo, and other hosts. Customize the thumbnail, size, opacity, padding, and visibility by device. Use custom values for dynamic video URLs.
 Add social media icons linked to your profiles. Click **Add** to add platforms, edit links, choose icons, and adjust padding. Supports all major platforms.
Upload your company logo (JPG, PNG, or GIF). Set a redirect link, alt text, and dynamic URL using custom values. Use the pencil icon to replace and the trash icon to delete.
Adds account information, compliance text, and unsubscribe links automatically. Edit the footer text, background color, padding, and visibility. Keeping a footer ensures CAN-SPAM compliance.
Add horizontal dividers to separate content sections. Customize height, width, alignment, line type (solid, dashed, dotted), color, and padding.
Add vertical spacing between elements without visual content. Set height and background color. Adapts responsively across Desktop and Mobile views.
For advanced users — drag in an HTML code block and write custom HTML in the built-in code editor. Useful for custom designs beyond the standard builder capabilities.
Use these elements to pull in dynamic content from an RSS feed, automatically populating email content with your latest blog posts or news updates.
Embed a product shopping cart element inside your email to showcase products and facilitate purchases directly from the email.
Add a multi-image slider to display a gallery of images or product photos in a compact, interactive format.
Add a browser link at the top of the email ("View in browser") for recipients whose email clients block images or styling.
***
## Email layouts
Layouts define how content is distributed within each section of your email.
Add social media icons linked to your profiles. Click **Add** to add platforms, edit links, choose icons, and adjust padding. Supports all major platforms.
Upload your company logo (JPG, PNG, or GIF). Set a redirect link, alt text, and dynamic URL using custom values. Use the pencil icon to replace and the trash icon to delete.
Adds account information, compliance text, and unsubscribe links automatically. Edit the footer text, background color, padding, and visibility. Keeping a footer ensures CAN-SPAM compliance.
Add horizontal dividers to separate content sections. Customize height, width, alignment, line type (solid, dashed, dotted), color, and padding.
Add vertical spacing between elements without visual content. Set height and background color. Adapts responsively across Desktop and Mobile views.
For advanced users — drag in an HTML code block and write custom HTML in the built-in code editor. Useful for custom designs beyond the standard builder capabilities.
Use these elements to pull in dynamic content from an RSS feed, automatically populating email content with your latest blog posts or news updates.
Embed a product shopping cart element inside your email to showcase products and facilitate purchases directly from the email.
Add a multi-image slider to display a gallery of images or product photos in a compact, interactive format.
Add a browser link at the top of the email ("View in browser") for recipients whose email clients block images or styling.
***
## Email layouts
Layouts define how content is distributed within each section of your email.
 ### Column layouts
Choose from single-column, double-column, or multi-column layouts for any section. Each column can contain any combination of elements.
### Layout settings
Control spacing around sections using Top, Bottom, Left, and Right padding values (in pixels).
Set the section to full-width or content-width. Customize background colors or apply patterns to create visually distinct sections.
Customize borders on any layout section — set color, thickness, and corner radius (globally or per edge) for unique styling.
By default, new templates have zero spacing before and after text tags, while text elements have a default padding of 12px.
***
## Appearance tab
The Appearance tab controls global-level settings that apply to all emails by default.
Set the default background color, body color, content width, and background image for all emails using this template.
Set default button radius, color, font type, size, and styling to maintain consistent CTAs across all emails.
Set default divider style, color, and dimensions.
Add custom CSS to override or extend default styles. For advanced users only.
Set mobile-specific overrides for font sizes, padding, and element visibility.
Customize the color and underline behavior of hyperlinks throughout the email.
Set the default font family, size, and color for all body text in the template.
***
## Template library
### Column layouts
Choose from single-column, double-column, or multi-column layouts for any section. Each column can contain any combination of elements.
### Layout settings
Control spacing around sections using Top, Bottom, Left, and Right padding values (in pixels).
Set the section to full-width or content-width. Customize background colors or apply patterns to create visually distinct sections.
Customize borders on any layout section — set color, thickness, and corner radius (globally or per edge) for unique styling.
By default, new templates have zero spacing before and after text tags, while text elements have a default padding of 12px.
***
## Appearance tab
The Appearance tab controls global-level settings that apply to all emails by default.
Set the default background color, body color, content width, and background image for all emails using this template.
Set default button radius, color, font type, size, and styling to maintain consistent CTAs across all emails.
Set default divider style, color, and dimensions.
Add custom CSS to override or extend default styles. For advanced users only.
Set mobile-specific overrides for font sizes, padding, and element visibility.
Customize the color and underline behavior of hyperlinks throughout the email.
Set the default font family, size, and color for all body text in the template.
***
## Template library
 The Email Template Library provides access to dozens of professionally designed, customizable templates.
Navigate to **Marketing > Emails > Templates**, click **+New**, and select **Email Marketing Templates**.
Browse by category or filter using:
* **All Templates** — all available templates
* **My Templates** — templates you have created or uploaded
* **Shared With Me** — templates others have shared with you
* **System Templates** — default templates available to everyone
* **Favourites** — templates you have starred
Sort by name, date, or relevance. Hover over any template and click the heart icon to add it to your Favourites. Click to select and open it in the builder.
***
## Advanced template features
The Email Template Library provides access to dozens of professionally designed, customizable templates.
Navigate to **Marketing > Emails > Templates**, click **+New**, and select **Email Marketing Templates**.
Browse by category or filter using:
* **All Templates** — all available templates
* **My Templates** — templates you have created or uploaded
* **Shared With Me** — templates others have shared with you
* **System Templates** — default templates available to everyone
* **Favourites** — templates you have starred
Sort by name, date, or relevance. Hover over any template and click the heart icon to add it to your Favourites. Click to select and open it in the builder.
***
## Advanced template features
 Save any individual element (button, text block, banner) to reuse it across multiple templates. Use the **Save Elements** feature to build a library of reusable components.
Show or hide specific elements based on a contact's custom field values. Use conditional elements to create personalized email experiences from a single template.
Use the **Email AI** tool to generate or refine email copy directly within the builder. Access it from the text element's toolbar.
Preview how custom field values (first name, company, etc.) will render in your email before sending using the **Preview Custom Fields** feature.
Add GIFs to your emails by uploading them to the media library and using the Image element. GIFs animate in most email clients that support HTML.
Save any individual element (button, text block, banner) to reuse it across multiple templates. Use the **Save Elements** feature to build a library of reusable components.
Show or hide specific elements based on a contact's custom field values. Use conditional elements to create personalized email experiences from a single template.
Use the **Email AI** tool to generate or refine email copy directly within the builder. Access it from the text element's toolbar.
Preview how custom field values (first name, company, etc.) will render in your email before sending using the **Preview Custom Fields** feature.
Add GIFs to your emails by uploading them to the media library and using the Image element. GIFs animate in most email clients that support HTML.
 Use Google Fonts in your email templates by selecting them from the font picker in the Appearance tab or text element settings.
Switch to the Plain Text Editor to create a simple, unformatted text-only version of your email — useful for transactional or personal-style emails.
Import existing email templates from Mailchimp or ActiveCampaign into the builder to migrate your email designs without starting from scratch.
Preview your email in Mobile view and hide specific elements on mobile to optimize the reading experience for smartphone users.
***
## Frequently asked questions
Yes. The email builder supports importing HTML templates from Mailchimp, ActiveCampaign, and other platforms. Use the **Import Email** option when creating a new template.
Conditional elements let you show or hide specific blocks of content based on a contact's custom field values. For example, you could show a different header image to contacts in different cities — all from a single template.
The Design Editor is the visual drag-and-drop interface. The Code Editor lets you write raw HTML for fully custom email layouts. You can start from a blank template in either mode.
Yes. Use the **Save Elements** feature to save any element (button, text block, banner image) and insert it into other templates. This is useful for maintaining consistent CTAs or header designs.
Insert custom field merge tags (such as `{{contact.first_name}}`) in text or subject lines. Use **Preview Custom Fields** to see how actual contact data will render before sending.
Yes. Upload a GIF to the media library and insert it using the Image element. GIFs animate in most email clients that support HTML. Note that Apple Mail on iOS 15+ may show only the first frame due to GIF caching behavior.
Yes. Use the **Appearance** tab in the email builder to set global defaults for fonts, button styles, link colors, and background colors. These apply to all content within that template.
***
## Importing email templates
### Importing HTML email templates
You can import any HTML email template into the email builder:
Go to **Marketing > Emails > Templates** and click **+ New**.
Choose **Import Email** from the template creation options.
Paste your HTML code into the code editor. The builder will render it as a visual template that you can further edit with the drag-and-drop tools.
Check the preview in both Desktop and Mobile views. Adjust any elements that did not import cleanly.
Complex HTML templates with heavy CSS may not convert perfectly. The builder works best with table-based email HTML (the standard for email compatibility). CSS grid and flexbox layouts may need manual adjustment.
### Importing from Mailchimp
To migrate email templates from Mailchimp:
1. In Mailchimp, open the template you want to export
2. Click **Export as HTML** (or copy the HTML from the code view)
3. In the HoopAI email builder, create a new template and select **Import Email**
4. Paste the Mailchimp HTML and click **Import**
5. Review the imported template and update any Mailchimp-specific merge tags with HoopAI merge tags (e.g., replace `*|FNAME|*` with `{{contact.first_name}}`)
### Importing from ActiveCampaign
To migrate from ActiveCampaign:
1. In ActiveCampaign, export the email template as HTML
2. In the HoopAI email builder, import the HTML using the same process
3. Replace ActiveCampaign merge tags (e.g., `%FIRSTNAME%`) with HoopAI merge tags
4. Update any ActiveCampaign-specific tracking links with your HoopAI tracking domain
### Sharing templates across accounts
To share an email template between accounts:
1. **Export the HTML** — open the template in the code editor and copy the full HTML
2. **Import in the target account** — create a new template via Import Email and paste the HTML
3. **Update merge tags and links** — ensure all custom field references and tracking links are correct for the new account
4. **Re-upload images** — images referenced by URL from the original account's media library may need to be re-uploaded to the new account's media library
Maintain a master template library and import templates into additional accounts as needed. This ensures brand consistency while allowing per-account customization.
Use Google Fonts in your email templates by selecting them from the font picker in the Appearance tab or text element settings.
Switch to the Plain Text Editor to create a simple, unformatted text-only version of your email — useful for transactional or personal-style emails.
Import existing email templates from Mailchimp or ActiveCampaign into the builder to migrate your email designs without starting from scratch.
Preview your email in Mobile view and hide specific elements on mobile to optimize the reading experience for smartphone users.
***
## Frequently asked questions
Yes. The email builder supports importing HTML templates from Mailchimp, ActiveCampaign, and other platforms. Use the **Import Email** option when creating a new template.
Conditional elements let you show or hide specific blocks of content based on a contact's custom field values. For example, you could show a different header image to contacts in different cities — all from a single template.
The Design Editor is the visual drag-and-drop interface. The Code Editor lets you write raw HTML for fully custom email layouts. You can start from a blank template in either mode.
Yes. Use the **Save Elements** feature to save any element (button, text block, banner image) and insert it into other templates. This is useful for maintaining consistent CTAs or header designs.
Insert custom field merge tags (such as `{{contact.first_name}}`) in text or subject lines. Use **Preview Custom Fields** to see how actual contact data will render before sending.
Yes. Upload a GIF to the media library and insert it using the Image element. GIFs animate in most email clients that support HTML. Note that Apple Mail on iOS 15+ may show only the first frame due to GIF caching behavior.
Yes. Use the **Appearance** tab in the email builder to set global defaults for fonts, button styles, link colors, and background colors. These apply to all content within that template.
***
## Importing email templates
### Importing HTML email templates
You can import any HTML email template into the email builder:
Go to **Marketing > Emails > Templates** and click **+ New**.
Choose **Import Email** from the template creation options.
Paste your HTML code into the code editor. The builder will render it as a visual template that you can further edit with the drag-and-drop tools.
Check the preview in both Desktop and Mobile views. Adjust any elements that did not import cleanly.
Complex HTML templates with heavy CSS may not convert perfectly. The builder works best with table-based email HTML (the standard for email compatibility). CSS grid and flexbox layouts may need manual adjustment.
### Importing from Mailchimp
To migrate email templates from Mailchimp:
1. In Mailchimp, open the template you want to export
2. Click **Export as HTML** (or copy the HTML from the code view)
3. In the HoopAI email builder, create a new template and select **Import Email**
4. Paste the Mailchimp HTML and click **Import**
5. Review the imported template and update any Mailchimp-specific merge tags with HoopAI merge tags (e.g., replace `*|FNAME|*` with `{{contact.first_name}}`)
### Importing from ActiveCampaign
To migrate from ActiveCampaign:
1. In ActiveCampaign, export the email template as HTML
2. In the HoopAI email builder, import the HTML using the same process
3. Replace ActiveCampaign merge tags (e.g., `%FIRSTNAME%`) with HoopAI merge tags
4. Update any ActiveCampaign-specific tracking links with your HoopAI tracking domain
### Sharing templates across accounts
To share an email template between accounts:
1. **Export the HTML** — open the template in the code editor and copy the full HTML
2. **Import in the target account** — create a new template via Import Email and paste the HTML
3. **Update merge tags and links** — ensure all custom field references and tracking links are correct for the new account
4. **Re-upload images** — images referenced by URL from the original account's media library may need to be re-uploaded to the new account's media library
Maintain a master template library and import templates into additional accounts as needed. This ensures brand consistency while allowing per-account customization.