> ## Documentation Index
> Fetch the complete documentation index at: https://help.hoopai.com/llms.txt
> Use this file to discover all available pages before exploring further.
# Email campaigns
> Create, send, schedule, A/B test, and track email campaigns from the HoopAI Platform.
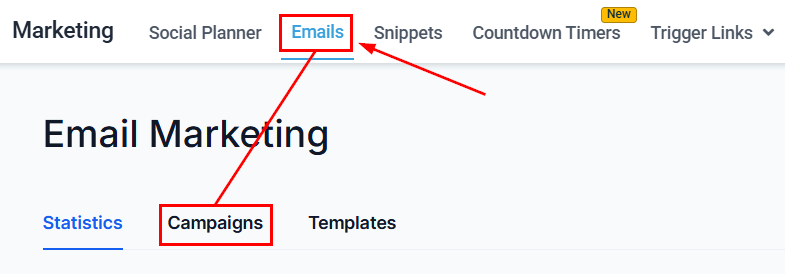
The Campaigns section lets you create, customize, and track the performance of your email campaigns. Navigate to **Marketing > Emails > Campaigns** to get started.
 ## Campaign types
All email campaigns are organized into three categories:
All email campaigns you send directly from the Marketing section
Emails sent from active workflows — listed per workflow, not per action
Emails sent as bulk actions from the Contacts section
***
## Creating a campaign
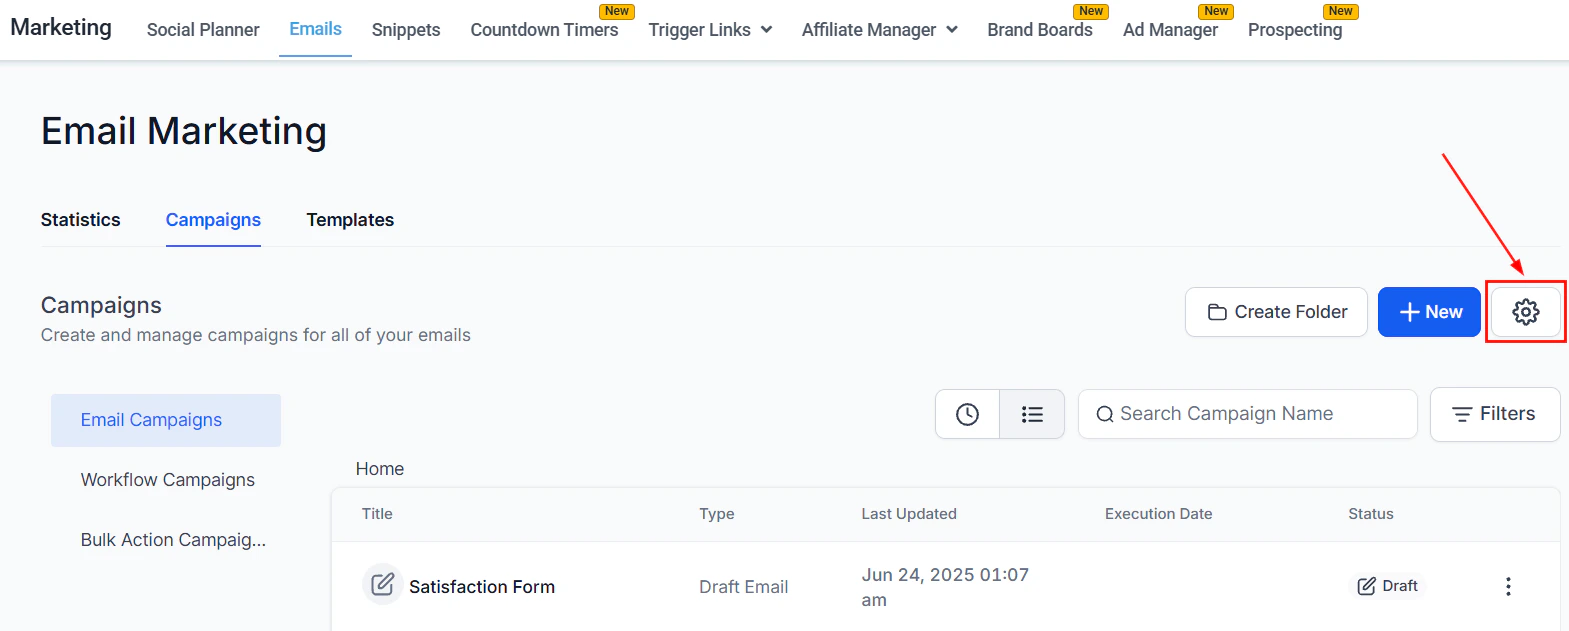
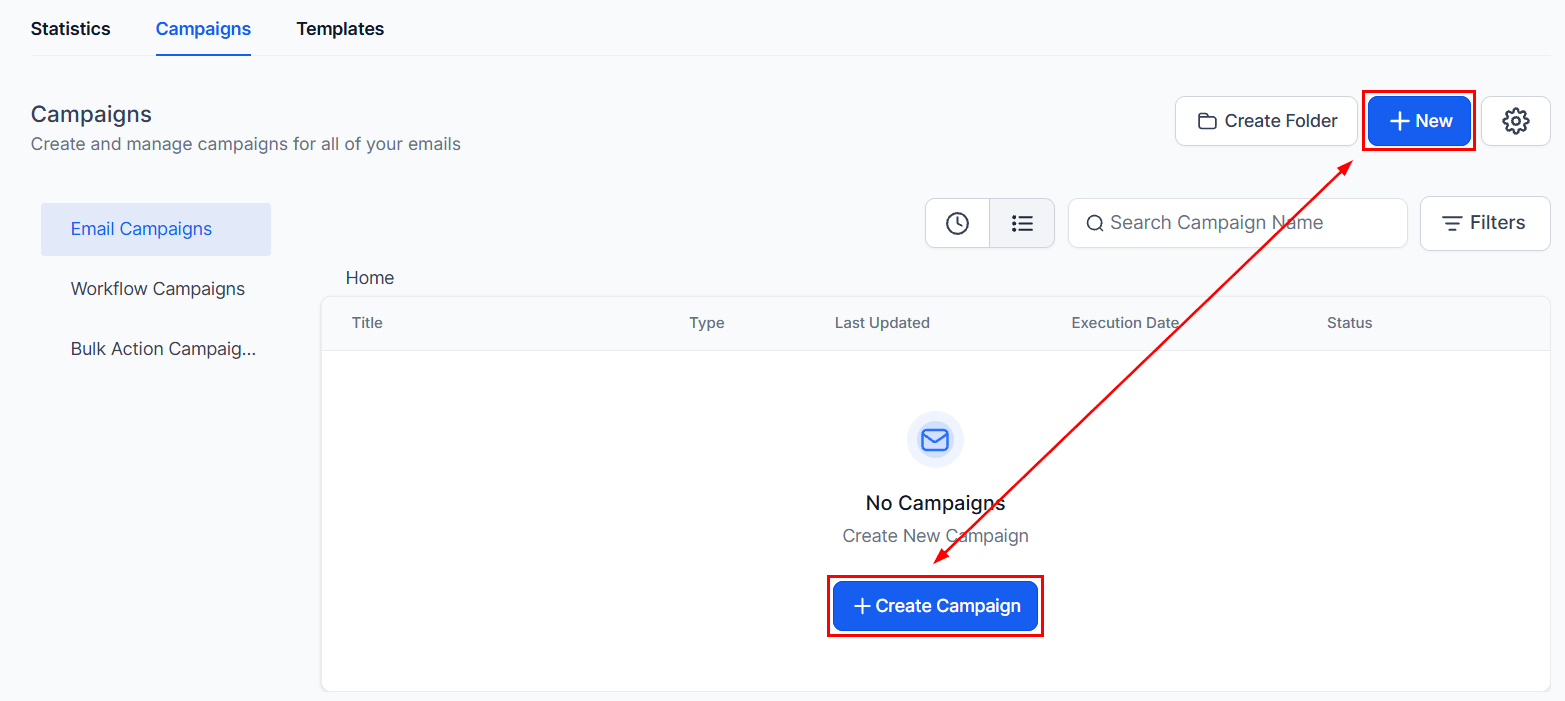
Click the **+ New** button in the Campaigns view. You can also organize campaigns into folders using the **Create Folder** button.
Select from:
* **Blank** — start from zero with the Design Editor
* **Email Marketing Templates** — use a system-provided template
* **Your Templates** — use templates you have already created
Use the drag-and-drop Email Builder to craft your message. Add elements (text, images, buttons, videos), arrange layouts, and apply your branding.
## Campaign types
All email campaigns are organized into three categories:
All email campaigns you send directly from the Marketing section
Emails sent from active workflows — listed per workflow, not per action
Emails sent as bulk actions from the Contacts section
***
## Creating a campaign
Click the **+ New** button in the Campaigns view. You can also organize campaigns into folders using the **Create Folder** button.
Select from:
* **Blank** — start from zero with the Design Editor
* **Email Marketing Templates** — use a system-provided template
* **Your Templates** — use templates you have already created
Use the drag-and-drop Email Builder to craft your message. Add elements (text, images, buttons, videos), arrange layouts, and apply your branding.
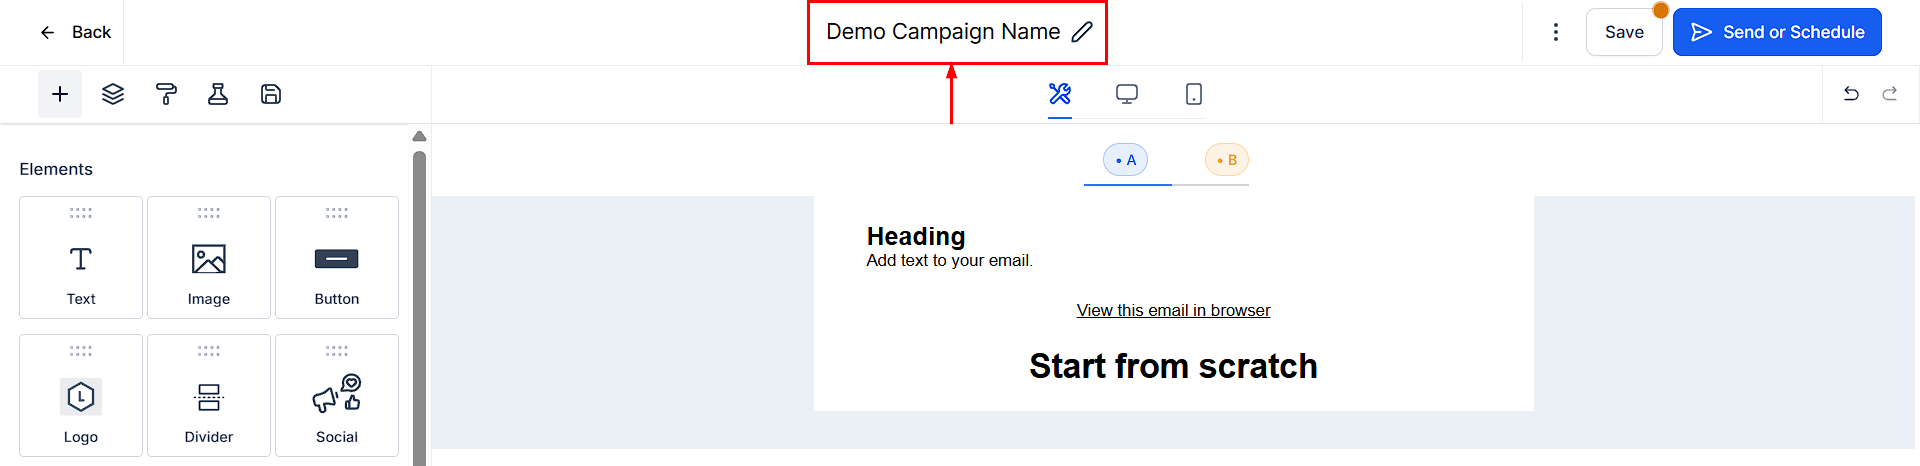 Use **Test Email** to see how your campaign looks when delivered. Switch between **Desktop** and **Mobile View** to verify responsiveness.
Click **Send or Schedule** and choose your delivery method (see below).
***
## Delivery options
Immediately sends the campaign to all selected contacts or a smart list.
Plans the campaign to be delivered at a specific date and time. Useful for timed promotions or announcements.
Delivers the campaign in segmented batches at predetermined times. For example, with 1,000 contacts and a batch quantity of 100, the campaign sends in 10 batches of 100 emails each. This is ideal for managing server load and improving deliverability.
**Batch settings:**
* Start date and time
* Batch quantity (number of emails per batch)
* Repeat interval (days, hours, minutes)
* Allowed send days (uncheck days you want to skip)
* Optional start and end time windows
Automatically delivers campaigns featuring dynamic content linked to an RSS feed — perfect for blog post announcements and product updates at scheduled intervals.
***
## A/B testing
A/B testing lets you experiment with up to six variations of a campaign to determine which performs best. The winning variation is automatically sent to the remaining contacts.
Use **Test Email** to see how your campaign looks when delivered. Switch between **Desktop** and **Mobile View** to verify responsiveness.
Click **Send or Schedule** and choose your delivery method (see below).
***
## Delivery options
Immediately sends the campaign to all selected contacts or a smart list.
Plans the campaign to be delivered at a specific date and time. Useful for timed promotions or announcements.
Delivers the campaign in segmented batches at predetermined times. For example, with 1,000 contacts and a batch quantity of 100, the campaign sends in 10 batches of 100 emails each. This is ideal for managing server load and improving deliverability.
**Batch settings:**
* Start date and time
* Batch quantity (number of emails per batch)
* Repeat interval (days, hours, minutes)
* Allowed send days (uncheck days you want to skip)
* Optional start and end time windows
Automatically delivers campaigns featuring dynamic content linked to an RSS feed — perfect for blog post announcements and product updates at scheduled intervals.
***
## A/B testing
A/B testing lets you experiment with up to six variations of a campaign to determine which performs best. The winning variation is automatically sent to the remaining contacts.
 Open a drafted campaign, go to the **A/B Testing** tab, and toggle the switch to enable.
* **Subject line** — tests which subject gets the highest open rate
* **Email content** — tests different body content (CTAs, images, layout) to drive clicks or conversions
Choose how long the test runs before a winner is selected — from 30 minutes to 24 hours. Set this based on your audience's typical response time.
Add up to 6 variations and specify what percentage of your list receives the test versions. The winner is sent to the remainder.
Test subject lines to improve open rates first, then optimize email content for clicks and conversions once you have a winning subject line.
***
## Campaign statistics
Track the performance of all campaigns from the **Statistics** view in the Campaigns section.
Open a drafted campaign, go to the **A/B Testing** tab, and toggle the switch to enable.
* **Subject line** — tests which subject gets the highest open rate
* **Email content** — tests different body content (CTAs, images, layout) to drive clicks or conversions
Choose how long the test runs before a winner is selected — from 30 minutes to 24 hours. Set this based on your audience's typical response time.
Add up to 6 variations and specify what percentage of your list receives the test versions. The winner is sent to the remainder.
Test subject lines to improve open rates first, then optimize email content for clicks and conversions once you have a winning subject line.
***
## Campaign statistics
Track the performance of all campaigns from the **Statistics** view in the Campaigns section.
 Metrics include: emails delivered, opened, and clicked, plus orders and revenue generated. A funnel visualization shows where recipients drop off.
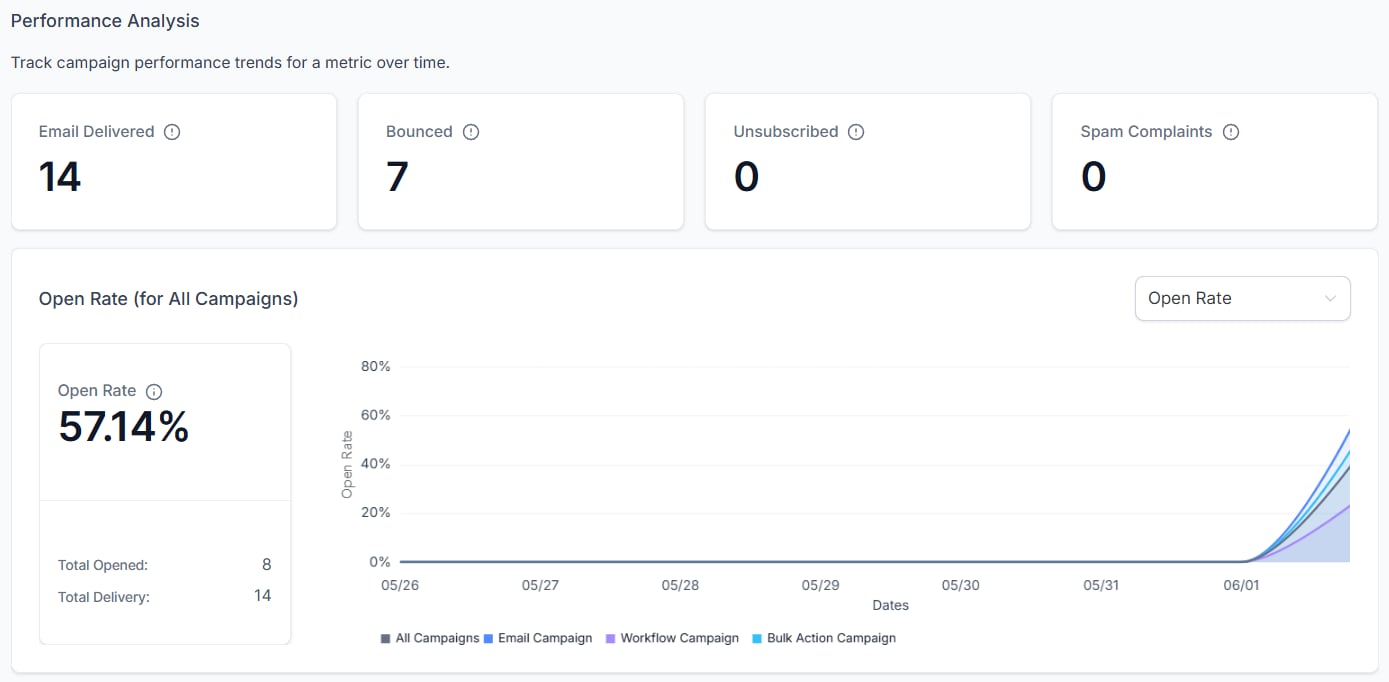
Monitor trends for emails sent, bounced, unsubscribed, and spam complaints over time. Use the dropdown to switch between different metrics.
View the top 5 emails generating the most revenue. Filter by Open Rate or Click Rate to identify your best performers.
Click on a specific campaign to view detailed statistics: delivery rate, open rate, click rate, bounce rate, unsubscribes, and revenue attribution.
***
## Click tracking
Click tracking reveals which links recipients click and how many times, helping you understand engagement and optimize content.
Metrics include: emails delivered, opened, and clicked, plus orders and revenue generated. A funnel visualization shows where recipients drop off.
Monitor trends for emails sent, bounced, unsubscribed, and spam complaints over time. Use the dropdown to switch between different metrics.
View the top 5 emails generating the most revenue. Filter by Open Rate or Click Rate to identify your best performers.
Click on a specific campaign to view detailed statistics: delivery rate, open rate, click rate, bounce rate, unsubscribes, and revenue attribution.
***
## Click tracking
Click tracking reveals which links recipients click and how many times, helping you understand engagement and optimize content.
 **Enable for all campaigns:**
1. Go to **Marketing > Emails > Campaigns**, click the gear icon
2. Navigate to **Tracking** and enable **Click performance tracking**
3. Click **Save**
**Enable for an individual campaign:**
Toggle click tracking on the Send or Schedule screen before sending.
After sending, click the three dots next to a campaign and select **Statistics**, then switch to the **Click Performance** tab to see detailed click data.
***
## Reply management
You can set a custom reply-to address for each campaign so that replies go to the right person or team.
When sending or scheduling, if the default sender email is not suitable, select **"Set a custom reply-to address for this campaign"** and enter the preferred address.
**Priority order for reply-to addresses:**
1. Campaign-level custom reply-to address
2. Location Settings > Email Service > Reply & Forwarding address
3. System default address
***
## Email verification
Before sending, your **From Email** address must be verified. The system will prompt you to verify if an unverified address is used.
To verify:
1. Enter the From Email address in the Send or Schedule screen
2. Click **Verify Now**
3. Check your inbox for the 6-digit OTP and enter it in the verification prompt
Email verification is not required for custom domains configured under LC email or for location admin emails already set up in settings.
***
## Pausing and cancelling campaigns
For scheduled, batch, and A/B test campaigns:
| Action | Result |
| ---------- | ------------------------------------------------------------------------------------------ |
| **Pause** | Temporarily stops the campaign. If resumed after the scheduled time, it sends immediately. |
| **Cancel** | Permanently stops the campaign, including all future batches or RSS sends. |
To pause or cancel: find the campaign under "Scheduled" status, click the three-dot menu, and choose **Pause** or **Cancel**.
***
## Segment targeting
When sending to a Smart List or tag, choose whether to:
* **Lock to selected contacts** — send only to contacts who match the criteria at the time of scheduling
* **Include new contacts** — automatically add contacts who join the list before the campaign sends
***
## Additional features
Automatically send emails based on new content in an RSS feed. Ideal for blogs, news sites, or content-heavy businesses that want to automate their newsletter.
After a campaign has sent, use the **Resend to Unopened** feature to follow up with contacts who did not open the first email — optionally with a different subject line.
Track which campaigns are driving actual purchases and revenue, not just clicks.
Automatically tag contacts based on how they interact with your email campaigns (opened, clicked, etc.) for use in segmentation and workflows.
Create smart list segments directly from campaign engagement data to target follow-up campaigns more precisely.
View and manage emails sent through active workflows from the Workflow Campaigns tab in the Campaigns section.
Embed products from your store directly into email campaigns to drive purchases.
Embed forms inside emails to capture information or survey contacts without requiring them to visit a separate page.
Embed Loom videos in campaigns for personalized outreach and video-based content.
Hide specific email elements for mobile viewers to optimize the mobile reading experience.
***
## Frequently asked questions
You can create up to six variations per A/B test. You choose the percentage of your list that receives the test versions; the winning variation is automatically sent to the remaining contacts.
For subject line tests, the winner is determined by the highest open rate. For email content tests, the winner is determined by click rate or conversions, depending on your campaign goal.
Yes. For scheduled, batch, and RSS campaigns, you can pause them from the campaign list by clicking the three-dot menu. Pausing temporarily stops sending; cancelling permanently stops the campaign.
Batch scheduling delivers your campaign in smaller groups over time, which reduces server load and improves deliverability for large lists. For example, 1,000 contacts could be split into 10 batches of 100 emails sent over several hours.
After a campaign has sent, click the three-dot menu next to it and look for the **Resend to Unopened** option. You can optionally use a different subject line for the resend.
Email address verification confirms you control the address and helps prevent spoofing. The platform sends a 6-digit OTP to the address; enter it in the verification prompt. Verified custom domains and location admin emails are exempt.
Yes. When sending to a Smart List, you can choose to lock the recipients to contacts who match at scheduling time, or allow new contacts who join the list before the send date to be included automatically.
**Enable for all campaigns:**
1. Go to **Marketing > Emails > Campaigns**, click the gear icon
2. Navigate to **Tracking** and enable **Click performance tracking**
3. Click **Save**
**Enable for an individual campaign:**
Toggle click tracking on the Send or Schedule screen before sending.
After sending, click the three dots next to a campaign and select **Statistics**, then switch to the **Click Performance** tab to see detailed click data.
***
## Reply management
You can set a custom reply-to address for each campaign so that replies go to the right person or team.
When sending or scheduling, if the default sender email is not suitable, select **"Set a custom reply-to address for this campaign"** and enter the preferred address.
**Priority order for reply-to addresses:**
1. Campaign-level custom reply-to address
2. Location Settings > Email Service > Reply & Forwarding address
3. System default address
***
## Email verification
Before sending, your **From Email** address must be verified. The system will prompt you to verify if an unverified address is used.
To verify:
1. Enter the From Email address in the Send or Schedule screen
2. Click **Verify Now**
3. Check your inbox for the 6-digit OTP and enter it in the verification prompt
Email verification is not required for custom domains configured under LC email or for location admin emails already set up in settings.
***
## Pausing and cancelling campaigns
For scheduled, batch, and A/B test campaigns:
| Action | Result |
| ---------- | ------------------------------------------------------------------------------------------ |
| **Pause** | Temporarily stops the campaign. If resumed after the scheduled time, it sends immediately. |
| **Cancel** | Permanently stops the campaign, including all future batches or RSS sends. |
To pause or cancel: find the campaign under "Scheduled" status, click the three-dot menu, and choose **Pause** or **Cancel**.
***
## Segment targeting
When sending to a Smart List or tag, choose whether to:
* **Lock to selected contacts** — send only to contacts who match the criteria at the time of scheduling
* **Include new contacts** — automatically add contacts who join the list before the campaign sends
***
## Additional features
Automatically send emails based on new content in an RSS feed. Ideal for blogs, news sites, or content-heavy businesses that want to automate their newsletter.
After a campaign has sent, use the **Resend to Unopened** feature to follow up with contacts who did not open the first email — optionally with a different subject line.
Track which campaigns are driving actual purchases and revenue, not just clicks.
Automatically tag contacts based on how they interact with your email campaigns (opened, clicked, etc.) for use in segmentation and workflows.
Create smart list segments directly from campaign engagement data to target follow-up campaigns more precisely.
View and manage emails sent through active workflows from the Workflow Campaigns tab in the Campaigns section.
Embed products from your store directly into email campaigns to drive purchases.
Embed forms inside emails to capture information or survey contacts without requiring them to visit a separate page.
Embed Loom videos in campaigns for personalized outreach and video-based content.
Hide specific email elements for mobile viewers to optimize the mobile reading experience.
***
## Frequently asked questions
You can create up to six variations per A/B test. You choose the percentage of your list that receives the test versions; the winning variation is automatically sent to the remaining contacts.
For subject line tests, the winner is determined by the highest open rate. For email content tests, the winner is determined by click rate or conversions, depending on your campaign goal.
Yes. For scheduled, batch, and RSS campaigns, you can pause them from the campaign list by clicking the three-dot menu. Pausing temporarily stops sending; cancelling permanently stops the campaign.
Batch scheduling delivers your campaign in smaller groups over time, which reduces server load and improves deliverability for large lists. For example, 1,000 contacts could be split into 10 batches of 100 emails sent over several hours.
After a campaign has sent, click the three-dot menu next to it and look for the **Resend to Unopened** option. You can optionally use a different subject line for the resend.
Email address verification confirms you control the address and helps prevent spoofing. The platform sends a 6-digit OTP to the address; enter it in the verification prompt. Verified custom domains and location admin emails are exempt.
Yes. When sending to a Smart List, you can choose to lock the recipients to contacts who match at scheduling time, or allow new contacts who join the list before the send date to be included automatically.