> ## Documentation Index
> Fetch the complete documentation index at: https://help.hoopai.com/llms.txt
> Use this file to discover all available pages before exploring further.
# Dashboard permissions
> Control who can view, edit, and manage dashboards with four permission levels — Full, Edit, View, and No Access.
The HoopAI Platform provides advanced custom permissions for dashboards, giving you precise control over who can view, edit, and manage each dashboard. This feature ensures your data is both secure and appropriately accessible to the right team members.
## Permission levels
Choose from four distinct permission levels:
| Level | Capabilities |
| ------------- | ------------------------------------------------ |
| **Full** | Create, edit, share, and delete dashboards |
| **Edit** | Edit a dashboard and its widgets — cannot delete |
| **View** | Read-only access to the dashboard |
| **No Access** | Restricted — dashboard is entirely hidden |
### Role-based access
* **Account Admin** — Full view access to all dashboards unless otherwise configured
* **Account User** — Access based on their assigned user permissions
Permissions follow role hierarchy. Lower-level roles cannot have higher access than higher-level roles in your account.
***
## Setting up permissions when creating a dashboard
When creating a new dashboard, you are prompted to configure permissions before finishing setup:
1. Toggle the **Private Dashboard** option if you want the dashboard to be visible only to specific users
2. Assign permission levels to individual users or user roles
3. Click **Confirm** to proceed
***
## Managing permissions on an existing dashboard
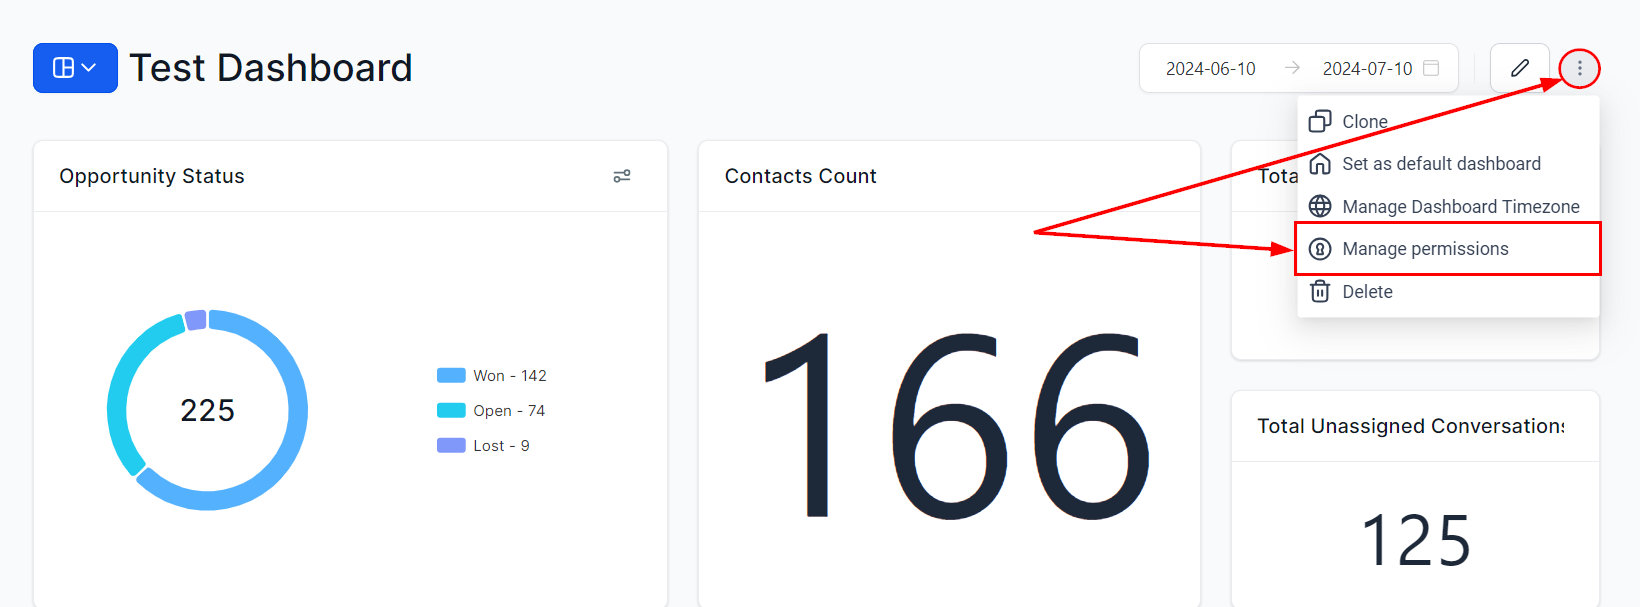
Click the **three dots** at the top-right corner of the dashboard and select **"Manage Permissions"**.
 Toggle the **Private Dashboard** option if needed, then choose the desired permission level for each user.
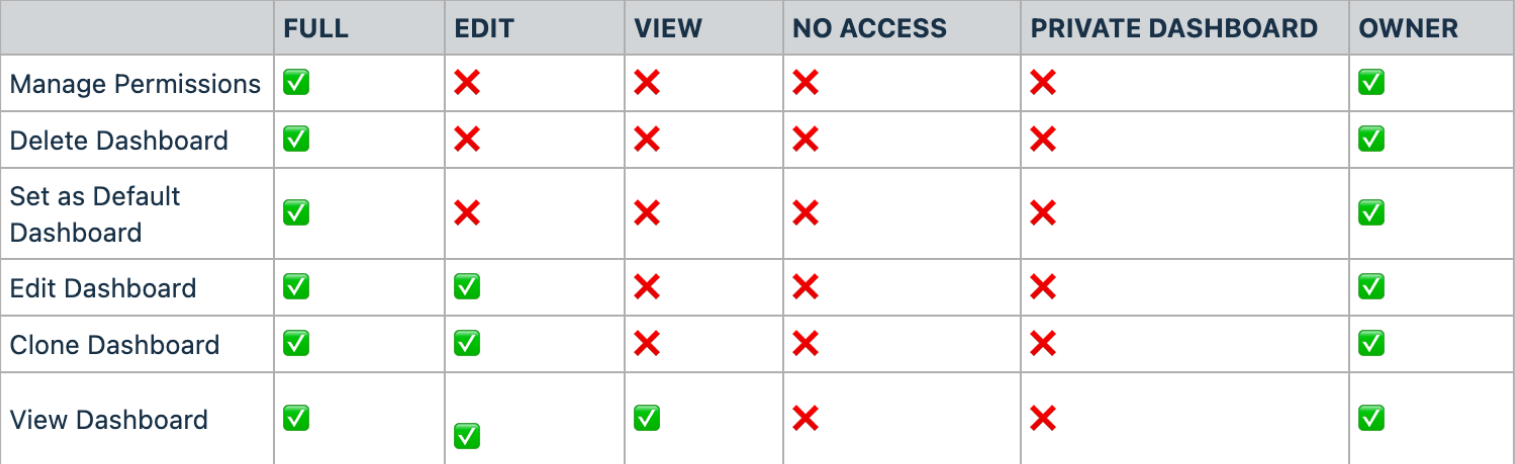 The four permission levels are available for each user: **Full**, **Edit**, **View**, and **No Access**.
Click **Save** to apply the updated permissions.
The four permission levels are available for each user: **Full**, **Edit**, **View**, and **No Access**.
Click **Save** to apply the updated permissions.
 ***
## Displaying user-specific data in widgets
To configure widgets so each team member only sees their own data:
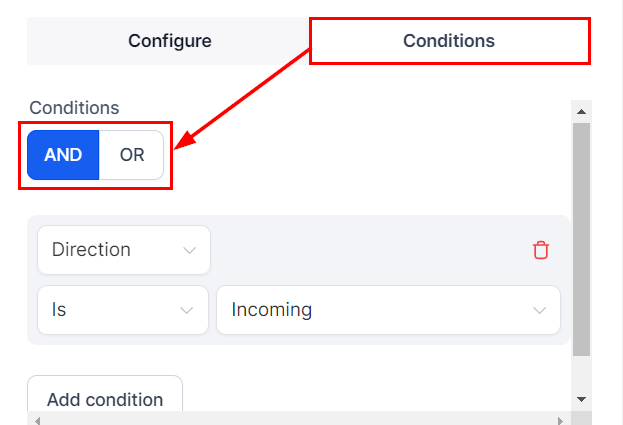
1. Open the widget's **Conditions** tab
2. Add a **User** condition
3. Set the operator to **"Logged in User"**
This ensures that when a team member views the dashboard, they see only their own data in that widget rather than data for all users.
***
## Frequently asked questions
During the creation process, you will have the option to set permissions. Toggle the Private Dashboard option if required and assign the desired permission levels before clicking Confirm.
Yes. Click on the three dots at the top right corner of the dashboard and select "Manage Permissions" to update permissions at any time.
Full (create, edit, share, delete), Edit (edit only), View (read-only), and No Access (completely restricted).
Ensure you have Full access to the dashboard. Users with Edit or View permissions cannot manage dashboard permissions — only owners and Full-access users can.
Confirm the correct permission level is assigned. Check whether the dashboard is set to Private and ensure the affected user is explicitly granted access.
***
## Displaying user-specific data in widgets
To configure widgets so each team member only sees their own data:
1. Open the widget's **Conditions** tab
2. Add a **User** condition
3. Set the operator to **"Logged in User"**
This ensures that when a team member views the dashboard, they see only their own data in that widget rather than data for all users.
***
## Frequently asked questions
During the creation process, you will have the option to set permissions. Toggle the Private Dashboard option if required and assign the desired permission levels before clicking Confirm.
Yes. Click on the three dots at the top right corner of the dashboard and select "Manage Permissions" to update permissions at any time.
Full (create, edit, share, delete), Edit (edit only), View (read-only), and No Access (completely restricted).
Ensure you have Full access to the dashboard. Users with Edit or View permissions cannot manage dashboard permissions — only owners and Full-access users can.
Confirm the correct permission level is assigned. Check whether the dashboard is set to Private and ensure the affected user is explicitly granted access.