> ## Documentation Index
> Fetch the complete documentation index at: https://help.hoopai.com/llms.txt
> Use this file to discover all available pages before exploring further.
# Dashboard elements
> Add titles, text boxes, images, and embedded content to your Hoop dashboard for better organization and branding.
Beyond data widgets, you can add visual elements to your dashboard to improve organization, provide context, and make the layout more intuitive for your team. Elements include titles, text boxes, images, and embeds. These help you rename sections, add team notes, display branding, and integrate external content.
## Adding elements
Click the **pencil icon** on your dashboard to enter edit mode.
Click **"Add Widget"** to open the widget and element selection panel.
Click the **Elements** tab. You'll see options for Titles, Text Boxes, Images, and Embed.
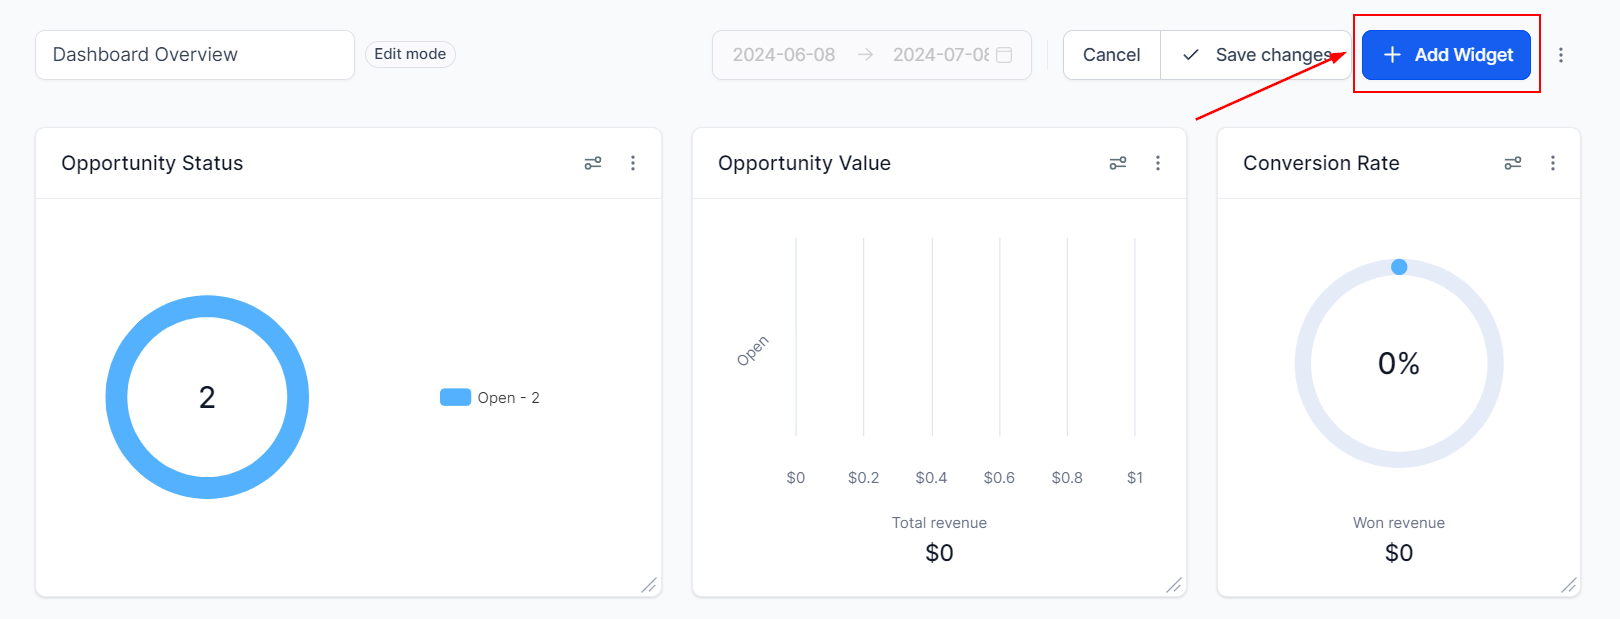 Select the element you want to add, configure it to suit your needs, then click **Save**. Click **Save Changes** when your layout is complete.
After adding an element, you can reposition it by dragging it to a new location, or resize it by dragging the corner handle.
## Available element types
Add headings to organize your dashboard into logical sections. Useful for renaming areas, adding important notes for your team, or increasing the branding of your workspace.
Select the element you want to add, configure it to suit your needs, then click **Save**. Click **Save Changes** when your layout is complete.
After adding an element, you can reposition it by dragging it to a new location, or resize it by dragging the corner handle.
## Available element types
Add headings to organize your dashboard into logical sections. Useful for renaming areas, adding important notes for your team, or increasing the branding of your workspace.
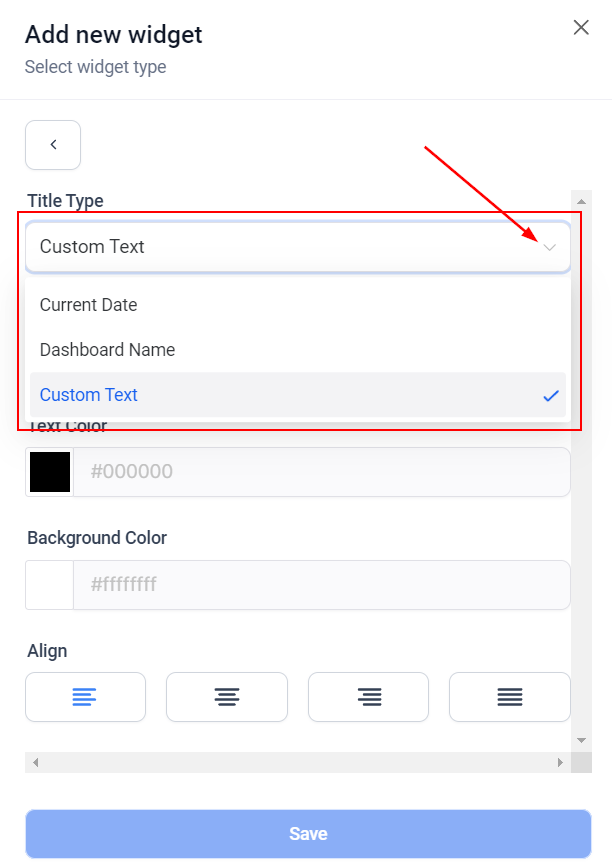 **Title options:**
* **Current Date** — automatically shows today's date
* **Dashboard Name** — displays the current dashboard's name
* **Custom Text** — type any text you want
You can customize the text color, background color, and text alignment.
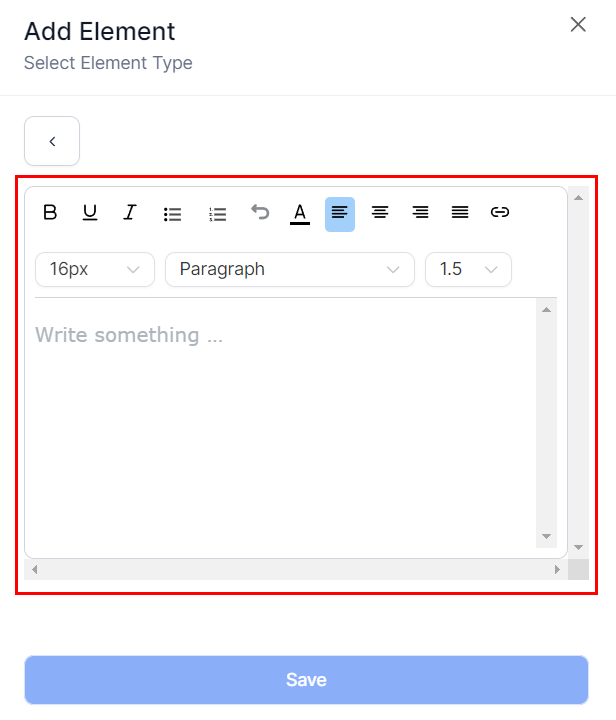
Add formatted text blocks to your dashboard — useful for motivational quotes, goals, notes for your team, or instructions. Text boxes support standard formatting: alignment, letter color, bulleted lists, numbered lists, and more.
**Title options:**
* **Current Date** — automatically shows today's date
* **Dashboard Name** — displays the current dashboard's name
* **Custom Text** — type any text you want
You can customize the text color, background color, and text alignment.
Add formatted text blocks to your dashboard — useful for motivational quotes, goals, notes for your team, or instructions. Text boxes support standard formatting: alignment, letter color, bulleted lists, numbered lists, and more.
 Add logos, charts, screenshots, or any image to make your dashboard more dynamic and personalized. Images are sourced from your media library.
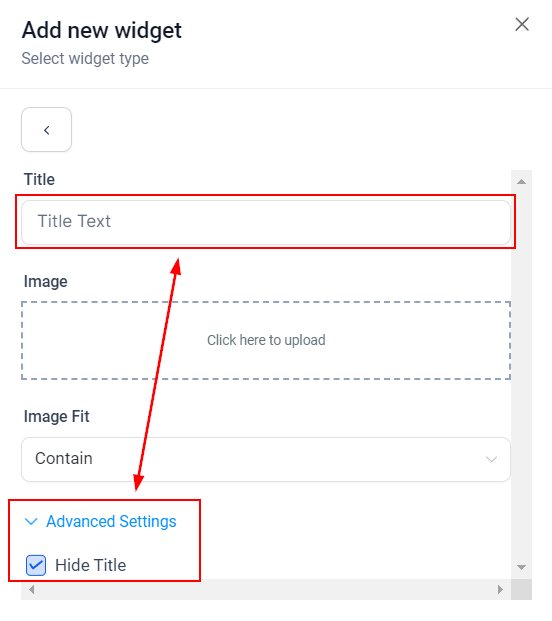 **Image options:**
* Add a title (you can hide it in Advanced Settings)
* Click the image box to open your media library and select or upload an image
* Choose an **Image Fit** option from the dropdown to control how the image fills the element box
Embed external content such as web pages, Google Data Studio reports, Google Docs, slideshows, calendars, Loom videos, YouTube videos, social media posts, and more. Embedded content integrates through iframes, turning your dashboard into a real-time business hub.
**Image options:**
* Add a title (you can hide it in Advanced Settings)
* Click the image box to open your media library and select or upload an image
* Choose an **Image Fit** option from the dropdown to control how the image fills the element box
Embed external content such as web pages, Google Data Studio reports, Google Docs, slideshows, calendars, Loom videos, YouTube videos, social media posts, and more. Embedded content integrates through iframes, turning your dashboard into a real-time business hub.
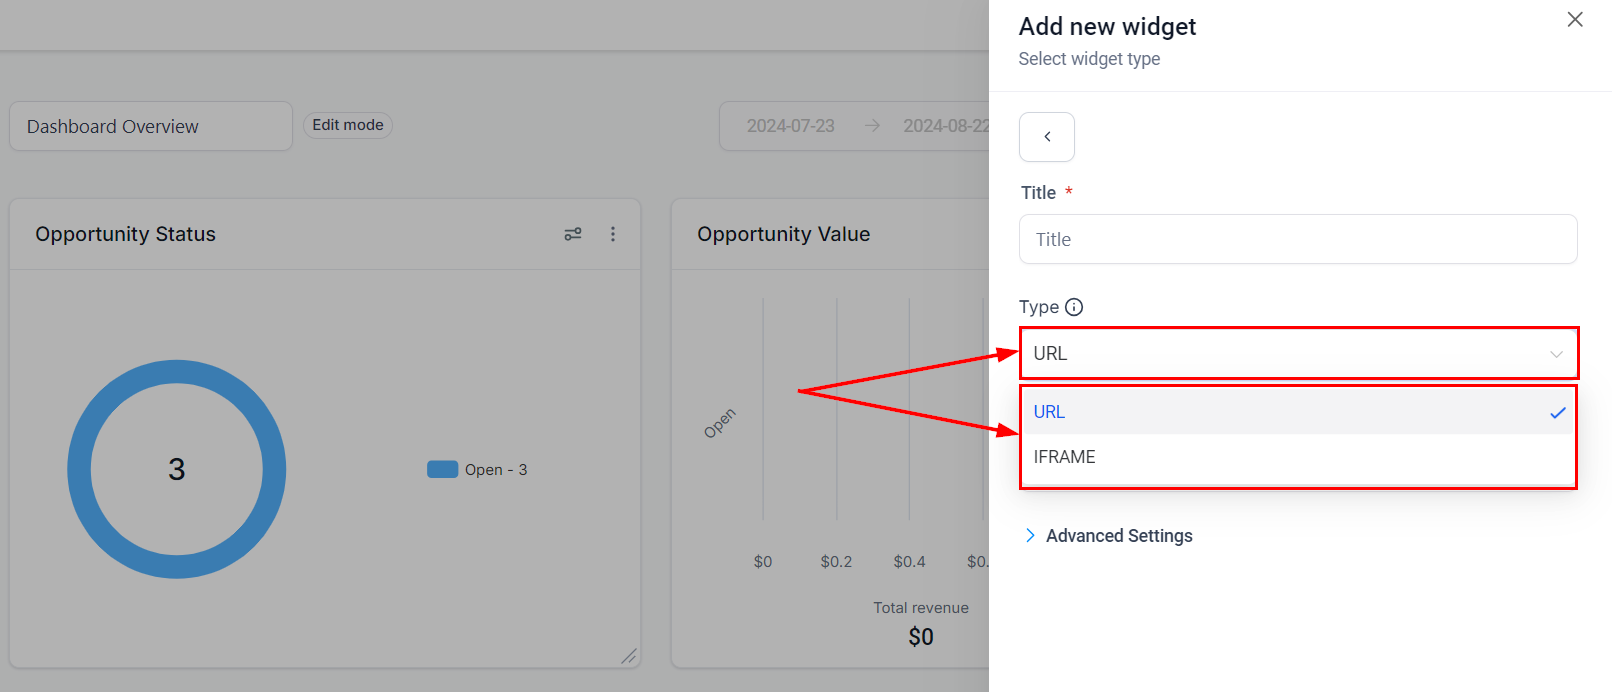 **Embed types:**
| Type | When to use |
| ---------- | -------------------------------------------------------- |
| **URL** | Enter a valid URL directly to embed the page |
| **IFRAME** | Paste iframe embed code provided by the external service |
**Advanced Settings:** Hide the widget title for a cleaner look by enabling **Hide Title**.
**Embedding YouTube videos:**
1. Copy the video ID from the YouTube URL (the part after `/watch?v=`)
2. Insert it into: `https://www.youtube.com/embed/`
3. Use the resulting URL in your embed element
**Embedding TikTok videos:**
1. Copy the video ID from the TikTok URL (the part after `/video/`)
2. Insert it into: `https://www.tiktok.com/embed/`
**Embedding Instagram posts:**
1. Get the shareable link for your Instagram post
2. Replace `?utm_source=ig_web_copy_link` with `/embed/`
Some websites restrict iframe embedding due to security policies. Always check the source site's embedding guidelines if your content does not display correctly.
## Tips for using elements effectively
Use **Title elements** to create clear visual sections that separate different data areas — for example, a "Sales Performance" header above opportunity widgets and a "Team Activity" header above task and call widgets.
Use the **Text Box element** to pin a weekly team goal or motivational message that everyone sees when they log in.
If you manage multiple dashboards, remember that element configurations are specific to each dashboard. Custom themes and layouts are maintained when you clone a dashboard.
**Embed types:**
| Type | When to use |
| ---------- | -------------------------------------------------------- |
| **URL** | Enter a valid URL directly to embed the page |
| **IFRAME** | Paste iframe embed code provided by the external service |
**Advanced Settings:** Hide the widget title for a cleaner look by enabling **Hide Title**.
**Embedding YouTube videos:**
1. Copy the video ID from the YouTube URL (the part after `/watch?v=`)
2. Insert it into: `https://www.youtube.com/embed/`
3. Use the resulting URL in your embed element
**Embedding TikTok videos:**
1. Copy the video ID from the TikTok URL (the part after `/video/`)
2. Insert it into: `https://www.tiktok.com/embed/`
**Embedding Instagram posts:**
1. Get the shareable link for your Instagram post
2. Replace `?utm_source=ig_web_copy_link` with `/embed/`
Some websites restrict iframe embedding due to security policies. Always check the source site's embedding guidelines if your content does not display correctly.
## Tips for using elements effectively
Use **Title elements** to create clear visual sections that separate different data areas — for example, a "Sales Performance" header above opportunity widgets and a "Team Activity" header above task and call widgets.
Use the **Text Box element** to pin a weekly team goal or motivational message that everyone sees when they log in.
If you manage multiple dashboards, remember that element configurations are specific to each dashboard. Custom themes and layouts are maintained when you clone a dashboard.