> ## Documentation Index
> Fetch the complete documentation index at: https://help.hoopai.com/llms.txt
> Use this file to discover all available pages before exploring further.
# Snippets
> Create and manage reusable text and email templates in Hoop for fast, consistent communication with contacts.
Snippets are pre-written message templates that you can insert into any conversation with a single click. They save time, ensure consistency, and can include dynamic elements like custom values and trigger links. Snippets are shared across the CRM — changes made in Conversations are reflected in Email Marketing and vice versa.
 Depending on your user permissions, you may not have access to all snippet features.
## Creating a snippet
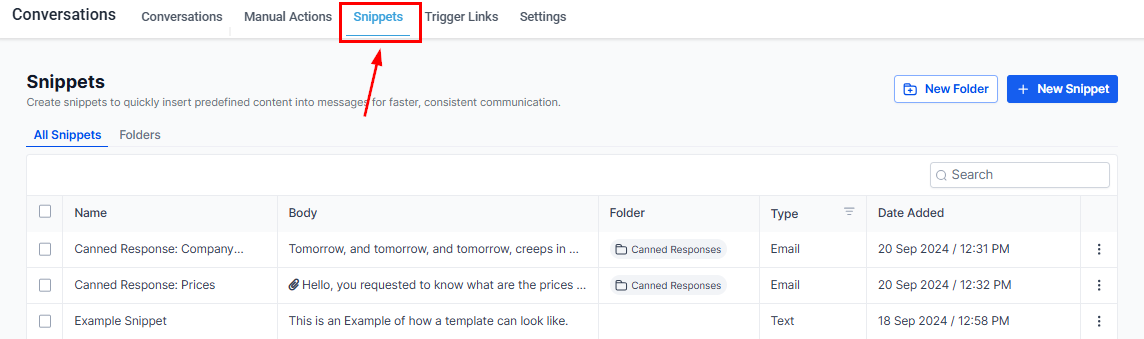
Navigate to **Conversations → Snippets** in your account.
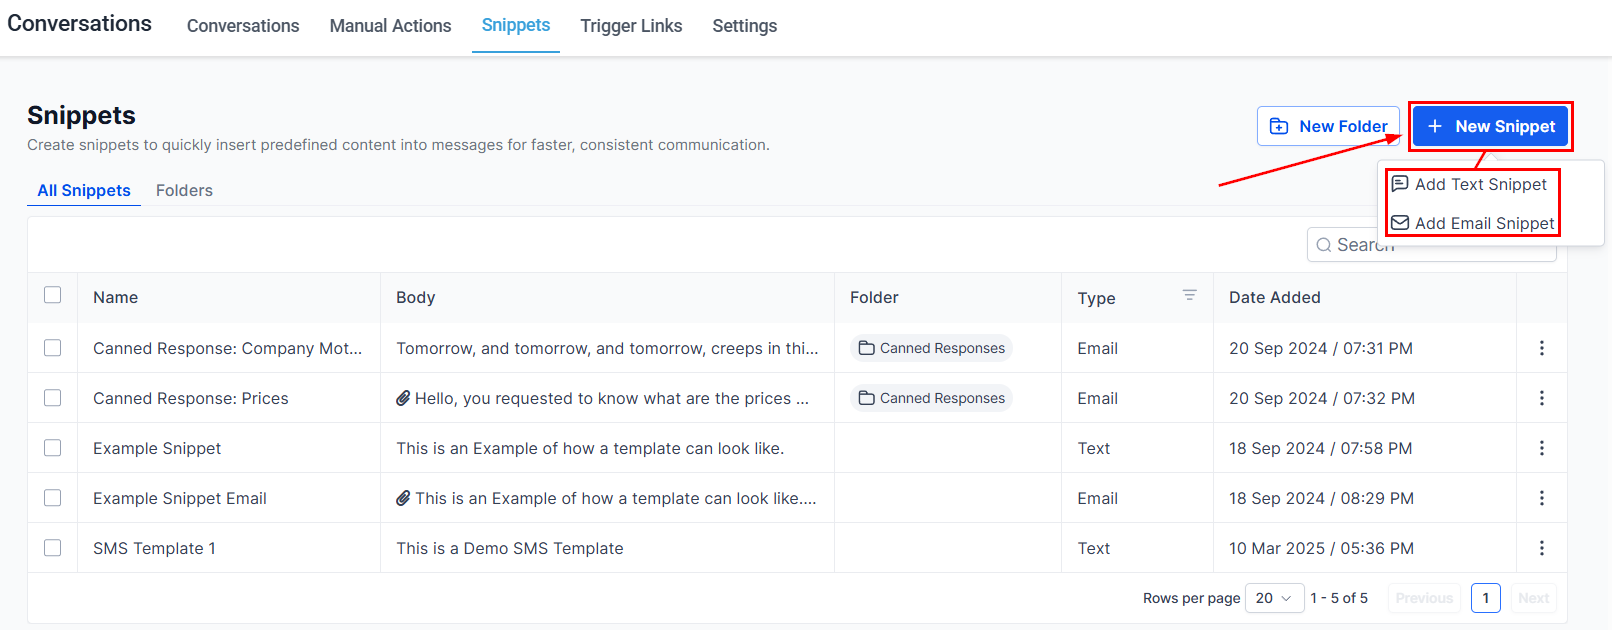
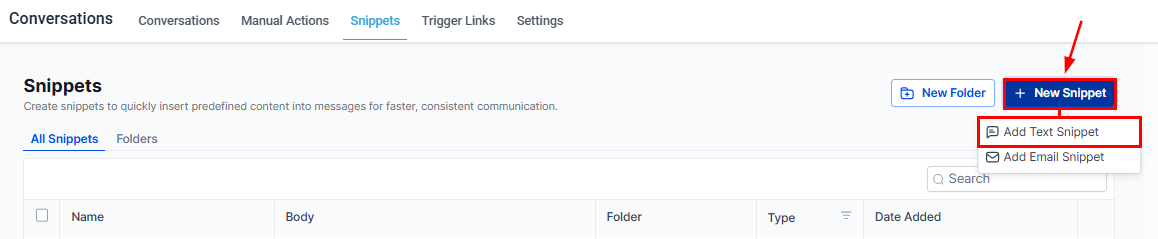
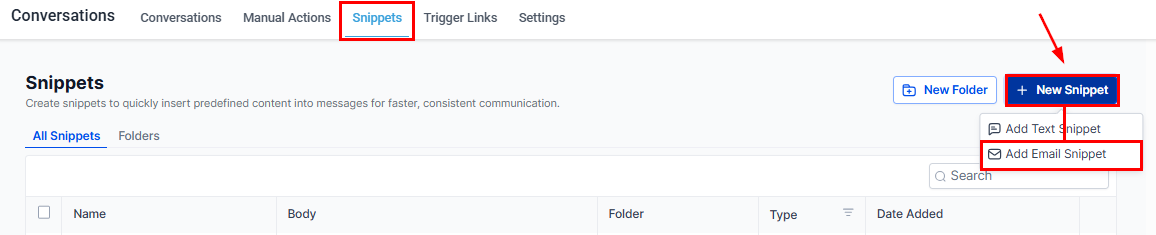
Click the **+ New Snippet** button in the top right. A dropdown appears — choose either **Add Text Snippet** or **Add Email Snippet**.
Depending on your user permissions, you may not have access to all snippet features.
## Creating a snippet
Navigate to **Conversations → Snippets** in your account.
Click the **+ New Snippet** button in the top right. A dropdown appears — choose either **Add Text Snippet** or **Add Email Snippet**.
 Complete the form for your chosen snippet type (see below).
Click **Save** to add it to your snippet library.
***
## Text snippets
Text snippets are used for SMS, Facebook DMs, Instagram DMs, and short chat messages.
Complete the form for your chosen snippet type (see below).
Click **Save** to add it to your snippet library.
***
## Text snippets
Text snippets are used for SMS, Facebook DMs, Instagram DMs, and short chat messages.
 **Required fields:**
* **Name** — displayed in the snippet list so your team can find it quickly.
* **Snippet Body** — the message content. Add **custom values** (tag icon) and **trigger links** (lightning bolt icon) for dynamic personalization.
**Optional:**
* **Attachments** — click **Add Attachment** or paste a file URL and click **+ Add** to include images or documents.
* **Test SMS** — enter a phone number and click **Send Test** to preview how the snippet looks when received.
***
## Email snippets
Email snippets are for quick email replies — confirmation messages, follow-ups, and similar responses that do not need a full campaign template.
**Required fields:**
* **Name** — displayed in the snippet list so your team can find it quickly.
* **Snippet Body** — the message content. Add **custom values** (tag icon) and **trigger links** (lightning bolt icon) for dynamic personalization.
**Optional:**
* **Attachments** — click **Add Attachment** or paste a file URL and click **+ Add** to include images or documents.
* **Test SMS** — enter a phone number and click **Send Test** to preview how the snippet looks when received.
***
## Email snippets
Email snippets are for quick email replies — confirmation messages, follow-ups, and similar responses that do not need a full campaign template.
 **Required fields:**
* **Name**
* **Subject** — the email subject line shown to recipients.
* **Snippet Body** — the email content. Use the **tag icon** for custom values and **thunderbolt icon** for trigger links.
**Optional:**
* **Add Attachment** — attach files from your computer.
* **Test Email** — enter From and To addresses, then click **Send Test** to verify how the email renders.
***
## Using snippets in conversations
### SMS / chat channels
Navigate to the contact's conversation and select the **SMS** or **chat** channel.
Click the **paper icon** in the message toolbar.
**Required fields:**
* **Name**
* **Subject** — the email subject line shown to recipients.
* **Snippet Body** — the email content. Use the **tag icon** for custom values and **thunderbolt icon** for trigger links.
**Optional:**
* **Add Attachment** — attach files from your computer.
* **Test Email** — enter From and To addresses, then click **Send Test** to verify how the email renders.
***
## Using snippets in conversations
### SMS / chat channels
Navigate to the contact's conversation and select the **SMS** or **chat** channel.
Click the **paper icon** in the message toolbar.
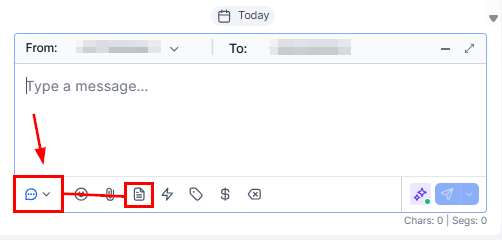 Click a snippet to insert it into the message box. Customize if needed, then click **Send**.
### WhatsApp
Open the conversation and switch to **WhatsApp**.
Click the **paper icon**.
Select the snippet — it populates the message field automatically.
Click a snippet to insert it into the message box. Customize if needed, then click **Send**.
### WhatsApp
Open the conversation and switch to **WhatsApp**.
Click the **paper icon**.
Select the snippet — it populates the message field automatically.
 Add any additional text and click **Send**.
### Email
Click the **paper icon** in the email composer to open the snippet selector. Snippets are organized in folders — click the template you want to apply it to the message body.
***
## Managing snippets
Click the **three-dot icon (⋮)** next to any snippet for management options:
| Action | Description |
| ----------------- | ------------------------------------------ |
| Move to Folder | Organize snippets into topic-based folders |
| Edit Snippet | Modify name, body, or attachments |
| Duplicate Snippet | Copy as a starting point for a new variant |
| Delete Snippet | Permanently remove (cannot be undone) |
To bulk-move or bulk-delete snippets, check the boxes next to multiple snippets and choose the desired action.
***
## Organizing snippets with folders
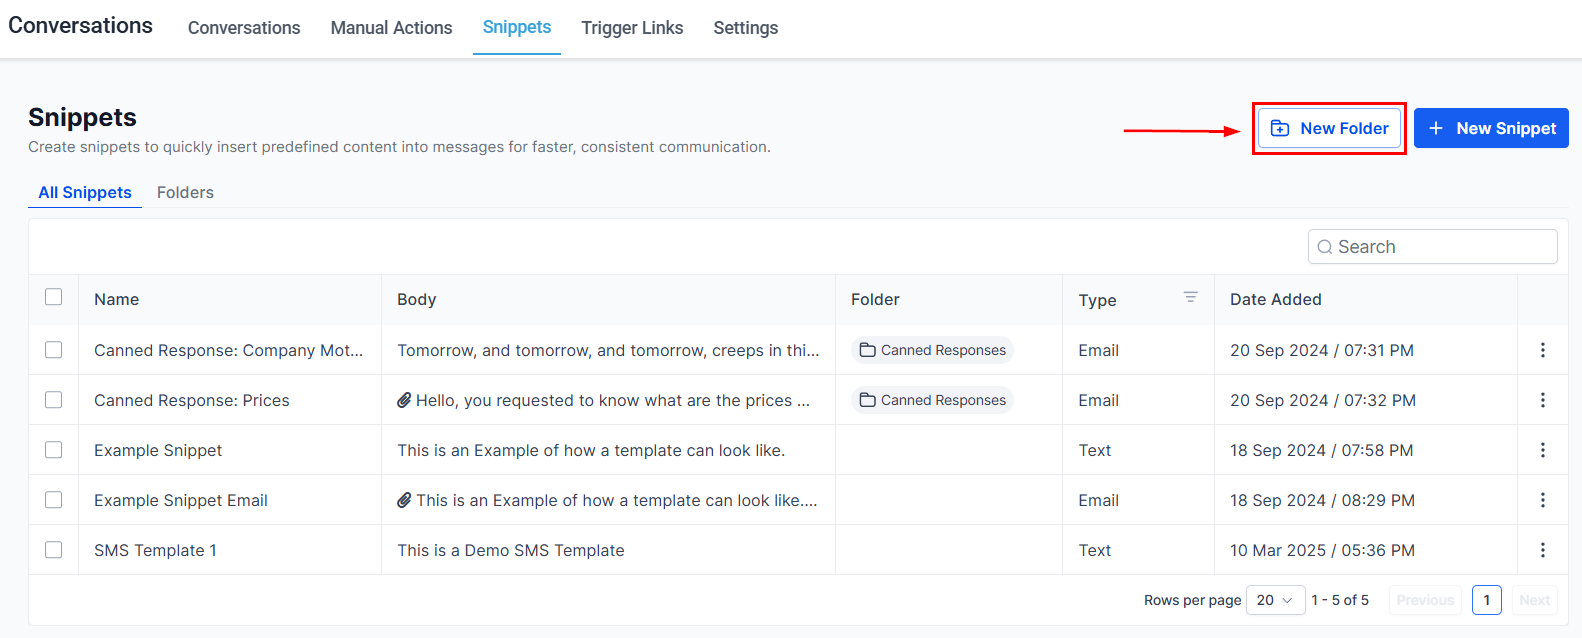
Click **+ New Snippet → Add Folder** (or the folder button), enter a name, and click **Save**.
Click the three-dot icon next to a snippet → **Move to Folder** → select the folder → **Move**.
Use the search bar on the **Folders** tab to find a specific folder by name.
Deleting a folder may also delete the snippets it contains. Move snippets to another folder first if you want to keep them.
***
## Snippet library columns
When viewing all snippets, four columns help you identify each one at a glance:
| Column | Description |
| ------------ | ---------------------------------------- |
| Name | Snippet identifier — make it descriptive |
| Snippet Body | Preview of the message content |
| Folder | Which folder the snippet belongs to |
| Type | **Text** or **Email** |
Click the three-line icon next to **Type** to sort snippets by type.
Add any additional text and click **Send**.
### Email
Click the **paper icon** in the email composer to open the snippet selector. Snippets are organized in folders — click the template you want to apply it to the message body.
***
## Managing snippets
Click the **three-dot icon (⋮)** next to any snippet for management options:
| Action | Description |
| ----------------- | ------------------------------------------ |
| Move to Folder | Organize snippets into topic-based folders |
| Edit Snippet | Modify name, body, or attachments |
| Duplicate Snippet | Copy as a starting point for a new variant |
| Delete Snippet | Permanently remove (cannot be undone) |
To bulk-move or bulk-delete snippets, check the boxes next to multiple snippets and choose the desired action.
***
## Organizing snippets with folders
Click **+ New Snippet → Add Folder** (or the folder button), enter a name, and click **Save**.
Click the three-dot icon next to a snippet → **Move to Folder** → select the folder → **Move**.
Use the search bar on the **Folders** tab to find a specific folder by name.
Deleting a folder may also delete the snippets it contains. Move snippets to another folder first if you want to keep them.
***
## Snippet library columns
When viewing all snippets, four columns help you identify each one at a glance:
| Column | Description |
| ------------ | ---------------------------------------- |
| Name | Snippet identifier — make it descriptive |
| Snippet Body | Preview of the message content |
| Folder | Which folder the snippet belongs to |
| Type | **Text** or **Email** |
Click the three-line icon next to **Type** to sort snippets by type.