> ## Documentation Index
> Fetch the complete documentation index at: https://help.hoopai.com/llms.txt
> Use this file to discover all available pages before exploring further.
# Sending messages
> Compose and send SMS, email, group SMS, and scheduled messages from the Hoop conversations inbox.
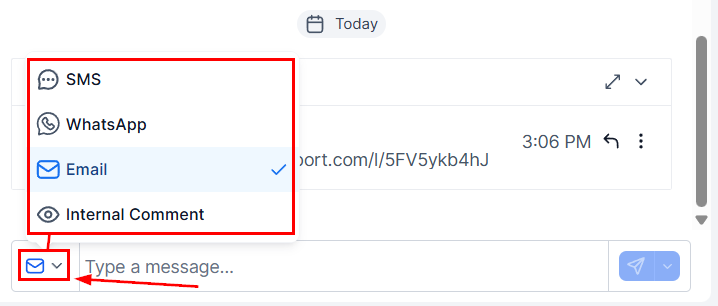
The message box at the bottom of every conversation lets you send across any connected channel. Switch channels mid-conversation by clicking the channel icons above the message box.
## Choosing a channel
Available channels depend on which integrations the contact has. Current options in Hoop:
* Email
* SMS
* Facebook & Instagram Messages
* GMB Messages
* TikTok DMs
* Web Chat Widget
* WhatsApp
* Internal Comments (private team notes, not visible to contacts)
 ## Starting a new conversation
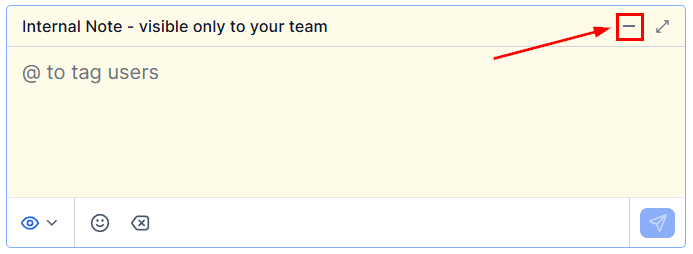
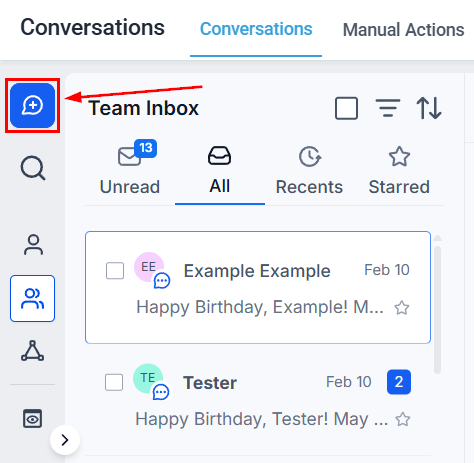
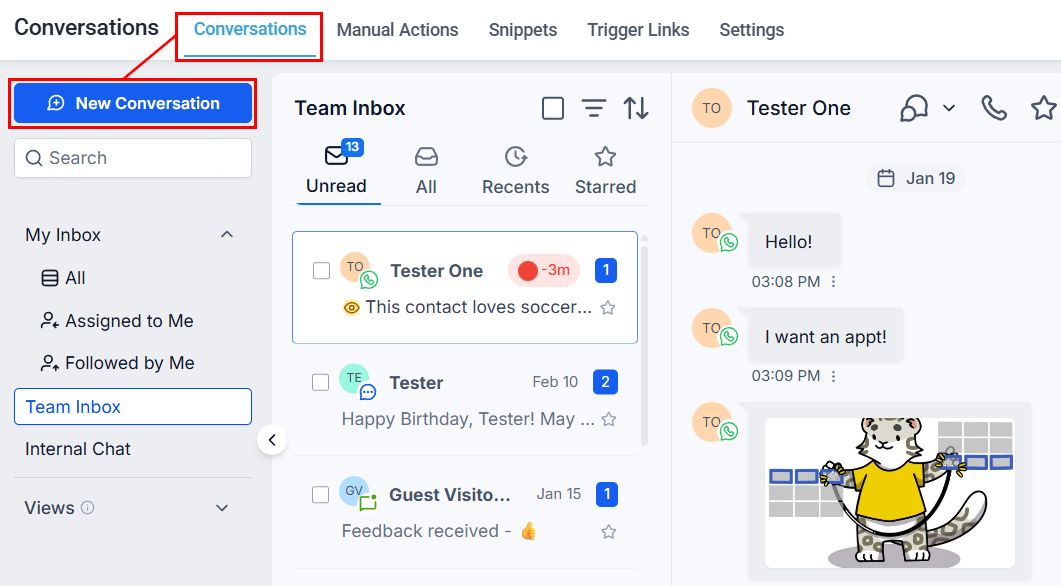
Click the **+** bubble icon to compose a fresh message to any contact or team member.
## Starting a new conversation
Click the **+** bubble icon to compose a fresh message to any contact or team member.
 A pop-up asks whether you are messaging **contacts** or **team members**.
Select **Single Contact Conversation**, choose the contact, pick a channel, then click **Create Conversation**.
Select **Group Conversation**, choose a phone number, add 2–10 contacts, then click **Create Conversation**.
All participants can see each other's phone numbers in a group SMS thread.
Select one or more team members, then click **Create Internal Chat**. Search by name or email address.
A pop-up asks whether you are messaging **contacts** or **team members**.
Select **Single Contact Conversation**, choose the contact, pick a channel, then click **Create Conversation**.
Select **Group Conversation**, choose a phone number, add 2–10 contacts, then click **Create Conversation**.
All participants can see each other's phone numbers in a group SMS thread.
Select one or more team members, then click **Create Internal Chat**. Search by name or email address.
 ***
## Sending an SMS
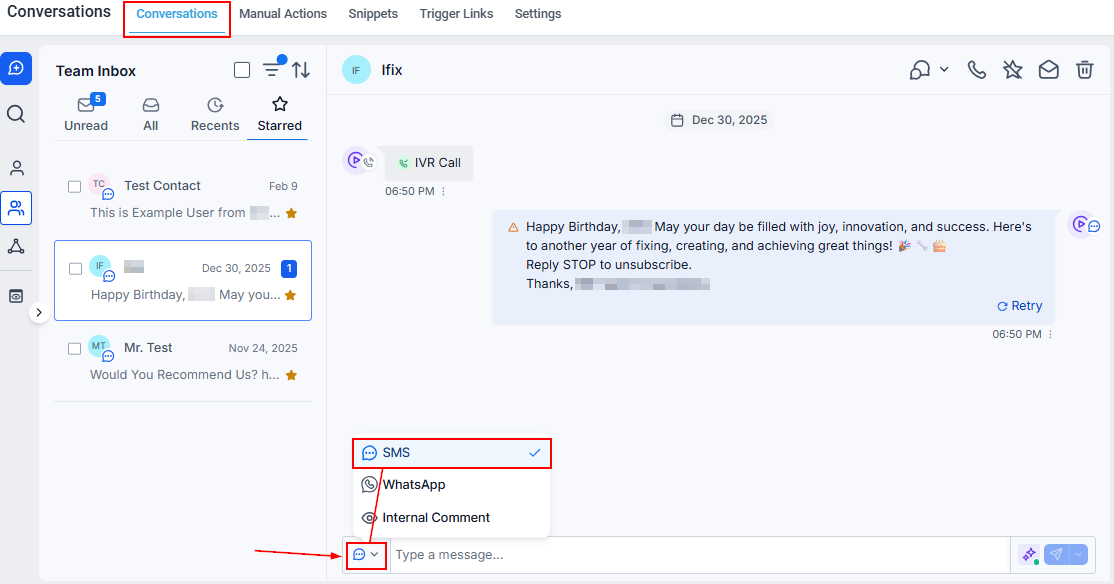
Open a conversation and click the **SMS** tab. The message box appears at the bottom.
***
## Sending an SMS
Open a conversation and click the **SMS** tab. The message box appears at the bottom.
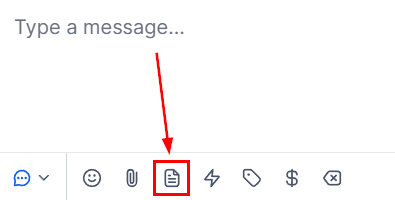
 Type your message. Use the toolbar icons for additional features:
* **Smiley face** — emoji picker (search by keyword or browse categories)
* **Paperclip** — attach files or images (keep total size under 500 KB for best delivery)
* **Paper icon** — insert a saved SMS snippet
* **Lightning bolt** — insert a trigger link
* **Tag icon** — insert a custom value (e.g., first name)
* **Dollar sign** — request payment via a payment link
* **Send now** — click the paper plane button.
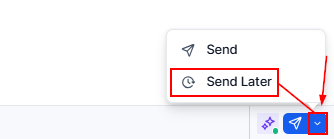
* **Schedule** — click the timer icon, set date, time, and timezone, click **Schedule**, then **Send Later**.
Type your message. Use the toolbar icons for additional features:
* **Smiley face** — emoji picker (search by keyword or browse categories)
* **Paperclip** — attach files or images (keep total size under 500 KB for best delivery)
* **Paper icon** — insert a saved SMS snippet
* **Lightning bolt** — insert a trigger link
* **Tag icon** — insert a custom value (e.g., first name)
* **Dollar sign** — request payment via a payment link
* **Send now** — click the paper plane button.
* **Schedule** — click the timer icon, set date, time, and timezone, click **Schedule**, then **Send Later**.
 ### Canceling a scheduled SMS
Click **Cancel** next to the queued message and confirm. The draft is permanently deleted.
Drafts are saved automatically. Close a conversation before sending and your draft is waiting when you return. Collapse the message box with the line icon at the top right.
***
## Sending an email
Click the **Email** tab in the conversation.
### Canceling a scheduled SMS
Click **Cancel** next to the queued message and confirm. The draft is permanently deleted.
Drafts are saved automatically. Close a conversation before sending and your draft is waiting when you return. Collapse the message box with the line icon at the top right.
***
## Sending an email
Click the **Email** tab in the conversation.
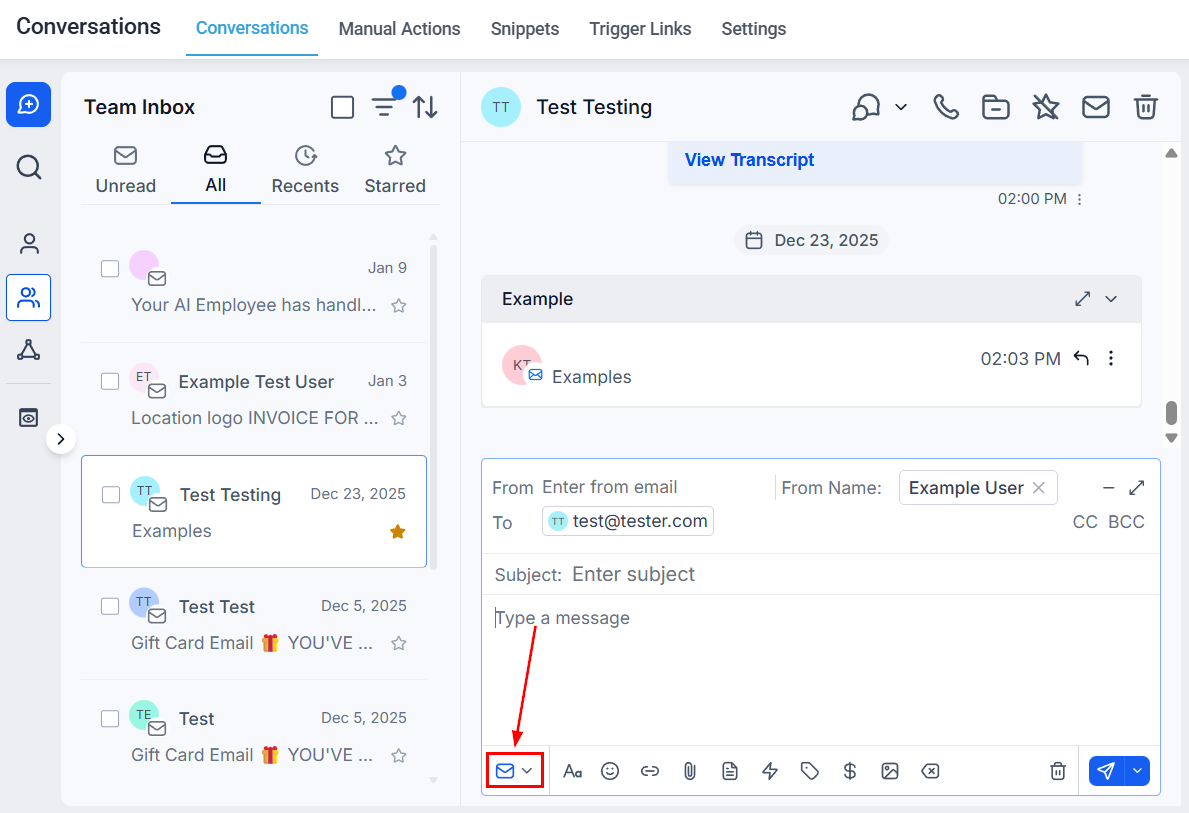 * **Sender** — name and address shown to the contact
* **Recipient** — contact email; add CC or BCC as needed
* **Subject** — first line recipients see in their inbox
* Click **A** for formatting options (bold, italic, lists, etc.)
* Click **\{…}** to insert custom merge fields
* Click the link icon to add a hyperlink (opens in same or new tab)
* Click the paperclip to attach files
* Click the paper icon to insert a saved email template
* **Sender** — name and address shown to the contact
* **Recipient** — contact email; add CC or BCC as needed
* **Subject** — first line recipients see in their inbox
* Click **A** for formatting options (bold, italic, lists, etc.)
* Click **\{…}** to insert custom merge fields
* Click the link icon to add a hyperlink (opens in same or new tab)
* Click the paperclip to attach files
* Click the paper icon to insert a saved email template
 * **Send now** — click **Send**.
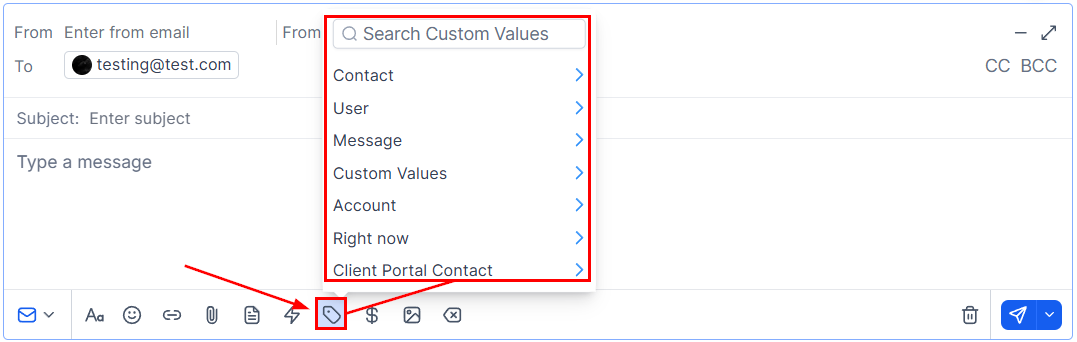
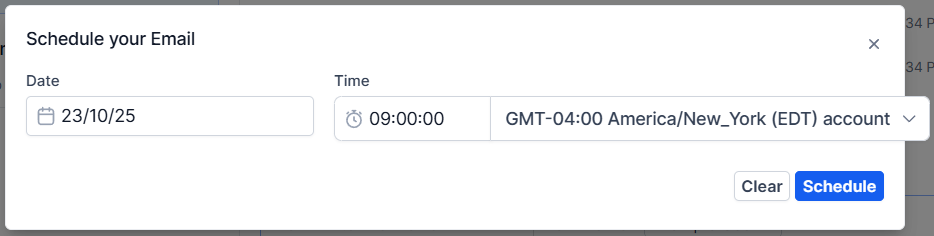
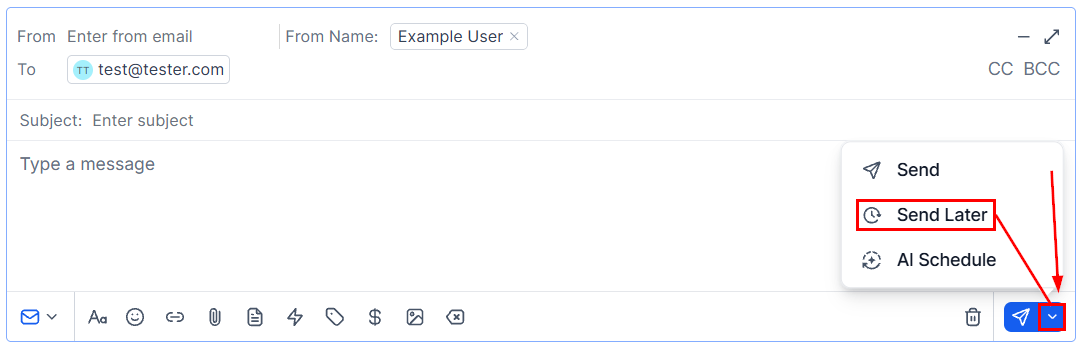
* **Schedule** — click the dropdown arrow next to Send → **Send Later** → set date/time/timezone → **Send Schedule**.
* **AI Scheduling** — choose a time window (e.g., next 48 hours) → **Send with AI Optimization**. The AI picks the highest-engagement moment in that window based on the recipient's historical patterns.
* **Send now** — click **Send**.
* **Schedule** — click the dropdown arrow next to Send → **Send Later** → set date/time/timezone → **Send Schedule**.
* **AI Scheduling** — choose a time window (e.g., next 48 hours) → **Send with AI Optimization**. The AI picks the highest-engagement moment in that window based on the recipient's historical patterns.
 ### CC and BCC
In the email composer, click **CC** or **BCC** next to the To field. Type an address or pick from your contacts. CC recipients can see each other; BCC recipients are hidden from all others.
***
## Sending a group SMS
Click the **+** icon in Conversations.
### CC and BCC
In the email composer, click **CC** or **BCC** next to the To field. Type an address or pick from your contacts. CC recipients can see each other; BCC recipients are hidden from all others.
***
## Sending a group SMS
Click the **+** icon in Conversations.
 Choose **Group Conversation** and select the CRM number to send from.
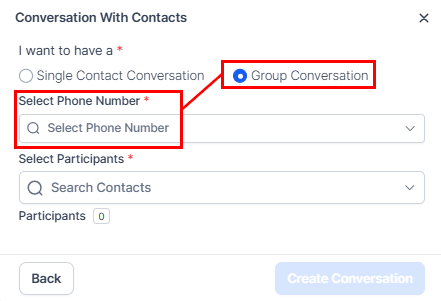 Select 2–10 contacts from your contact list.
Click **Create Conversation**, compose your message, and send. All participants receive it and can reply to the entire group.
Select 2–10 contacts from your contact list.
Click **Create Conversation**, compose your message, and send. All participants receive it and can reply to the entire group.
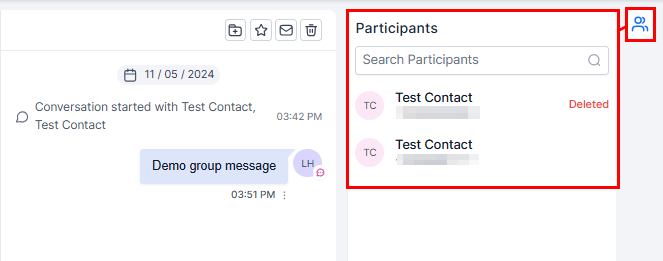 * Enhanced collaboration — stakeholders stay in one thread.
* Centralized messaging — no need for individual messages.
* Real-time engagement — all participants can reply in context.
Click the three dots below a sent message → **Details** to see per-contact delivery status (sent, delivered, or failed). Tags like "Updated" or "Deleted" appear beside contacts whose numbers have changed.
Users with assigned data access can only create group chats with their assigned contacts. Admins have access to all account numbers; users access their assigned and unassigned numbers.
***
## Scheduling messages
Any channel supports scheduled sending.
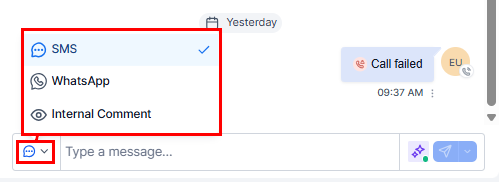
Choose your channel and write your message.
* Enhanced collaboration — stakeholders stay in one thread.
* Centralized messaging — no need for individual messages.
* Real-time engagement — all participants can reply in context.
Click the three dots below a sent message → **Details** to see per-contact delivery status (sent, delivered, or failed). Tags like "Updated" or "Deleted" appear beside contacts whose numbers have changed.
Users with assigned data access can only create group chats with their assigned contacts. Admins have access to all account numbers; users access their assigned and unassigned numbers.
***
## Scheduling messages
Any channel supports scheduled sending.
Choose your channel and write your message.
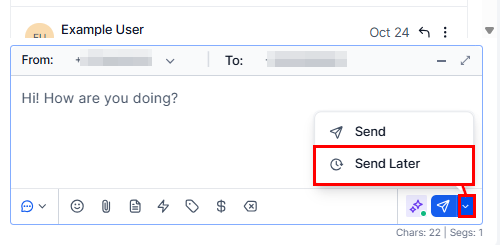
 Click the dropdown arrow next to Send and choose **Send Later**.
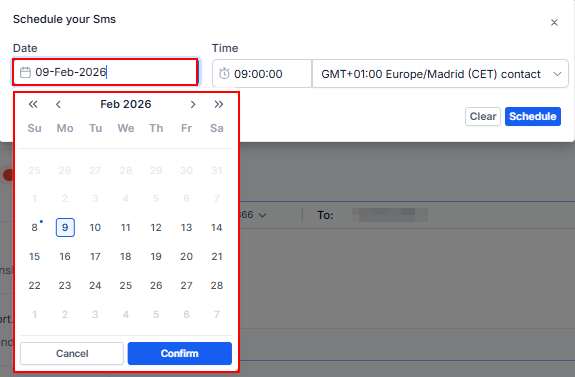
 Pick a date, set the time (24-hour format), and choose the timezone. The contact's timezone is pre-selected if available.
 Click **Schedule**. The message shows a **Cancel** link until the send time passes.
Once a scheduled message's send time has passed, the Cancel option is no longer available.
Click **Schedule**. The message shows a **Cancel** link until the send time passes.
Once a scheduled message's send time has passed, the Cancel option is no longer available.