> ## Documentation Index
> Fetch the complete documentation index at: https://help.hoopai.com/llms.txt
> Use this file to discover all available pages before exploring further.
# Smart lists
> Create, filter, manage, and share smart lists to segment your contacts dynamically in the HoopAI Platform.
Smart lists are saved, filtered views of your contact database. By combining conditions, sort orders, and custom columns, you can instantly see exactly the right contacts — and share those views with teammates.
 ## Creating a smart list
Navigate to **Contacts** in the left sidebar, then click the **Smart Lists** tab.
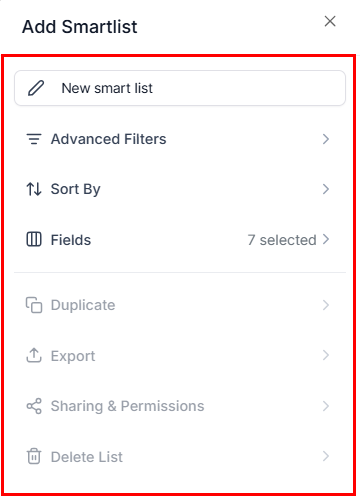
Click the **+ Add Smart List** button to open the filter panel on the right.
## Creating a smart list
Navigate to **Contacts** in the left sidebar, then click the **Smart Lists** tab.
Click the **+ Add Smart List** button to open the filter panel on the right.
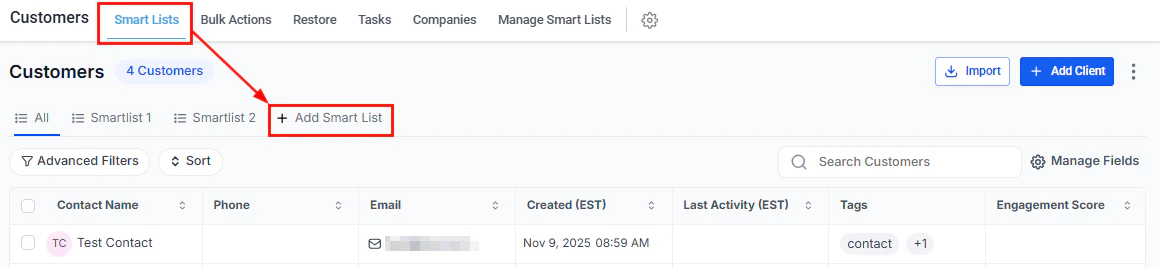 Click the name field at the top of the filter panel and enter a descriptive name.
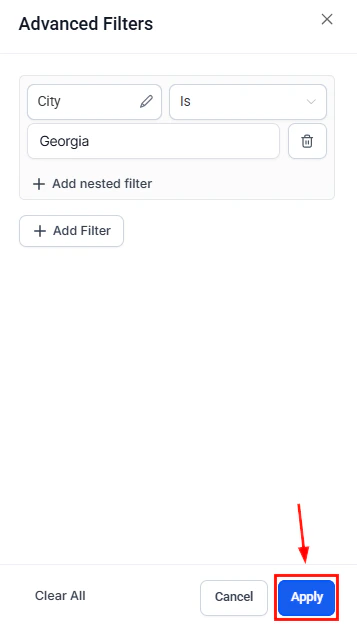
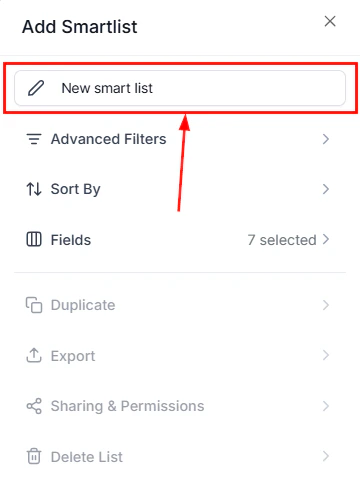 Click **Advanced Filters** to select filter criteria. Choose a field, then pick a condition:
* **Is / Is Not** — exact match
* **More Than / Less Than** — numerical comparison
* **Contains** — partial text match
* **Is Empty / Is Not Empty** — presence check
* **Has Active Campaign** — automation membership check
Click **Advanced Filters** to select filter criteria. Choose a field, then pick a condition:
* **Is / Is Not** — exact match
* **More Than / Less Than** — numerical comparison
* **Contains** — partial text match
* **Is Empty / Is Not Empty** — presence check
* **Has Active Campaign** — automation membership check
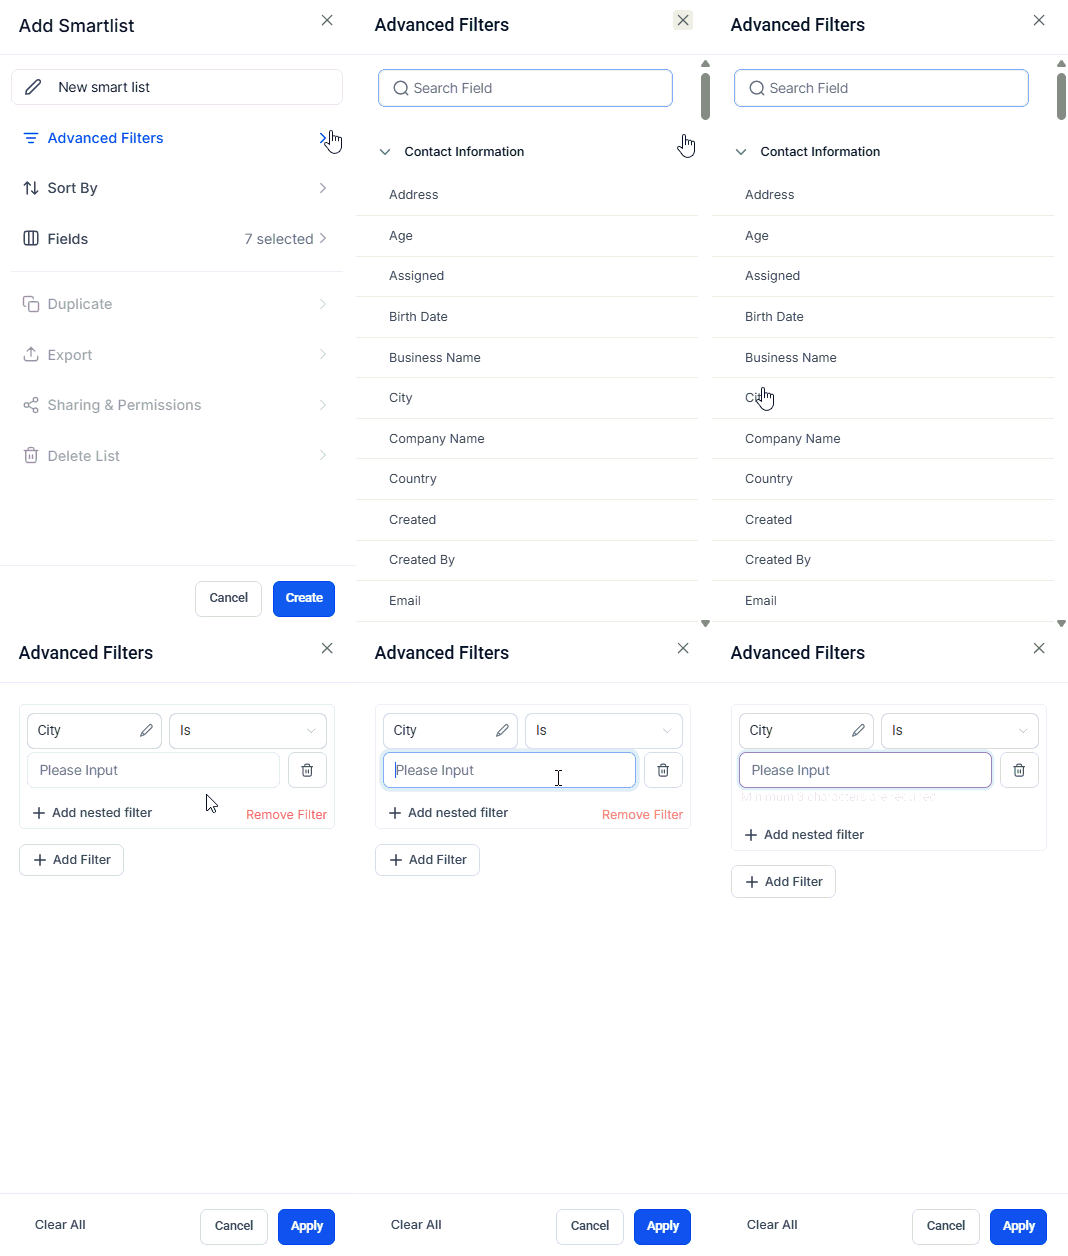 Click **Apply** to confirm each filter.
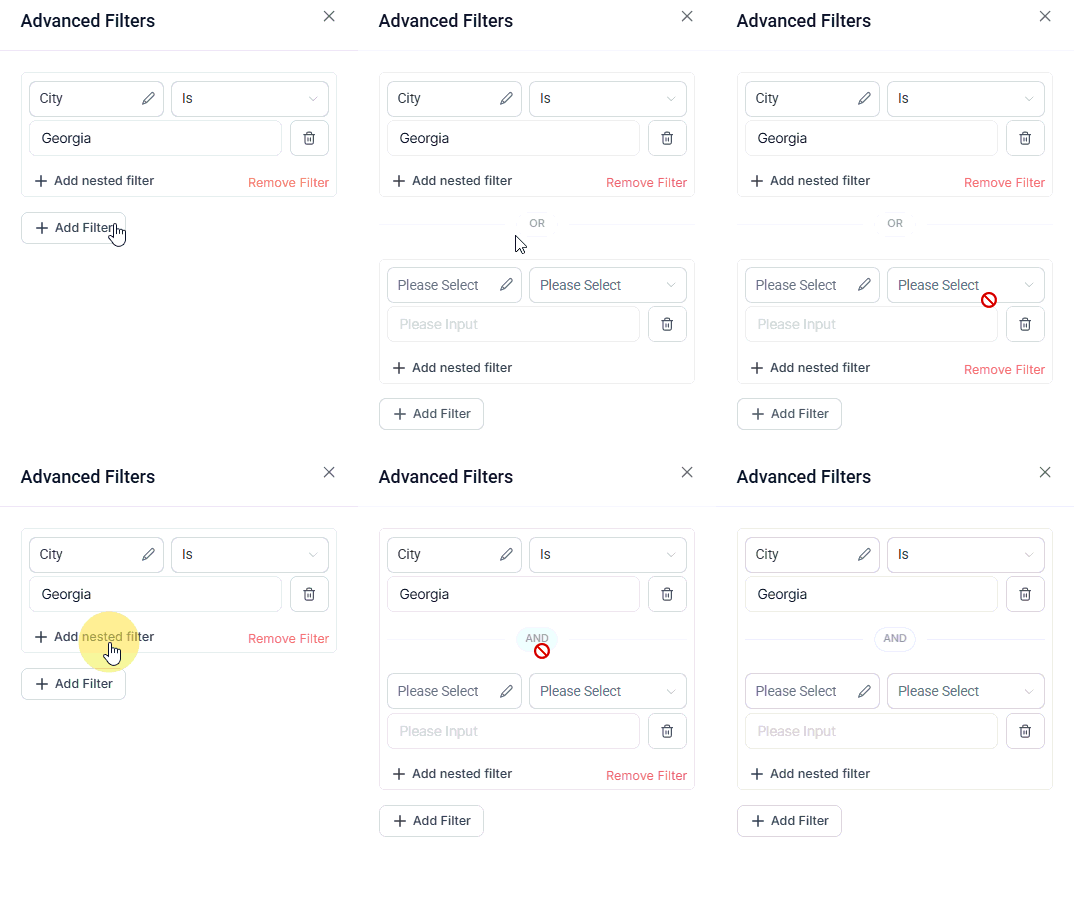
 Use **And** to require all conditions, or **Or** to allow any condition. Add additional filter rows as needed.
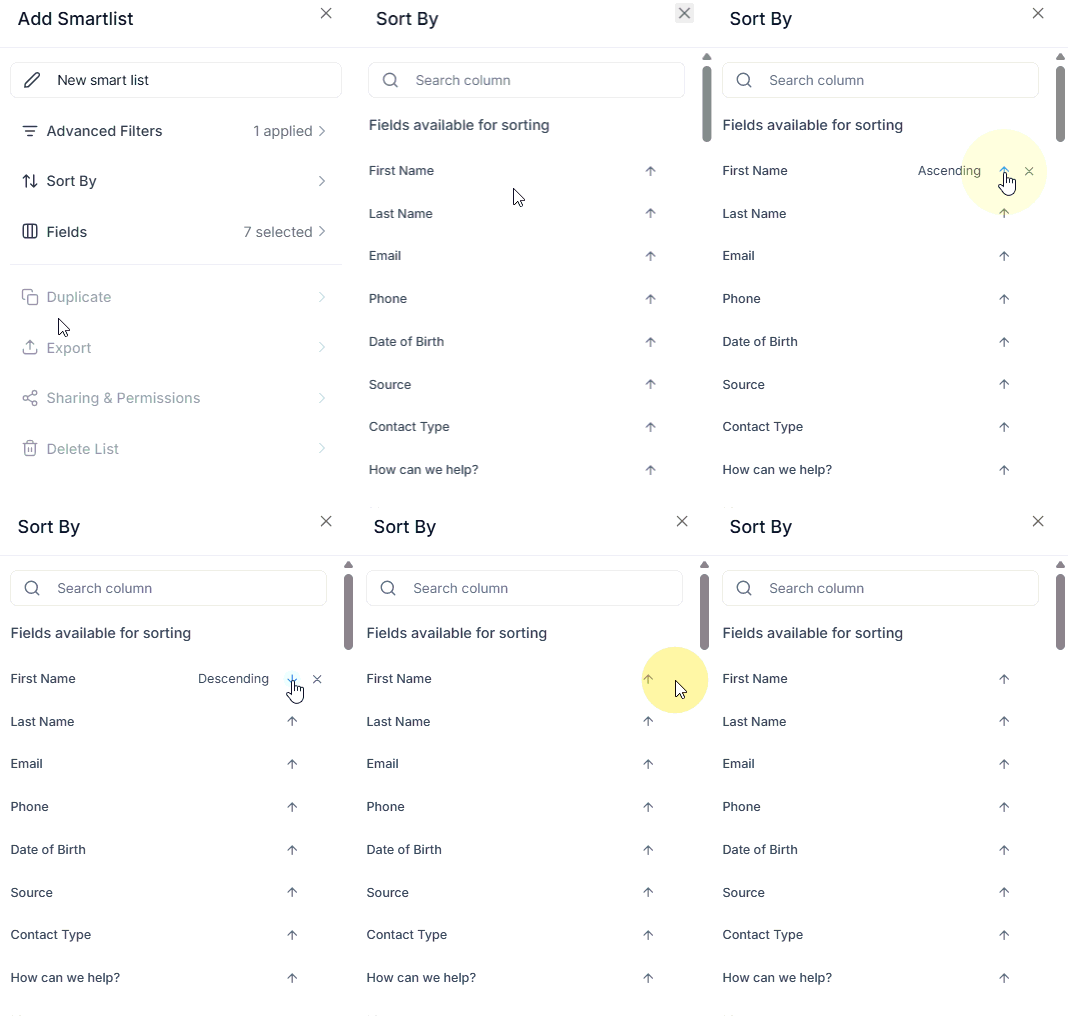
 Expand the **Sort By** menu to choose a field and direction (ascending or descending).
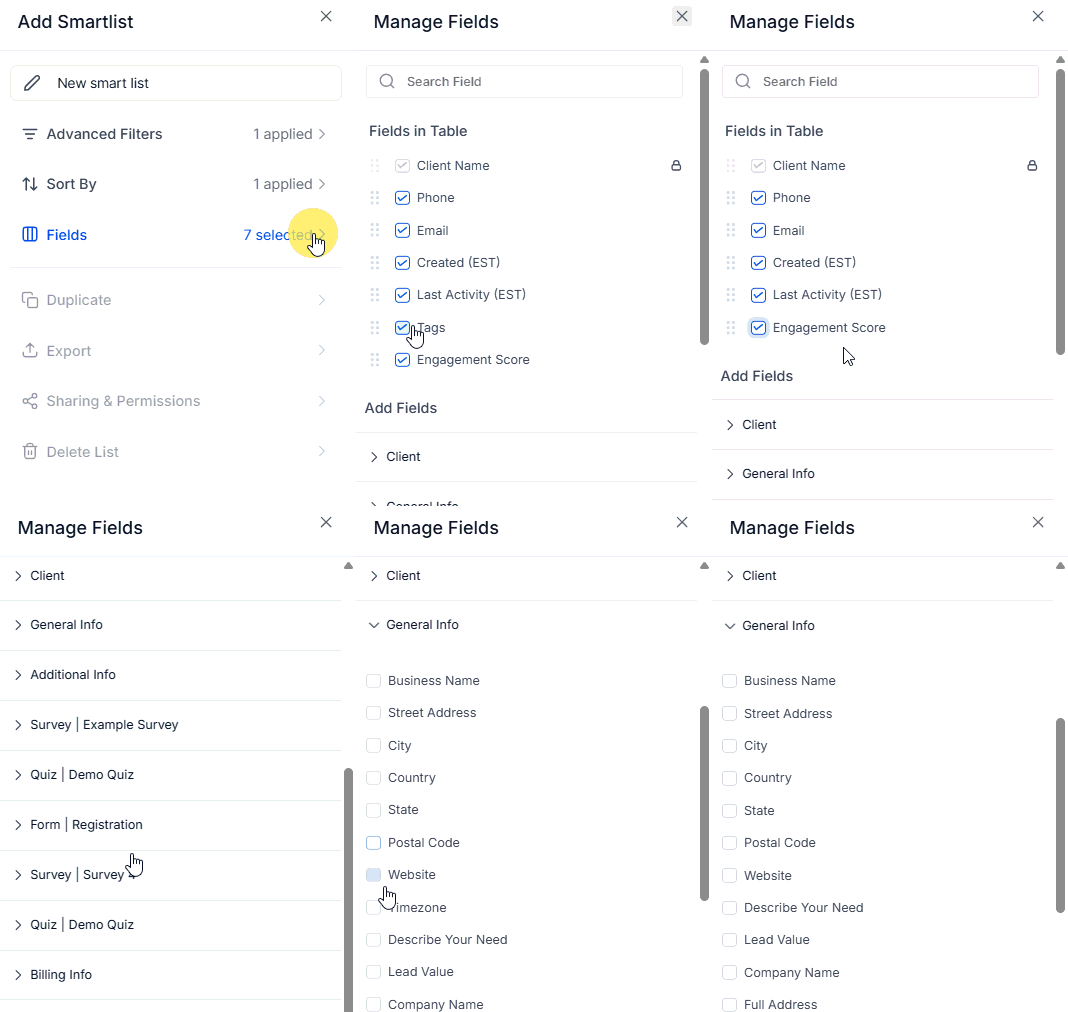
 Click **Fields** to select which columns appear in the list. The contact name column is always first.
 Click **Create** in the bottom right to save.
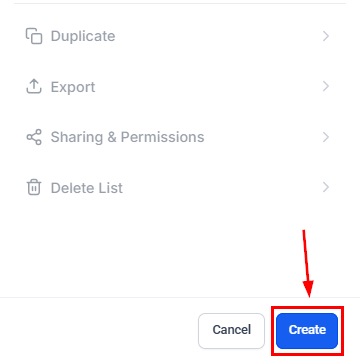 The new list appears in the top navigation bar for quick access.
***
## Managing smart lists
Access the management panel by clicking the **three-dot icon** in the Smart Lists tab and selecting **Manage Smart Lists**.
The new list appears in the top navigation bar for quick access.
***
## Managing smart lists
Access the management panel by clicking the **three-dot icon** in the Smart Lists tab and selecting **Manage Smart Lists**.
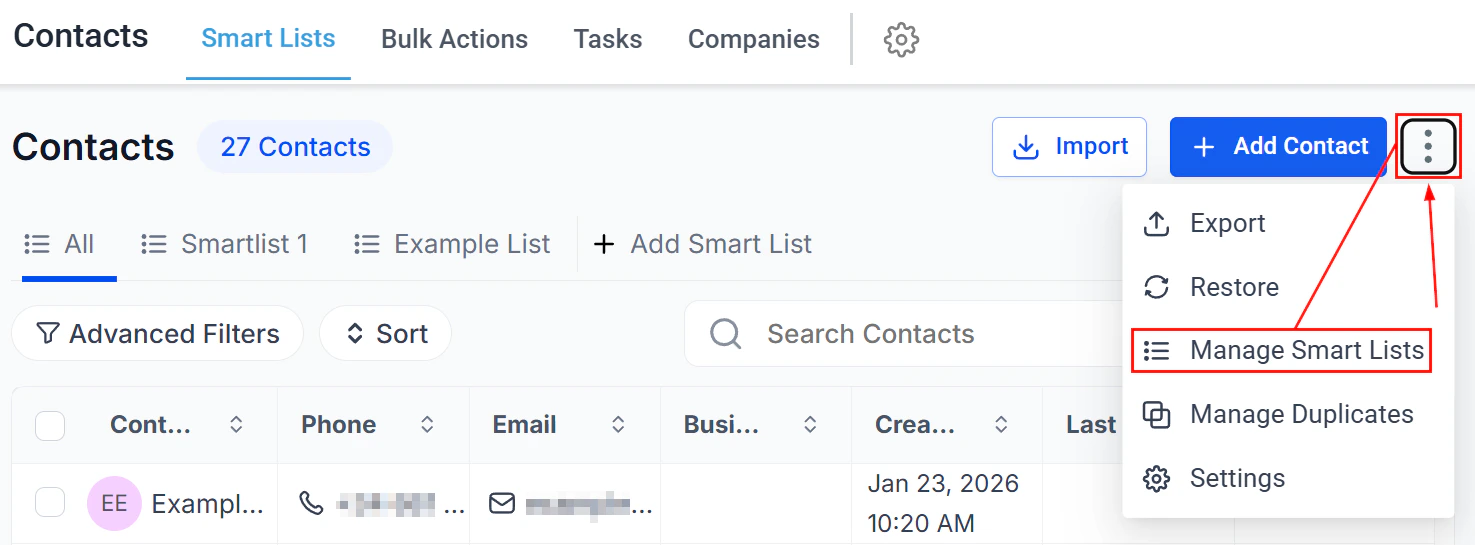 Each smart list is displayed as a card with quick action buttons:
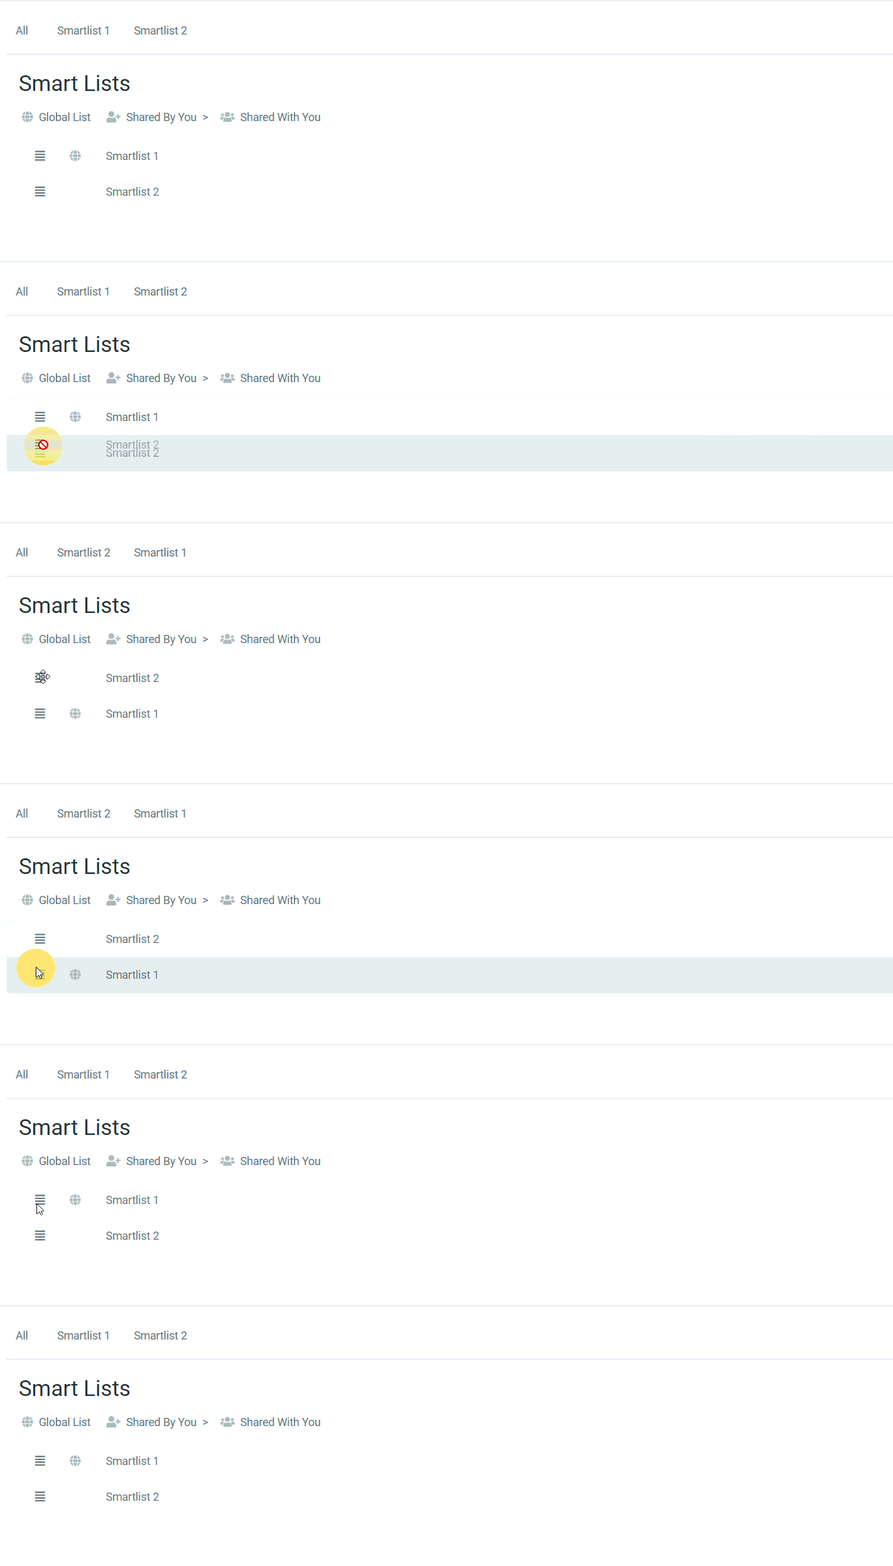
Click and hold the drag handle icon on any card to reorder smart lists in the panel.
Each smart list is displayed as a card with quick action buttons:
Click and hold the drag handle icon on any card to reorder smart lists in the panel.
 Click the **Duplicate** icon to copy a smart list and its filters to a new list.
 Click the **Share** icon to share a smart list with all users or selected individuals.
 Sharing status icons appear next to each list:
* **Globe icon** — shared with everyone
* **Person icon** — shared by you with others
* **Incoming arrow** — shared with you by another user
Sharing status icons appear next to each list:
* **Globe icon** — shared with everyone
* **Person icon** — shared by you with others
* **Incoming arrow** — shared with you by another user
 Click the **Edit** (pencil) icon to rename the smart list.
 Click the **Delete** (trash) icon to remove the smart list. Contacts remain in your account.
To delete a shared smart list, you must first revoke access for all other users.
Click the **Delete** (trash) icon to remove the smart list. Contacts remain in your account.
To delete a shared smart list, you must first revoke access for all other users.
 ***
## Editing a smart list
Click the smart list you want to edit in the top navigation bar.
Click **Advanced Filters** to view and modify the current filter conditions.
Click **Clear All Filters** to start fresh, or use the **And** / **Or** operators to add and adjust filters.
* Click **Save** to update the existing smart list
* Click **Save as New** to create a new list with the current filters
* Click **Discard Changes** to revert to the previous state
***
## Common use cases
Create a list of customers who purchased within the last 6 months to target with a new product launch campaign.
Filter by lead score or recent activity to help your sales team focus on the highest-value prospects.
Identify potential attendees by past attendance, location, or stated interests for targeted invitations.
Surface contacts with multiple open support tickets so your team can proactively reach out.
List contacts who have earned a threshold of loyalty points and send them exclusive offers.
Find contacts who purchased a specific product and promote complementary or upgraded options.
***
## Adding a contact photo
You can add or change a contact's profile photo to replace the default initials bubble.
### Adding a photo to a new contact
In the Smart Lists tab, click **+ Add Contact**.
In the contact creation form, click the pencil icon under **Contact Image**, then click **Upload Image** to select a file from your computer.
Fill out the remaining contact details and click **Save**.
### Editing an existing contact's photo
Click on the contact's name in any smart list.
Hover over the contact's image or initials circle, then click the pencil icon that appears.
Click **Upload From Computer**, select your image, crop it as desired, and click **Save**.
Profile photos appear in the Contacts Smart List, Conversation Inbox, and the right-side contact panel. Use a 512x512 pixel JPG or PNG image under 2.5 MB for best results.
***
## Viewing and deleting cards on file
Stored payment cards can be reviewed and removed from a contact record.
Go to **Contacts** and find the contact whose stored cards you want to manage.
Click the **\$** icon within the contact record.
Open the **Actions** menu and select **Manage Cards**. All stored cards are listed here.
Click the **trash** icon next to any card. A confirmation popup appears. For cards linked to an active subscription, an additional warning is displayed before confirmation.
Deleting a card that is linked to an active subscription will remove the payment method for automatic billing on that subscription.
***
## Editing a smart list
Click the smart list you want to edit in the top navigation bar.
Click **Advanced Filters** to view and modify the current filter conditions.
Click **Clear All Filters** to start fresh, or use the **And** / **Or** operators to add and adjust filters.
* Click **Save** to update the existing smart list
* Click **Save as New** to create a new list with the current filters
* Click **Discard Changes** to revert to the previous state
***
## Common use cases
Create a list of customers who purchased within the last 6 months to target with a new product launch campaign.
Filter by lead score or recent activity to help your sales team focus on the highest-value prospects.
Identify potential attendees by past attendance, location, or stated interests for targeted invitations.
Surface contacts with multiple open support tickets so your team can proactively reach out.
List contacts who have earned a threshold of loyalty points and send them exclusive offers.
Find contacts who purchased a specific product and promote complementary or upgraded options.
***
## Adding a contact photo
You can add or change a contact's profile photo to replace the default initials bubble.
### Adding a photo to a new contact
In the Smart Lists tab, click **+ Add Contact**.
In the contact creation form, click the pencil icon under **Contact Image**, then click **Upload Image** to select a file from your computer.
Fill out the remaining contact details and click **Save**.
### Editing an existing contact's photo
Click on the contact's name in any smart list.
Hover over the contact's image or initials circle, then click the pencil icon that appears.
Click **Upload From Computer**, select your image, crop it as desired, and click **Save**.
Profile photos appear in the Contacts Smart List, Conversation Inbox, and the right-side contact panel. Use a 512x512 pixel JPG or PNG image under 2.5 MB for best results.
***
## Viewing and deleting cards on file
Stored payment cards can be reviewed and removed from a contact record.
Go to **Contacts** and find the contact whose stored cards you want to manage.
Click the **\$** icon within the contact record.
Open the **Actions** menu and select **Manage Cards**. All stored cards are listed here.
Click the **trash** icon next to any card. A confirmation popup appears. For cards linked to an active subscription, an additional warning is displayed before confirmation.
Deleting a card that is linked to an active subscription will remove the payment method for automatic billing on that subscription.