> ## Documentation Index
> Fetch the complete documentation index at: https://help.hoopai.com/llms.txt
> Use this file to discover all available pages before exploring further.
# Contact details
> View and manage every aspect of a contact record in the HoopAI Platform — information panels, appointments, tasks, messages, payments, documents, and more.
Each contact in the HoopAI Platform has a dedicated record that brings together all of their information, interactions, and activity in one place. From the contact details view, you can manage communication channels, schedule appointments, handle payments, assign tasks, and track the contact's full history.
## Opening a contact record
Navigate to **Contacts > Smart Lists** and click a contact's name to open their record.
 ***
## Contact header
The top of every contact record displays:
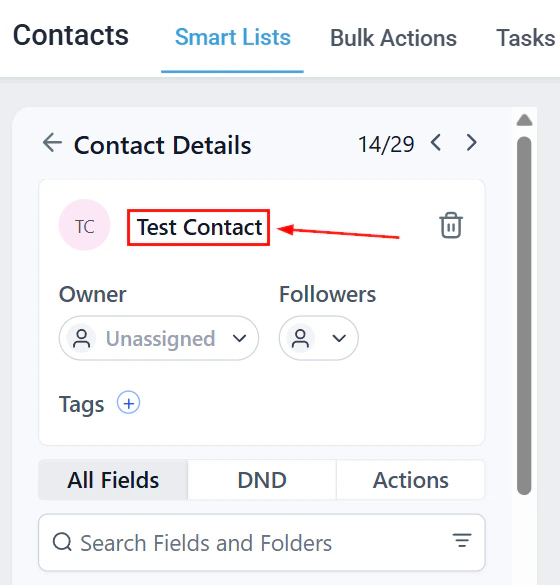
* **Contact name** — shown in the upper left for quick confirmation
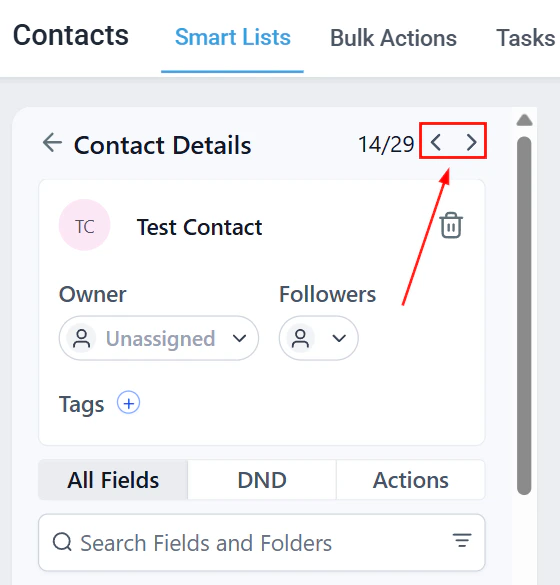
* **Navigation arrows** — click to cycle through contacts in the current list without returning to Smart Lists
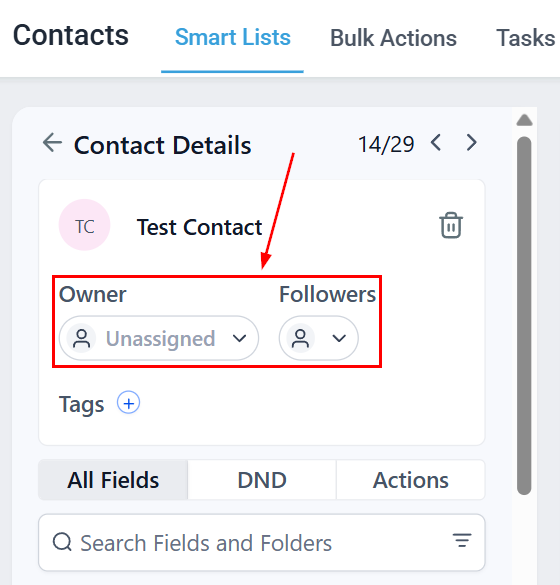
* **Owner and followers** — assign team members so they are notified when interactions occur
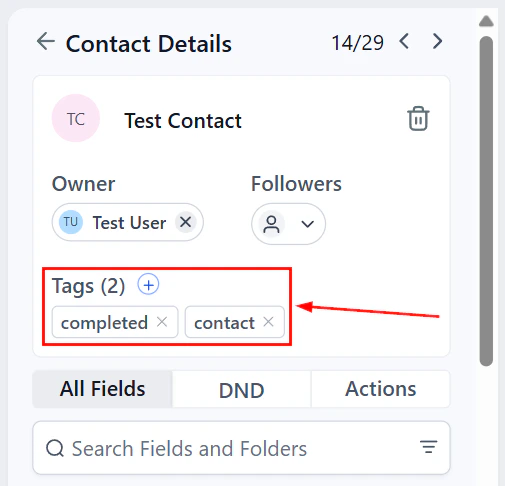
* **Tags** — add or remove tags directly from the header
***
## Contact header
The top of every contact record displays:
* **Contact name** — shown in the upper left for quick confirmation
* **Navigation arrows** — click to cycle through contacts in the current list without returning to Smart Lists
* **Owner and followers** — assign team members so they are notified when interactions occur
* **Tags** — add or remove tags directly from the header
 ***
## Contact tabs
The left panel of a contact record contains several tabs.
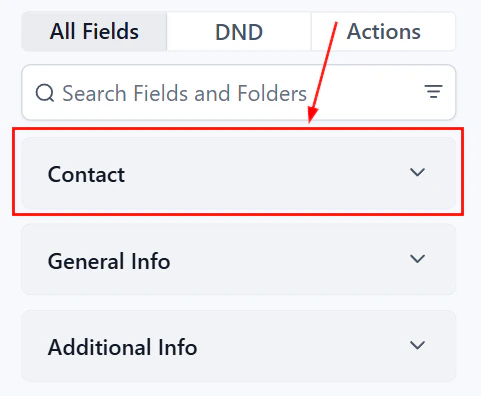
The default tab. Displays the contact's name, email addresses, phone numbers, tags, active opportunities, and enrolled workflows.
***
## Contact tabs
The left panel of a contact record contains several tabs.
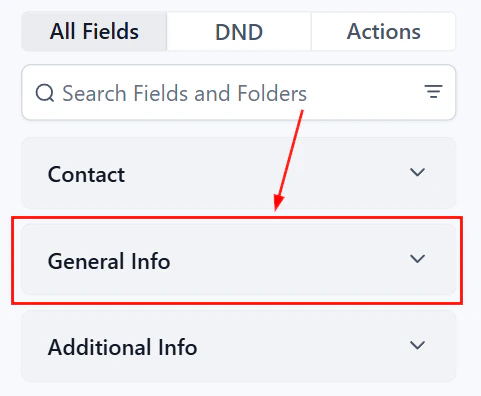
The default tab. Displays the contact's name, email addresses, phone numbers, tags, active opportunities, and enrolled workflows.
 Enter additional contact information such as business name, address, and website.
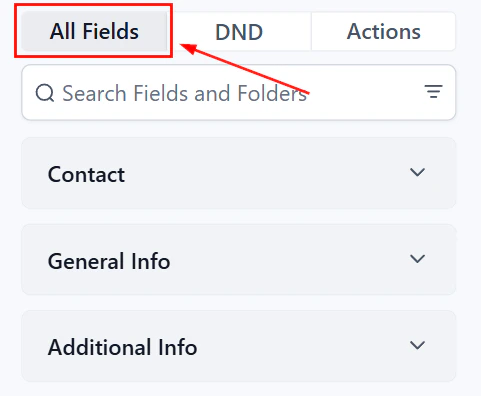 Displays all custom fields associated with the contact. Custom fields are created in Settings and can be added to forms and surveys.
 Click **Audit Logs** to view a full activity history for the contact.
 ***
## Do Not Disturb (DND)
DND removes a contact from one or all communication channels. You can set DND per channel — SMS, Calls, Email, Facebook, GMB, and WhatsApp — once each channel is integrated.
***
## Actions panel
Below the tabs, the **Actions** panel provides quick access to opportunities, workflows, and client portal management.
Create new opportunities or view existing ones linked to the contact. Click **Add** to link the contact to an existing opportunity.
* **Active** — shows all running automations the contact is enrolled in; use this tab to add the contact to a new automation
* **Past** — shows all completed or stopped automations for historical context
* **Course Offers** — view subscribed offers; grant or revoke access using the dropdown or the **x** button
* **Community Groups** — assign the contact to available community groups or course offerings
***
## Information panel (right side)
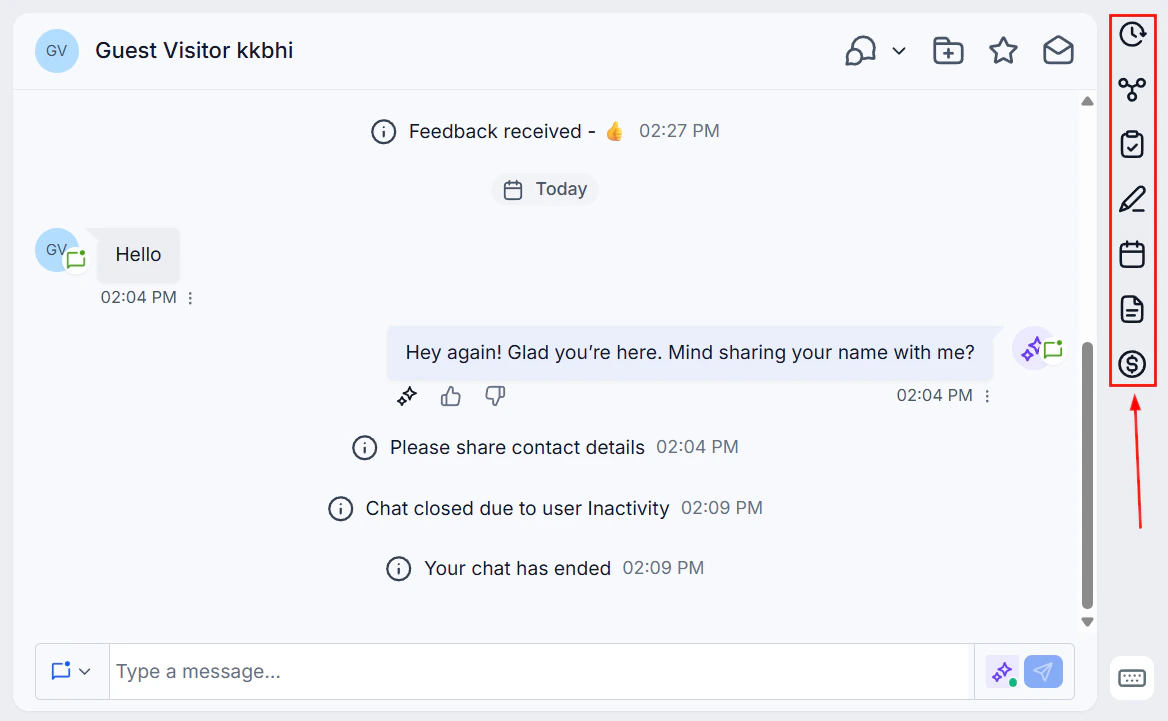
The right panel contains tabs for managing different aspects of the contact.
***
## Do Not Disturb (DND)
DND removes a contact from one or all communication channels. You can set DND per channel — SMS, Calls, Email, Facebook, GMB, and WhatsApp — once each channel is integrated.
***
## Actions panel
Below the tabs, the **Actions** panel provides quick access to opportunities, workflows, and client portal management.
Create new opportunities or view existing ones linked to the contact. Click **Add** to link the contact to an existing opportunity.
* **Active** — shows all running automations the contact is enrolled in; use this tab to add the contact to a new automation
* **Past** — shows all completed or stopped automations for historical context
* **Course Offers** — view subscribed offers; grant or revoke access using the dropdown or the **x** button
* **Community Groups** — assign the contact to available community groups or course offerings
***
## Information panel (right side)
The right panel contains tabs for managing different aspects of the contact.
 ### Activity tab
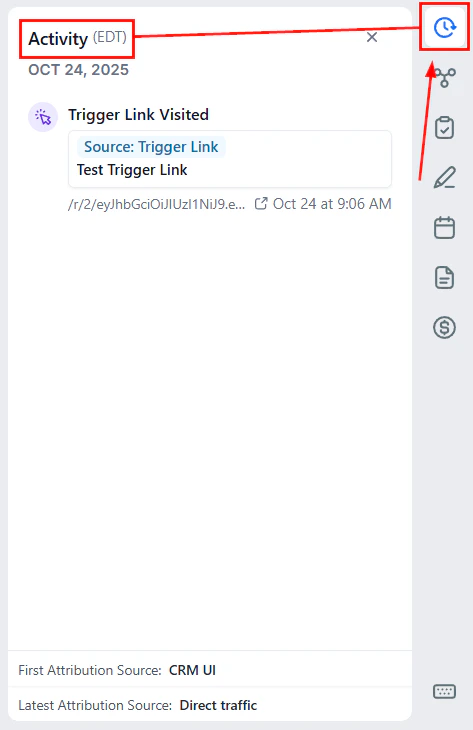
View a complete timeline of the contact's interactions, including website visits, form submissions, calls, emails, and purchases.
### Activity tab
View a complete timeline of the contact's interactions, including website visits, form submissions, calls, emails, and purchases.
 ### Contact attribution
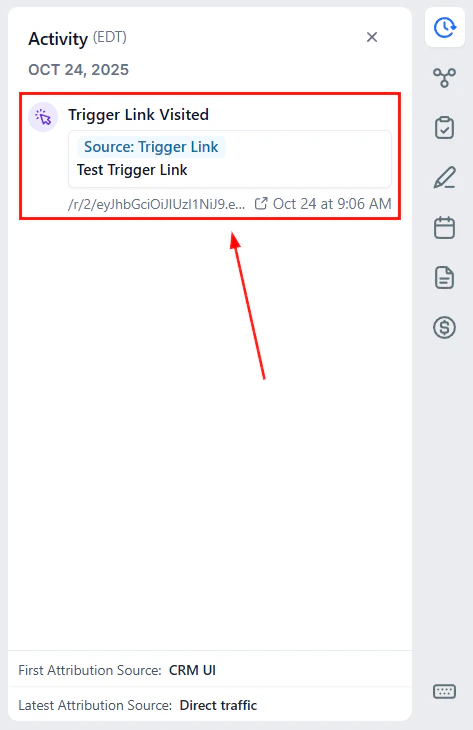
Within the Activity tab, attribution shows where a contact first and most recently interacted with your business:
* **First Interaction** — the original source; remains constant unless contact data is reset
* **Latest Interaction** — updates with each new interaction
Click either attribution source to see detailed UTM data.
**Session sources include:** CRM UI, Paid Search, Paid Social, Direct Traffic, Organic Search, Social Media, Referrals, and Others (SMS, email, third-party integrations).
To capture attribution accurately, ensure UTM parameters are correctly set up in your Google Ads and Facebook Ads configurations. Avoid adding custom UTM parameters not specified in the setup guide.
### Associations tab
View and manage the relationships between the contact and other contacts, opportunities, companies, and custom objects.
Open the **Associations** tab on the right panel. Existing linked objects are shown as cards.
Click **+ Add** and choose:
* **Create New** — opens a modal to create a new contact, opportunity, or custom object
* **Add Existing** — link an already existing object
Select the appropriate association label from the dropdown. Up to 10 association labels can be applied between two contacts.
Click **Manage Associations** to open the Association Settings page, where you can update labels, adjust linked objects, and configure additional options.
### Tasks tab
Create and manage tasks associated with the contact. Each task requires a title, due date, and an assigned user.
Use the filter and search controls at the top to organize tasks. Click **+ Add** to create a new task.
### Notes tab
Record additional information about the contact. Each note includes a timestamp and can be edited later.
* Click **+ Add** to create a note
* Use the search bar to find specific notes
* Sort notes to quickly locate relevant entries
### Appointments tab
View, schedule, and manage appointments for the contact.
Toggle between **New** and **Previous** appointments, or use the search bar to find a specific booking.
#### Scheduling an appointment
In the contact record, click the **Calendar** icon or navigate to the **Appointments** tab on the right panel. Click **+ Add**.
Select **Meetings** or **Services**.
Configure the following:
* **Calendar** — choose which calendar to book on
* **Title and description** — leave blank to use the calendar's default
* **Team member** — select a specific user, or let the calendar assign one automatically
* **Attendees** — add other contacts as guests
* **Time zone** — ensure correct scheduling across time zones
* **Date and time slot** — unavailable times are automatically hidden
* **Meeting location** — specify a location or use the calendar's default
* **Status** — set as confirmed or unconfirmed
Click **Book Appointment** to add it to the schedule.
#### Editing an appointment
Click the three-dot icon on an appointment card, then click the pencil icon to open the full edit view.
#### Canceling an appointment
Click the three-dot icon on the appointment card, then select **Cancel**. Confirm in the popup. The status changes to **Cancelled** and any workflows triggered by appointment cancellation will start.
### Documents tab
Access all documents associated with the contact, organized into three categories:
Documents stored within the CRM on the contact details page. Documents added via custom file-upload fields appear here in the **Custom Fields** folder.
### Contact attribution
Within the Activity tab, attribution shows where a contact first and most recently interacted with your business:
* **First Interaction** — the original source; remains constant unless contact data is reset
* **Latest Interaction** — updates with each new interaction
Click either attribution source to see detailed UTM data.
**Session sources include:** CRM UI, Paid Search, Paid Social, Direct Traffic, Organic Search, Social Media, Referrals, and Others (SMS, email, third-party integrations).
To capture attribution accurately, ensure UTM parameters are correctly set up in your Google Ads and Facebook Ads configurations. Avoid adding custom UTM parameters not specified in the setup guide.
### Associations tab
View and manage the relationships between the contact and other contacts, opportunities, companies, and custom objects.
Open the **Associations** tab on the right panel. Existing linked objects are shown as cards.
Click **+ Add** and choose:
* **Create New** — opens a modal to create a new contact, opportunity, or custom object
* **Add Existing** — link an already existing object
Select the appropriate association label from the dropdown. Up to 10 association labels can be applied between two contacts.
Click **Manage Associations** to open the Association Settings page, where you can update labels, adjust linked objects, and configure additional options.
### Tasks tab
Create and manage tasks associated with the contact. Each task requires a title, due date, and an assigned user.
Use the filter and search controls at the top to organize tasks. Click **+ Add** to create a new task.
### Notes tab
Record additional information about the contact. Each note includes a timestamp and can be edited later.
* Click **+ Add** to create a note
* Use the search bar to find specific notes
* Sort notes to quickly locate relevant entries
### Appointments tab
View, schedule, and manage appointments for the contact.
Toggle between **New** and **Previous** appointments, or use the search bar to find a specific booking.
#### Scheduling an appointment
In the contact record, click the **Calendar** icon or navigate to the **Appointments** tab on the right panel. Click **+ Add**.
Select **Meetings** or **Services**.
Configure the following:
* **Calendar** — choose which calendar to book on
* **Title and description** — leave blank to use the calendar's default
* **Team member** — select a specific user, or let the calendar assign one automatically
* **Attendees** — add other contacts as guests
* **Time zone** — ensure correct scheduling across time zones
* **Date and time slot** — unavailable times are automatically hidden
* **Meeting location** — specify a location or use the calendar's default
* **Status** — set as confirmed or unconfirmed
Click **Book Appointment** to add it to the schedule.
#### Editing an appointment
Click the three-dot icon on an appointment card, then click the pencil icon to open the full edit view.
#### Canceling an appointment
Click the three-dot icon on the appointment card, then select **Cancel**. Confirm in the popup. The status changes to **Cancelled** and any workflows triggered by appointment cancellation will start.
### Documents tab
Access all documents associated with the contact, organized into three categories:
Documents stored within the CRM on the contact details page. Documents added via custom file-upload fields appear here in the **Custom Fields** folder.
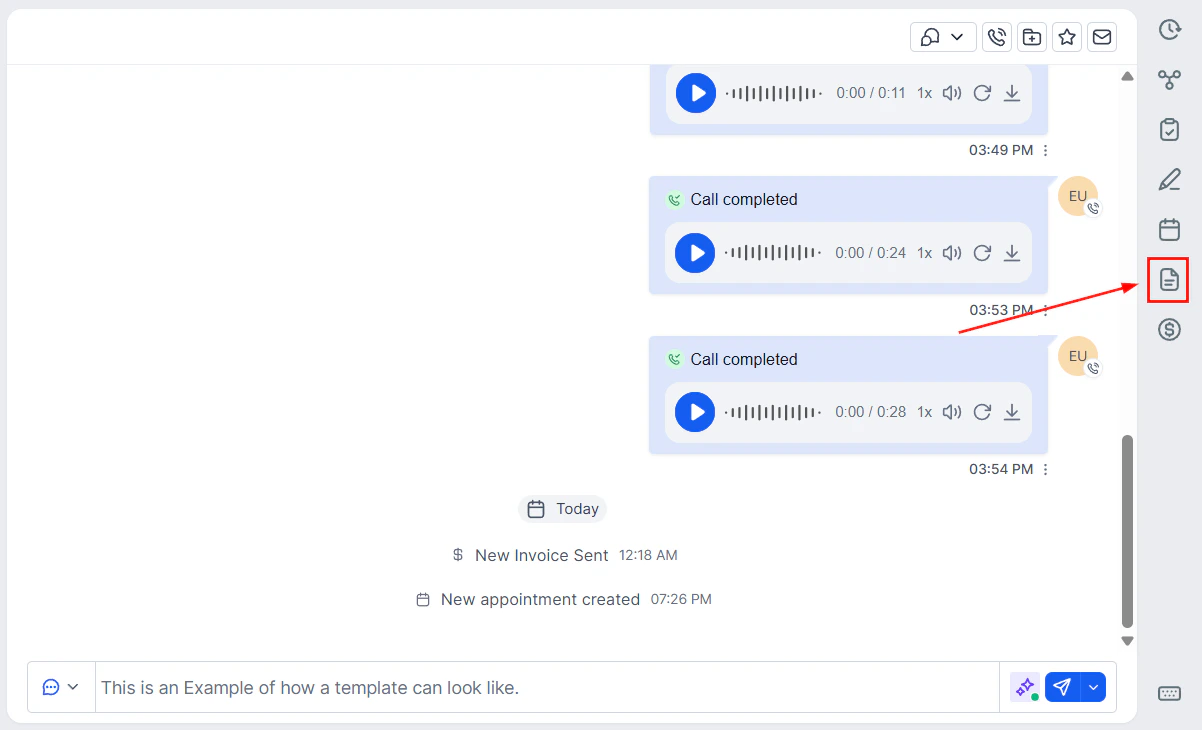 All documents you have sent to the contact, including contracts and proposals.
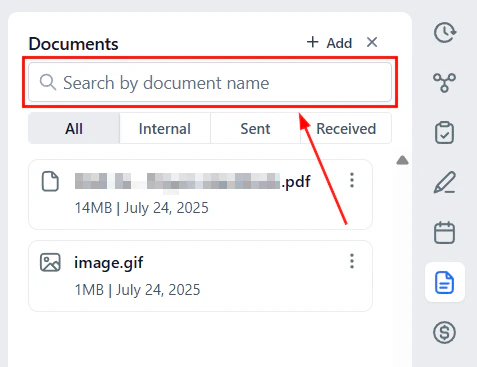 Documents submitted by the contact through forms and surveys. Use the **Document** icon, select **Received**, then choose **Form** or **Survey** to view submissions.
**Adding documents:** Click **+ Add** to upload up to 10 files simultaneously. Supported types include PDF, Word, PowerPoint, CSV, and common image formats, up to 250 MB each.
### Payments tab
Manage all payment-related activity for the contact, including manual charges, subscriptions, invoices, and stored payment cards.
Add a credit or debit card for easy checkout, fees, and subscription payments.
Apply an immediate charge directly from the contact record. Navigate to the **Payments** tab, click **Charge Now** from the Actions dropdown, enter the amount and a description, select or add a payment method, and click **Confirm & Charge**.
If a saved card fails, attempt a different saved card or contact the customer to update their payment details.
Select **Create Subscription** from the Actions dropdown. Set the Bill Start Date, select recurring products, and choose the payment method. Click **Schedule** to activate.
Select **Create Invoice** from the Actions dropdown. This opens the Invoice builder with the contact's details pre-filled. Add items, discounts, and taxes, then click **Send** and choose a messaging channel to deliver the invoice.
View all stored cards showing the last four digits, expiration date, and label. Click the trash icon to delete a card.
***
## Contact profile picture
Each contact can have a profile picture displayed on their record, in conversation threads, and on opportunity cards.
### Uploading a profile picture
1. Open the contact record
2. Click the avatar/photo area at the top of the contact header
3. Upload an image from your computer or select one from the Media Library
4. The image is cropped to a circle and saved immediately
### Auto-fetching from social profiles
When a contact is created via a social integration (Facebook Lead Ads, Instagram DM, WhatsApp), the platform automatically pulls their social profile picture if available. This happens during:
* Facebook Messenger conversations
* Instagram DM conversations
* WhatsApp message threads
The auto-fetched image can be replaced manually at any time by uploading a new one.
Auto-fetched profile pictures depend on the social platform making the image available via their API. If a contact has a private social profile, the image may not be retrieved.
***
## Managing multiple phone numbers
Each contact supports up to 11 phone numbers (1 primary + 10 additional).
In the **Contact** section of the contact record, click **+ Add**, then select **Phone**. Enter the number and click **Save**.
Click the radio button next to the number you want to designate as primary.
Choose a label (Home, Landline, Mobile, Work) from the dropdown. Each label can only be applied to one number per contact.
Click the trash icon next to the number to remove it. The primary number cannot be deleted until another number is set as default.
***
## Managing multiple email addresses
Each contact supports up to 11 email addresses (1 primary + 10 additional).
In the **Contact** section, click the **+** icon next to the primary email. Enter the address and click outside the field to save it.
Click the circle next to the email address you want as primary. The primary email is used automatically for all contact actions.
When composing a message, select the recipient address from the **To** dropdown. The primary email is pre-selected.
***
## Managing followers
Followers have owner-level permissions to manage and edit contact data collaboratively.
Go to **Settings > My Staff**, then edit the relevant team member. Enable **Restrict data visibility to only assigned data** in their user permissions.
Open the contact record. In the upper panel, click the people icon next to **Followers**. Select up to 10 users from the dropdown.
Follower contacts are only visible when the "Only Assigned Data" setting is turned on. If followers cannot see the contact, verify that this setting is enabled for their user profile.
Documents submitted by the contact through forms and surveys. Use the **Document** icon, select **Received**, then choose **Form** or **Survey** to view submissions.
**Adding documents:** Click **+ Add** to upload up to 10 files simultaneously. Supported types include PDF, Word, PowerPoint, CSV, and common image formats, up to 250 MB each.
### Payments tab
Manage all payment-related activity for the contact, including manual charges, subscriptions, invoices, and stored payment cards.
Add a credit or debit card for easy checkout, fees, and subscription payments.
Apply an immediate charge directly from the contact record. Navigate to the **Payments** tab, click **Charge Now** from the Actions dropdown, enter the amount and a description, select or add a payment method, and click **Confirm & Charge**.
If a saved card fails, attempt a different saved card or contact the customer to update their payment details.
Select **Create Subscription** from the Actions dropdown. Set the Bill Start Date, select recurring products, and choose the payment method. Click **Schedule** to activate.
Select **Create Invoice** from the Actions dropdown. This opens the Invoice builder with the contact's details pre-filled. Add items, discounts, and taxes, then click **Send** and choose a messaging channel to deliver the invoice.
View all stored cards showing the last four digits, expiration date, and label. Click the trash icon to delete a card.
***
## Contact profile picture
Each contact can have a profile picture displayed on their record, in conversation threads, and on opportunity cards.
### Uploading a profile picture
1. Open the contact record
2. Click the avatar/photo area at the top of the contact header
3. Upload an image from your computer or select one from the Media Library
4. The image is cropped to a circle and saved immediately
### Auto-fetching from social profiles
When a contact is created via a social integration (Facebook Lead Ads, Instagram DM, WhatsApp), the platform automatically pulls their social profile picture if available. This happens during:
* Facebook Messenger conversations
* Instagram DM conversations
* WhatsApp message threads
The auto-fetched image can be replaced manually at any time by uploading a new one.
Auto-fetched profile pictures depend on the social platform making the image available via their API. If a contact has a private social profile, the image may not be retrieved.
***
## Managing multiple phone numbers
Each contact supports up to 11 phone numbers (1 primary + 10 additional).
In the **Contact** section of the contact record, click **+ Add**, then select **Phone**. Enter the number and click **Save**.
Click the radio button next to the number you want to designate as primary.
Choose a label (Home, Landline, Mobile, Work) from the dropdown. Each label can only be applied to one number per contact.
Click the trash icon next to the number to remove it. The primary number cannot be deleted until another number is set as default.
***
## Managing multiple email addresses
Each contact supports up to 11 email addresses (1 primary + 10 additional).
In the **Contact** section, click the **+** icon next to the primary email. Enter the address and click outside the field to save it.
Click the circle next to the email address you want as primary. The primary email is used automatically for all contact actions.
When composing a message, select the recipient address from the **To** dropdown. The primary email is pre-selected.
***
## Managing followers
Followers have owner-level permissions to manage and edit contact data collaboratively.
Go to **Settings > My Staff**, then edit the relevant team member. Enable **Restrict data visibility to only assigned data** in their user permissions.
Open the contact record. In the upper panel, click the people icon next to **Followers**. Select up to 10 users from the dropdown.
Follower contacts are only visible when the "Only Assigned Data" setting is turned on. If followers cannot see the contact, verify that this setting is enabled for their user profile.